The Adler class 8 sewing machine - Clean up
Shiny and black is hard to photograph.
Click here to see all the Adler class 8 posts.
I’m going to start this by saying that the way I cleaned the Adler will probably cause anyone who does professional restoration to scream in anger. You should not take my methods as an example of how to clean antique sewing machines.
If you are looking for a guide to cleaning antique machines, look elsewhere.
I used 99 percent pure ethanol to clean my sewing machine.
It does a dandy job of dissolving dried up, caked on oil.
It also does a dandy job of stripping off shellac.
The shellac on my machine was soaked through with oil, and worn off in large patches. I made the deliberate decision to strip the shellac off of my machine and then refinish it with new shellac.
If you try to clean an antique sewing machine with alcohol, you will destroy the finish - and you normally don’t want to do that. You’d just normally clean the oil and dust off using sewing machine oil or kerosene. That won’t damage shellac.
The shellac on my machine was already damaged. Maybe a professional could have saved it. I knew I couldn’t, so I just stripped it off along with the filth.
The shellac is (or is supposed to be) clear. The black stuff is japanning. Alcohol doesn’t bother the black stuff at all.
In removing the shellac, you do have to be careful not to damage the decals. You’ll see a lot of gold curlicue patterns on old sewing machines. Those were mostly applied as decals. The shellac normally protects them from damage. Stripping the shellac can remove the decals. I know that I removed some bits from the decals on my machine while removing the shellac.
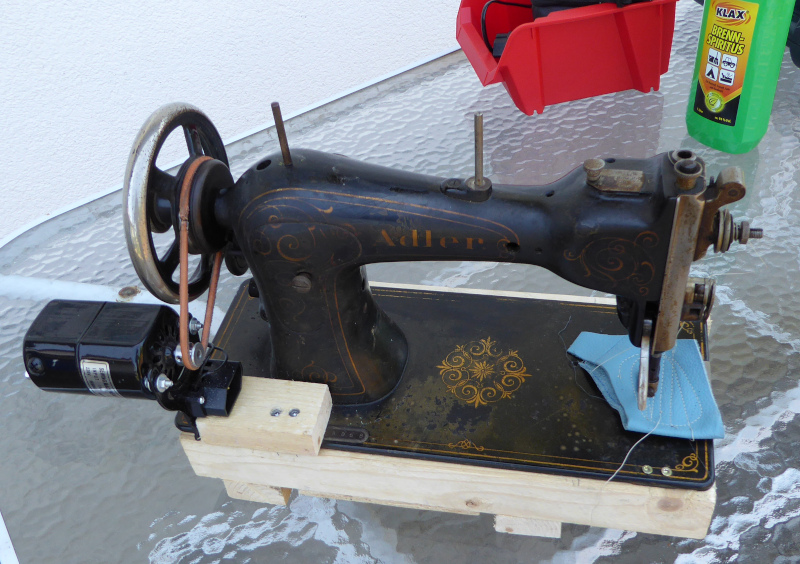
That said, here’s the progress of the Adler from filthy to shiny.
Back side:
| Before | After |
|---|---|
 |
 |
The back side was especially dirty. You can see a large splotch on the base. The removable back cover plate is so filthy that you can’t quite see the gold decorations.
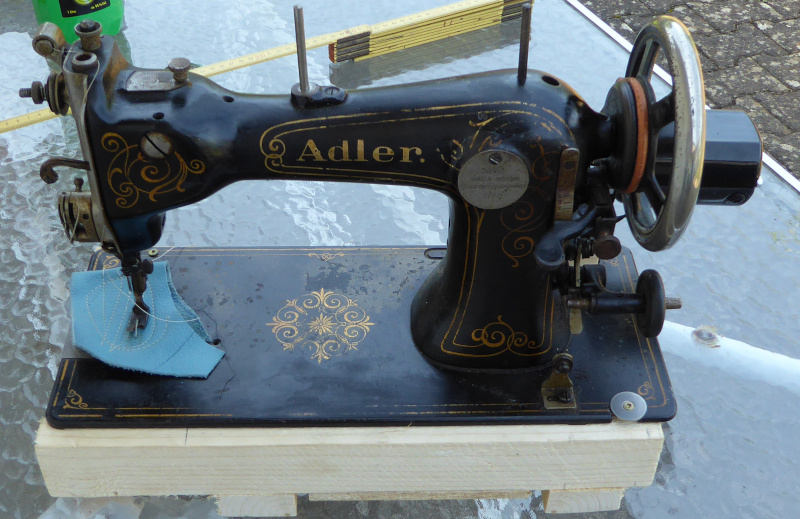
From the front:
| Before | After |
|---|---|
 |
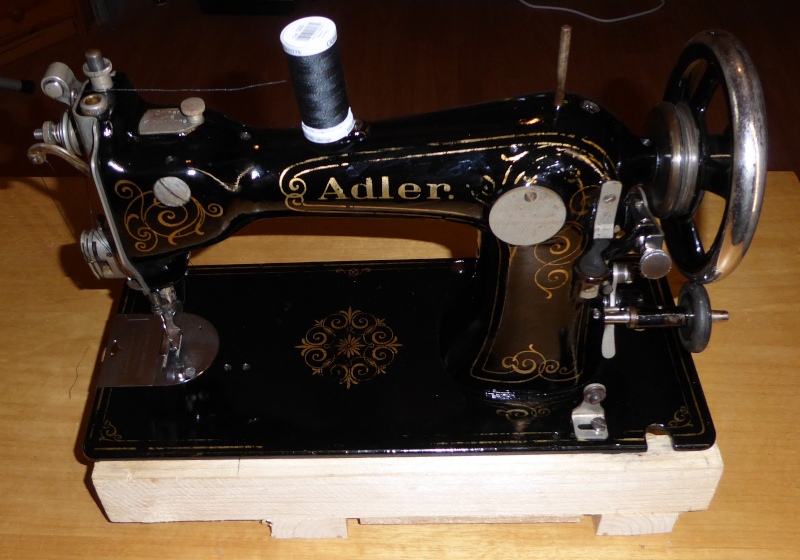 |
The shellac on the base along the front side is worn through. There is pin-striping around the edge of the base. It is worn off along the front edge. You can’t really see it in the photos, but there are relatively large areas where the shellac is missing.
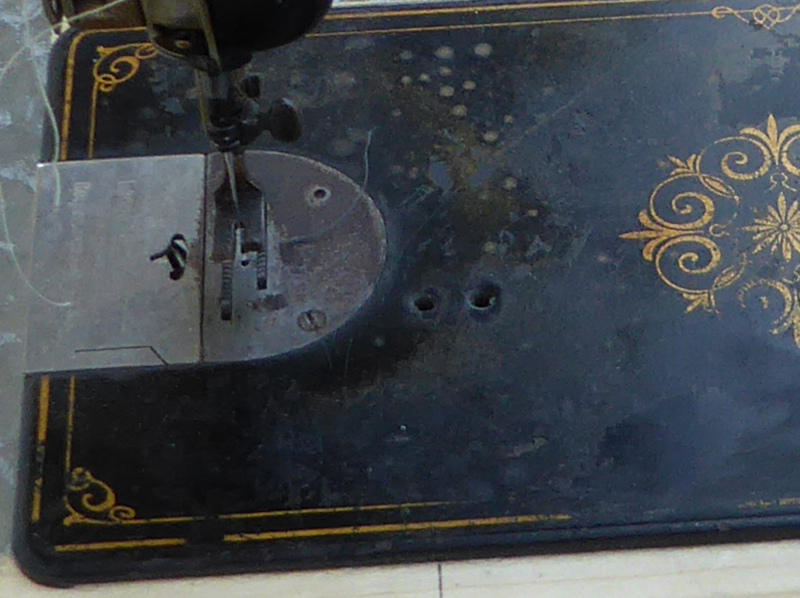
This is the area around the needle:
| Before | After |
|---|---|
 |
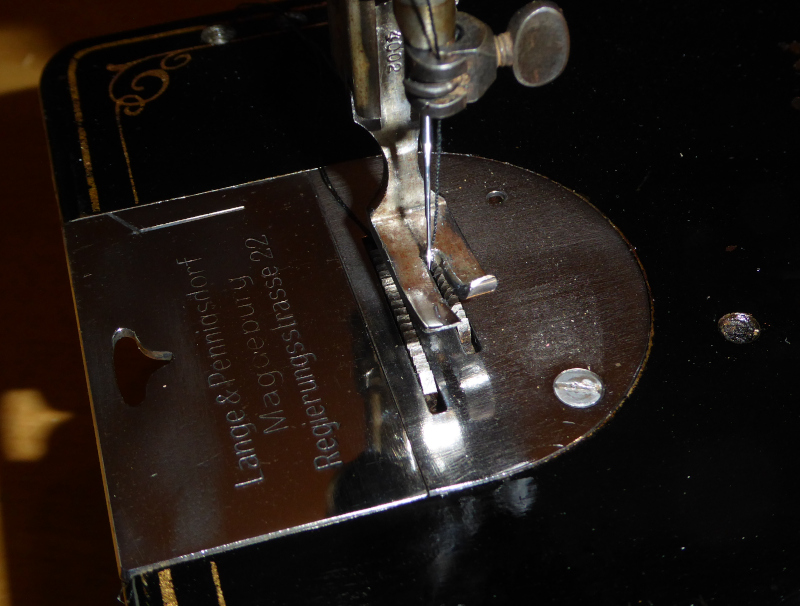 |
The throat plate (the half round plate that the needle passes through) is filthy, rusted, and rough. I got all of the grunge off, then took it out in the garage and buffed it smooth. It and the slider plate are smooth as glass, now - except, of course, for the engraved name of the shop that originally sold the machine way back when.
The top of the presser foot is still somewhat grimy looking. I couldn’t get that stuff off no matter what I did to it. I figure if I can’t scrape it off when I’m doing my darnedest then it won’t come off when stuff rubs on it accidentally.
The bottom side of the presser foot is much better. I buffed it clean and polished it smooth - it looks like a mirror from the bottom side.
The feed dogs are clean as well. There was so much gunk caked up in them that the teeth were nearly full. That had to have left filth on anything the previous owner sewed with the machine.
Getting the presser foot loose was an adventure by itself. There was so much oil caked on it that it wouldn’t come out after I removed the screw. I had to soak it in alcohol over night, then wiggle and jiggle it until the oil let it go. It’s all clean now - and I need to find a new screw. The original screw had a little nub on the tip to hold the foot. The nub is broken off. I didn’t break it, it was broken long ago. The caked on oil helped hold the foot in place. With all the old oil gone, the foot wiggles a bit even when the screw is as tight as I can get it.
Bobbin winder and stitch length control:
| Before | After |
|---|---|
 |
 |
I partially disassembled the stitch length control, took the bobbin winder off, and removed the balance wheel so that I could clean out the gunk in, around, and behind the various parts. I removed the tire from the bobbin winder and used my buffing wheel to get the winder clean and shiny. I was careful to not damage the japanning while cleaning the metal. There were already patches missing from the japanning. Bare spots that should have had japanning now have a coat of shellac.
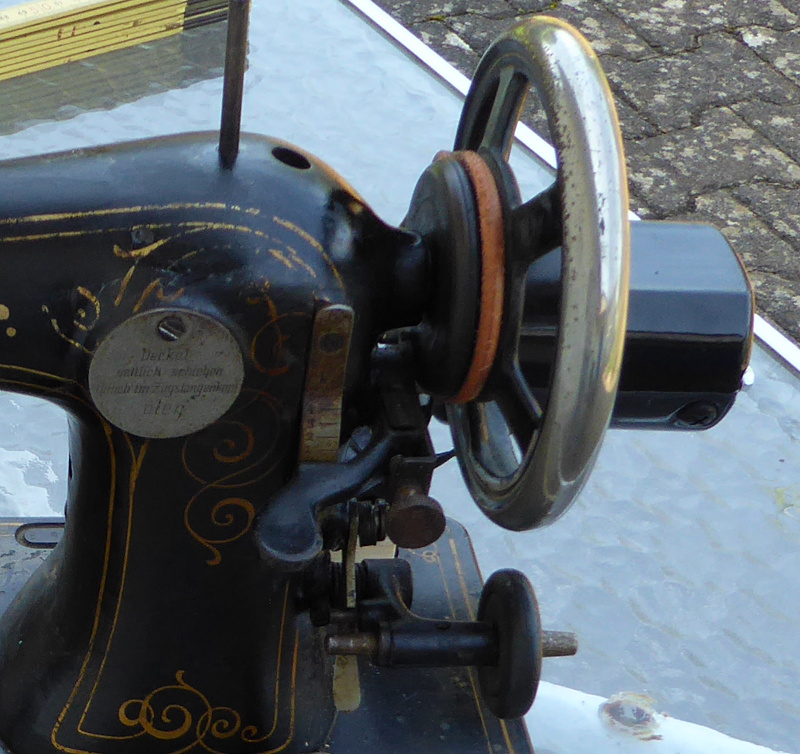
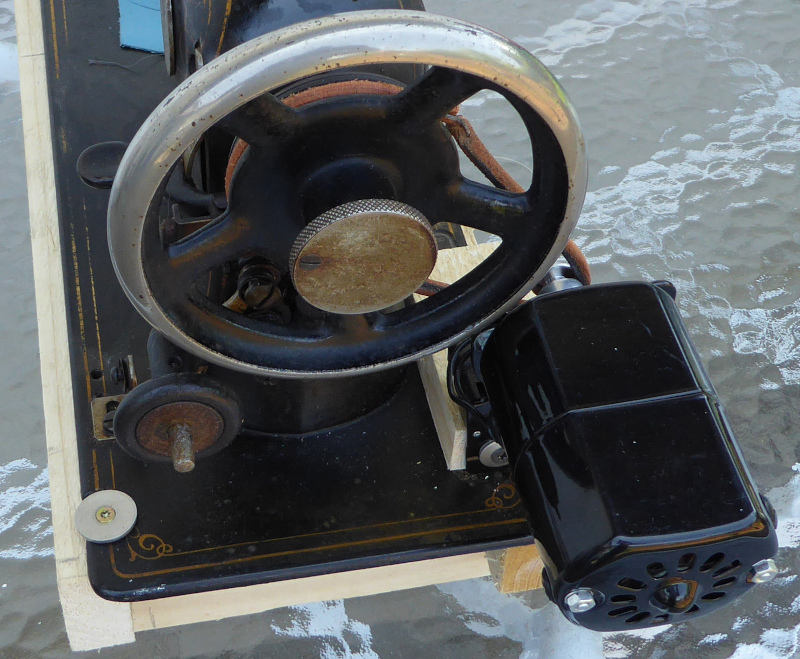
Balance wheel and bobbin winder clutch:
| Before | After |
|---|---|
 |
 |
I polished the chromed outer rim of the balance wheel and cleaned the grime off the black spokes. The spokes got a fresh coat of shellac.
I scrubbed the bobbin clutch knob (the big knurled knob in the center of the balance wheel) with a steel brush chucked in a hand drill to get the grunge out of the knurling and off of the surface. Several other knurled knobs got the same treatment.
Rotary hook and bobbin case:
| Before | After |
|---|---|
 |
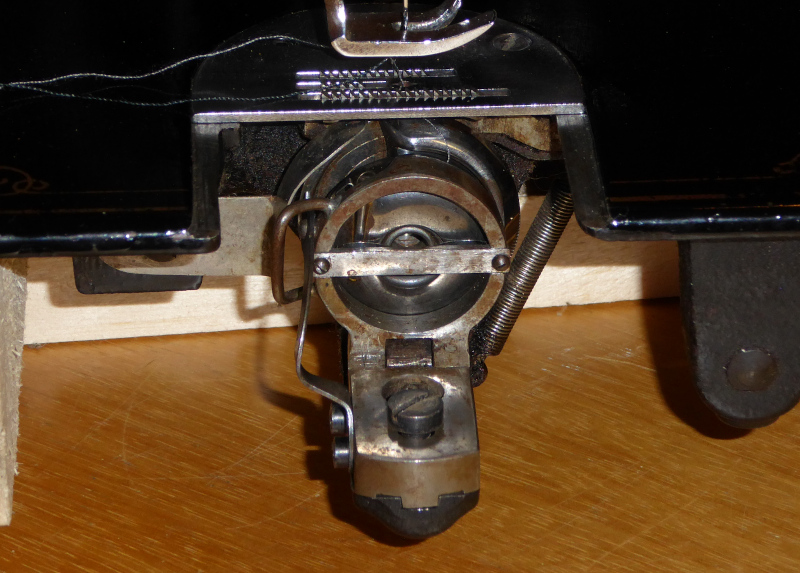 |
This is the only part of the insides of the machine that I touched. The bobbin race (inside the rotary hook) and the bobbin itself were so full of grunge that the thread picked up crud while sewing. I do not know what the previous owner sewed with this machine, but I hope it was all dark colored.
Besides removing, disassembling, and cleaning the holder for the bobbin case, I also disassembled the bobbin case. That is, I removed the thread tensioning spring from the bobbin case and cleaned the gunk out from under it.
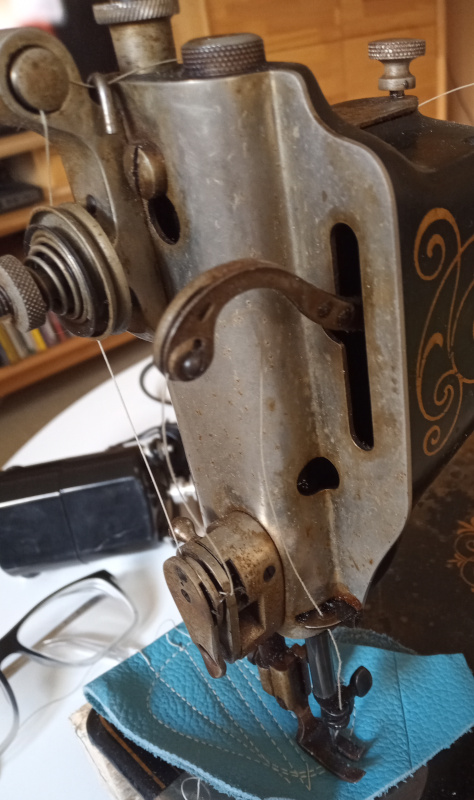
Face plate and thread guides/tensioner
| Before | After |
|---|---|
 |
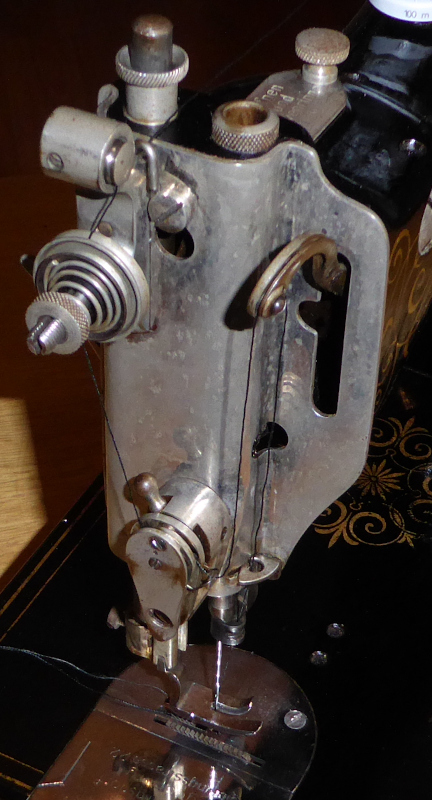 |
The face plate was covered in dried on oil, as were the various parts of the thread guides.
I took the plate off, removed all the individual gadgets from it, then cleaned the plate with alcohol. I didn’t polish it, though I may yet do so someday.
I disassembled and cleaned each of the guides and the tensioners. There was gunk in the tensioners and in the guides. The thread must have gotten filthy passing through them when the previous owner sewed things.
Because of the disassembly, I lost all idea of how the tensioners were set - not that it matters. The thread slides through the cleaned parts much more smoothly than before. Cleaning them meant readjusting the tension, no matter what.
I cleaned the thread take-up lever, but didn’t take it out of the machine to polish it. The grunge is gone from the thread guide in the end of it, and alcohol stripped off all the oil caked up on the lever itself. What’s still there won’t come off without some serious work - it ain’t gonna come off and dirty up stuff I’m trying to sew.
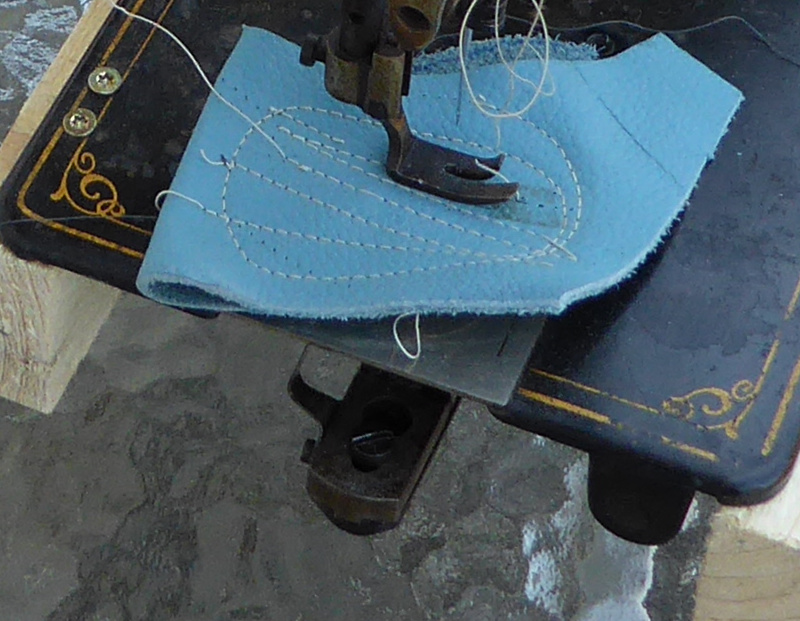
Stitching test
Once I got it all clean and back together, I threaded the machine and adjusted the tension. That took a good bit of experimenting, but in the end it sews a nice, neat seam. I’ll (try) to explain how to adjust the tension in a later post. I managed it this time around, but I need to do some more experimenting to see how to best explain it.
| Stitching test |
|---|
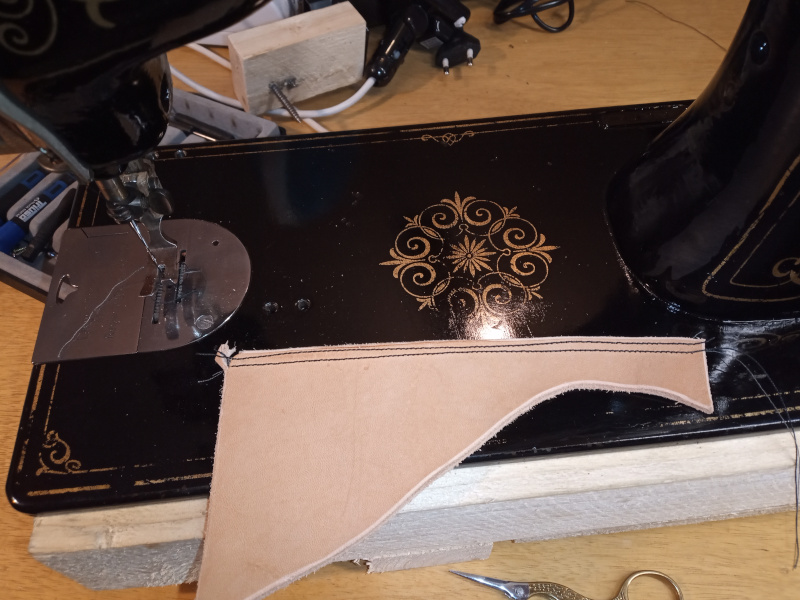 |
I did those stitches by hand cranking the machine. Rather, “finger cranking.” I stuck a finger through the spokes and turned the balance wheel with that one finger. The Adler runs so smoothly and lightly that the strength of an index finger is enough to sew through leather.
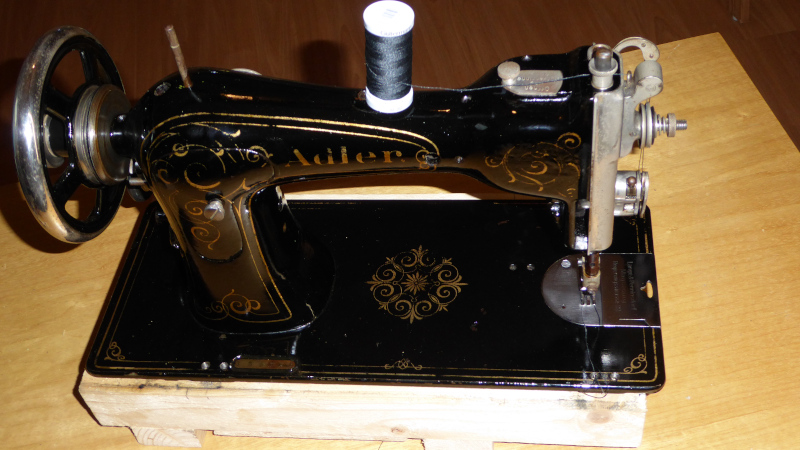
All done:
| Clean machine |
|---|
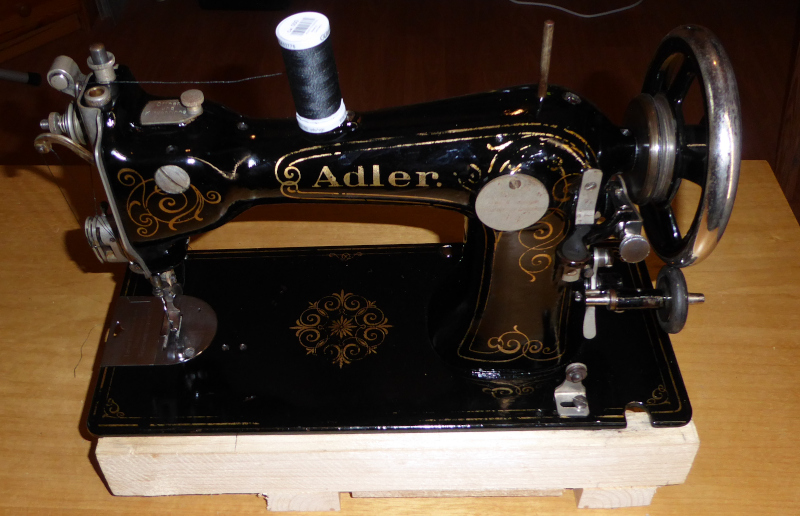 |
I’m not afraid to let that machine near my leather (or other materials.)
It isn’t perfect, and I lost some details of the decals. I’m not all that good at shellacing things - there are runs and lines in places.
I wasn’t going for a museum quality restoration (I’m not capable of that, anyway.) All I wanted was a clean, working sewing machine that I’m not embarassed to show to other people. I’ve at least reached that level.
I’ve still got a good bit of work to do. It needs a nicer base to sit on, and I have to think up a better way to attach the motor and drive the machine.