D43 oscilloscope software - Pre-compiled binaries for easy use
GitHub to the rescue.
My Telequipment D43 projects - Table of Contents
I have long intended to provide a simpler way for folks to use the D43 oscilloscope camera software.
Over the last few days, I spent some time looking for a simple way to provide an easy to use package consisting of my Python code and all the required dependencies.
I’ve known of PyInstaller for a while, but it can only package up what’s on the machine it runs on. That’ll work for Linux since that’s what I use, but it doesn’t do anything for Windows or macOS users.
I did try PyInstaller out, and it was a snap to build a package from my Linux system.
While looking for information about PyInstaller, I came across hints that it could be used with GitHub “Actions.” Even better, I found that GitHub can carry out actions on different operating systems. GitHub can generate binary executables for Windows, macOS, and Linux from the same Python script.
I am, of course, not the first person to want to make such programs. I followed this example which shows how to make binary files for macOS and Windows. I modified it to match my repository, and extended it to generate a Linux version along with the Windows and macOS versions the example makes.
I’ve included a copy of the yml file needed down below.
Making the file wasn’t too bad. Testing it and correcting it was a bit fun.
The way it is set up, GitHub runs the script every time you push a tag with a version number. Each test meant deleting the release on GitHub, deleting the tag on GitHub, deleting the tag locally, then making and pushing the tag again.
That took several rounds. The biggest problem I had was that the virtual machines that GitHub uses to build the Linux binaries don’t have PyInstaller installed by default. It also took me a while to realize that the failed Linux build caused the other builds to be aborted.
The solution to that was to include PyInstaller in the requirements.txt file of the D43 python script. That way, PyInstaller is installed along with the other requirements of the program. PyInstaller itself doesn’t make it into the final binary, though. It analyses the code, and takes only (and all) of the libraries that are really imported.
One other problem I ran into was that the finished Linux binary has a dependency on GLIBC. The binary requires the same version as was on the machine it was generated on - or newer. The configuration file I’m using specifies that the Linux binary should be built on Ubuntu 18.04, which uses GLIBC version 2.27. The binary won’t run on my machine because OpenSuse 15.2 uses GLIBC 2.26. I ran up a virtual machine with OpenSuse 15.3 (still not officially released) and the binary made by GitHub does run there.
If you want to try this yourself, there are a few things you need to do to prepare your code:
(I assume you are already using GitHub to host your code.)
- Generate or update your requirements.txt file
The surest way to do that is to install pipreqs. Install it, then do the following:
cd /path/to/python/script
pipreqs .
Where ‘/path/to/python/script’ is the folder the main Python script of your program lives in. Once you have the requirements.txt file, add the following line to it:
pyinstaller
- Make an icon for Windows
I wrote the D43 program on Linux, so my icons are all portable network graphics (PNG) files. Windows needs a .ico file instead. I used Gimp to convert my .png icon into a .ico file. I put it in a separate folder so that I know why it’s there.
- Make icons for macOS
This was the most time consuming part, and I don’t know if I got it right. There are several places that tell you what you need to do, and I tried my best to follow them. The problem is that most of the descriptions assume Windows or macOS. Linux is kind of left out in the cold. I eventually merged the tips from this Stackoverflow post with some general Linux-fu (making use of the ImageMagick ‘convert’ program) to resize a large icon to the various required sizes and then using ‘png2icns’ from libicns to combine the scaled .png files into one .icns file. You are welcome to use my batch file (it can be found in the D43 repository in the ‘icons’ folder,) but I’m not sure how well it works. It only generates some of the recommended sizes because png2icns kept complaining about duplicates.
- Create the yml file to build your binaries
Take the yml given below and modify it for your program name and folders, then save it as ‘build.yml’ in the folder ‘.github/workflows’ of your local repository.
- Make any final changes to your code
In my case, I made sure to set the version number with ‘QCoreApplication.setApplicationVersion.’ I hadn’t bothered with a version up to that point.
- Commit and push
Commit all of the local changes and push them to your GitHub repository. Everything is now prepared for the build.
- Tag your version
Set a git tag including the version number of the release:
git tag -a v1.0.0 -m "Tagged version 1.0.0 for release."
Now for the final bit, push the tag to your GitHub repository:
git push --tags
That will cause GitHub to carry out the actions specified in the build.yml file you created. You can check the progress of the Action on the “Actions” page of your GitHub repository. The “Actions” page includes links to more detailed status information and to logging information. You’ll need to look at the logging if things don’t go right.
In my case, it took just a few minutes for GitHub to build all three binaries and create a ‘Release’ entry for them on the GitHub page.
If you have trouble with your build action, check the ‘Actions’ documentation for hints on how to find and solve problems. The logs were enough for me to track down the problems I had (missing PyInstaller, aborted builds.) I don’t know what else may go wrong, so I won’t try to tell you how to solve your problems. You’ll have to take your chances with the documentation just like I did.
That’s it. It took me the better part of a Sunday afternoon to get it done, but it works - I think. The Windows and Linux binaries do work. As always, I have no way to test the macOS version. If you can try out the macOS version, let me know how it goes.
You can find the first ever binary release of the Digital D43 software here.
Download files:
- D43 (no extension) for Linux
- D43.exe for Windows
- D43.zip for macOS
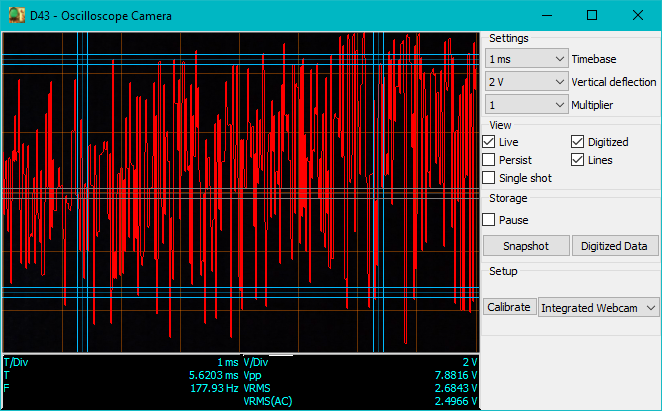
The D43 software looks pretty much the same under Windows and Linux. Here it is running on Windows 10:
| Digital D43 on Windows 10 |
|---|
 |
Edit 2021-05-27: Removed in-line build.yml.
You can download my build.yml here.
I originally had the file in with the text, but Markdown did terrible things to it.