HowTo: Solder by hand - Meet my new soldering iron
The hardware store cheapy left me hanging.
HowTo: Solder by hand - Table of Contents
I wrote most of this series on how to solder by hand using my cheap hardware store soldering iron and lead free (99.3% tin) solder.
I did it that way because while I have literally spent years using the old tin/lead solder, I had never really used any lead free solder. I wanted to gather some experience using it since all I read says it is horrible stuff to work with. I intended from the very start to write a post comparing lead free and tin/lead solder, and really needed to give this supposedly horrible stuff a good shake before saying anything about it.
This post isn’t (directly) about lead free solder.
This post is about what caused me to finally shell out some bucks on a better soldering iron.
As I said, I wrote most of the series using my old hardware store cheapy. That worked fine up until the 13th post of the series (that’s the one about soldering SMD ICs.)
I did the first couple of pins on the IC and made photos, then the third pin was very difficult to solder. After that, I couldn’t really get anything to stick. The solder just wouldn’t melt anymore. Turning up the heat didn’t help, either. It just wouldn’t get any hotter.
I got out my (also cheap hardware store) multimeter, which has a thermocouple for measuring temperatures. I checked the hand book, and found that the thermocouple is rated up to 1000 degrees celsius. With that, I checked the temperature at the tip of the iron, and found that no matter what I did it wouldn’t go above about 270 degrees celsius. That’s high enough for tin/lead solder, but not hot enough for the lead free solder I have.
I finished the SMD IC soldering and removing posts using the old iron and tin/lead solder, and started looking for a new soldering iron.
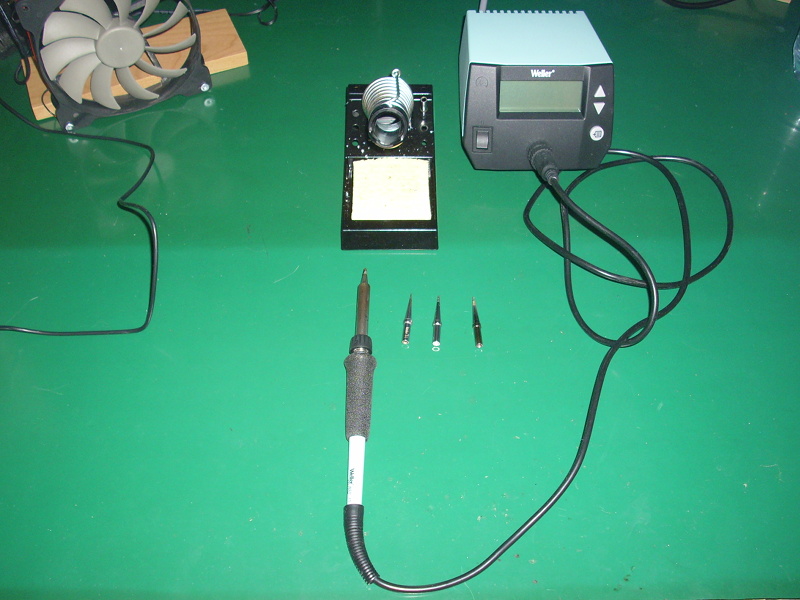
I found a video review from Dave over at the EEVblog comparing the Weller WE1010 and the Hakko FX888D soldering irons. It’s clear that Dave loves Hakko, but he couldn’t really come up with anything to clearly put the Weller down. Back in the days when I used a soldering iron every day to earn a living, I had Weller soldering stations. The WE1010 looked good and I’ve used Weller equipment for a very long time, so I ordered a WE1010. I also ordered some extra tips since I prefer smaller tips than most folks. I ordered the extra tips doubled - a set for lead free and for tin/lead.
Heres’ my WE1010 together with a set of tips:
| WE1010 and tips |
|---|
 |
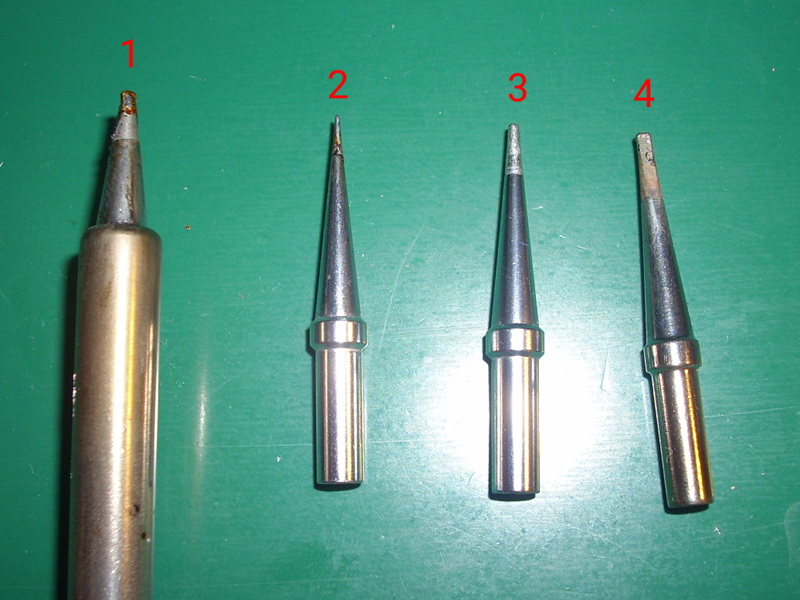 |
Here are the various tip types referred to in the photo:
| Number | Weller model number | Description | Comments |
|---|---|---|---|
| 1 | ET A | 1.6mm chisel | Delivered with the WE1010 |
| 2 | ET SL | 0.4mm conical | Too small, probably won’t see much use |
| 3 | ET KL | 1.2mm chisel | Goldilocks - not too narrow, not too wide. My preference. |
| 4 | ET L | 2.0mm chisel | Too wide for my taste, useful for heavier stuff. |
I had a bit of a time deciding which tips to order. I’ve mentioned that I prefer to use a small tip, but I never came out and said what size. That’s for a very good reason: I never bought fine tips for my old iron because Stannol only made one (too large) size tip for my old Industa 300. I used to modify them to suit my liking. You can’t do that with Weller (or any good brand) soldering iron tips, but the Industa tips were cheap things made of iron plated copper. I used to take them out in the garage and file off the plating, then I’d use a small hammer and an anvil to hammer the point of the tip to the small size I prefer. I never measured the blasted things, I just hammered ‘em down until it looked about right. I hammered them because copper hardens when you hammer it into shape - the hammered ones lasted longer than if I’d just filed them into shape.
At any rate, I ordered several different sizes so I could try them out and find what I liked best.
The 1.2mm chisel (ET KL) works best for my style of soldering on the things I work on. The wider ones are useful for soldering parts with large pads connected to large copper areas.
The 0.4mm conical is probably useful for really small stuff (like the MAX2015 or LTC2040 in their fine pitched packages,) but I’ll have to crank the temperature way up. The longer the tips are, the more heat they lose from the heater to the tip. The small size also does a poor job of transferring heat.
The thing about losing heat over the length also explains the adjustable temperature offset function of the WE1010. If you use the ET A tip delivered with the iron, then the tip temperature is exactly the temperature shown on the display. If you use a long tip, then you lose somewhere between 20 and 30 degrees celsius. The temperature offset lets you calibrate the display to the tip you are using. For short tips like the ET A you leave it at zero. For long tips you set it to 25 degrees. For that long, pointy ET SL you have to add about 50 degrees.
I find the WE1010 holds the set temperature very well. Dave from the EEVblog thought differently, but he also thought the sponge needed to be wet enough to audibly sizzle when you wipe the tip. If the sponge is wet enough to sizzle, then it is far too wet. You soak the sponge, then squeeze it out until you think it’s dry. That’s plenty enough water to keep the sponge from burning, but not enough to sizzle and cause the tip temperature to drop like Dave shows happening.
Dave also found out accidentally that the WE1010 doesn’t have a primary side fuse. It’s true. It doesn’t have one.
It’s also true that the WE1010 doesn’t need a fuse.
That’s why the UL and CE markings are valid.
Despite popular belief, fuses aren’t there to protect your equipment.
Popular belief is wrong.
Fuses are there to prevent fires.
The WE1010 doesn’t need a primary side fuse because it has this thing that apparently even a lot of engineers have never heard of.
The WE1010 has a transformer that is short circuit proof. By its very construction, it cannot catch on fire.
It’ll smoke like crazy (Dave proved that by plugging a 110VAC model into 240VAC,) but it cannot catch on fire.
The transformer itself is enclosed, and it is double insulated.
The transformer and the WE1010 itself carry this mark:
| Kurzschlussfesten, geschlossenen Sicherheitstransformator (Enclosed, short circuit proof safety transformer) |
|---|
 |
That is a symbol that means (approximately) “short circuit proof.” I say approximately because I can only find a description of it in German on Wikipedia. I don’t know what you’d call it in English, and have had no luck tracking it down. That it’s in German is appropriate - Weller is a German brand, and is developed here in Germany though it is built in various other countries.
Edit 2020.08.19 I have found that the German “Kurzschlussfesten, geschlossenen Sicherheitstransformator” corresponds to the UL 5085-3 Class 2 or Class 3 transformers. These are divided into “inherently limited” and “non-inherently limited.” Given the output voltage (23VAC) of the Weller WE1010 transformer, it falls under the UL5085-3 Class 2 inherently limited rules. The main difference between Class 2 and Class 3 is the output voltage. This whitepaper from Bel Fuse describes the UL classes.
Most devices have a fuse so that they don’t catch on fire if they short out.
The WE1010 can’t catch on fire if it shorts out, so it doesn’t have (or need) a fuse - and that’s why it could get a UL mark without a fuse.
In any case, my WE1010 works quite well and I feel perfectly safe using it.
I’ve learned a bit about tip temperatures (and measuring them) and the type of solder you use, and I’ll post that when I write up my comparison of lead free versus tin/lead solder.
I did repeat the SMD IC soldering and removing examples using the WE1010 and lead free solder. The techniques I described for those tasks work just fine with lead free solder. The temperatures are different, but that’s to be expected.
In final summary, I find the WE1010 a safe and very good tool.
Let me know what you think of the WE1010, or tell me which iron you prefer in the comments below.