HowTo: Solder by hand - Your tools
It really doesn’t take that much.
HowTo: Solder by hand - Table of Contents
It only takes a few tools to solder - and you can get by without just about any of them except for the soldering iron.
Here are the tools I most commonly use while soldering:
| My tools |
|---|
 |
List of tools:
- Soldering iron
- Side cutters
- Needle nosed pliers
- Tweezers
- Third hand
- Pocket knife
Let’s take a look at each of them.
Soldering iron
The most important tool when it comes to soldering.
Mine is a cheap thing I bought at the hardware store a long time ago. It is temperature controlled in the sense that it will maintain a particular temperature. I have my doubts about how accurate the dial is - I know I have to set it to a stupidly high number to get it to act like I’m used to from better irons at lower temperatures. In other words, that “400” it is set at is closer to 300.
Added 2020-02-09: My soldering iron actually hits about 330 degrees C when set to well over 400 - I told you it wasn’t very accurate. My multimeter has a temperature sensor. I checked the handbook - it is rated to 1000 degrees celsius. I used it to measure the temperature of the soldering iron tip.
You want a temperature controlled iron, preferably one with an accurate dial or display.
The correct temperature depends several things:
- Type of solder (lead or lead free, other alloy contents)
- Size of the joint
- Size of the soldering iron tip
In general, you need a higher temperature for lead free solder. You need more heat for larger joints, or when using a smaller tip for a normal joint.
You mostly try not let things get too hot, while still being hot enough to work quickly.
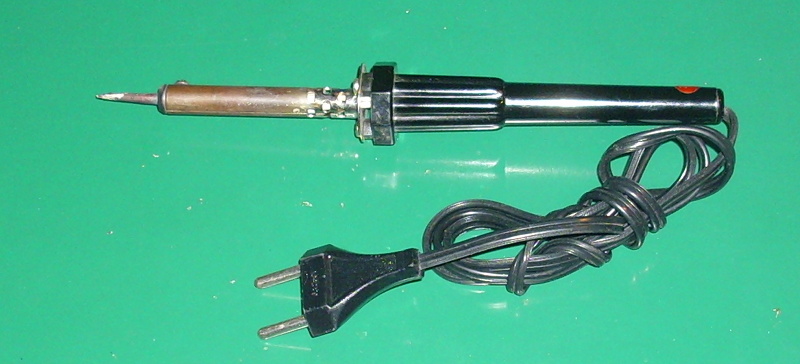
You can learn to solder with an unregulated soldering iron. I did. I started out with one like this:
| Unregulated soldering iron |
|---|
 |
They work, and a lot of folks start out with them. You’ll probably destroy a few things before you really get the hang of soldering with one of them. As a kid, that was all I could afford.
If you can, though, I recommend you pick up a temperature controlled soldering iron. All the posts in this series will assume you are using an iron that won’t get blazing hot just because you left it plugged in a little too long.
When you buy your soldering iron, keep in mind that you will need to use tips of various sizes and that you will have to replace tips occassionally. A super cheap soldering iron isn’t much good if you can no longer get tips for it.
I use a very fine tip on my soldering iron, and don’t usually bother to switch to a larger one. Most folks do like to use a tip that matches the size of the joint they are working on. I’d suggest a 1 millimeter tip and maybe a 3 millimeter tip.
Addded 2020-02-09: I ended up having to buy a new soldering iron, and a set of new tips to go with it. In trying out the new iron, I found that a 1.2mm chisel tip works best for the techniques I use and that are described in this series. If you have a Weller WE1010, then you’ll want to get a Weller “ET KL” tip - that’s the 1.2mm chisel tip. That’s pretty close to the 1mm I originally recommended.
Make sure your iron includes a cleaning sponge in the stand. Some use a real sponge that you have to soak in water. Some have a pad of brass shavings. Both will clean. You will need the sponge - you must clean the tip before each joint.
Side cutters
Also called “wire cutters” or “diagonal cutters.” You use them to clip the pins of the through hole parts after you have soldered them in place, or to just, you know, cut a piece of wire to length.
You want a pair that is sharp, and whose jaws come together accurately. A good pair of cutters can be expensive - I remember paying over 20 dollars a pair for them when we bought them at work.
Mine aren’t all that good. I bought them in a set of pliers. A poor pair of cutters can break components or damage a PCB.
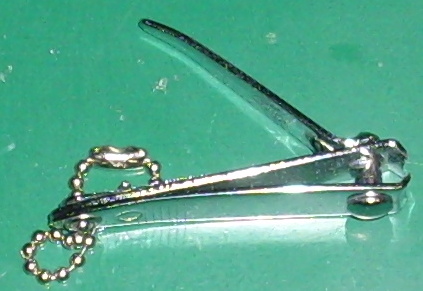
An alternative to good, expensive cutters is a cheap pair of nail clippers. They are sharp, the jaws close accurately, and they cut smoothly.
I mean something like this:
| Clippers |
|---|
 |
Don’t steal them out of your bathroom - get an extra pair just for clipping wires. Get the ones with a straight cutting edge instead of the curved one if you can.
Don’t use fingernail scissors, either. You’ll ruin the scissors, and they don’t cut wire well at all.
Needle nosed pliers
These aren’t critical. They’re just to hold onto hot things with. It’s helpful if they are spring loaded so they open when you stop squeezing, but really any pair of needle nosed pliers with smooth jaws will do.
Tweezers
I use mine mostly for holding surface mount devices (SMD) when I’m soldering. SMD parts can be very small so you’ll want a pair of tweezers with a fine, smooth jawed tip if you are going to solder SMD parts. The tip needs to be smaller than the parts you work with. Mine are fookin’ sharp because I use them with really small parts.
Mine started out as part of a set of nail clippers and stuff. The tweezers were so crappy my wife couldn’t use them. I took ‘em out in the garage and ground the tips to a fine point and then polished them nice and smooth. Grinding them to shape reformed the tips so that they now meet accurately. I have used my cheapy tweezers to solder 0201 sized SMD parts. That’s a fraction of a millimeter on each side.
If you aren’t doing SMD stuff, a heavier pair of tweezers can be used instead of the needle nosed pliers.
Third hand
Sometimes you just really need another hand. One hand holding the pliers, one hand holding the soldering iron, and that !”$§$#@ printed circuit board (PCB) will not stay put at the correct angle for you to work.
They are also helpful for soldering wires to connectors (DB-9 or such.)
Third hands are usually sold with a magnifying glass attached. I find the magnifying glass gets in my way, so I took it off of mine.
Pocket knife
I always have a pocket knife handy.
In a pinch, I can cut or strip wire with it. I also use it to unbend component leads when removing parts from a PCB.
That’s it. All the tools I commonly use when soldering.
The iron is the most important (and expensive) part. Even so, it shouldn’t cost much to get started.