Fixing up an old kitchen knife
When the blade is willing but the wood is weak.
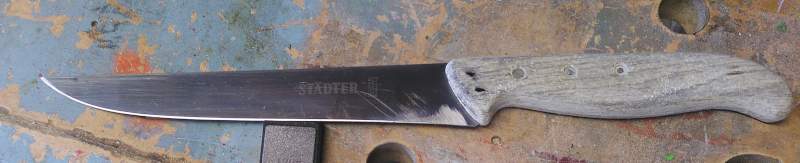
Everytime I’ve sharpened our kitchen knives for the last year or so, there was always this one knife where I kept thinking “this thing is broken.” The handle was cracked, the pins were loose, the blade flopped when cutting, etc.
A few of weeks ago, I decided enough was enough and took that knife out in the garage to fix it up.
| Before |
|---|
 |
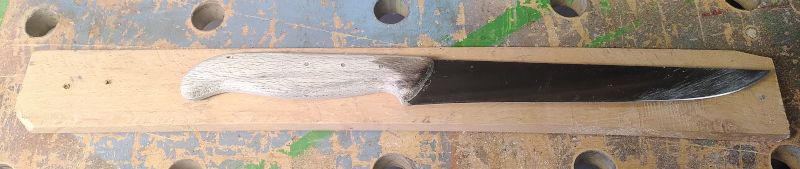 |
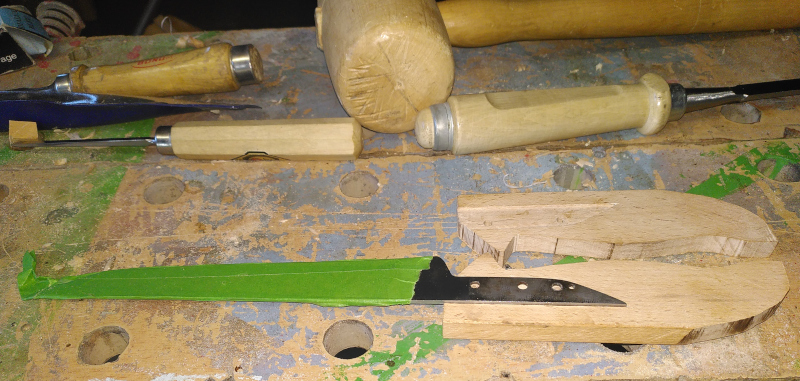
In that second picture, the knife is on the wood I used to make the new handle. This is more of the beech wood that my wife’s grandfather had used to make some things for her brother. The bits and pieces made their way to me, and I try to use them in things that will be kept for a while. This knife already has 20 years behind it, and will likely make another 20, so it qualifies.
Before the repair comes the disassembly.
| Disassembled |
|---|
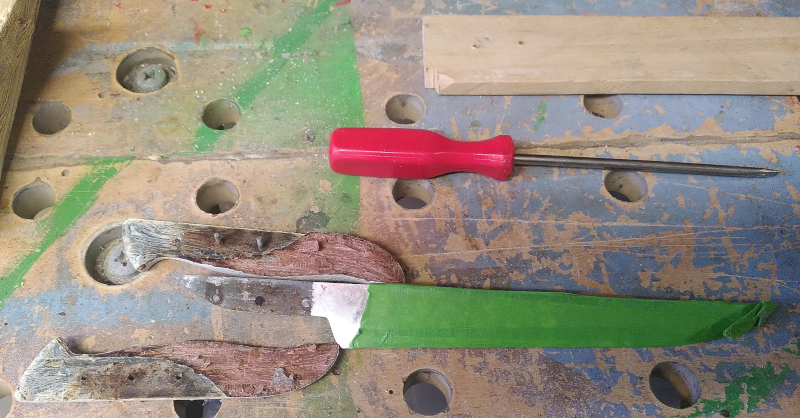 |
The wood has started rotting inside.
After cleaning the blade, the next step was to drill new holes for the new pins. I used 4mm brass rod for the pins, so the original holes just won’t do.
| New holes for the pins |
|---|
 |
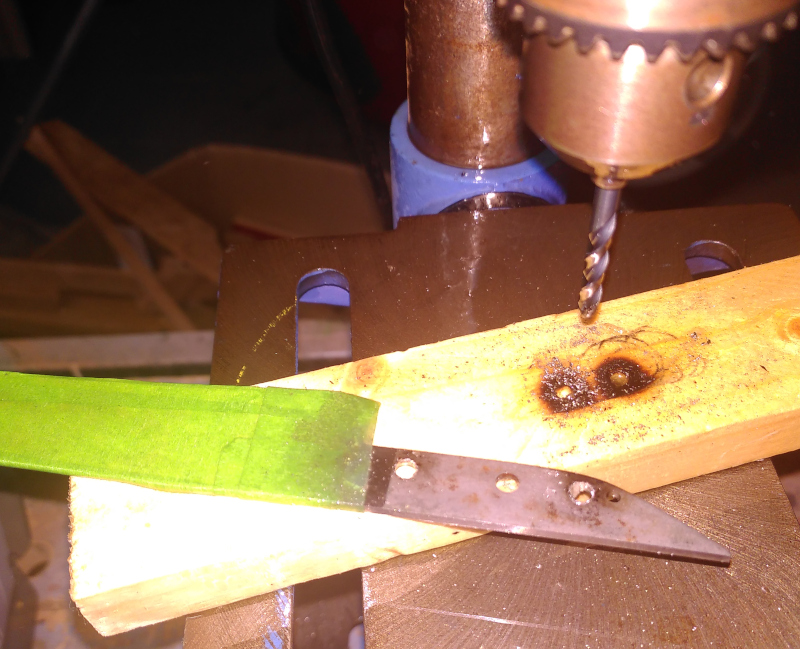 |
What I actually did was to drill out one existing hole to 4mm, and make a completely new hole for the second one. The existing hole was too close to the end of the tang. If I had drilled it out, it would have quite likely broken through on the edge of the tang.
The drilling was messy. I used oil to keep the bit cool, but the blade still got hot enough to char the wood under it. The entire blade was hardened, not just the cutting part. If I ever drill holes in another blade, I’ll try to get drill bits made for that kind of work. As it was, I broke one smaller bit and had to sharpen the larger ones a couple of times each.
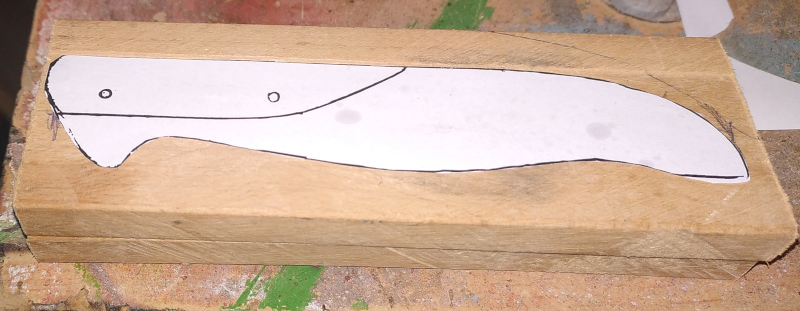
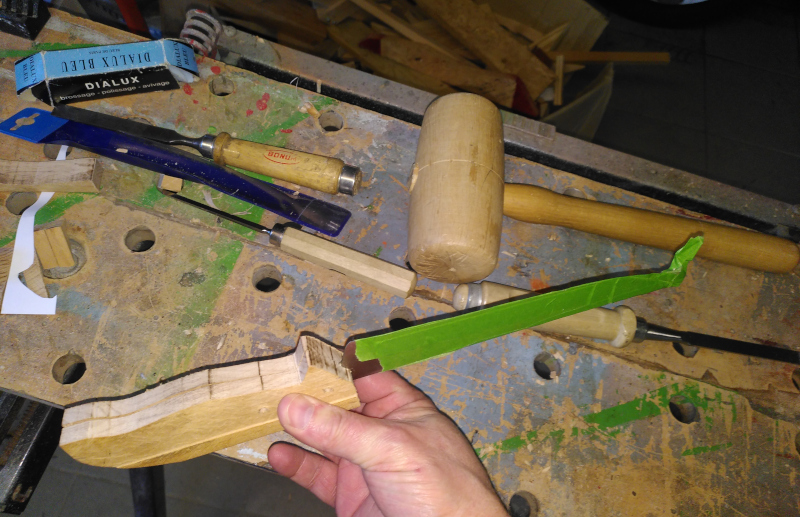
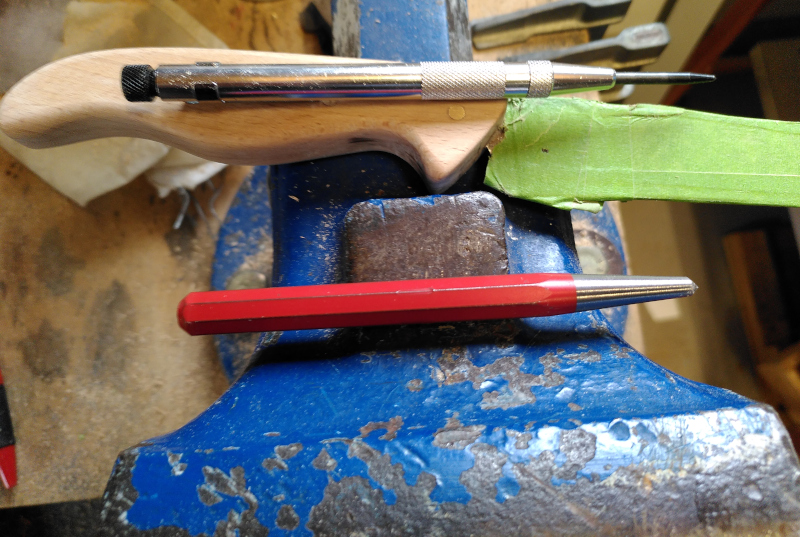
I traced the old handle and used it as a basis for the new handle. The new one is slightly larger and sits back about 3/8 inch (1 cm) further from the cutting edge of the blade. That will let me more easily sharpen the full length of the blade.
| Cutting and shaping the handle |
|---|
 |
 |
 |
 |
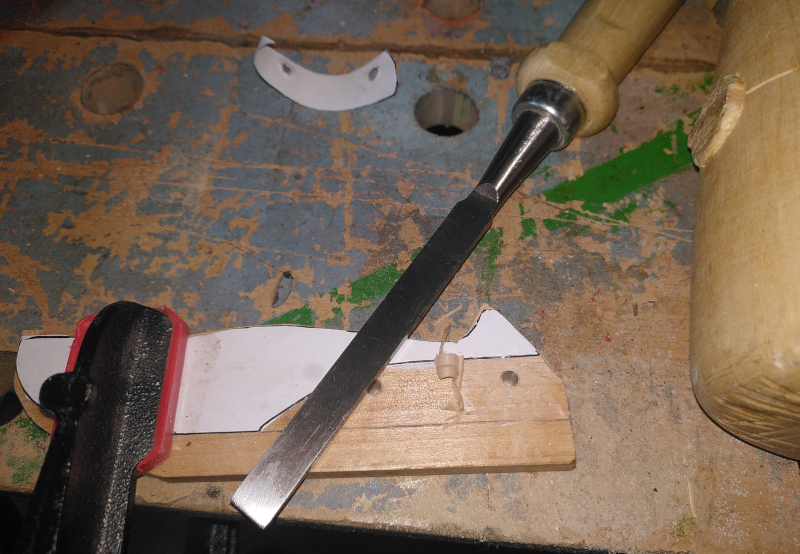
I stuck the two halves together with contact cement, then glued one copy of the template to the stack. I cut the shape with a bandsaw. I made the cutouts for the blade using a couple of wood chisels with copies of the templates glued to the handle halves. Getting a perfect fit was a bit of cut and try. I intentionally started far inside the lines, then slowly trimmed the shape until the tang fit perfectly. The same for getting the depth - start too shallow, then slowly deepen with lots of stops to check the fit.
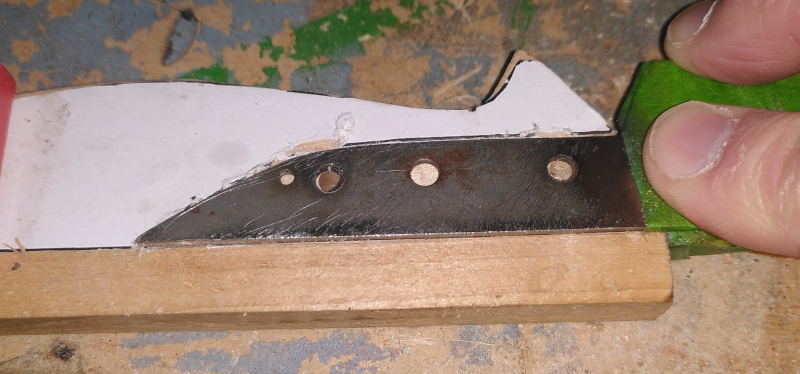
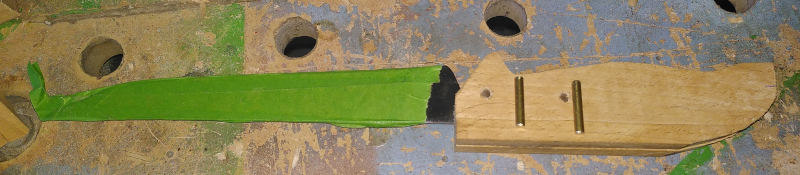
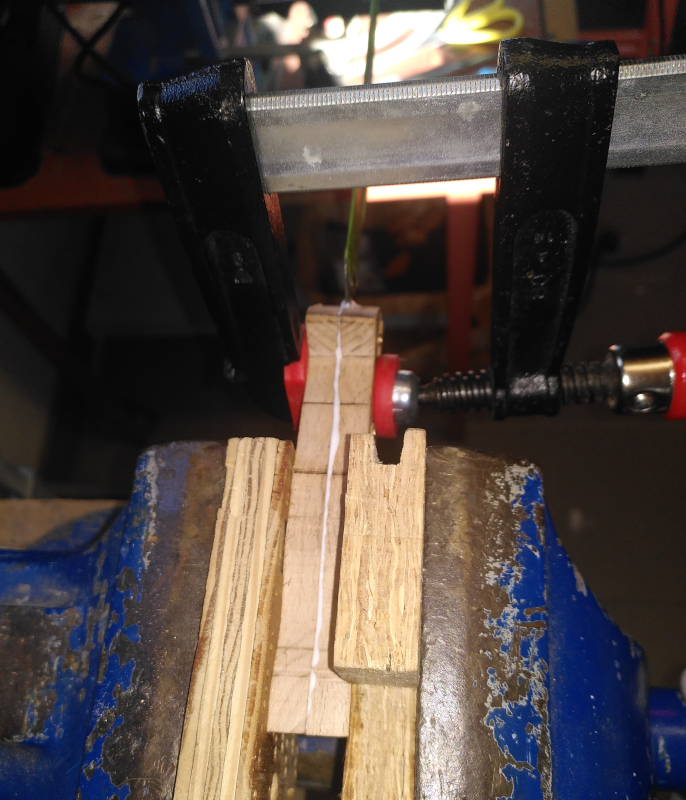
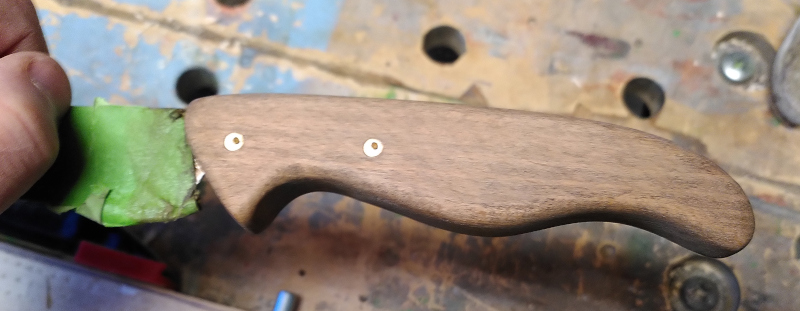
I made the holes by clamping the blade into one half of the handle and drilling through the holes in the blade into the wood. After that, clamp the blade into both halves and drill all the way through starting with the already drilled holes in the first half.
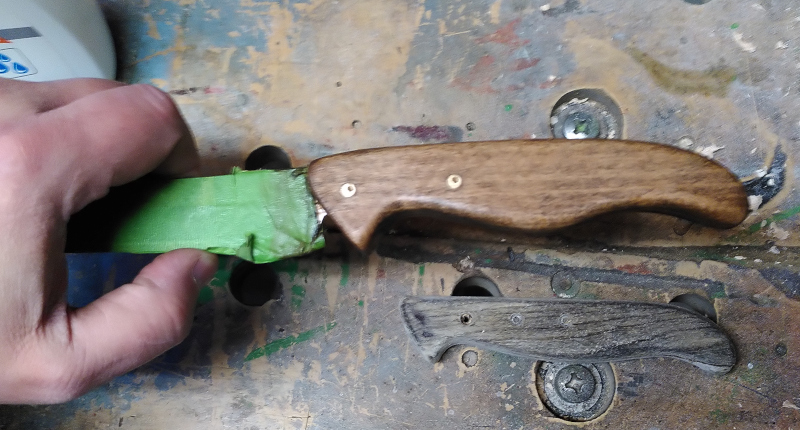
Assembly starts with putting glue on the handle halves. After that, set the blade in place and fit the two halves together. Drive the brass pins in, then clamp it all together. Do not set the pins yet. The pins are still too long, and will be shortened when the handle is shaped and sanded.
| Assembly |
|---|
 |
 |
 |
 |
At this point, the project took a break for a couple of weeks. I had eye surgery for cataracts and wasn’t allowed out in my workshop. The one eye is done now, with the next scheduled for next month. That break gave the glue a good long while to set and cure.
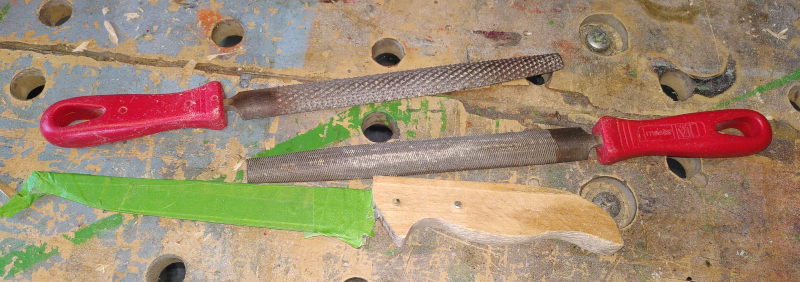
When I finally got back to it, the next step was shaping the handle. As cut with the bandsaw, the handle was rather rough and blocky. I used a couple of wood rasps and my disk and belt sander to shape the handle into something comfortable to hold.
| Shaping |
|---|
 |
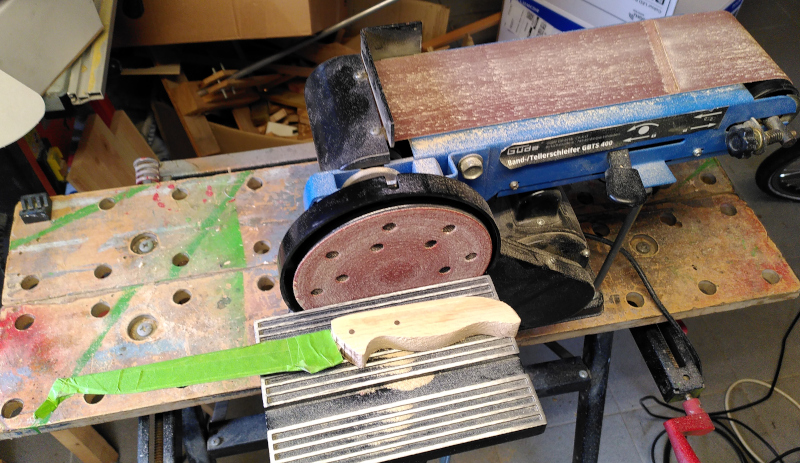 |
Besides shaping the handle, I also used the belt sander to grind the pins flush with the wood.
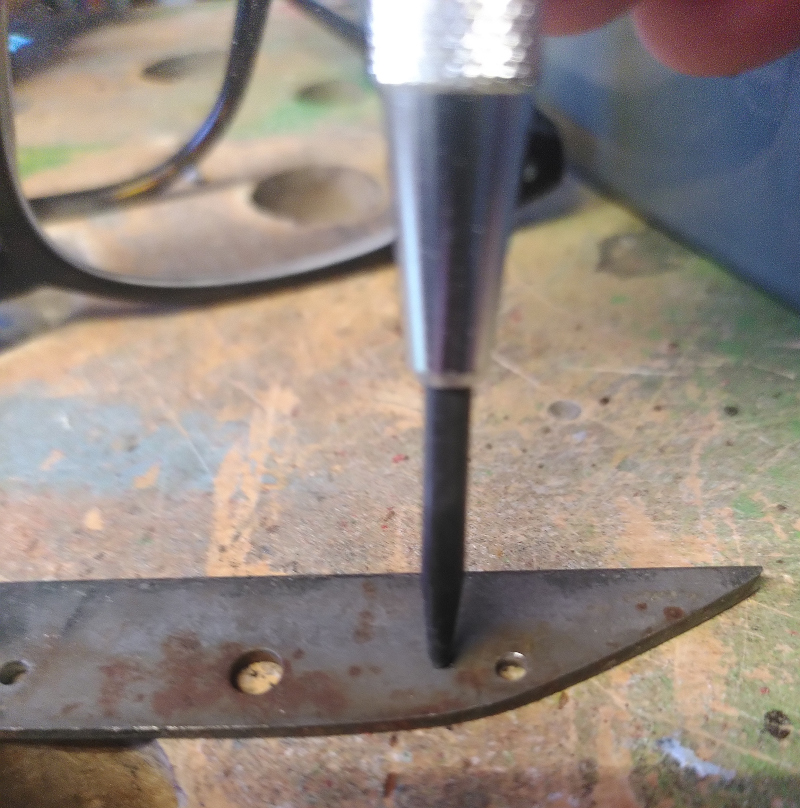
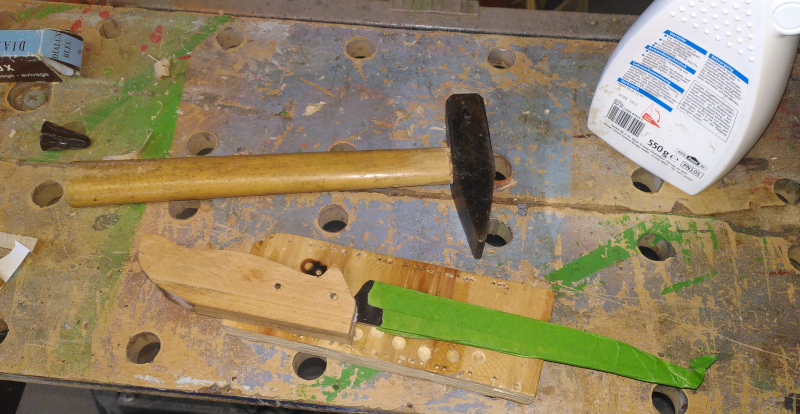
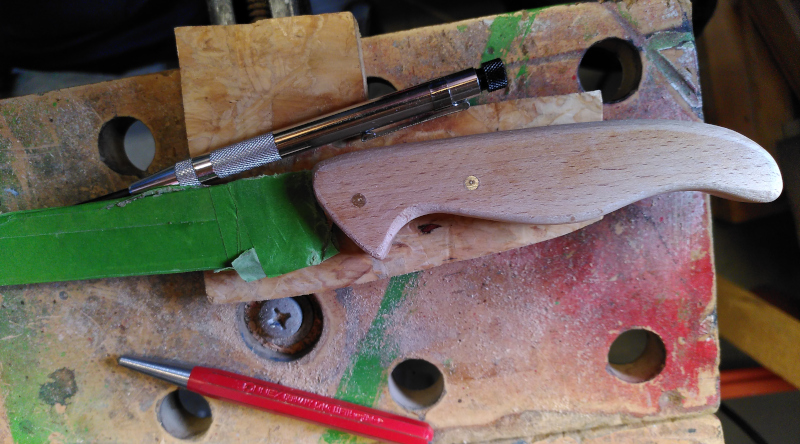
With the handle shaped and the pins ground, it was time to set the pins.
| Setting the pins |
|---|
 |
 |
I use an automatic punch to mark the center of the pins and make a dimple for setting the center punch. I use the back of my vise as an anvil to back the pins while driving the center punch with a hammer. Center punching the ends of the pins spreads them and makes them hold tight to the wood. Knife makers probably won’t think much of doing it that way, but it seems more secure to me than simply hammering the pins to mushroom them a bit.
After setting the pins, I spent a good bit of time sanding the handle really nice and smooth. Besides making it more comfortable to hold, you really have to sand the wood to a fine finish for staining. If you don’t sand it fine enough, the end grain will be darker than the rest - that doesn’t look so good.
| Finishing |
|---|
 |
 |
 |
I used walnut stain to give the beech wood some contrast. After staining, the whole thing got another sanding with 1000 grit sandpaper. Staining raises “hairs” on the surface of the wood that have to be sanded smooth.
I bought some linseed oil to finish something else a while back. It was either buy a small bottle that would have just barely been enough for the other project, or spend 50 cents more and buy a quart can of oil. Guess which I did? Since I’ve got it, I use it when I might have otherwise gone for a varnish of some kind. I have learned the hard way that typical varnishes don’t hold up well in the dishwasher, so I used linseed oil on the knife and warned my wife to only hand wash it from now on.
After all that, I straightened the cutting edge before sharpening it back to a razor edge.
| Sharpening |
|---|
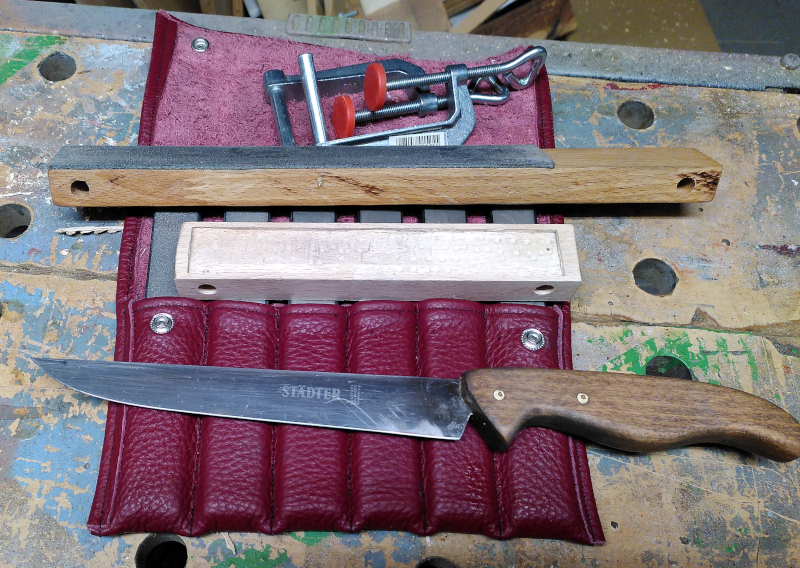 |
With the way the original handle was attached, I couldn’t sharpen the blade all the way to the end. There was like an inch of blade that the sharpening stone couldn’t reach because the handle was in the way - there was “bulge” and a dull spot in the cutting edge where I hadn’t been able sharpen the blade. With the handle set back like it is now, I can sharpen the entire cutting edge.
| All done |
|---|
 |
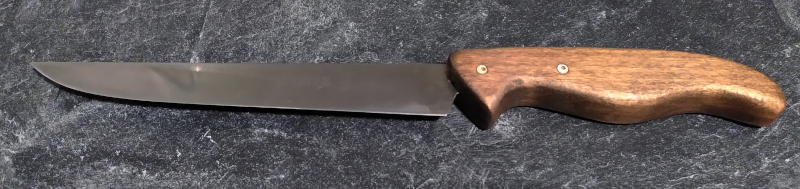 |
I don’t know how, but I managed to accidentally make a sort of “bookend” pattern on the handle in the finger grip. Looks nice, I just wish I knew how it got there.
At any rate, that’s how I put an old knife back to use. I suppose it would have been simpler to just buy a new one, but I really don’t like throwing things away if they can be fixed. The blade was fine, it just needed a new grip on life.