Making a new knife instead of fixing an old one
Replacing things you broke while trying to fix them.
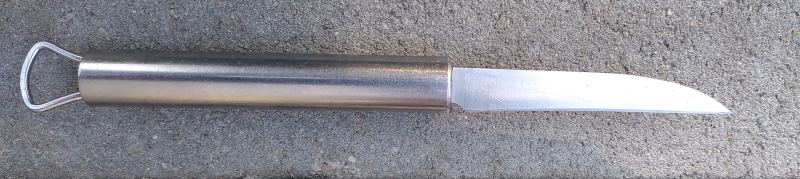
There’s this one paring knife that my wife has always hated to use. The handle and the blade were made such that she almost always cut herself in the finger if she used it. It’s supposedly a good knife, sold by a good brand. The blade was good, the handle was solid. It was just too easy for your hand to slide forward on the handle and slice your finger on the blade.
Since I’ve been doing things with knives, and I had some apple wood I wanted to use, I thought I’d put a new handle on it.
| Bad knife |
|---|
 |
The plan was to take the blade out of the handle, drill holes in the tang, make and shape scales to fit, pin together, shape the handle.
That plan failed almost immediately. It turns out that there’s only a stub of a tang in there, maybe 2cm long, with some kind of welded on clip that was wedged in the steel handle.
I got the welded clip off of the tang, and tried to drill a hole for a pin, but the tang snapped in half, leaving just absolutely no room to work. End of that idea.
That left us short a knife in the kitchen, and I still wanted to make a knife handle out of my apple wood.
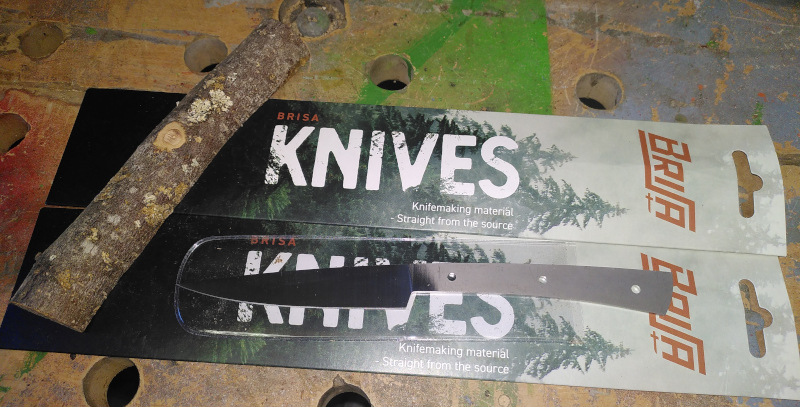
The solution was a company named Brisa in Finland. They sell knife making supplies, including finished blades that lack only a handle. I found the Cocinero 90 (9 cm paring knife) blade and decided that it looked pretty cool and pretty functional. The blades are made of the same steel that many large name manufacturers use in Europe, and they were inexpensive - the Cocinero 90 cost about 14 Euros.
| Brisa Cocinero 90 blades |
|---|
 |
I bought two of them because there’s a minimum order price. Two blades plus postage got me over the minimum. I’m going to have to do something with the second blade, now.
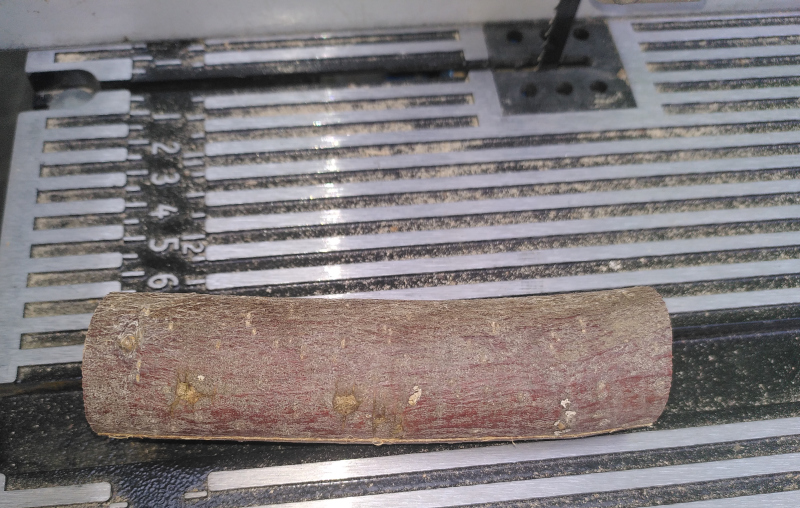
There’s a piece of the apple wood laying there beside the blades. That’s a section of an apple tree branch, about 30mm in diameter. We pruned our little apple tree back rather brutally a few years ago. I held onto the larger branches, keeping them in a warm, dry place for them to dry out. The branches may not be as hard as wood from the tree itself, but these branches are hard and dry enough that they go “click” when you tap them instead of “tonk.” Harder than the oak and beech wood I used for the other knives, for sure.
Before I do any work on a knife, I blunt the edge. I really don’t like juggling razor blades around power tools.
| Blunt the blade |
|---|
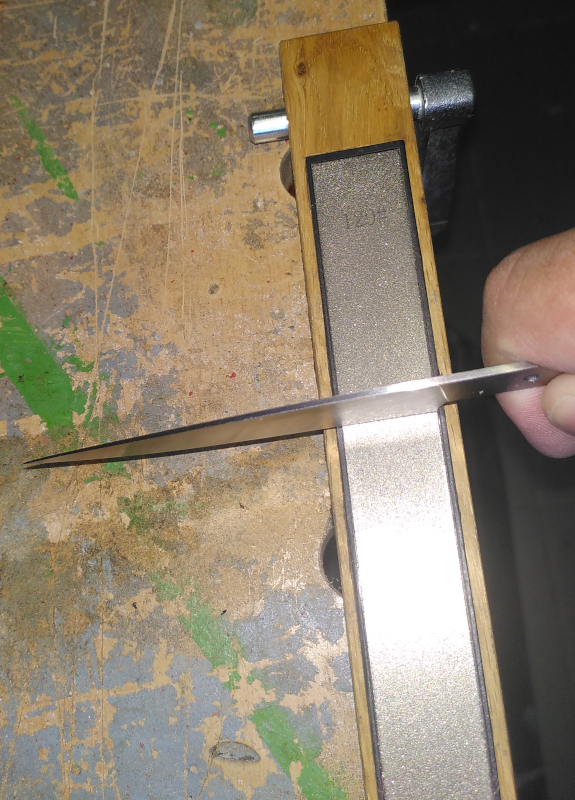 |
I used the 120 grit diamond stone, and pulled the edge over it a few times. Brisa delivers them hair shaving sharp. I made them as dull as possible.
According to Brisa, the holes for mounting the scales are 3mm diameter so I bought some 3mm brass rod to make the pins.
When I got all the pieces here in my hands, it turned out that the holes are a smidge over 3mm while the brass rod was a smidge under 3mm.
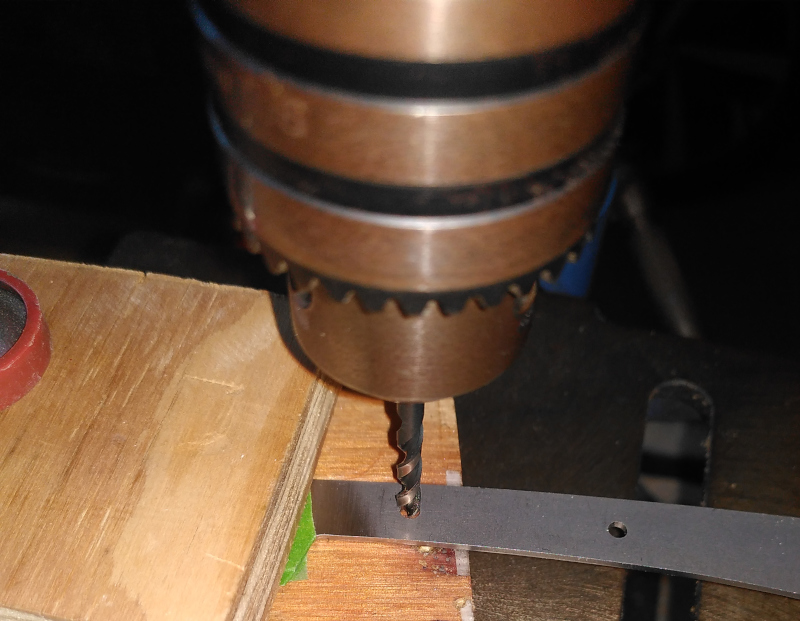
The way I put pins and scales on knives depends on the pins fitting the holes tightly, so I got to drill out another knife blade. 4mm again, but at least this time I only had to go from 3mm to 4mm - just drill each hole out once rather than going up in small steps.
| Drilling pin holes |
|---|
 |
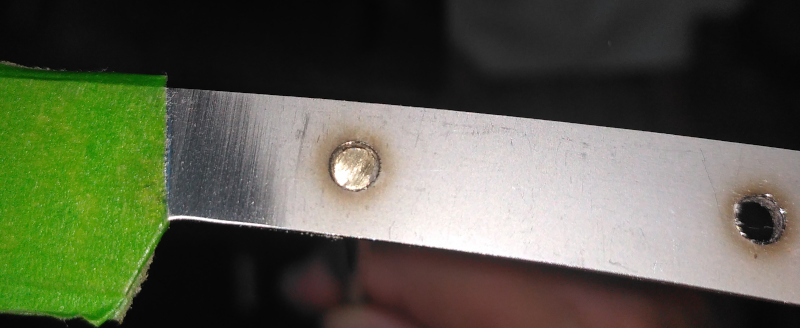 |
The green stuff is “frog tape.” It is like masking tape, but better when you are painting. I would have used regular masking tape, but I couldn’t find the roll I know I have here somewhere. The important thing here is to keep from scratching the blade while clamping it to be worked on.
The pins fit tightly into the holes. They needed a little persuasion with a hammer. I took them out after checking the fit. They are driven into the scales and the blade at the same time later.
The scales are made by first sawing the wood in two the long way.
| Sawing an apple branch |
|---|
 |
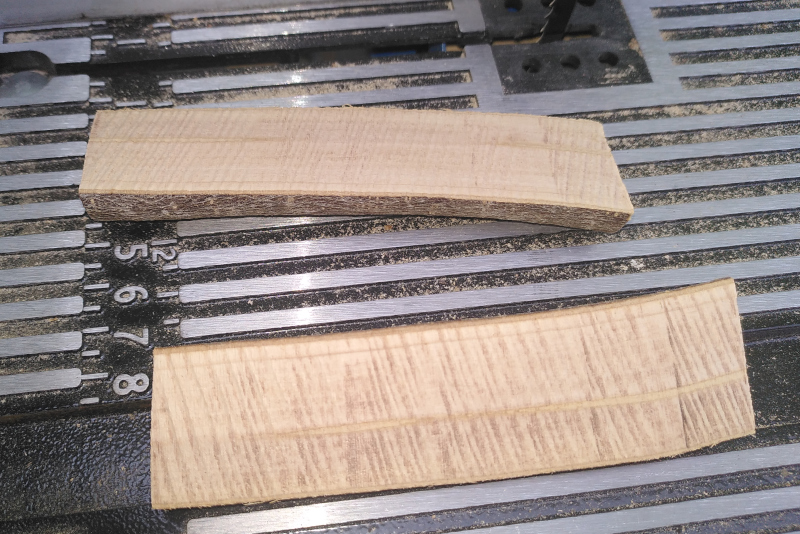 |
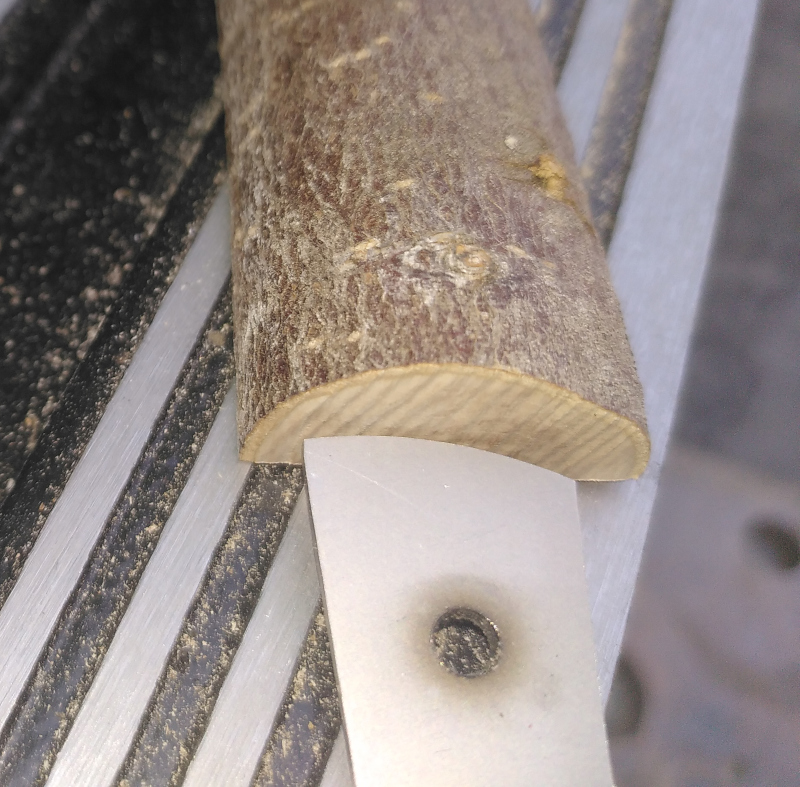
Since the pins are set by spreading the heads, I wanted a closed surface on the outside of the scales. If I had made the scales from the center of the branch, the grain would have run parallel to the blade. That would risk splitting the scales the long way when setting the pins. I sliced the inner side off just a few millimeters so that when the scale was finished, the outer ring of the branch would cover the entire length and width of the scale. I hope that will prevent the wood from splitting.
| Check how thick to slice the scales |
|---|
 |
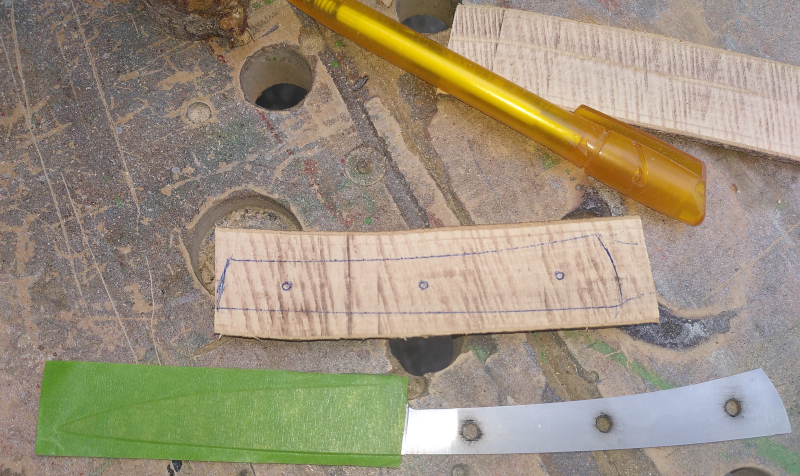
After splitting the branch and thinning it, I traced the blade onto the scale halves.
| Tracing the blade |
|---|
 |
While I was at it, I marked where the holes go and drilled them out.
| Drilling the scale holes |
|---|
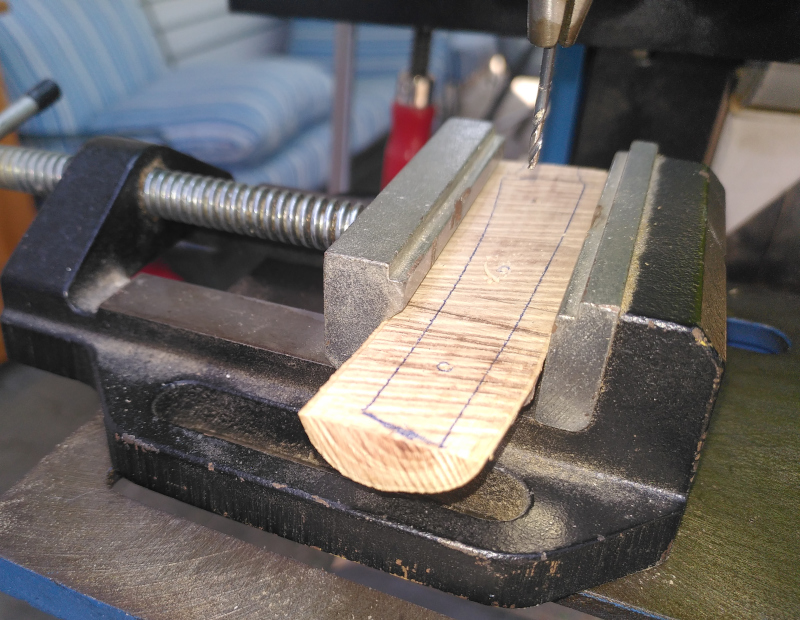 |
There’s two tricks here. First is to make sure that the scales are perpindicular to the drill bit, in both directions. The long way is easy - clamp one side in the V-groove of the vise. The short way is trickier - you have to adjust it and eyeball it until it is level since there’s a V-groove only on one side of the vise. The other trick is to drill the holes from the inside, where the blade sits. Here, you are kind of forced to do it that way since you can only mark the flat side. If I’d have had regular, flat boards, I could have marked the outside. If the scales then aren’t flat, you wind up with the holes slanted slightly. If you drill from the outside, the holes won’t line up with the holes in the blade. If you drill from the inside, the pins can slant off a bit but still be in the right place in the center.
Once you’ve drilled the holes in both scales, you chamfer one end of each pin and drive them through the scales and the blade all in one go. The chamfer pulls the pin to the center of the hole in the steel.
Grind the scales and the pins down to the correct thickness using a belt sander. There should be a whole bunch of pictures here of sanding and shaping the scales to fit the knife tang, but just after I got started the sander started making noise. I had to take it apart and adjust the fit of the belt and the pulleys connecting the motor to the sander. That threw me out of my planned operations, and I forgot to make pictures when I finally got the sander straightened out. I have that other blade to work with, so maybe I’ll make pictures when I do it.
With the scales pinned on and ground down, you center punch both ends of each pin. Lay the handle down on an anvil, center punch the pins facing up, flip the knife and center punch the pins on the other side. First just lightly to hold things while I was working on them because I was pretty sure I’d end up thinning the scales a bit more. I used a carpenter’s hammer and only tapped the center punch. You don’t want to hit it too hard because that could spread the brass too much and split the wood.
I don’t have a real anvil. The bench vise I use has a large block on the back for such work, however.
I used a couple of wood rasps to shape the handle around the tang, then the belt sander some more, then some hand sanding.
When it is all shaped properly and it all looks good, the pins get another round of center-punching. 4 taps with the carpenter’s hammer to deepen the holes and widen the spread to tighten the pins and scales.
| Almost there |
|---|
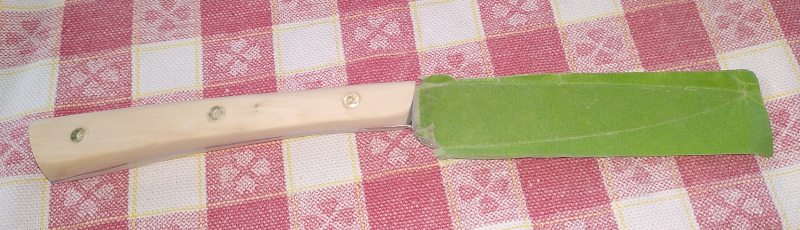 |
That’s properly shaped and the pins locked down tight. I sanded the scales with 1000 grit sandpaper, then cleaned off all the dust and rubbed in some boiled linseed oil.
After the linseed oil dried, I took the tape off the blade and sharpened it back to a razor’s edge.
| All done |
|---|
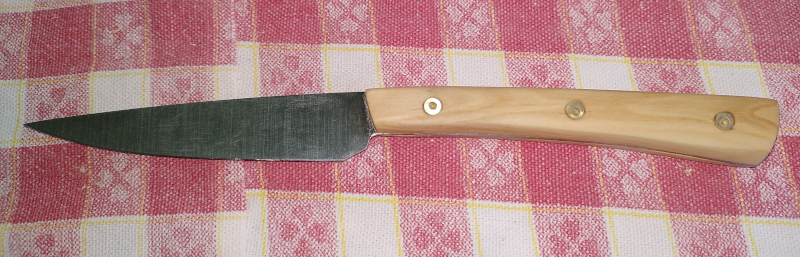 |
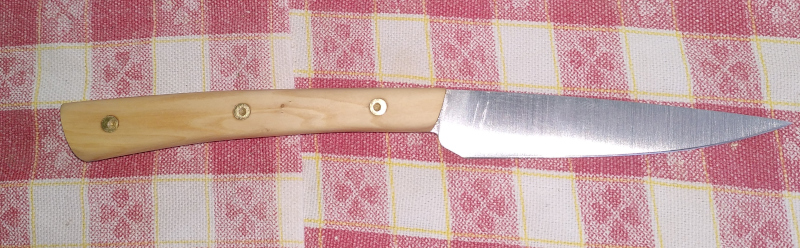 |
All the knife makers out there are now pulling their hair out because I put the scales on “wrong.” They all prefer to use epoxy to hold the scales on, with the pins or rivets being basically just decoration.
The scales on my knife are held by the pins, and there’s no epoxy in there anywhere. According to knife maker forums, you’ll split your scales if you use real rivets, including the skinny little pins you’ll sometimes see in knife handles. According to knife maker forums, the scales will fall off because there’s no way the rivets and the wood can hold tight enough.
Maybe. We’ll see. It certainly holds up well enough in the knives I’ve already done this way, and I’ve seen antique knives with the scales held on by nothing but the rivets because there was no epoxy back in the day.
Anyway, that’s how I made a knife to replace one I broke.
2026-08-01: My wife loves the knife. It is wicked sharp, easy to hold, does not cut her fingers, and is absolute hell on tomatoes. That last is important because she likes to make sliced tomatoes in vinegar and oil as a salad. We go through a lot of sliced tomatoes.