The Pfaff model K sewing machine - Disassembly and cleanup
Removing the ick and doing things I’d rather not.
Read all about my adventures with the Pfaff model K.
The Pfaff model K turned out to be as bad (or worse) ick-wise as my Adler class 8 was when I got it. The shellac was also in bad shape. Against my desire to not do so, I’ve ended up having to strip the old shellac off another vintage sewing machine.
When parts of the decals are worn away on a vintage sewing machine, then that’s because the shellac protecting the decals has also been worn off. Worn decals = you’re going to have to put new shellac over the machine to protect what’s left of the decals. New shellac means you have to remove the old shellac - new shellac over old shellac can cause the old shellac to do strange things and ruin the new finish you are trying to put on it.
Before you put fresh shellac on an old sewing machine, you’ll need to remove as many of the external parts as possible so that you can clean things properly and paint the shellac on.
I made a bunch of pictures (though not enough) while disassembling my model K. They’ll help me put it back together properly. Maybe they’ll help you with your old sewing machine as well.
I used lamp oil (kerosene) and a small, stiff brush to clean the machine. The kerosene was supposedly plain lamp oil, but we seem to have put some lavender oil in the bottle at some point in the 10 years or more that it was in the cabinet in the utility room. The sewing machine and the garage smelled like lavender while I was cleaning things up.
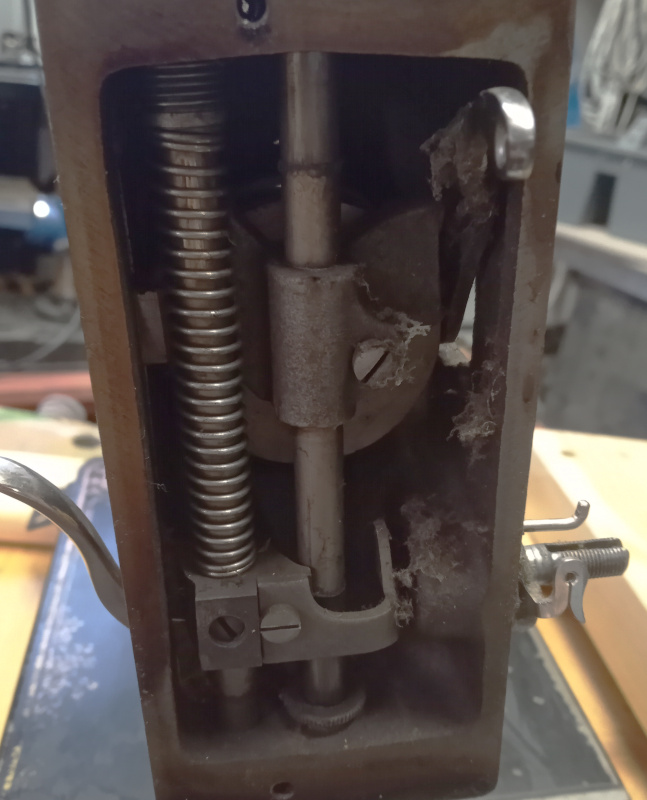
Starting at the bottom:
| Underside of the Pfaff K |
|---|
 |
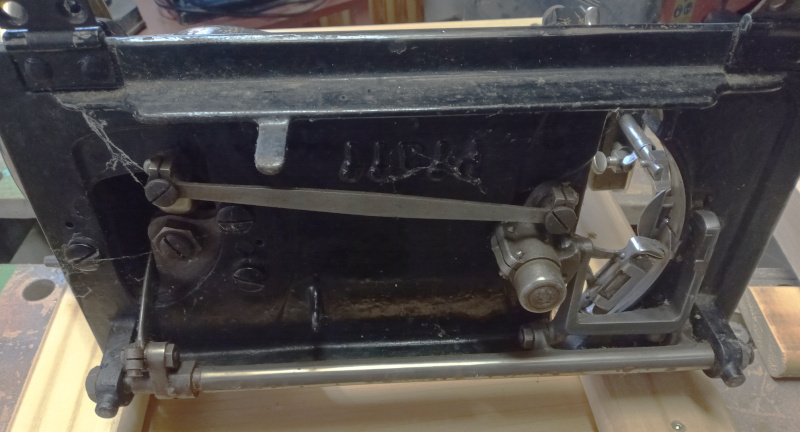 |
As you can see, there’s a lot of fuzz and congealed oil on the bottom of the machine. There’s lots of spider webs, too.
Dribble a little kerosene in all the oil holes while cleaning. It’ll dissolve any dried on oil on the moving parts. Work the parts back and forth to get the kerosene into the joints.
Besides the moving parts, I cleaned the bottom of the machine with kerosene as well. There was just loads of dried oil with dust trapped in it.
This Pfaff K seems to have not received a lot of attention, despite showing signs of heavy use. There’s what looks like a ton (and a half) of cloth fuzz and oil trapped under the needle plate.
| Major ick |
|---|
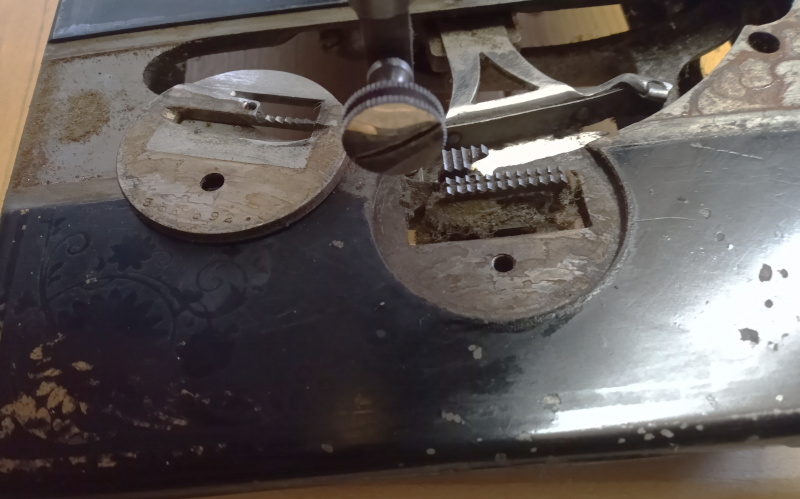 |
The needle plate was “glued” in place with dry oil. The teeth in the feed dogs were full of grunge. I scraped the gunk out from between the teeth, then used kerosene to clean them, the needle plate, and the hole the needle plate sits in. It took some scraping with the point of my pocket knife to get all the grunge out of the hole for the needle plate, despite a thorough soaking with kerosene and scrubbing with the brush.
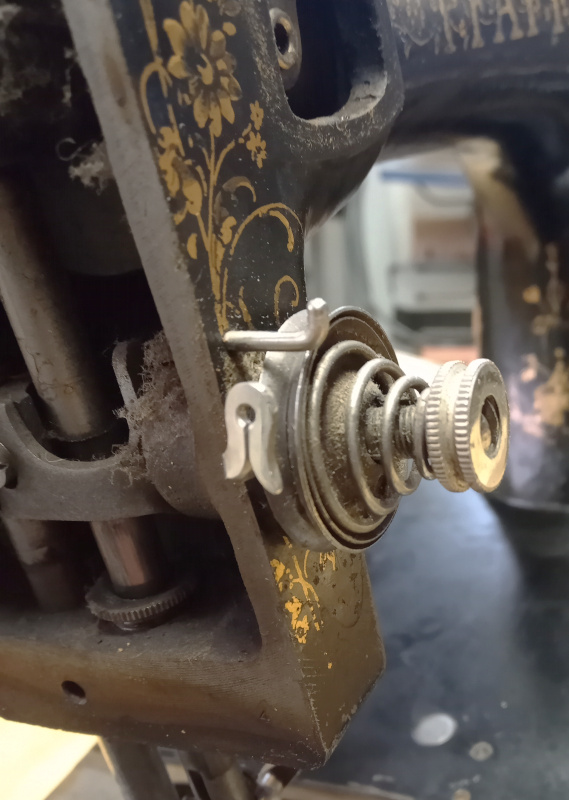
The main tensioner was so full of fuzz that I thought some kind of felt washer had disentegrated inside it. On disassembly, I found that it was just packed in fuzz and oil, though.
| Main tensioner |
|---|
 |
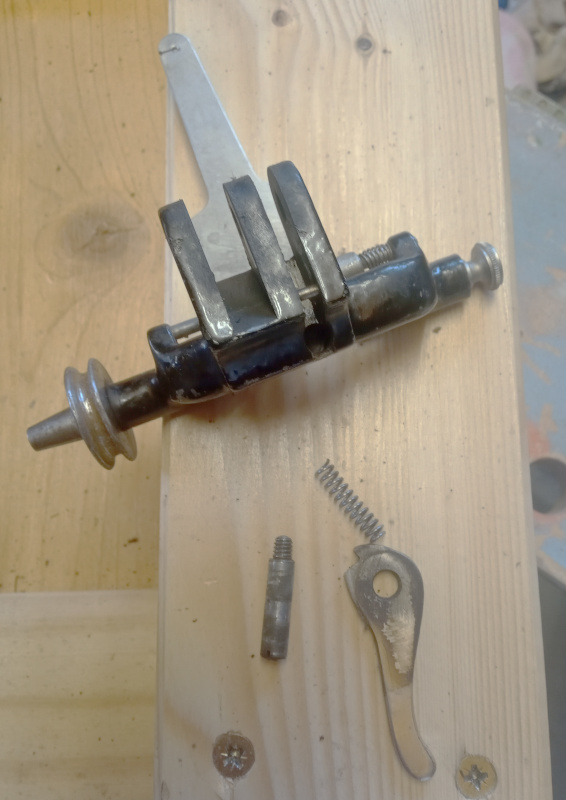
I had to remove the mounting shaft for the main tensioner so that I could get all the crud out.
| Removing the main tensioner shaft |
|---|
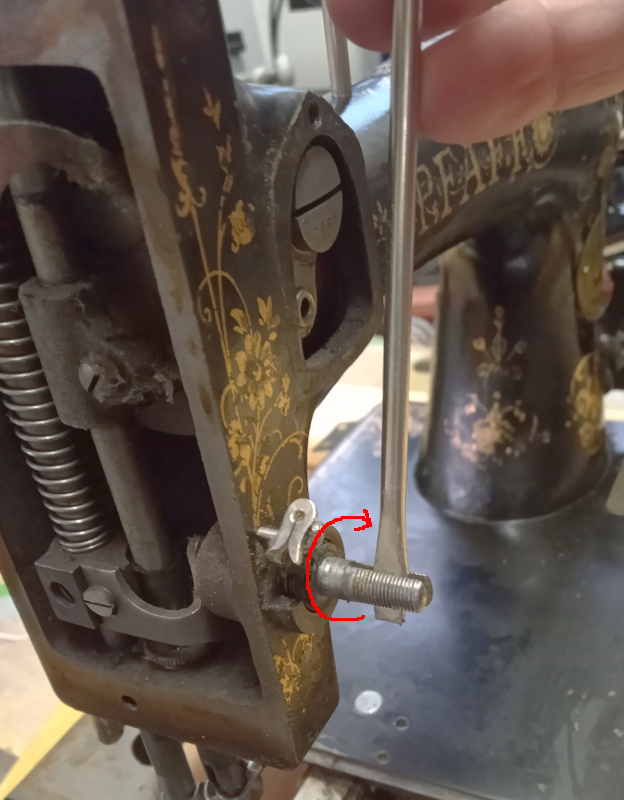 |
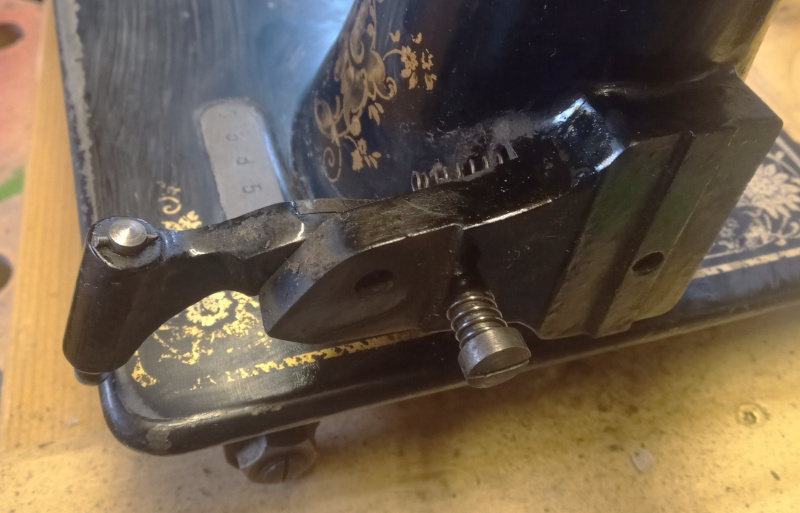
The shaft for the main tensioner is screwed into the housing. It has a left handed screw. Turn it clockwise (as indicated by the arrow) to remove it. I should have put the tensioner nut back on the shaft before unscrewing it. The screwdriver spread the split shaft - the nut would have prevented that.
I made some pictures to show how the main tensioner was put together so that I’ll be able to put it back together later.
| Main tensioner details |
|---|
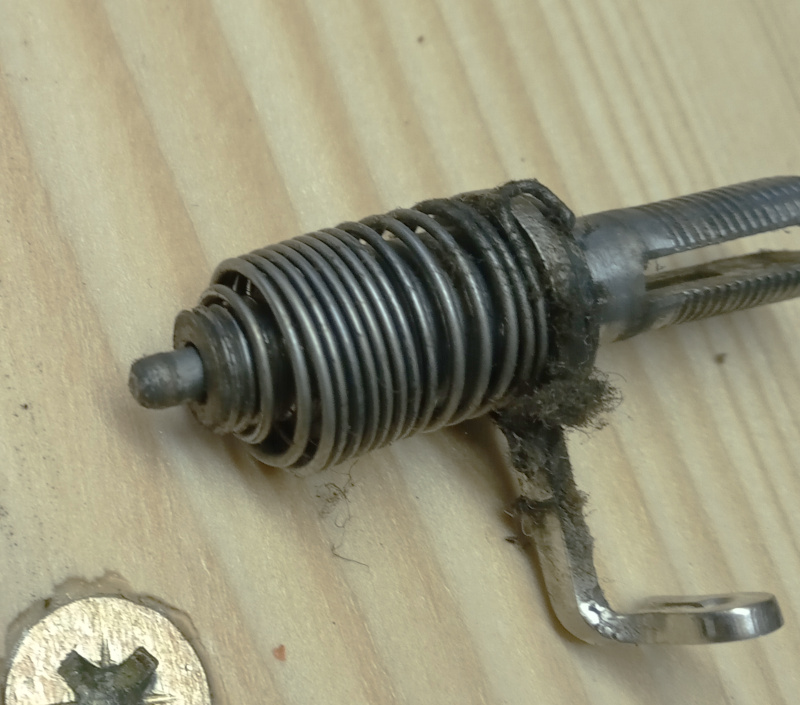 |
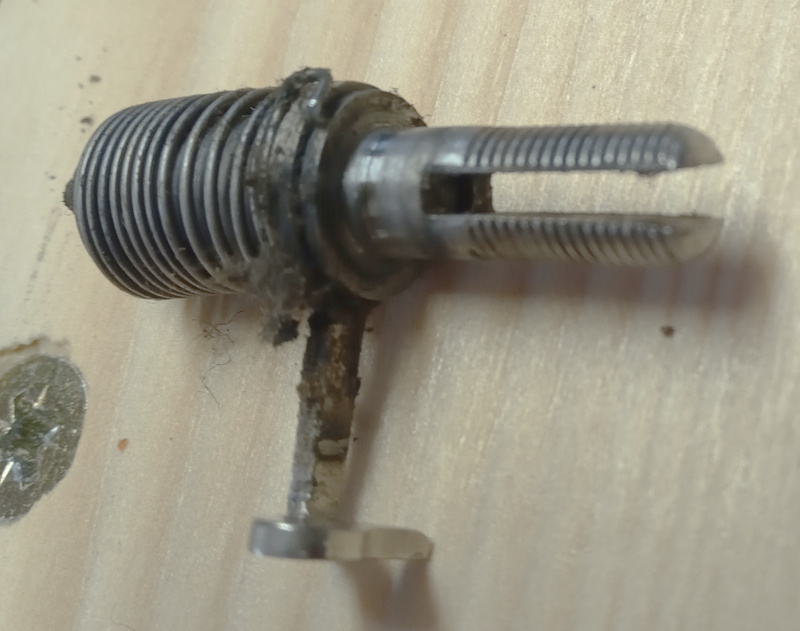 |
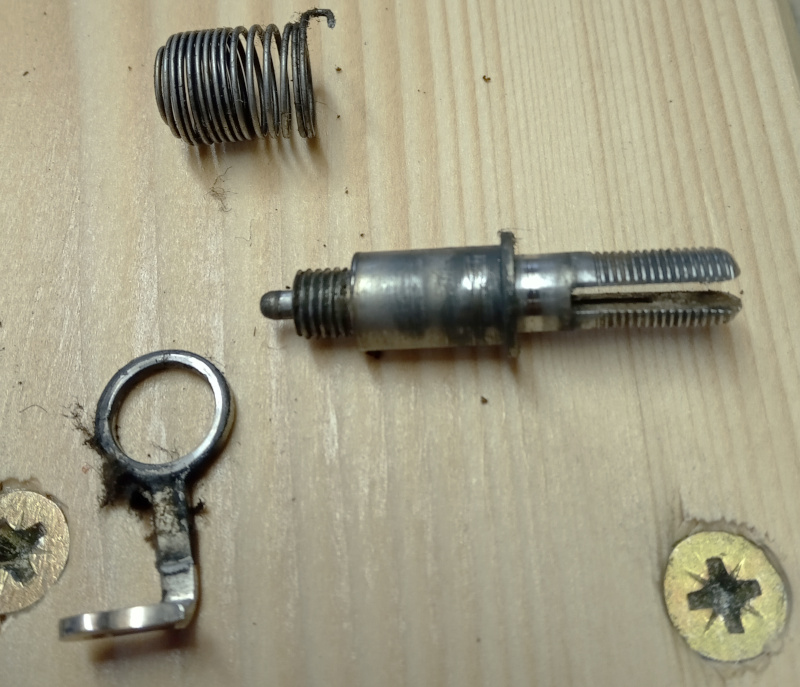 |
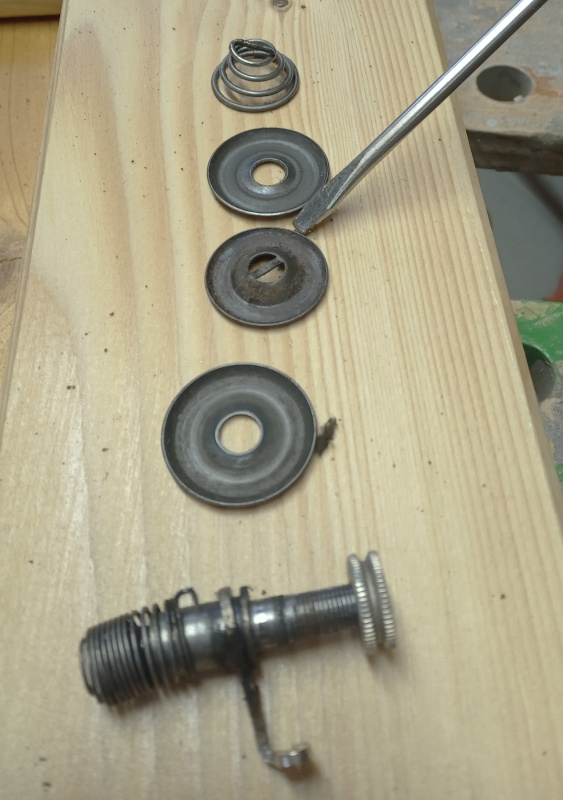 |
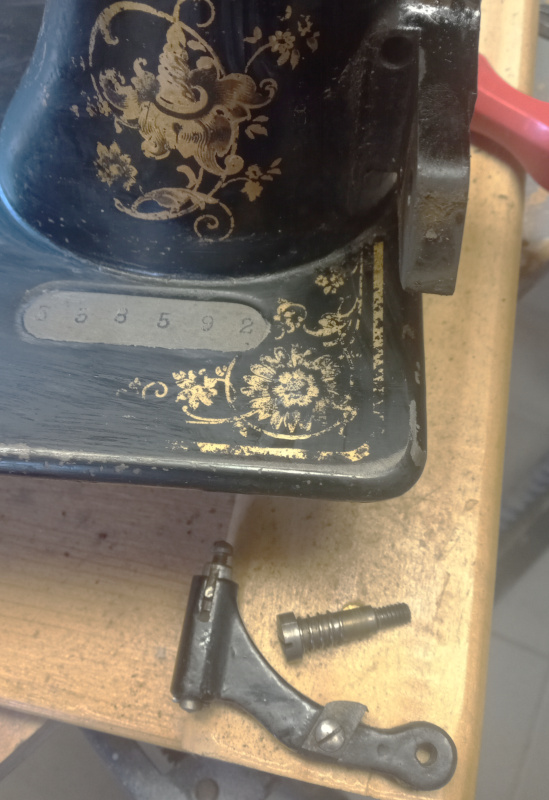
The shaft of the main tensioner is hollow. There’s a pin inside it which is used to release the tension on the thread when the presser foot is raised. You can see the rounded tip of the pin sticking out of the tensioner shaft. The flat end goes towards the tension discs.
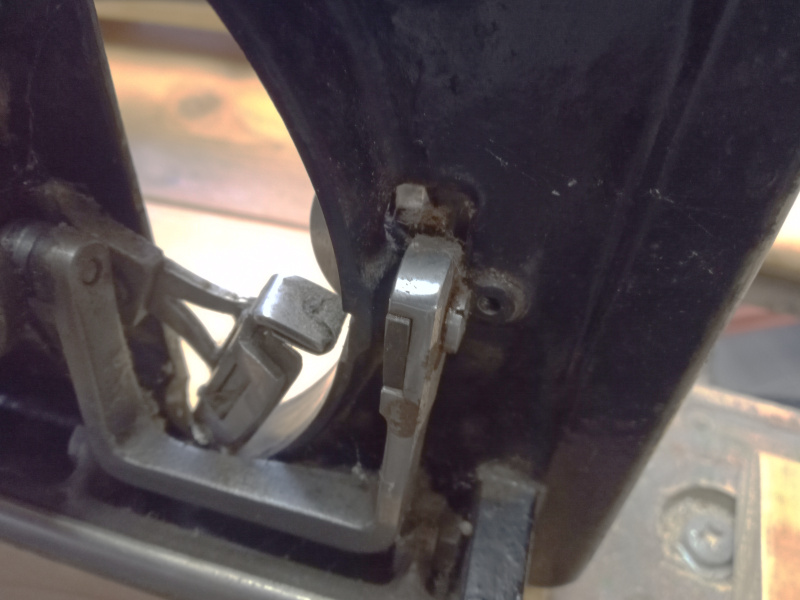
There was more grunge under the nose plate.
| Nose plate |
|---|
 |
Kerosene and the brush took care of the grunge. It took some convincing with a knife blade to get the dried on oil off the housing. There was so much dried oil that the nose plate was glued to the housing - it stayed put even after I had removed the screw holding it on.
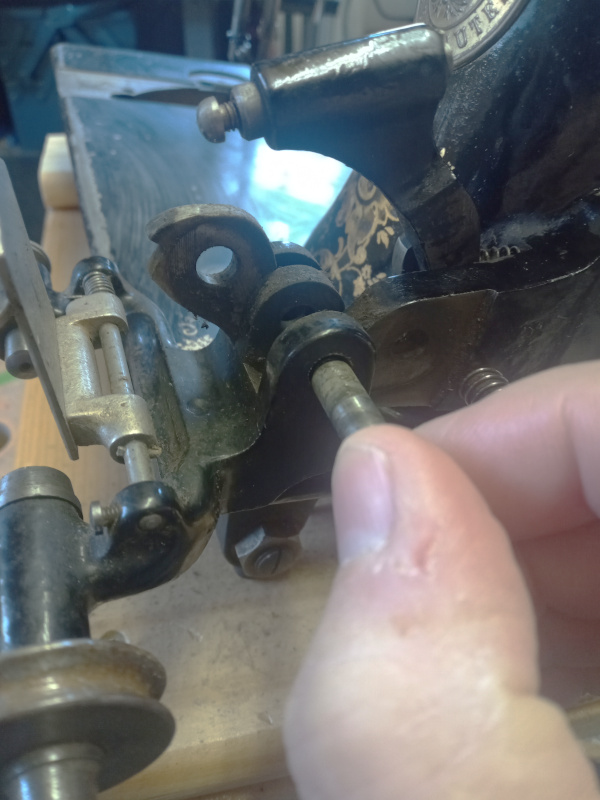
With the “business end” disassembled and cleaned, I went on to the bobbin winder.
| Bobbin winder |
|---|
 |
 |
 |
 |
This Pfaff K has a simpler style winder for its long bobbins. Later machines had a gear driven guide to make sure the thread was wound smoothly on the bobbin.
As you can see, there was plenty of grunge on, around, and behind the bobbin winder. The brush and the kerosene took care of all of that.
I thought I had made photos of the balance wheel as I removed it, but I can’t find them - that means I didn’t make them. The balance wheel wasn’t hard to remove. I’ll make sure to make photos when I put it all back together.
With all the external parts removed, I got to work with the ethanol to remove the old shellac.
I buy 99% pure ethanol from the grocery store. They sell it as charcoal starting fluid. You could use denatured alcohol (as the Americans call it) or methylated spirits (as the British call it.) Isopropyl alcohol would probably do. You could also use Everclear, if you can find it cheap enough.
I used paper towels to wipe off the old shellac. Soak the paper towel in alcohol, then wipe it across a small area of the machine. Do not rub. Wipe across with very little pressure, allowing the alcohol to dissolve the shellac and lubricate the motion of the towel.
If you rub the surface with the towel, you will destroy the decals.
You want the towel to be sopping wet and not sticky. When the paper towel starts to stick, soak a clean section of the paper towel in alcohol and use it. When the towel is sticky all over, get a clean paper towel.
Clean shellac looks like this when you remove it with alcohol:
| Clean shellac |
|---|
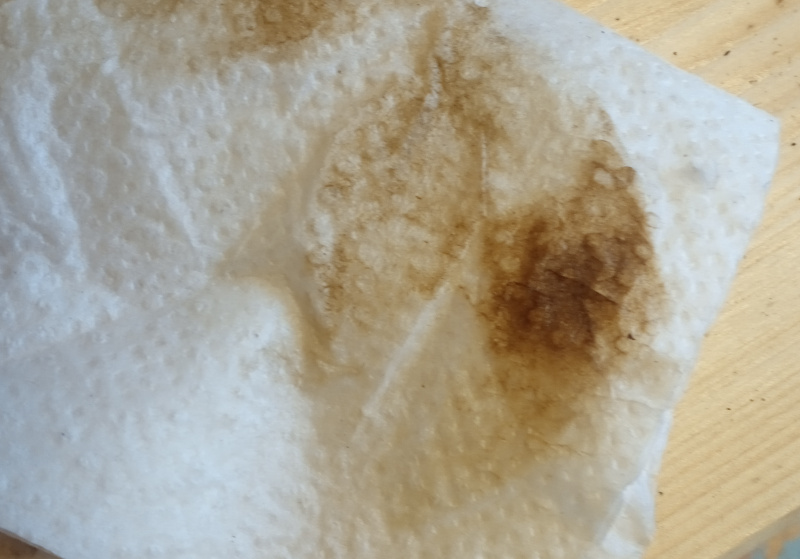 |
Shellac isn’t transparent. It is sort of honey colored. The lighter it is, the higher the quality.
Shellac with oil and grunge in it looks like this:
| Dirty shellac |
|---|
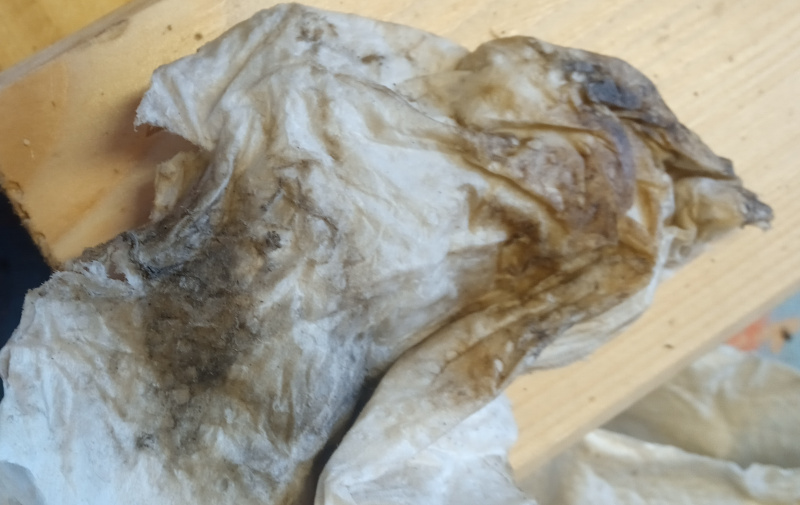 |
Don’t reuse a section of paper towel that has dirt and oil in it. When the towel comes up nasty, switch to a clean section immediately.
The Pfaff K looked like this when disassembled and stripped of shellac:
| Disassembled |
|---|
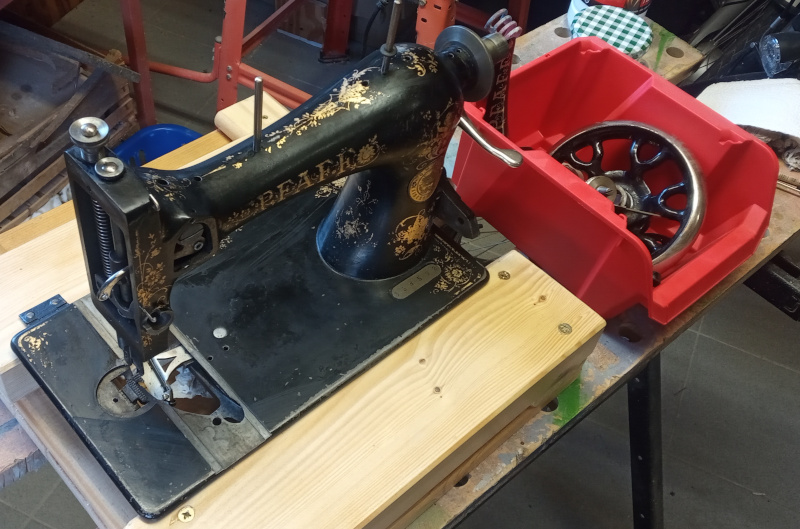 |
I’ve got all the small parts in the red box to the side, there. Be very careful when you disassemble the old machines. Don’t lose any parts - you’ll probably have to buy a second machine to get replacements. Modern screwdrivers tend to pop out of the screw slots - press hard when loosening screws so that doesn’t happen. The screwdriver will tend to mess up the slots when it pops out - you’ll have to sand or file the edges of the screw slot smooth again so that they don’t catch on cloth when sewing.
Once it was all stripped and clean, I went over the machine and oiled it in all the spots with oil holes and every place where metal rubs metal. Oil it, work it until the oil is all in the moving parts and the machine runs smoothly. Properly oiled, the Pfaff K can be cranked by hand without the balance wheel.
Once it moves freely, wipe off any excess oil then clean the japanned surfaces with alcohol again to remove any oil.
The oiled surfaces will keep shellac from running in and clogging up moving parts. Shellac might get on the parts, but it won’t be able to get a grip - it’ll fall right off when the mechanism runs.
Older vintage machines have japanning under the shellac. That’s the black stuff.
I don’t know of anyway to touch up japanning. It was originally painted over the entire machine then baked in a large oven. Besides having to find a recipe for japanning, you’d have to bake the machine somehow.
I used a can of RAL 9005 “jet black” glossy paint to touch up the dings and worn areas in the japanning.
RAL is a European color standard. 9005 is the code for “jet black.” It is a very dark black. It matches the color of the japanning very well.
| Jet black |
|---|
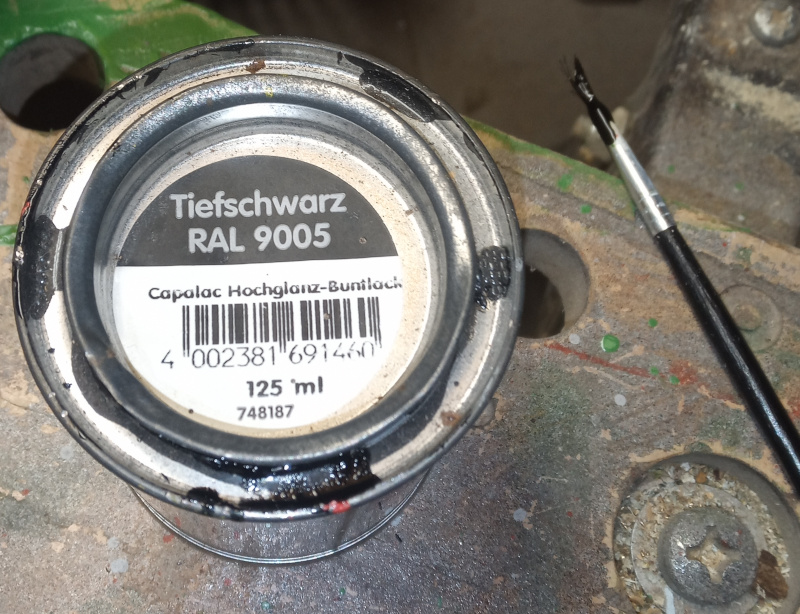 |
The manufacturer doesn’t matter. As long as it’s RAL 9005, it ought to match the japanning pretty well.
| Touch up |
|---|
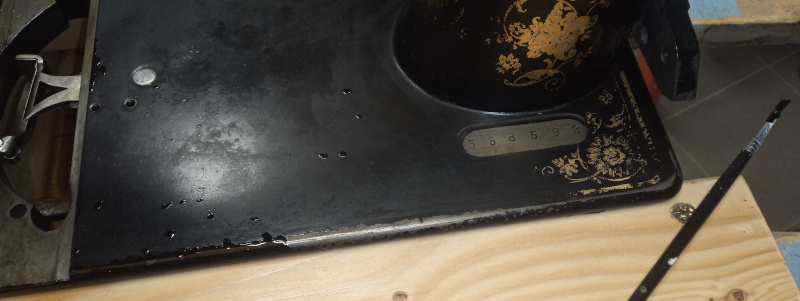 |
In that picture, it looks like the colors don’t match. That’s just because the paint is glossy and the japanning is matt from the cleaning. When you put a coat of shellac over it, it’ll all be glossy. You’ll only see the paint because it won’t be perfectly even with the surface of the japanning. I don’t sand the paint for fear of damaging the japanning or the decals.
I’ll describe putting the shellac on and reassembling the machine another time.