The Pfaff model K sewing machine - Reassembly
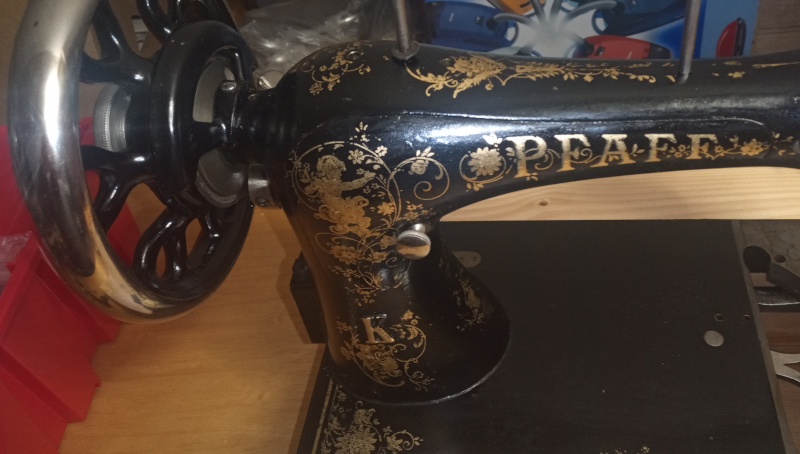
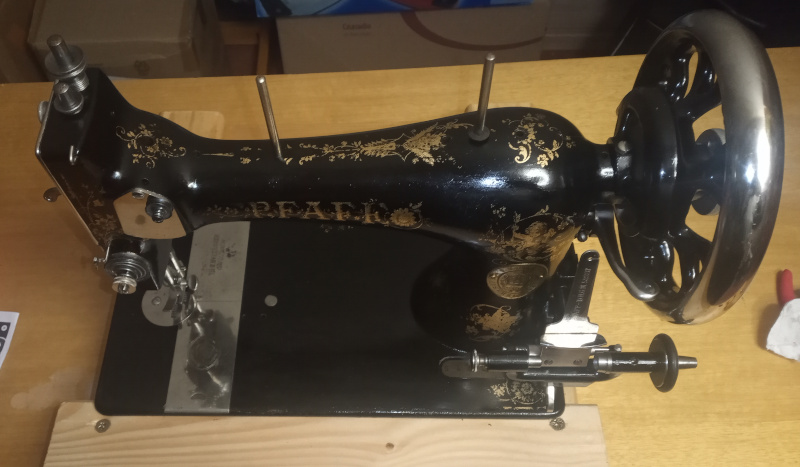
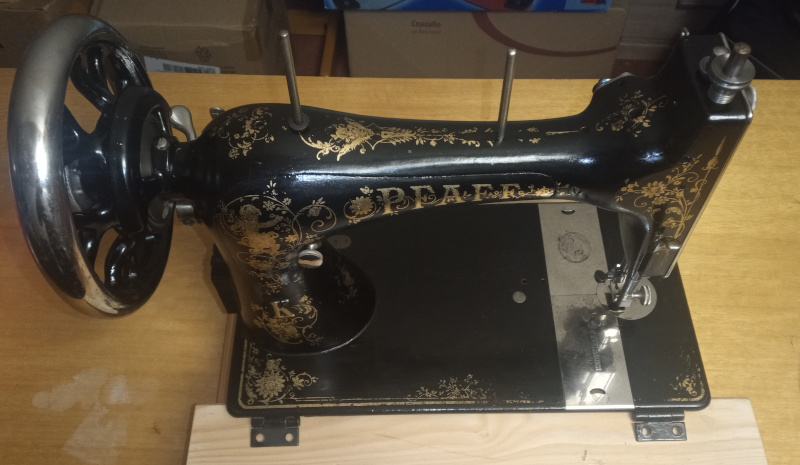
Back together again - clean and smooth running.
Read all about my adventures with the Pfaff model K.
I mentioned way back in August, when I first got the Pfaff K that it looked like one of my wife’s friends was going to take it off my hands when I got it done. In the mean time my wife has expressed doubts about it, to the extent that I figured I was going to have to sell it on eBay or something and that there was no hurry to get done.
A couple of days ago, my wife casually mentioned that her friend had checked with her daughter. The daughter is interested after all, so I’m going to have to get it in gear to get finished before Christmas.
Since I had it all cleaned up, I figured it was about time to put it back together.
This is going to be a long post - I made rather more pictures about putting it together than I did when taking it apart. The good part of it is that it will mostly be pictures.
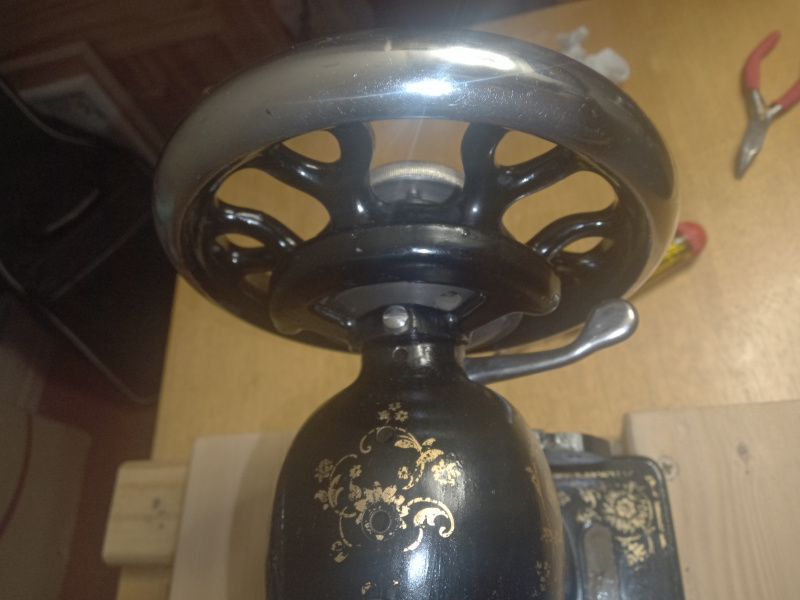
Balance wheel
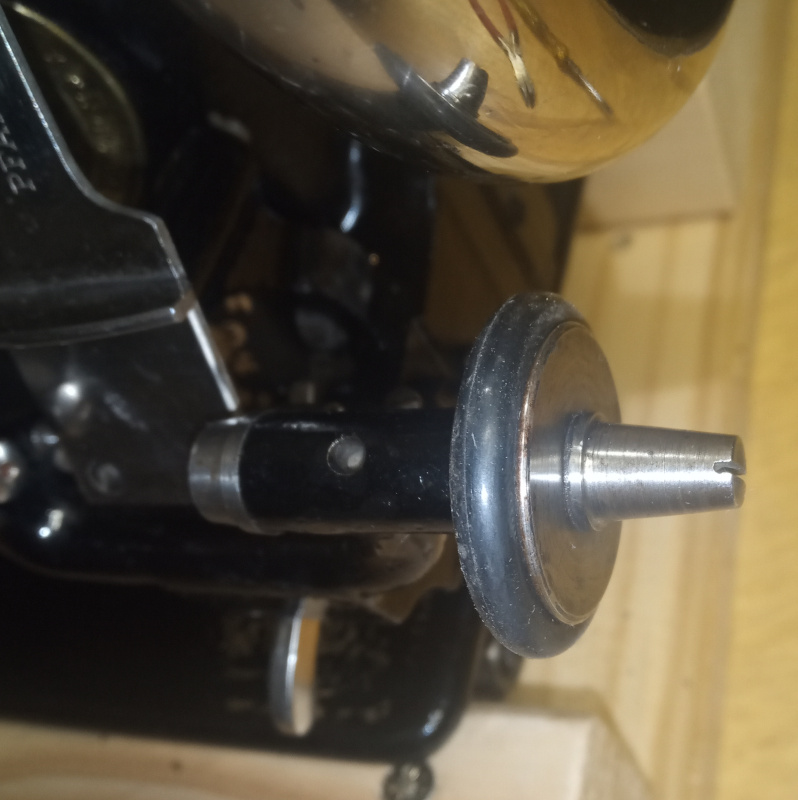
The only tricky part of the balance wheel is that is has to spin freely when the clutch is disengaged. The axle has to be clean, and it has to be oiled.
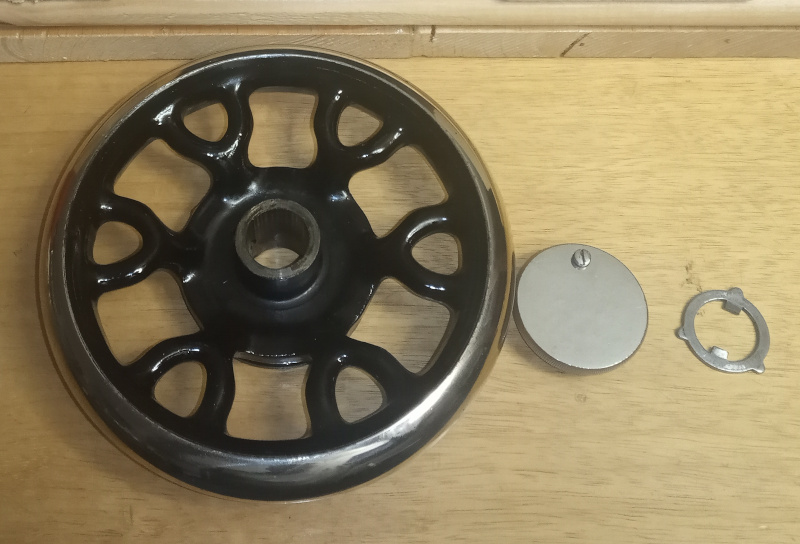
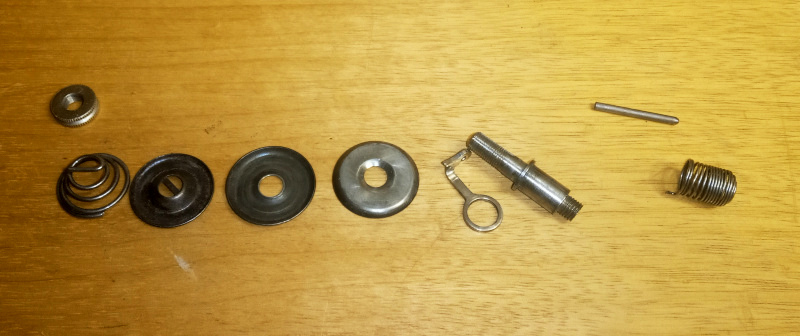
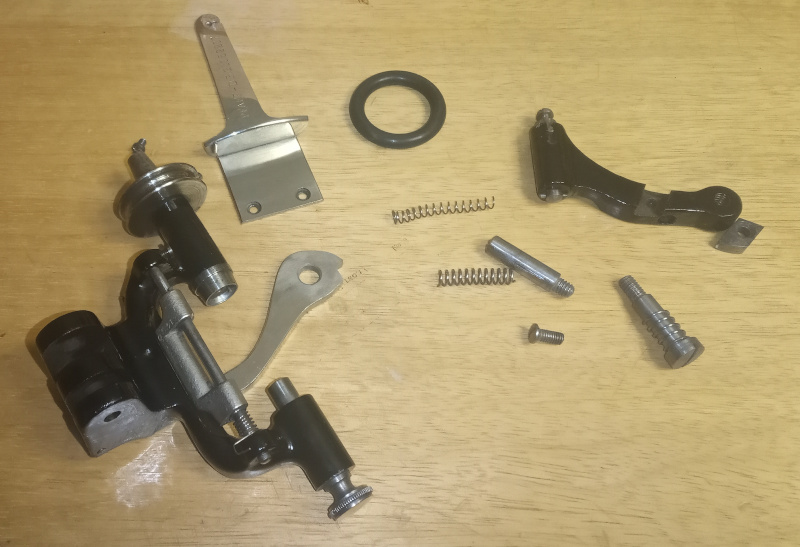
| Balance wheel parts |
|---|
 |
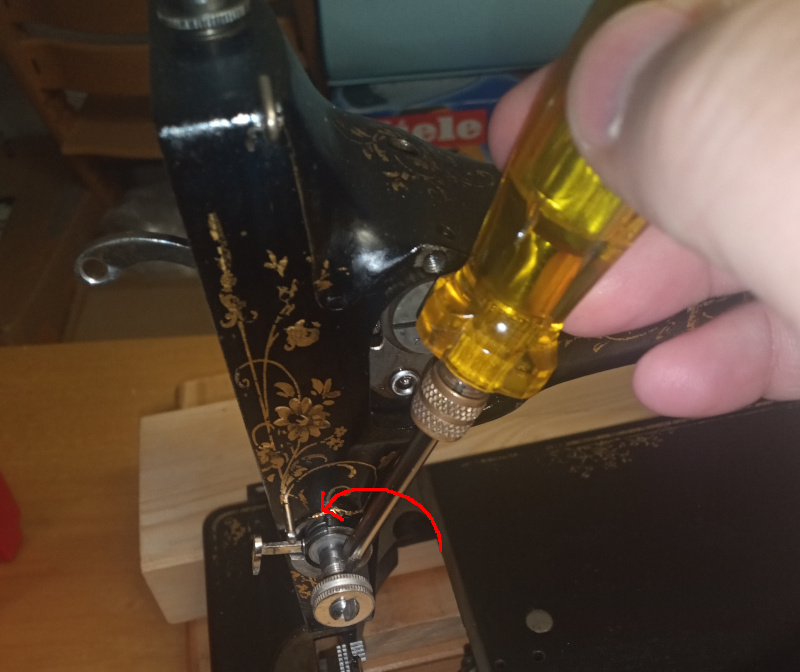
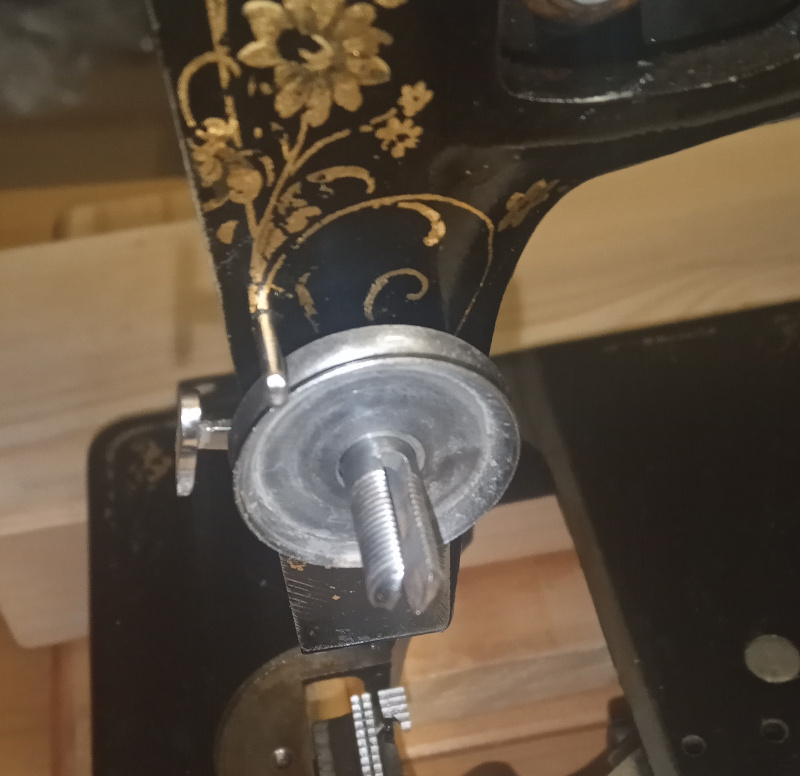
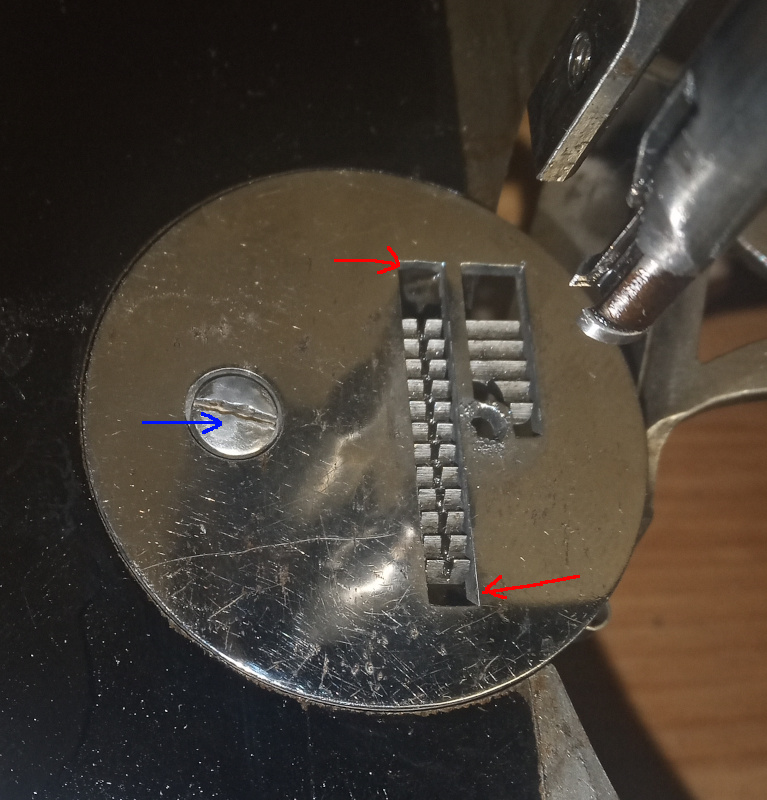
| Clean the axle |
|---|
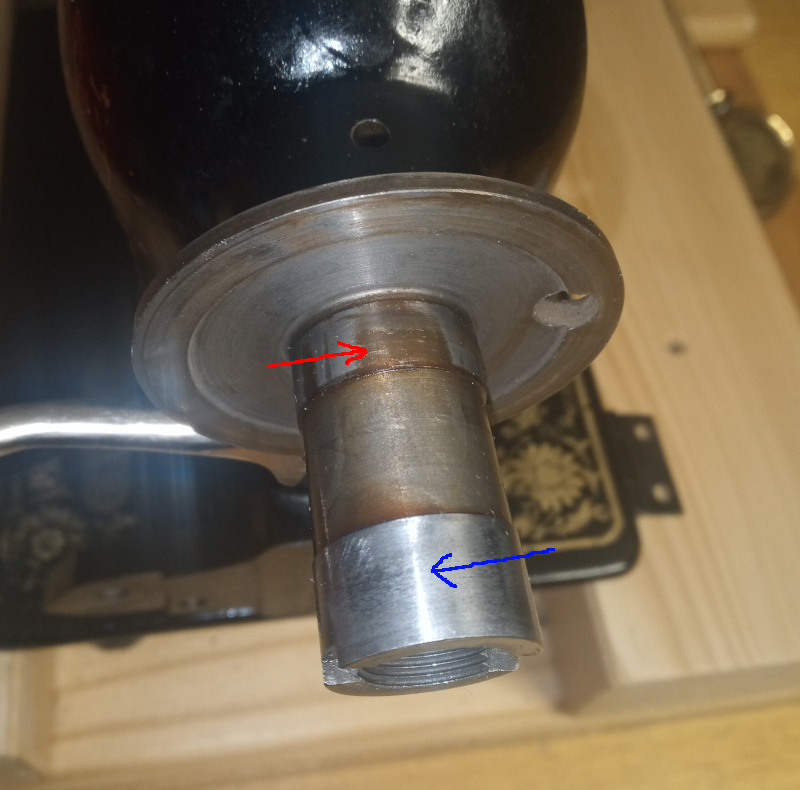 |
The whole axle needs to look like the area pointed to by the blue arrow. The red arrow points at some dried on oil that has to come off.
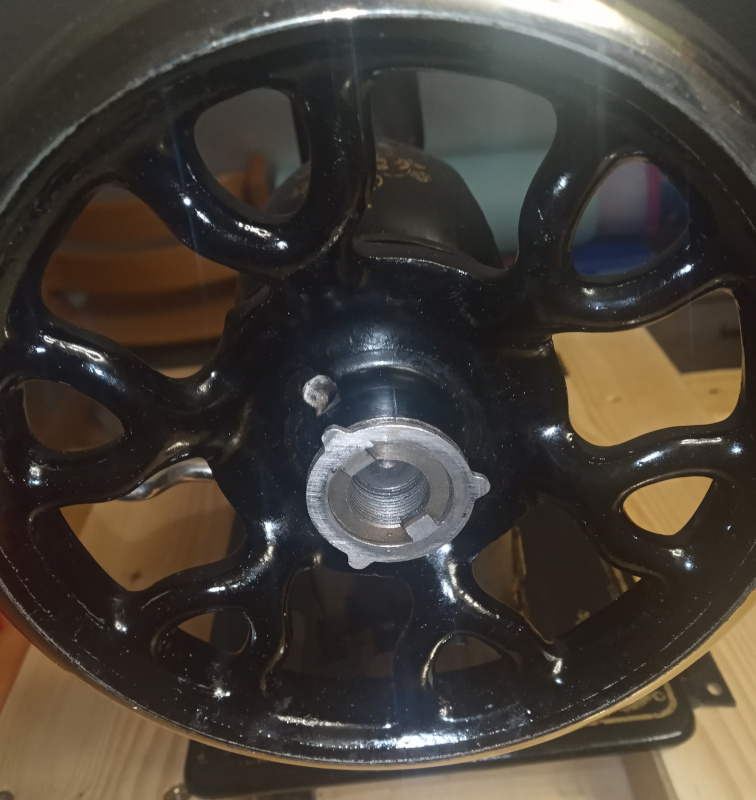
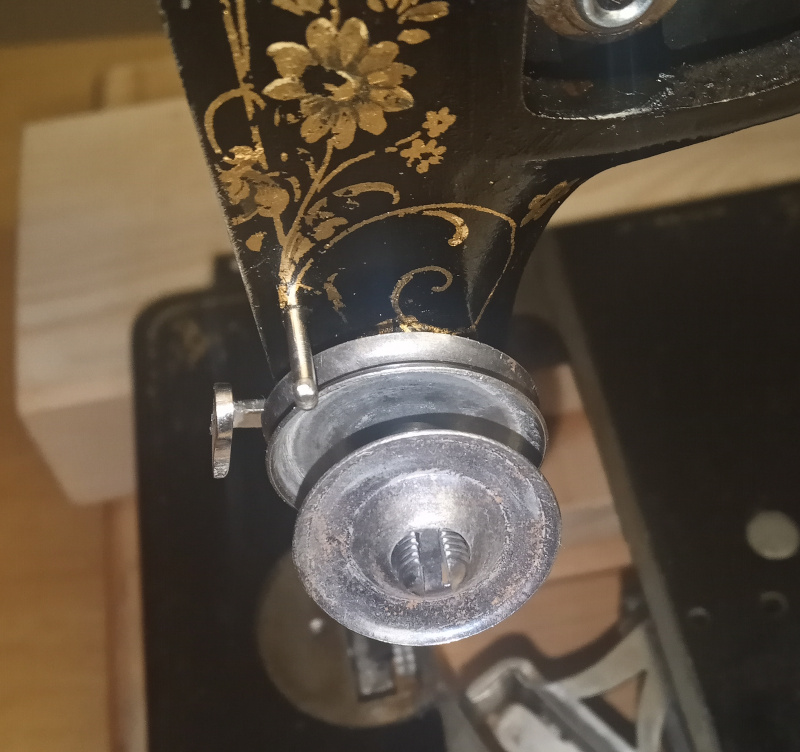
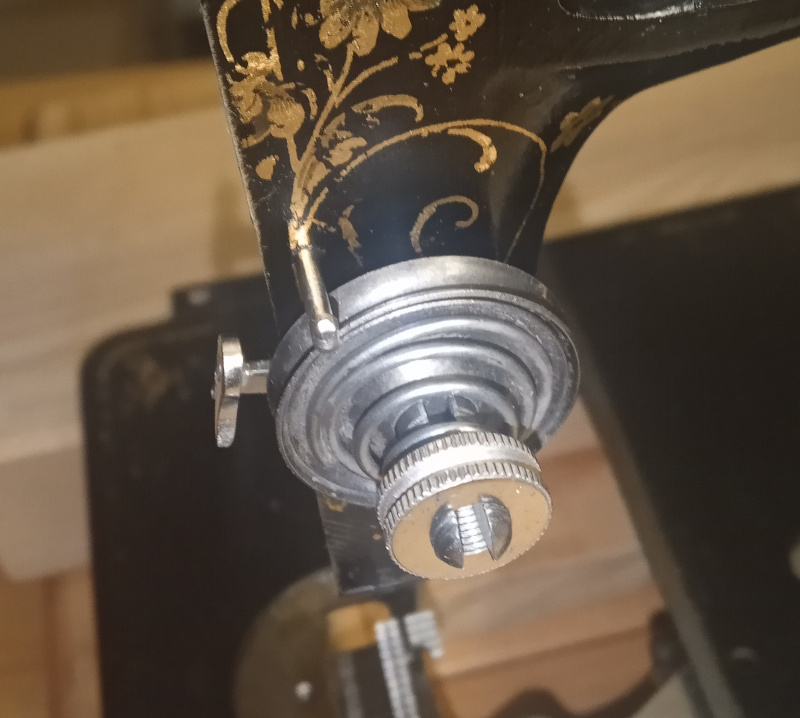
| Balance wheel assembly |
|---|
 |
 |
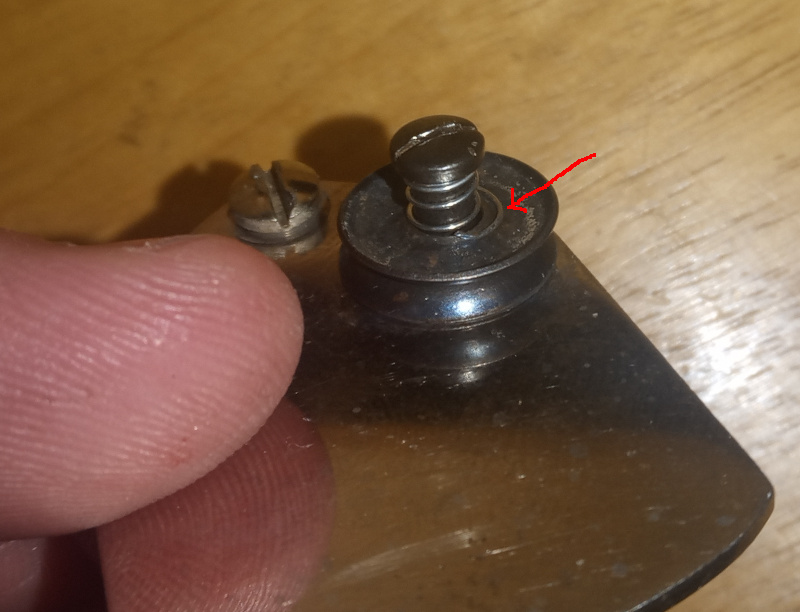
The washer isn’t flat - the two tabs are bent up a little bit. The tabs go in the slots in the axle.
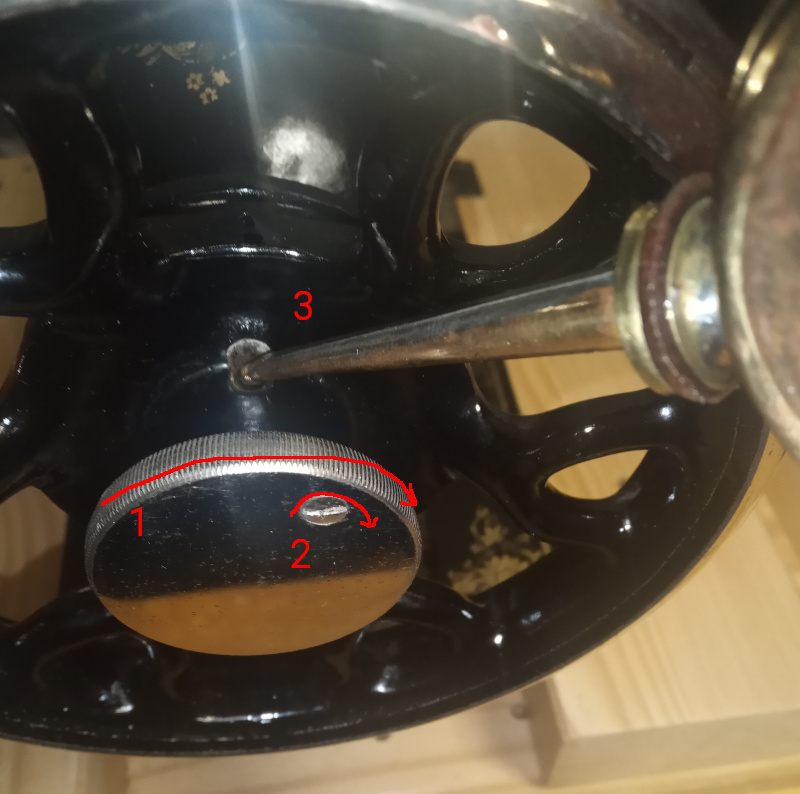
Put the clutch knob in and tighten it all the way (1) then tighten the screw (2.) After you tighten the screw, loosen the clutch knob again, then put some oil in the oil hole (3.) Spin the wheel. It should turn freely - the mechanism of the machine itself shouldn’t move. If the needle goes up and down then you need to clean the axle and maybe the inside of the balance wheel.
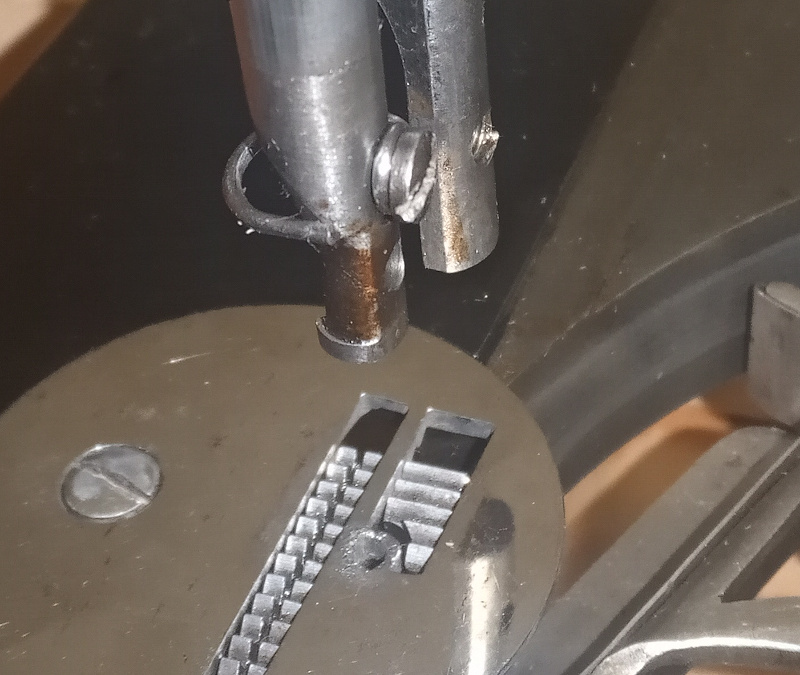
Tensioner
The tensioner’s axle screws into the housing of the machine. It is threaded backwards - you turn it left to tighten it.
| Tensioner parts |
|---|
 |
The Pfaff K uses an assembly that is a little more complicated than the simple spring used on the similar Singer 28 to take up the slack when the take up lever moves.
| Thread take up spring assembly |
|---|
 |
Note that the rounded end of the pin points towards the inside of the machine when installed.
| Install the take up spring assembly |
|---|
 |
 |
Screw the tensioner assembly into the housing, being careful no to drop the pin. Make sure the spring is clipped around the thread hook.
Turn the assembly in as far as you can by hand, then screw the tensioner nut onto the axle. Use a flat blade screwdriver to tighten the axle. The tensioner nut will keep the two halves of the axle from spreading while you tighten the axle. Remove the nut when done, then put a drop of oil in the gap between the take up spring and the housing.
Remember that the axle screws in backwards - turn to the left to tighten as shown in the picture.
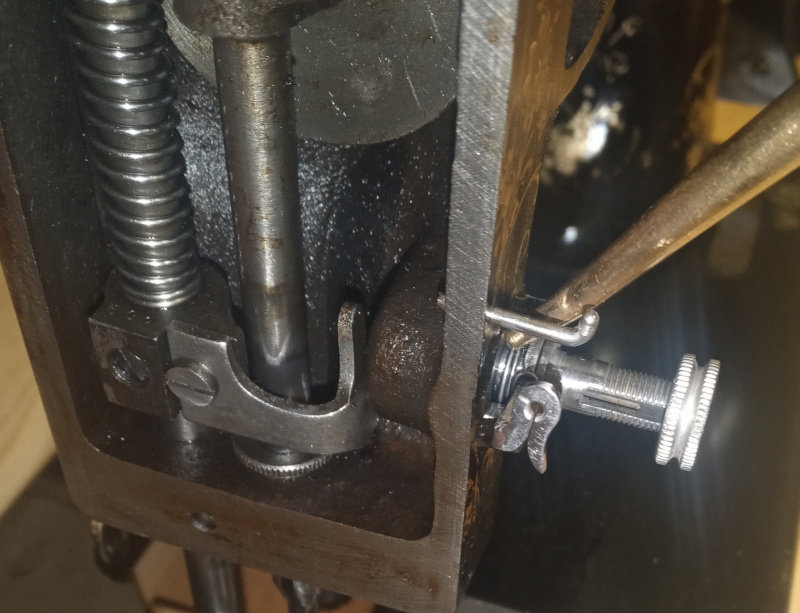
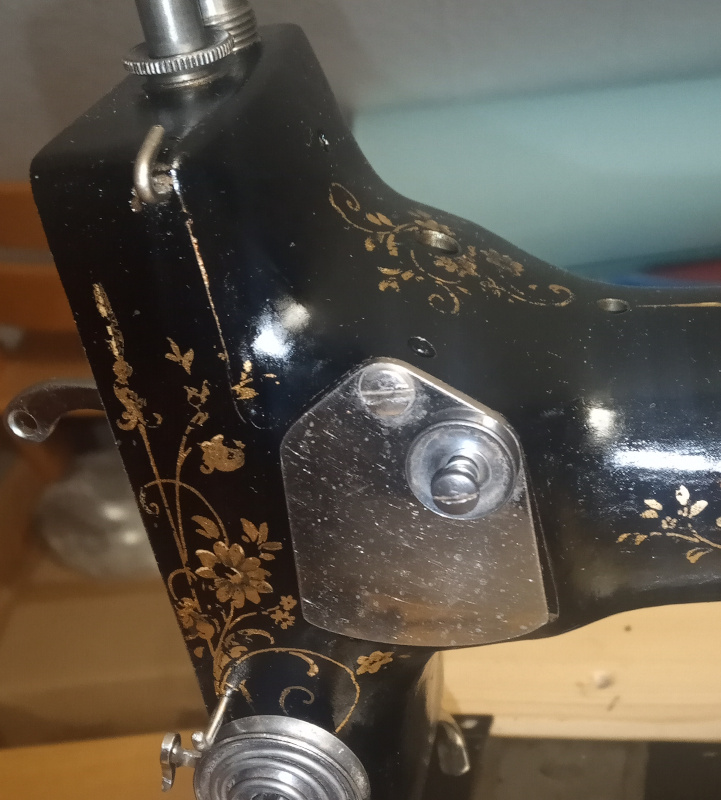
| Main tensioner |
|---|
 |
 |
 |
 |
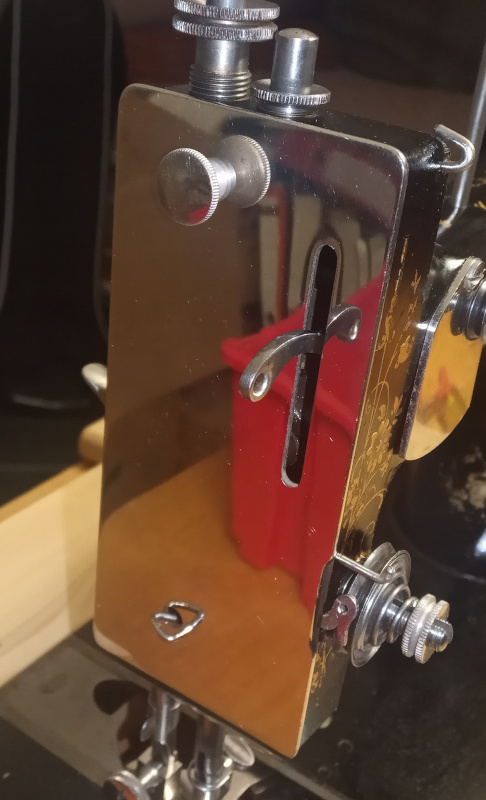
Front Cover
The front cover has a pair of small tensioner discs to maintain the proper tension for the bobbin winder. It should have a spring to press the discs together, but it was gone long before the Pfaff K made it to me. I’m going to swipe the spring out of that ballpoint pen and use it as a replacement part.
| Front cover parts |
|---|
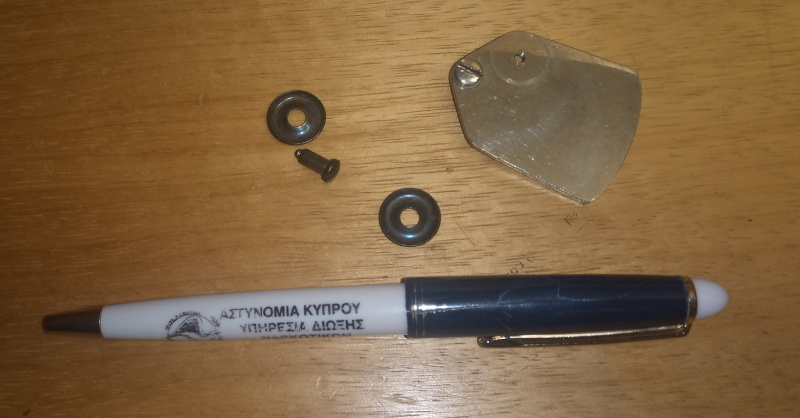 |
If you can read Greek, then you may wonder how I came to own that particular pen. You’ll just have to stay curious because I’m not going to tell that story.
| Front cover spring |
|---|
 |
 |
I clipped the spring just a little longer than the black screw, then “unwound” the lowest loop so that it would sit on the disc rather than slipping through the hole.
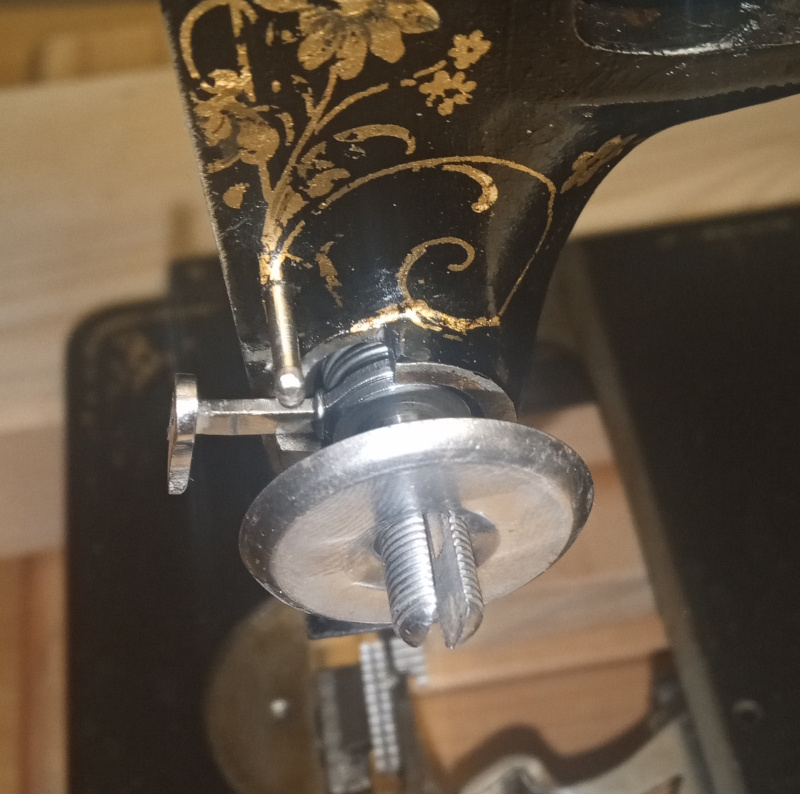
| Front cover |
|---|
 |
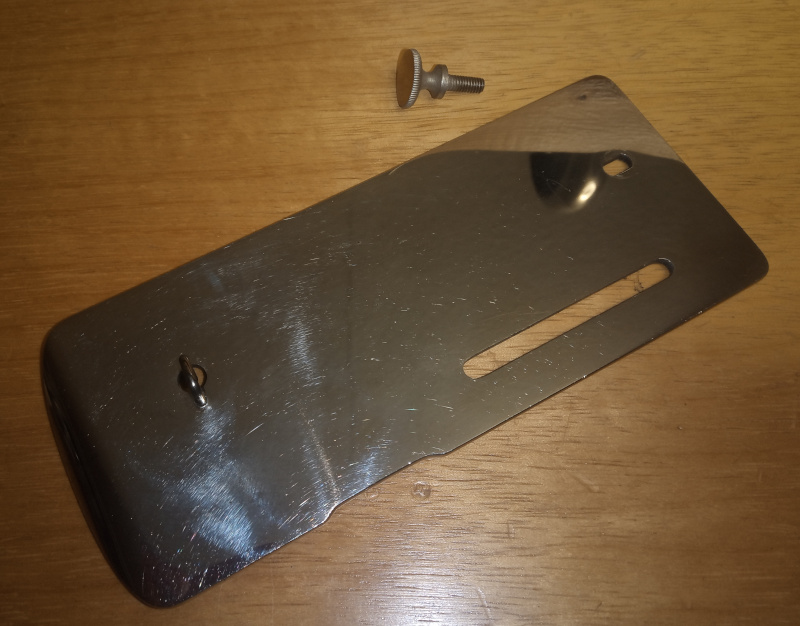
Needle plate
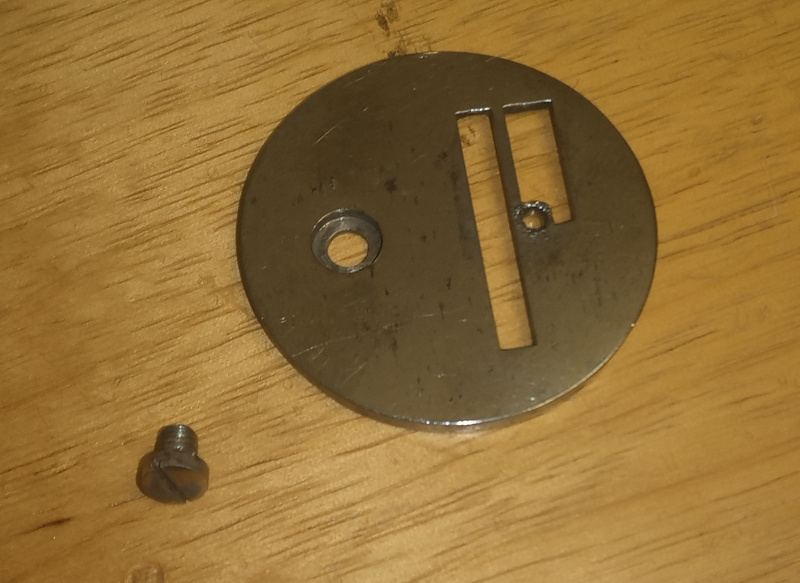
When you reinstall the needle plate, make sure that the head of the screw is smooth. Screw heads on old machines often have sharp edges on the slot where someone slipped with a screwdriver. Anything sharp or rough on the screw or the needle plate will catch on your cloth and damage it while sewing. I had to use some 600 grit sandpaper to smooth the head of the screw. I had kind of mangled the slot while getting the screw out - it was stuck tight with decades old oil.
| Needle plate |
|---|
 |
 |
Set the stitch length to its longest setting then crank the balance wheel. The feed dogs shouldn’t hit the edges of the holes in the needle plate. I found it helped to put the plate in, then shove in the two sliders that cover the shuttle. Push both sliders in all the way and they’ll push the needle plate where it belongs. Tighten the screw - be careful not to damage the slot in the screw head.
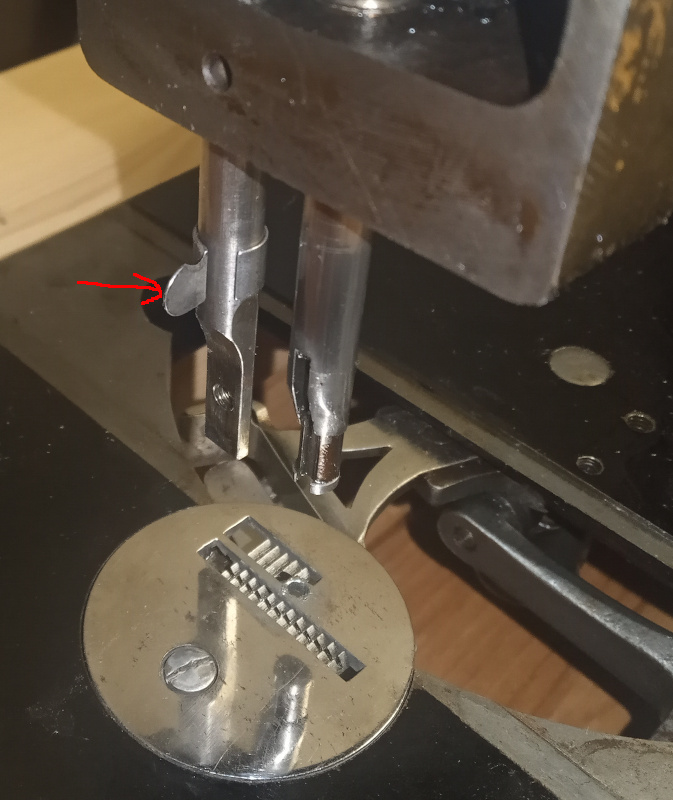
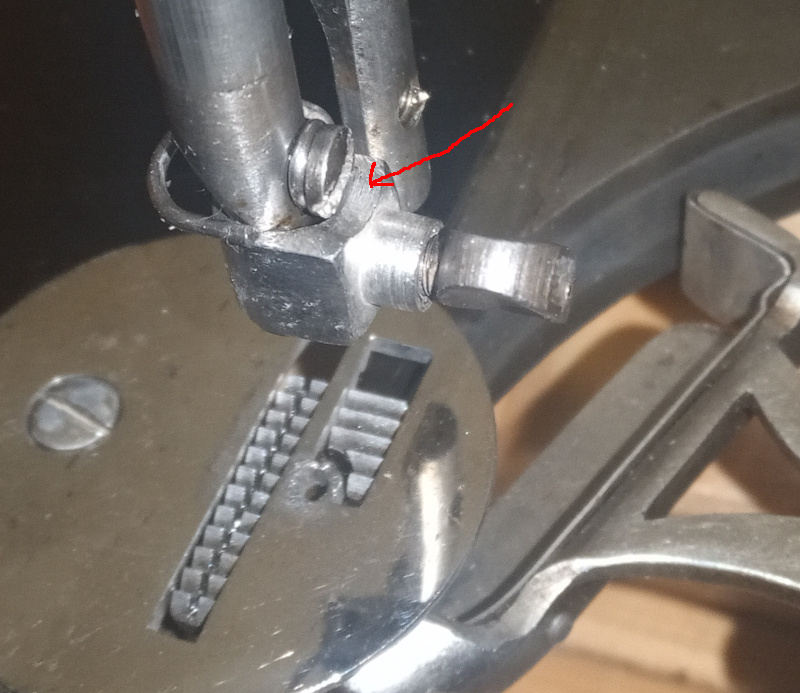
Thread cutter
I was surprised to find a thread cutter clipped to the presser foot bar on this machine and assumed it had been added later. I found a paper copy of the Pfaff K user’s guide (in German) from 1909 that shows the cutter - it seems to have been original equipment.
| Thread cutter |
|---|
 |
 |
Thread guide
This guide goes just above the needle clamp.
| Thread guide |
|---|
 |
 |
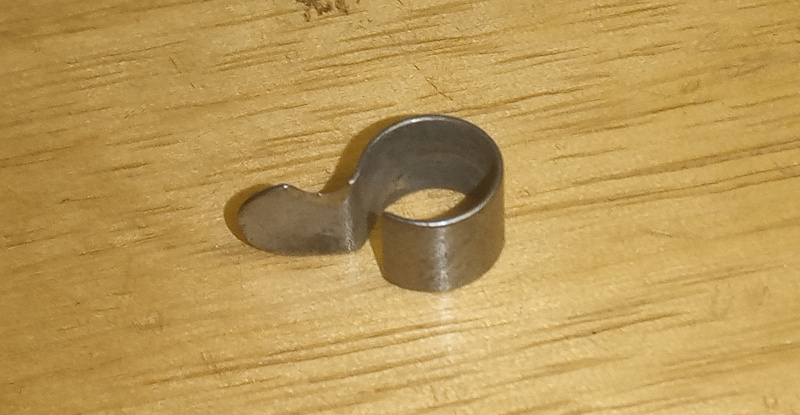
Needle clamp
One side of the needle clamp has a curved notch in it. That side goes up. The notch fits around the screw for the needle guide.
| Needle clamp |
|---|
 |
 |
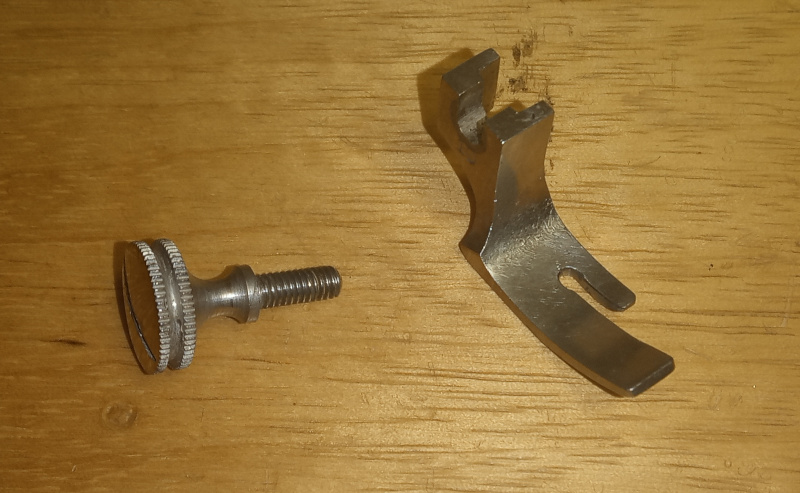
Presser foot
There’s nothing special here, except to mention that the Pfaff K takes standard low shank presser feet. The feet from my wife’s Pfaff 262 fit just fine.
| Presser foot |
|---|
 |
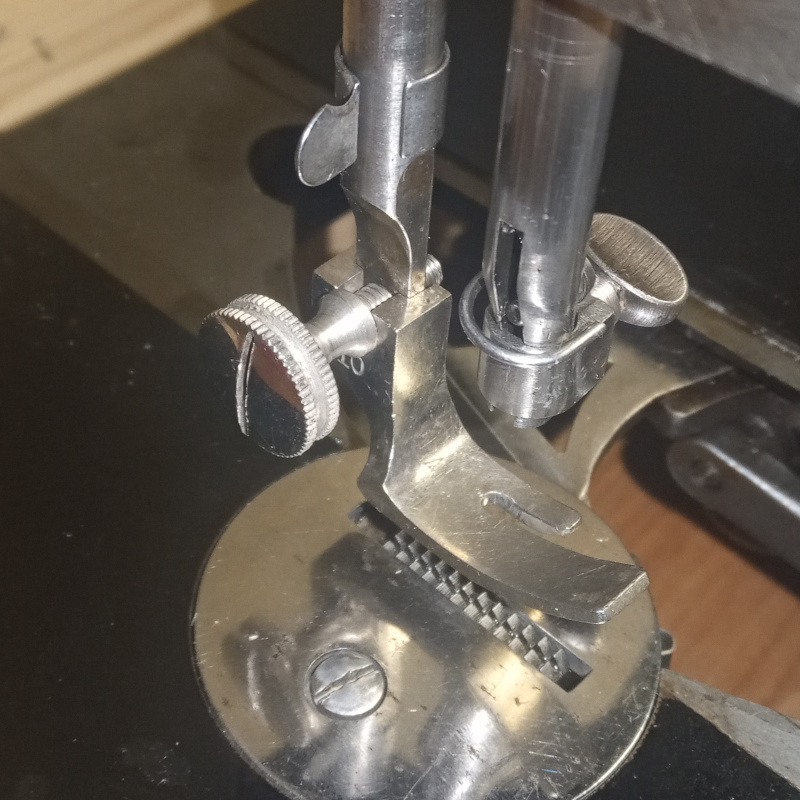 |
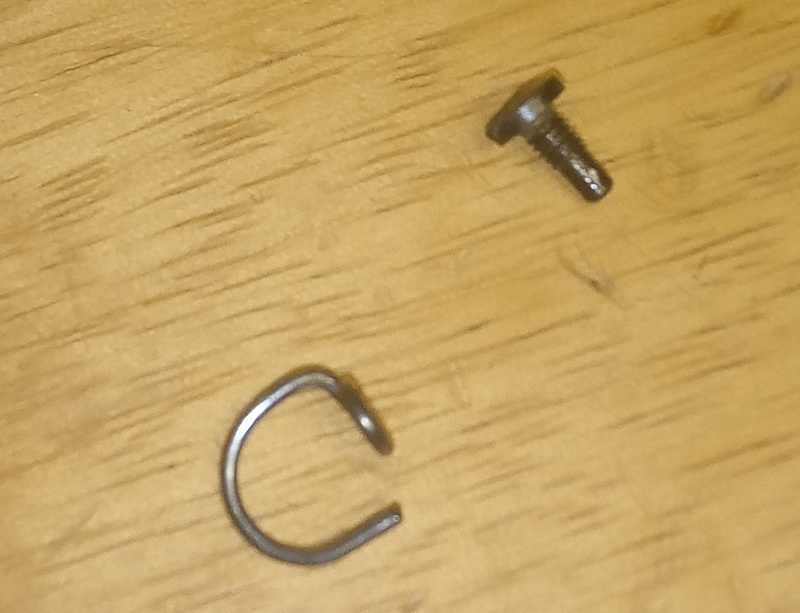
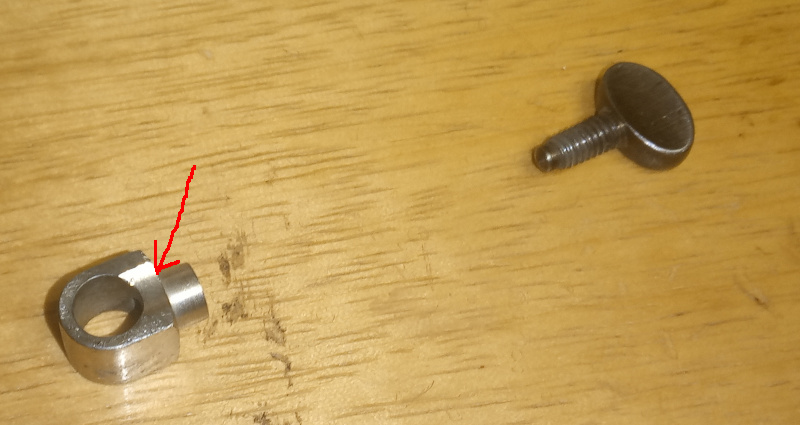
Nose plate
Make sure you use the right screw for the nose plate. It looks almost exactly like the one for the presser foot, but the collar on the presser foot screw isn’t as wide as the collar on the screw for the nose plate.
| Nose plate |
|---|
 |
 |
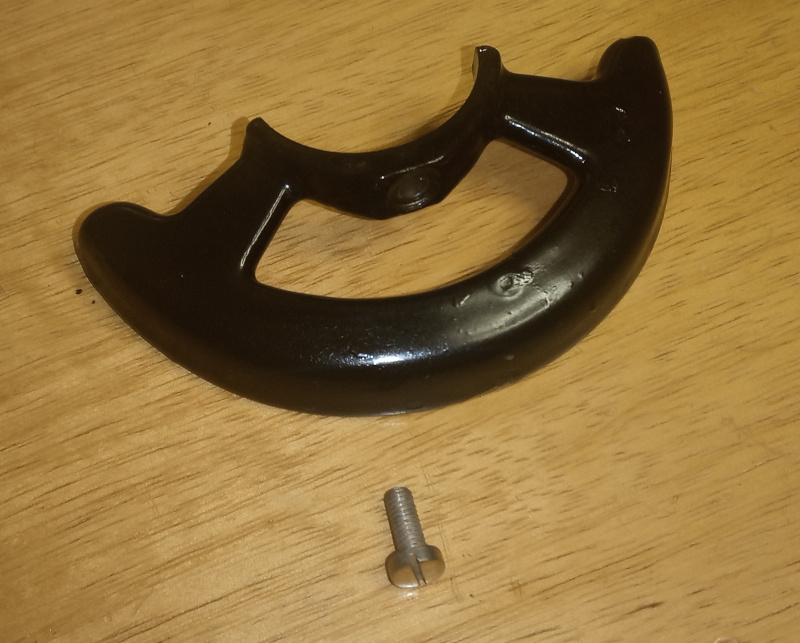
Belt guard
The screw for the belt guard is very much like one used in the bobbin winder. The one for the belt guard has a bigger head than the one for the bobbin winder.
| Belt guard |
|---|
 |
 |
Back cover
The screw for the back cover seems to be identical with the one for the presser foot.
| Back cover |
|---|
 |
 |
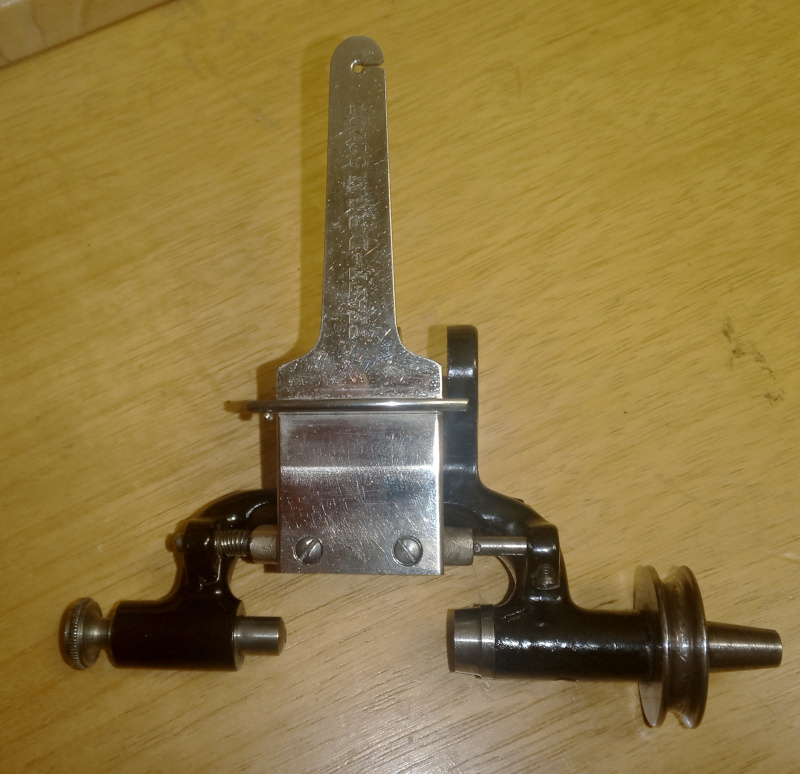
Bobbin winder
I didn’t take the bobbin winder completely apart. Reassembling it still took longer than any other part of the Pfaff K.
| Bobbin winder parts |
|---|
 |
There are two small screws to hold the paddle shaped thing. One is barely visible in the upper left corner of the picture. The other small screw rolled under one of the other parts when I made the picture.
| Install the paddle |
|---|
 |
 |
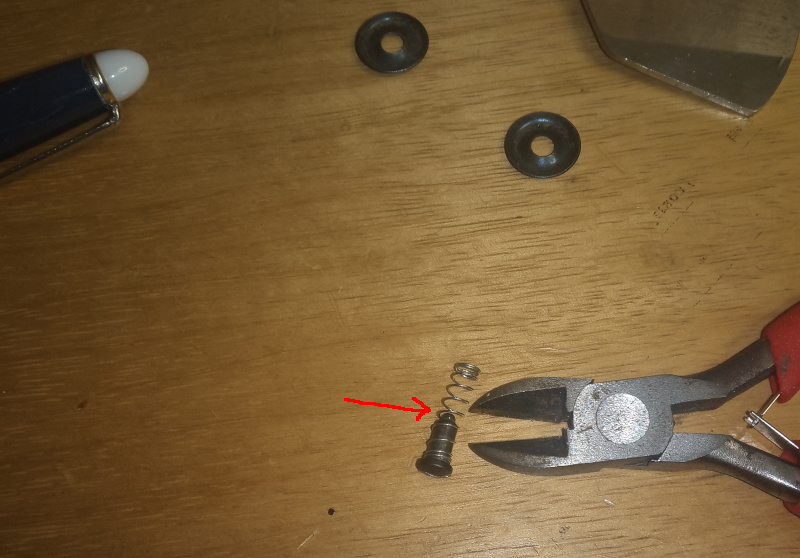
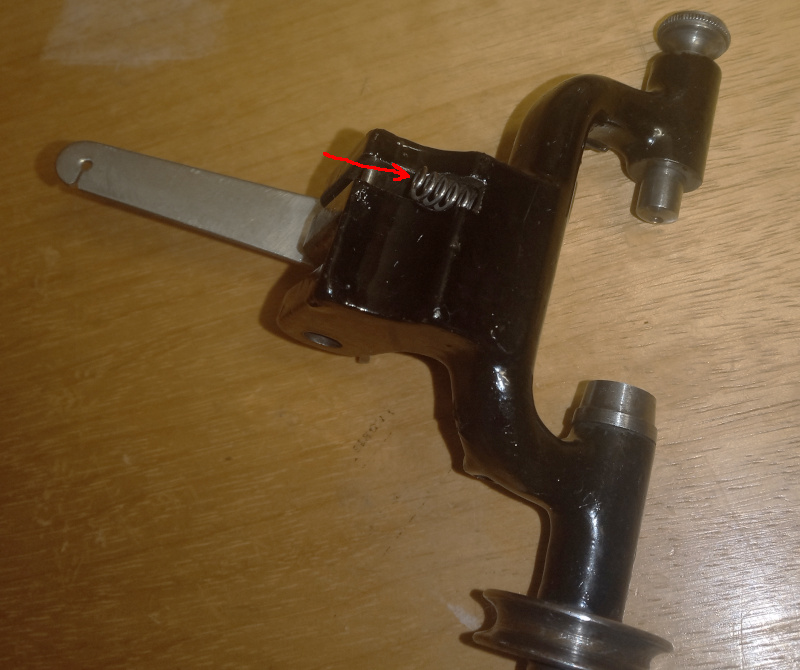
The red arrow points to the end of the spring. It must be in the little hole in the frame. Use the two small screws to attach the paddle. Make sure the spring stays in its little hole until the screws are tight. Once the paddle is attached, the spring will stay in place.
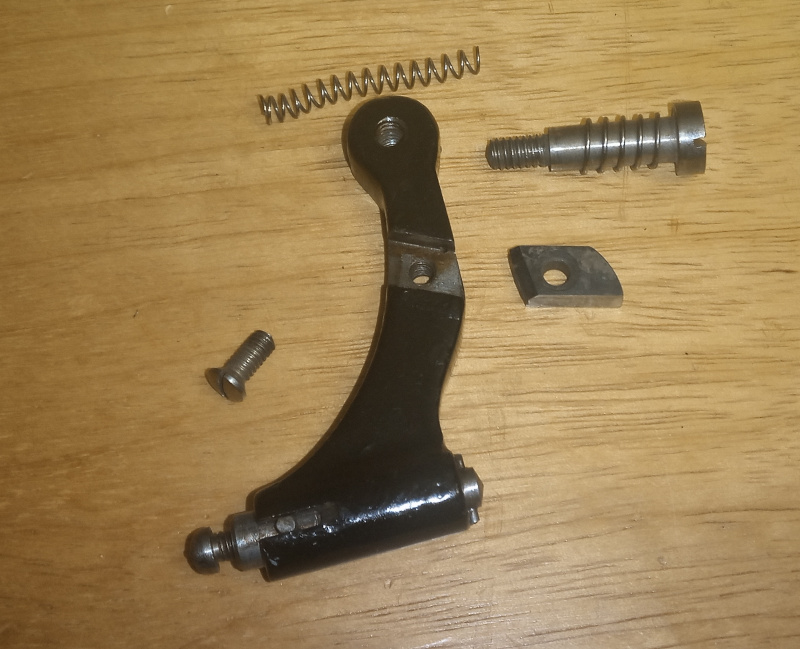
The winder latch uses the longer of the two springs shown above.
| Bobbin winder latch |
|---|
 |
 |
 |
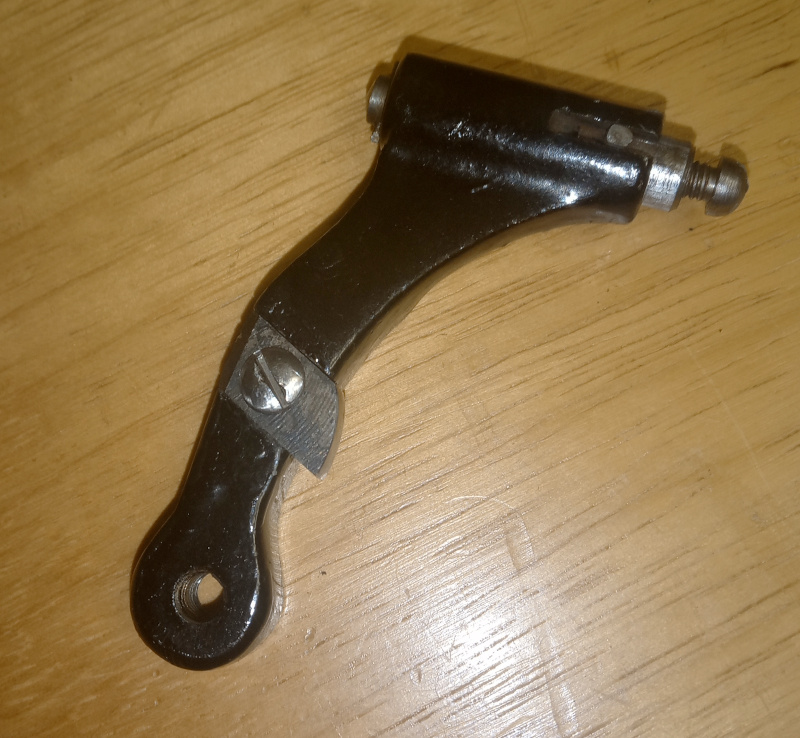
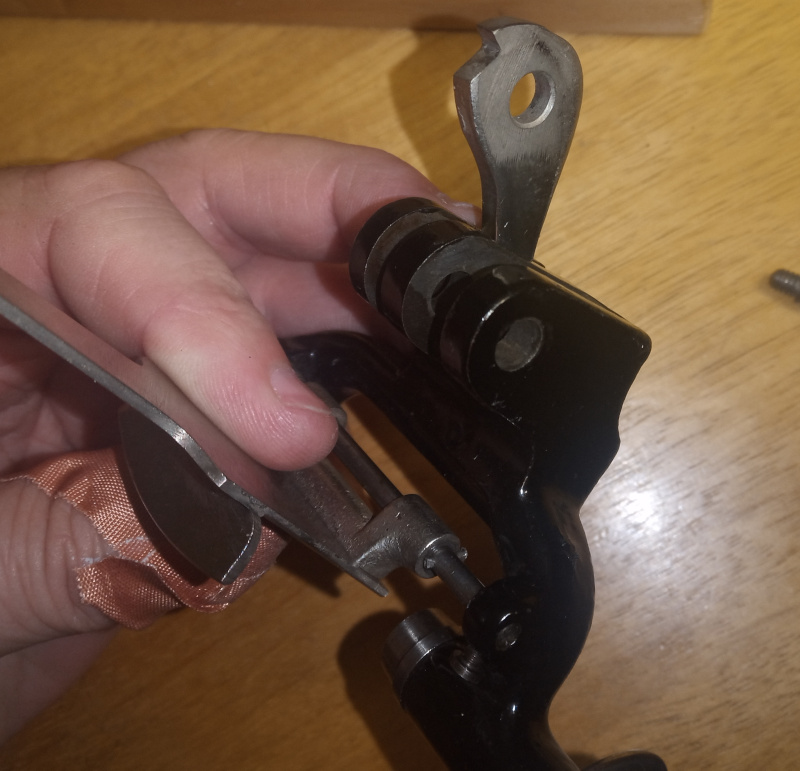
Assemble the latch, then install it on the machine. Put the long spring in the hole in the machine, then lift the latch up so that the spring goes in the hole in it as well.
Put the lever and the spring on the winder assembly before installing it on the machine.
| Install the lever |
|---|
 |
 |
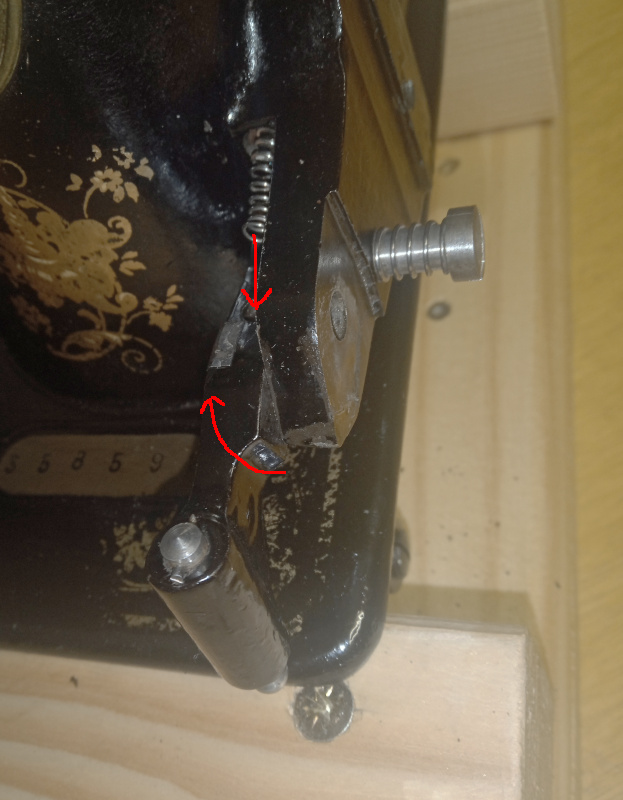
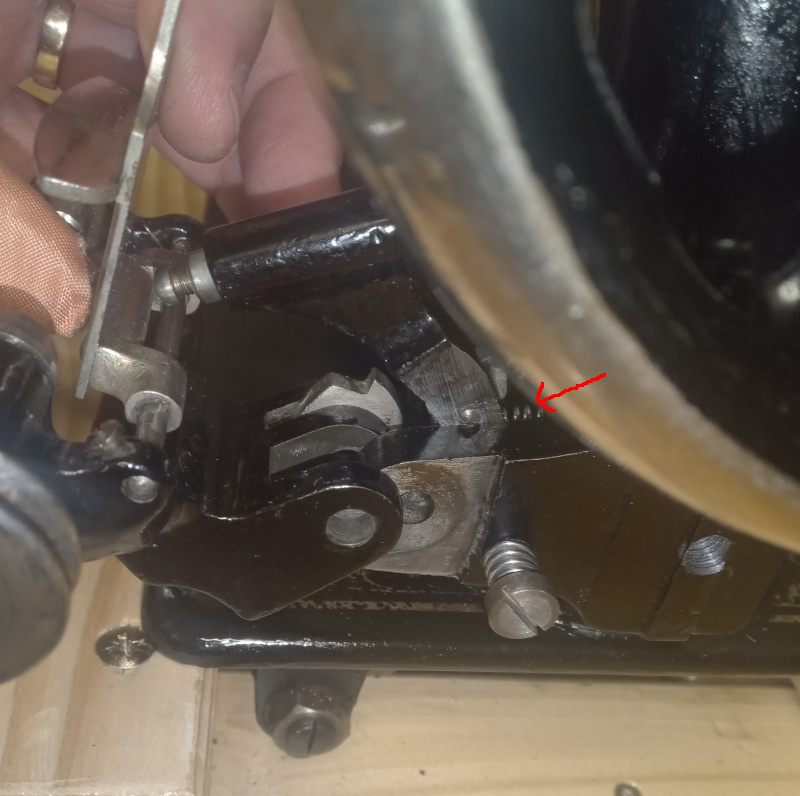
Installing the winder assembly on the machine is a bit tricky. You have to keep the lever in its place (with the spring behind it,) you have to keep the latch up (with its spring behind it,) and you have to line things up so that the screw goes through all the holes and into the threads in the winder. The screw not only has threads, is also an axle that fits tightly into the holes. It took some patience to coax them all into place.
| Install the winder |
|---|
 |
 |
 |
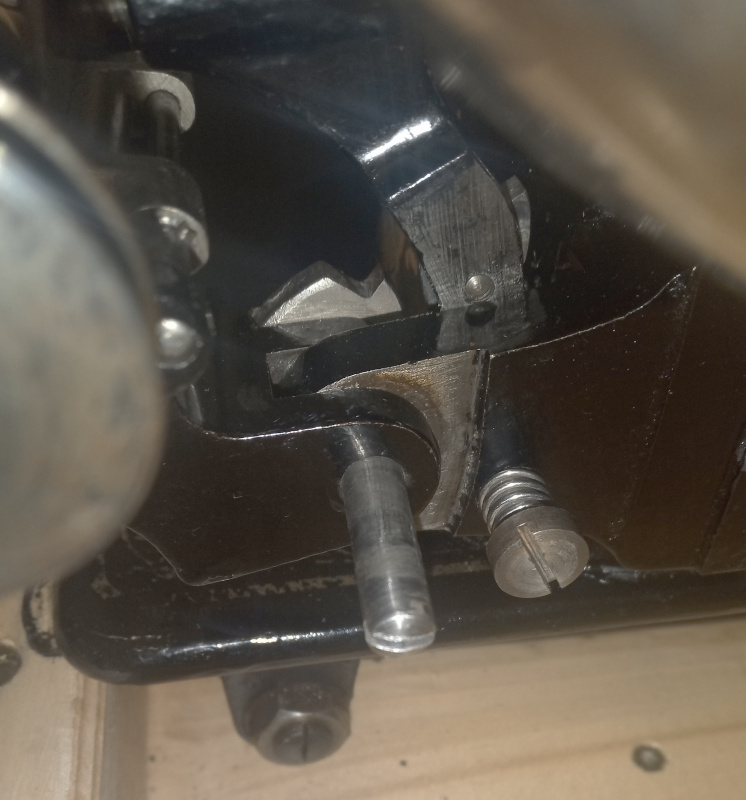
Wiggle and turn the screw until it goes through all the holes (including the one in the lever,) then tighten it. Put a drop of oil in the oil hole and in all the places where metal rubs on metal in the winder assembly. The whole thing should move smoothly and easily. It should latch in place when you raise the bottom lever and pop back down when you press the paddle back.
Re-install the winder tire. If you need a new one, you can use a plain O-ring. I’ll include the dimensions in a later post together with information about needles, bobbins, and other consumables.
All done
That’s all the things re-installed that I had to remove to do the clean up.
| All done |
|---|
 |
 |
I had oiled everything as part of the clean up, and again before reassembling things. Once done, you should be able to give the balance wheel a spin and it’ll run several stitches by itself with just the momentum from the spin.
Now that it is clean, it runs at least as smooth as (if not smoother than) my Adler class 8.
I’ll mount its motor in the next day or two, then adjust things and give it a real try out. After that all that’s left is to build it a new base. If there’s time after that I’ll try to make a combination dustcover and carrier for it.