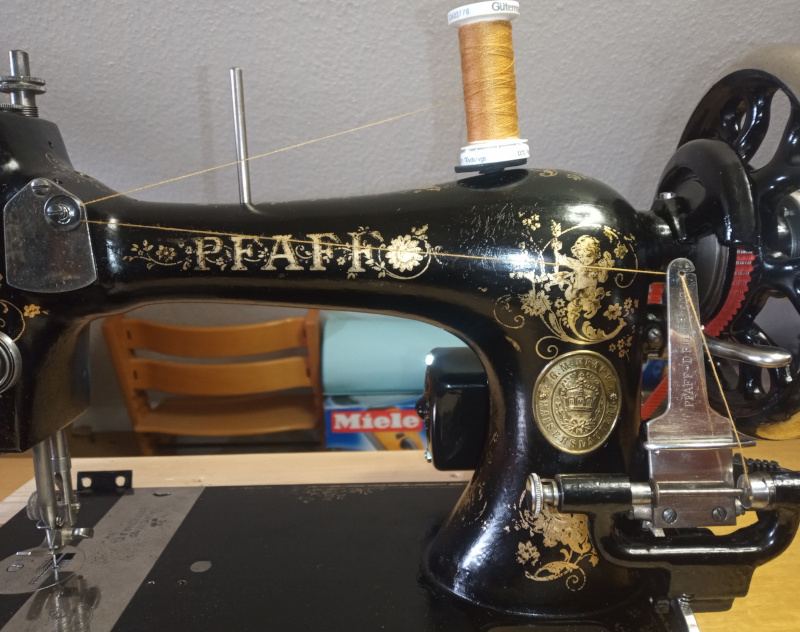
The Pfaff model K sewing machine - Threading the machine
A heckuvalotta photos.
Read all about my adventures with the Pfaff model K.
As with the other sewing machines I’ve worked with, I’ve decided to put together a pictorial guide to threading the Pfaff K vibrating shuttle sewing machine. This guide will also apply to the Pfaff L sewing machine. The Pfaff L is the full sized “big sister” of the 3/4 sized Pfaff K. It also applies to the Pfaff 11 and Pfaff 12, though some details of the bobbin winder may be different. The Pfaff K was later renamed and upgraded to become the Pfaff 11, likewise the full size Pfaff L was upgraded and renamed to the Pfaff 12.
I bought a copy of the Pfaff K user’s guide and made a PDf copy of it. It is, however, in German. The pictures may be of interest if you can’t read German. The user’s guide for the Singer 27K and 28K is very similar, and I found an English PDF that you can download.
I’ll start with winding a bobbin and loading it in the shuttle, then go on to threading the machine and pulling the lower thread up.
Winding a bobbin
The bobbin winder on the Pfaff K is somewhat more complicated than on machines that use the disc like bobbins on modern day machines. Later vibrating shuttle sewing machines used an even more complicated looking winder, though they should work pretty much like the one described here.
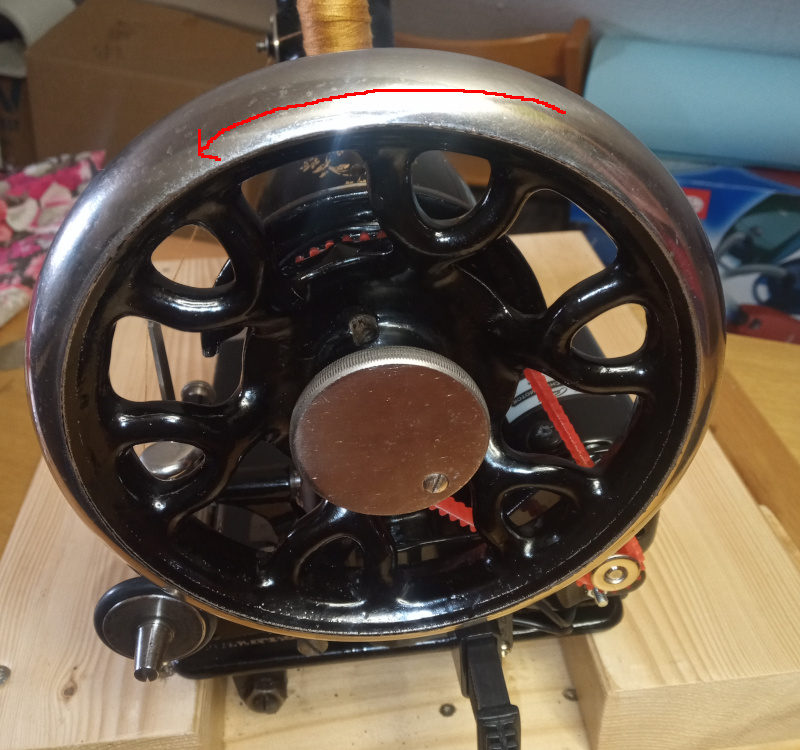
As with most machines, winding a bobbin starts with disengaging the clutch so that the machine itself doesn’t run while the winder is running.
| Disengage the clutch |
|---|
 |
The picture shows me doing it one handed. That’s only because I had to have one hand free to work the camera. It will really take two hands to do.
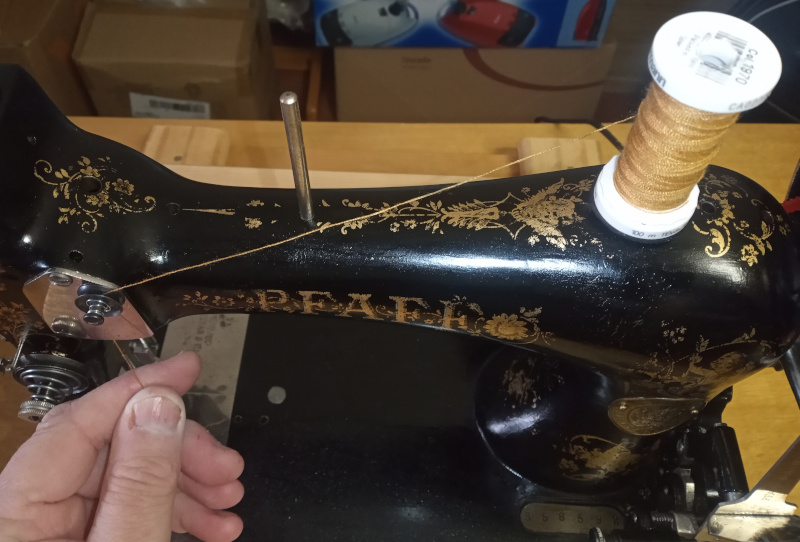
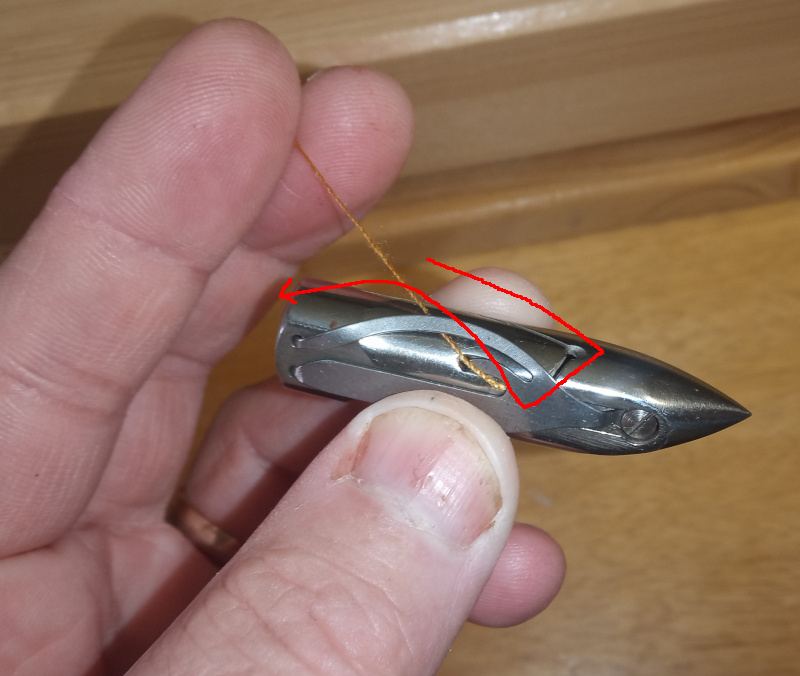
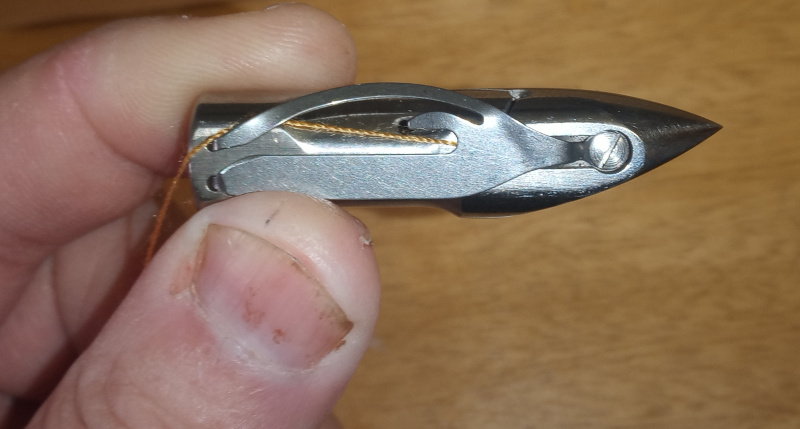
Put a spool of thread on the right most peg, then run the thread through the tensioner on the front plate. From the tensioner, run the thread over to the right and through the slitted hole in the top end of the winder paddle.
| Thread the machine for winding |
|---|
 |
 |
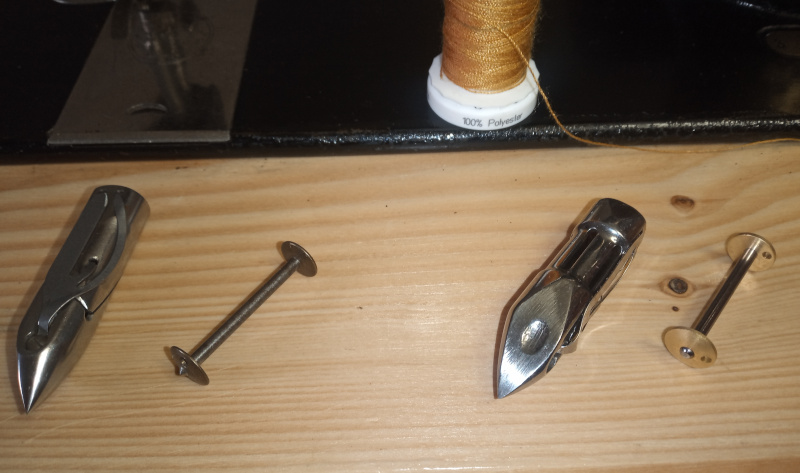
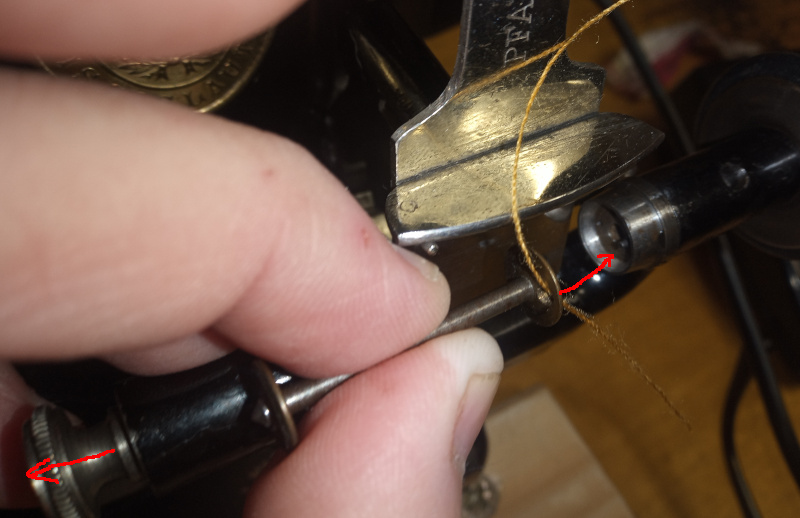
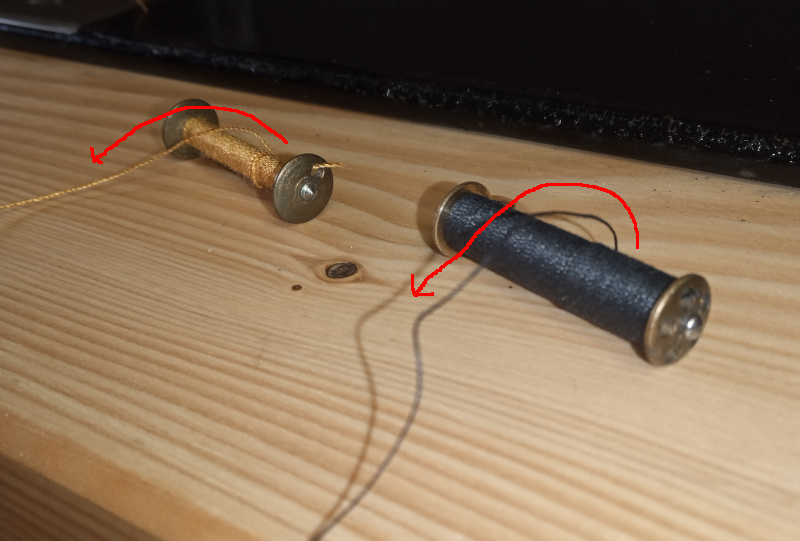
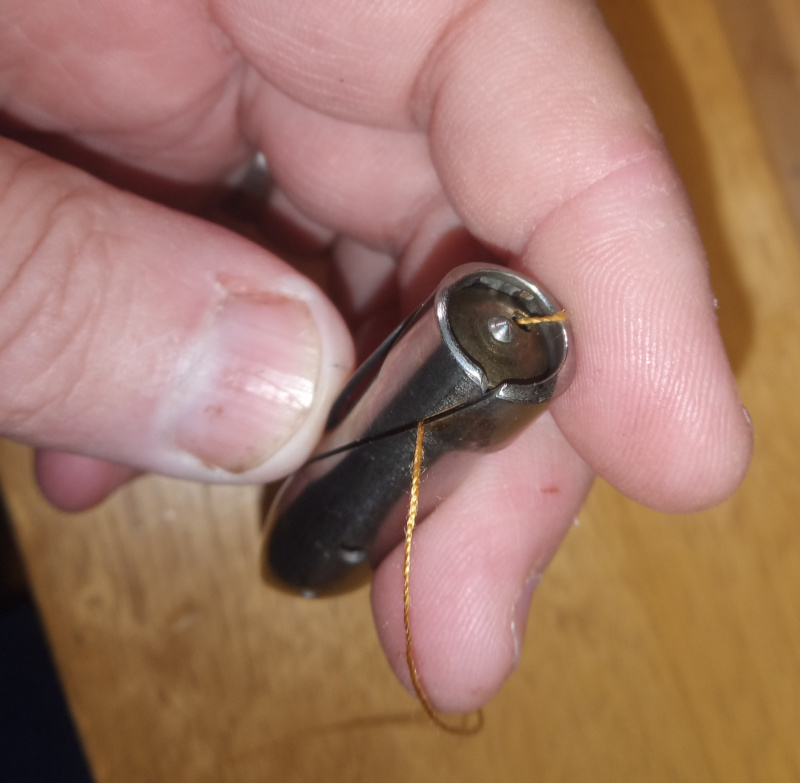
I have some original Pfaff bobbins and a shuttle, as well as a Singer shuttle and some bobbins. The bobins all have a hole in one end. The thread goes through the hole, then the hole goes on a little drive pin on the winder.
| Thread the bobbin |
|---|
 |
 |
| Ready to wind |
 |
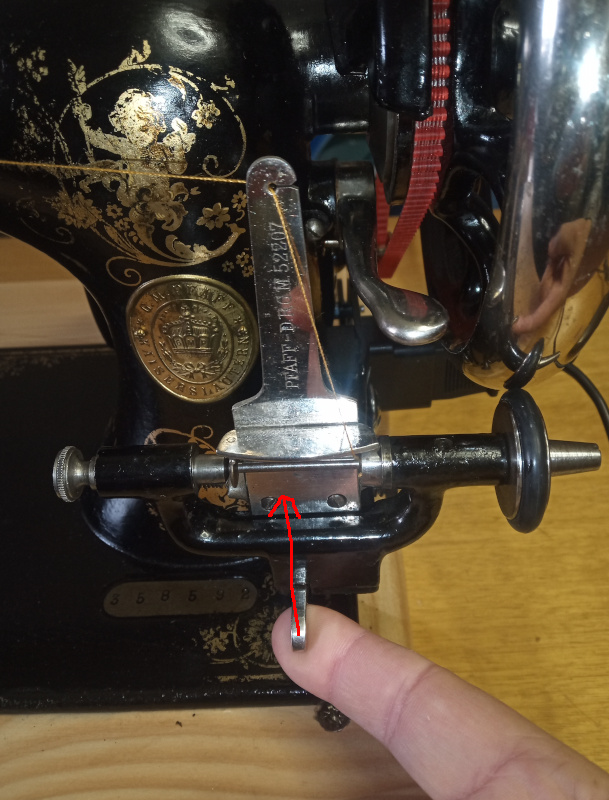
Lift the winder lever up. The winder will latch in place. Pump the treadle, or run the motor, or crank the hand crank so that the balance wheel turns counter clockwise (just like when sewing.)
A properly adjusted winder will automatically disengage when the bobbin is full. You can stop early, then push the paddle back to disengage the winder.
| Engage the winder |
|---|
 |
 |
How you put the bobbin in the shuttle makes a lot of difference. Inserted properly, the thread tension will be steady and correct while sewing. Inserted incorrectly will lead to a thread tension that is too high and that varies while sewing - that will make a mess of your stitches.
On the Pfaff bobbins, the holes are on one end only. You put the bobbin in the shuttle such that the holes are visible. The Singer bobbins have holes at both ends, but the Singer shuttle is built so that you can’t put the thread under the tension spring if you’ve put the bobbin in wrong.
| Put the bobbin in the shuttle |
|---|
 |
 |
 |
 |
Reengage the clutch so that the machine will run.
| Reengage the clutch |
|---|
 |
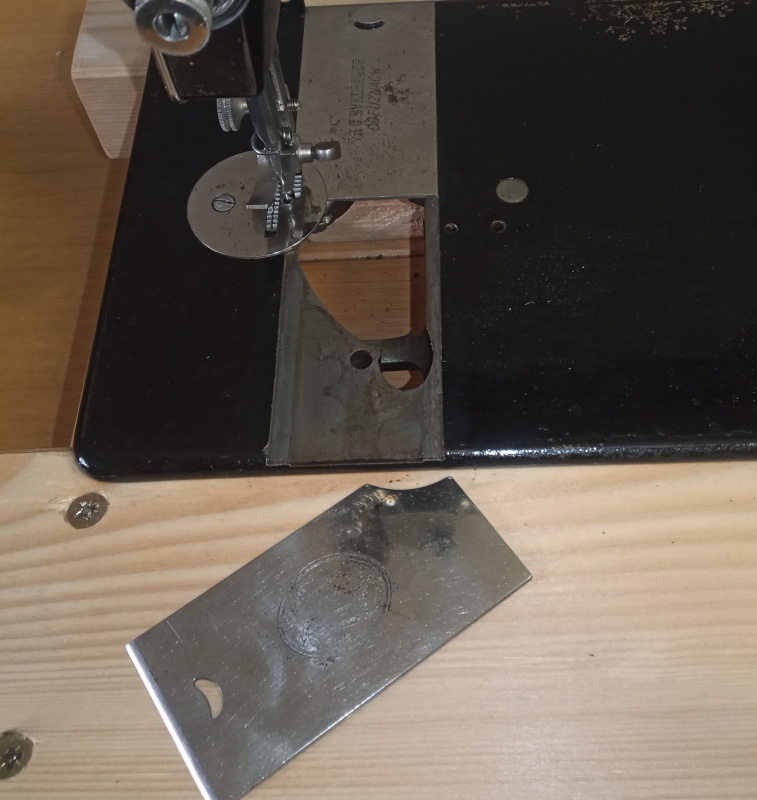
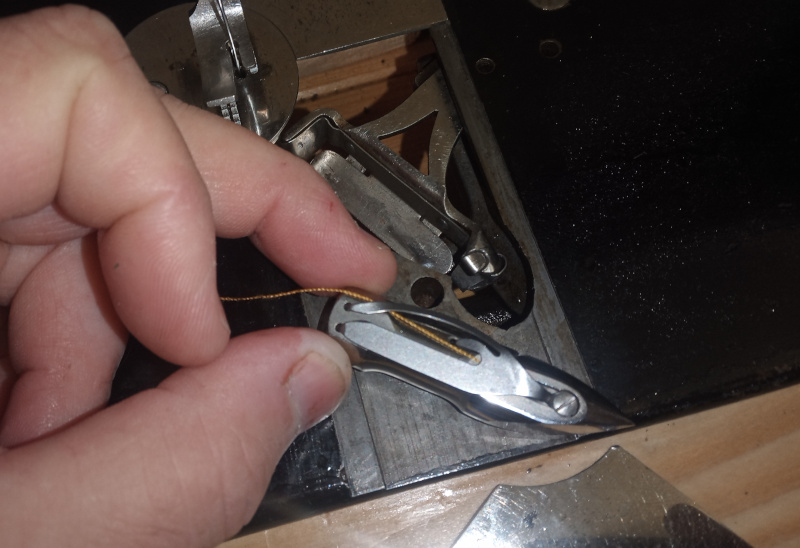
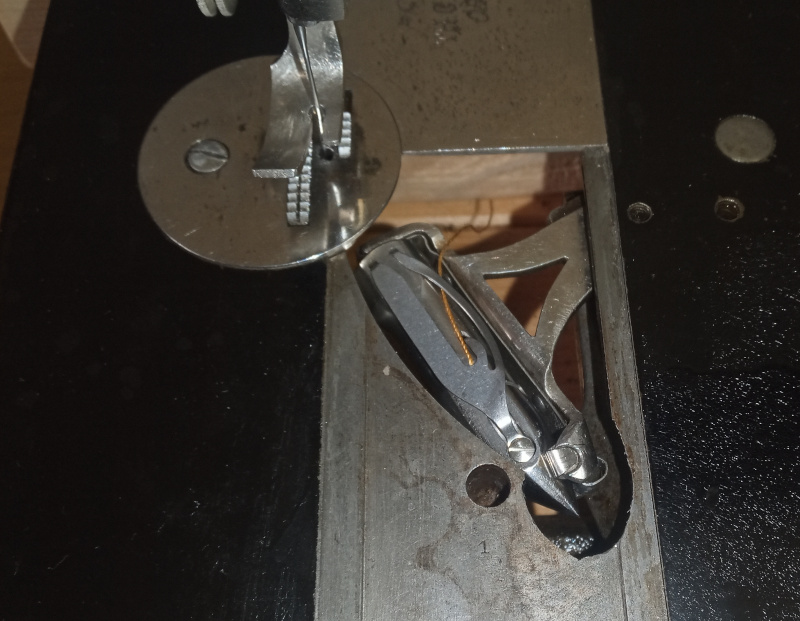
Remove the front slide cover, then rotate the balance wheel until the shuttle carrier is at its furthest forwards point. The shuttle only fits one way - point to you, spring up. Drop it in the carrier, then drop the loose end of the thread behind the shuttle carrier.
| Load the shuttle in the shuttle carrier |
|---|
 |
 |
 |
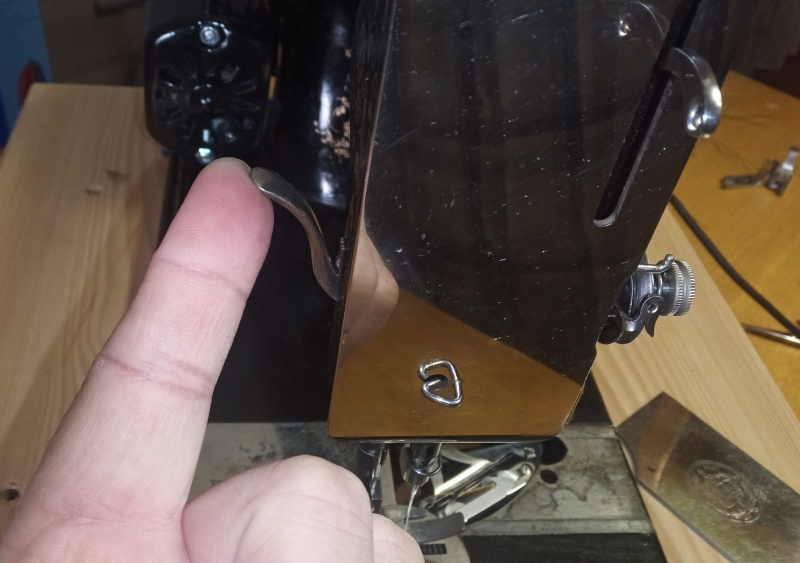
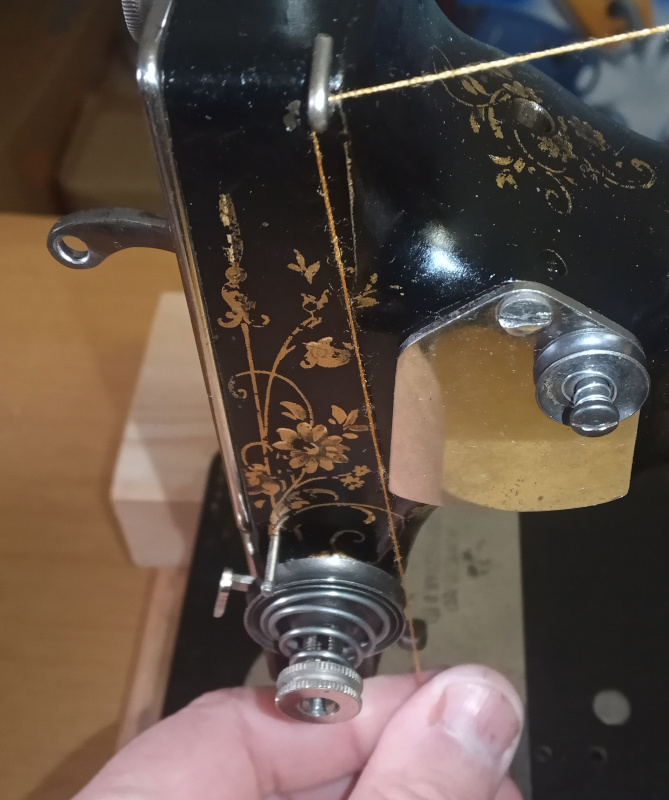
Raise the presser foot to release the tensioner, then start threading the machine.
| Release the tensioner |
|---|
 |
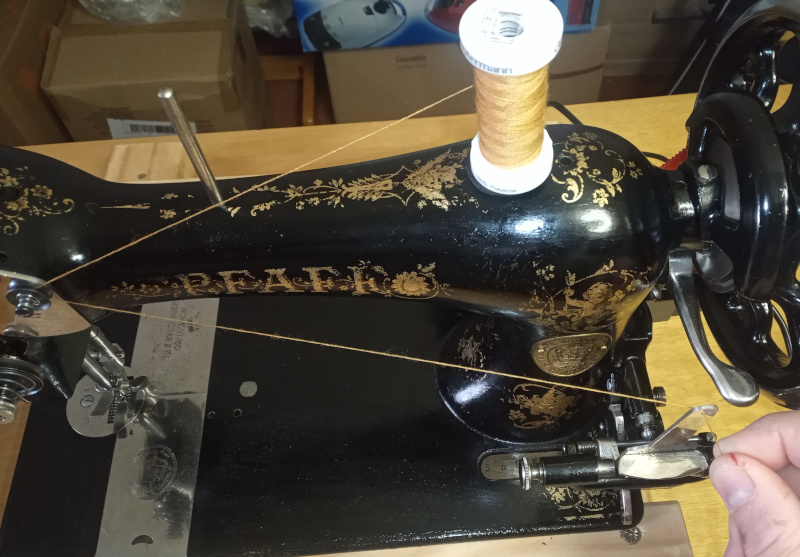
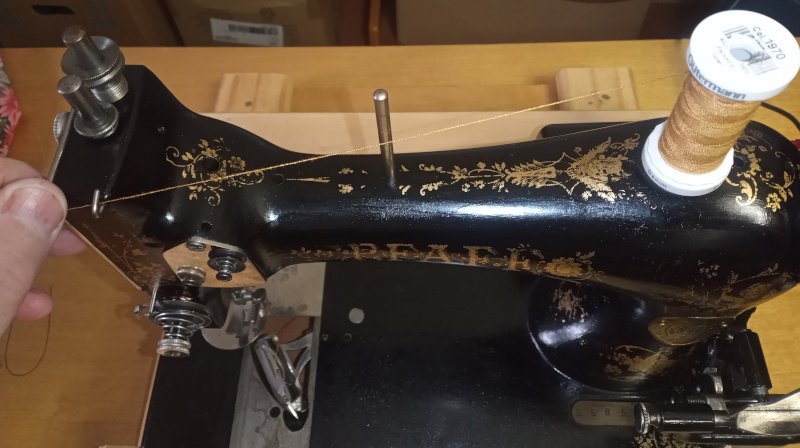
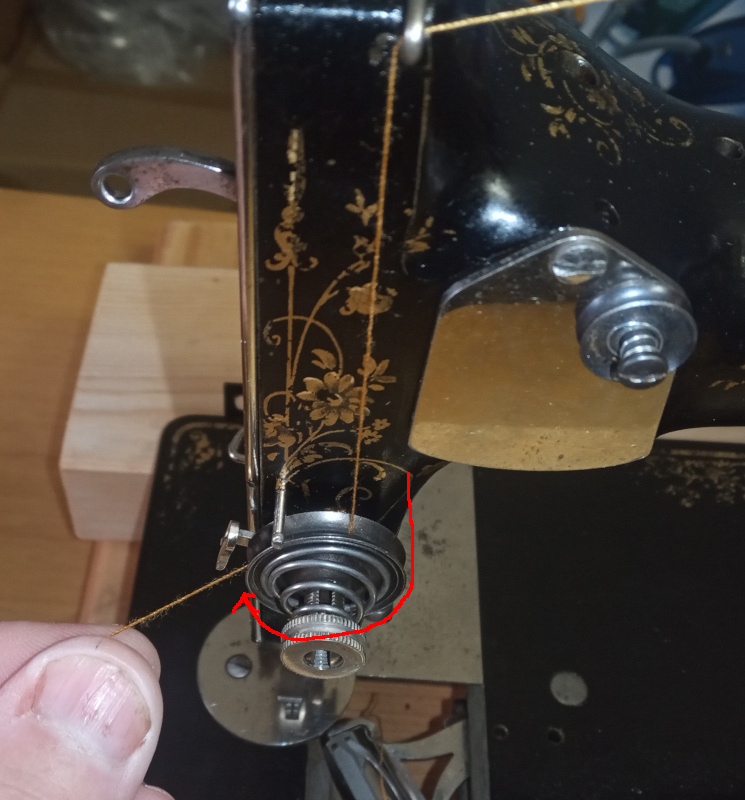
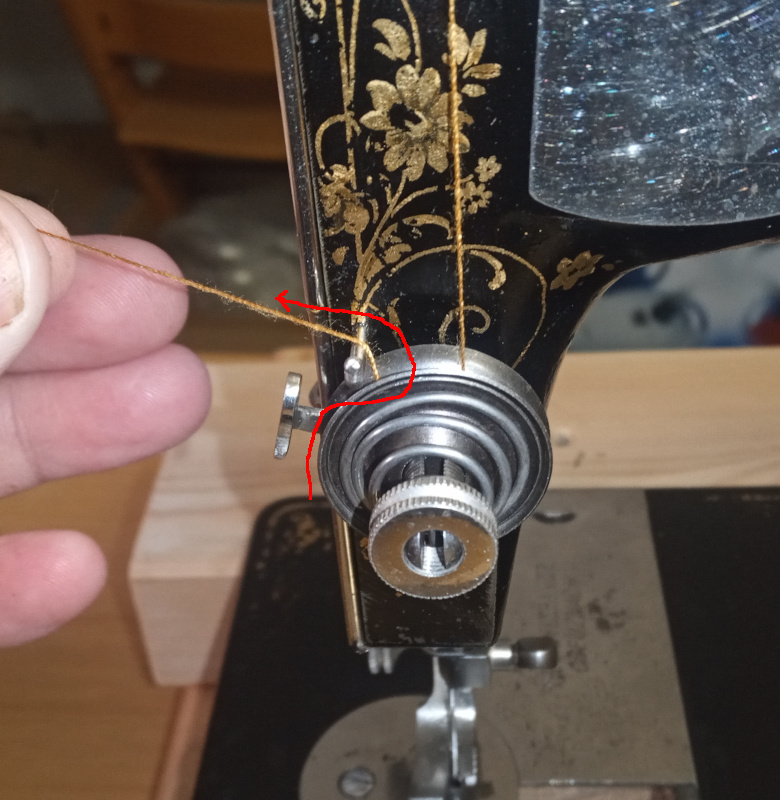
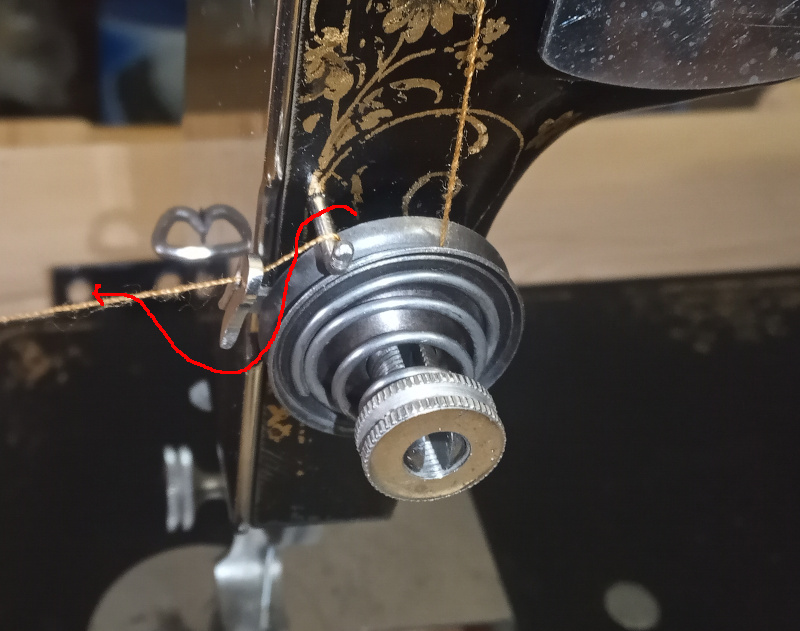
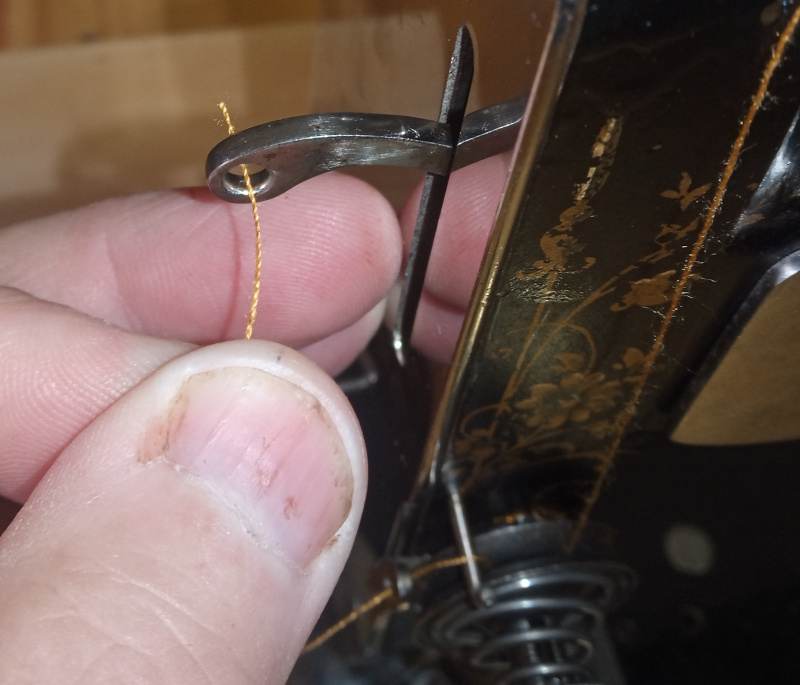
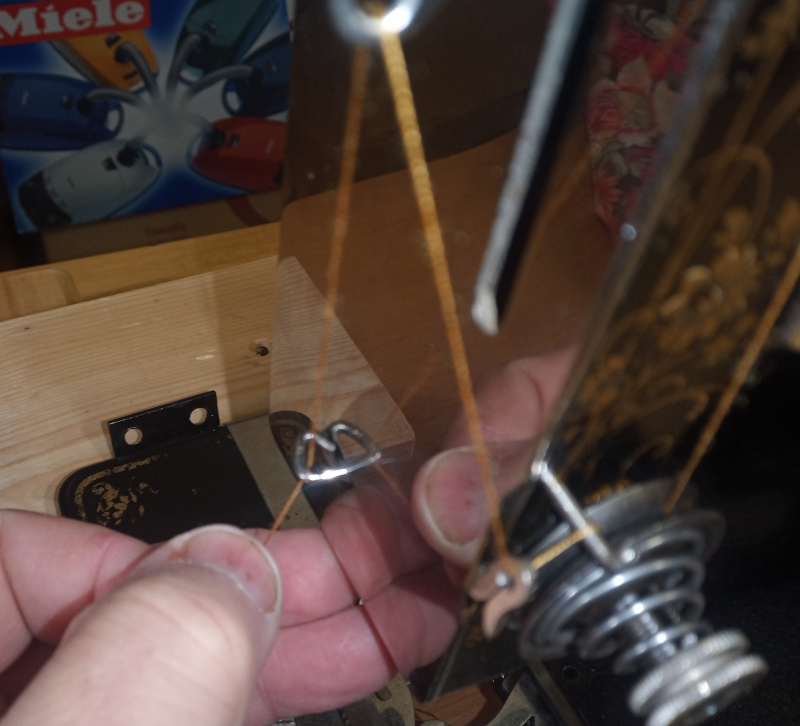
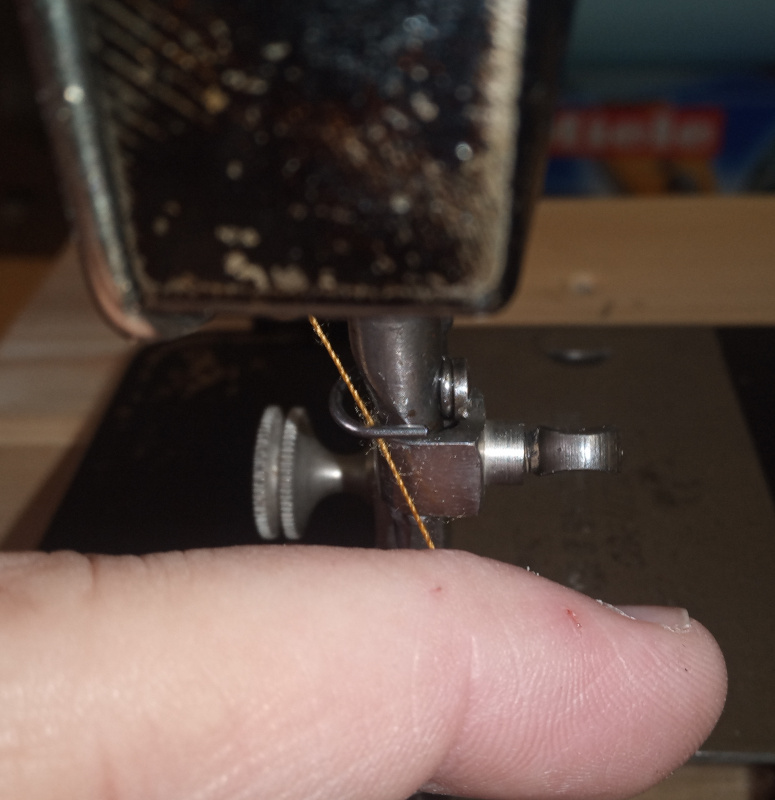
The thread spool is still on the right most peg. Run the thread across to the hook above the main tensioner. The thread goes over the hook then down to the tensioner. Pull the thread around the tensioner with the thread between the tensioner discs. The thread goes up then over the hook just above the discs. From there it goes to the left and under the takeup spring and into its hook. Put the thread through the hole in the takeup lever then run it down to the guide on the nose plate. From the nose plate guide, the thread goes into a last guide above the needle. Thread the needle from left to right. Finally, pull the thread through the hole in the presser foot. You need about 4 inches of thread hanging out behind the foot.
| Thread the machine |
|---|
 |
 |
 |
 |
 |
 |
 |
 |
 |
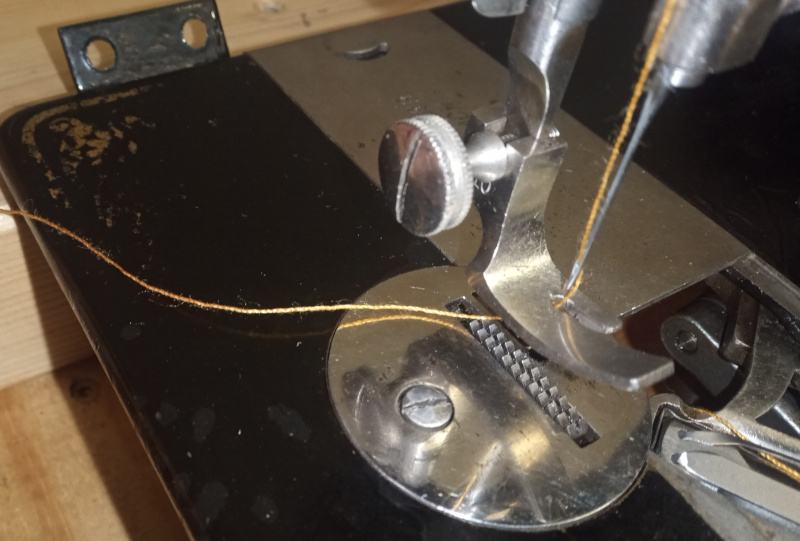 |
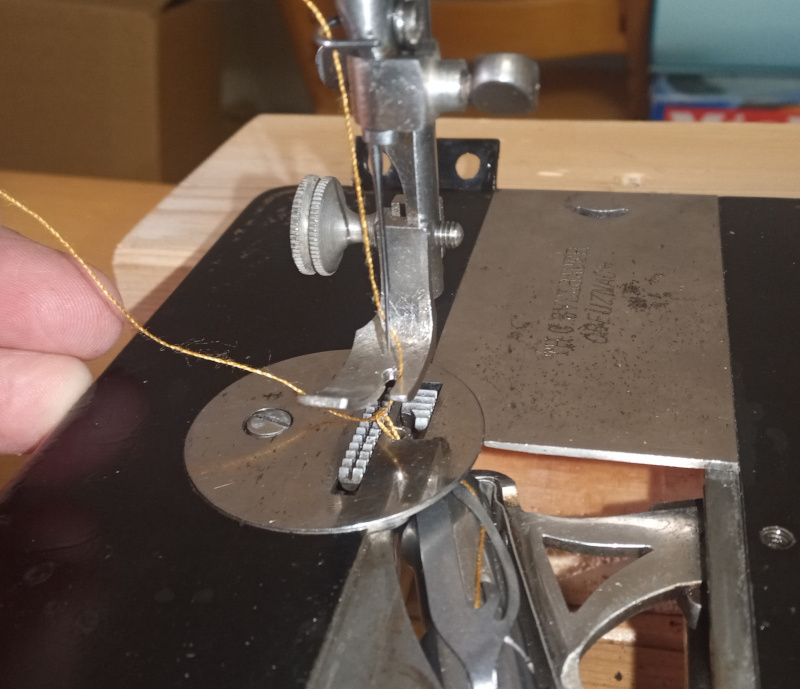
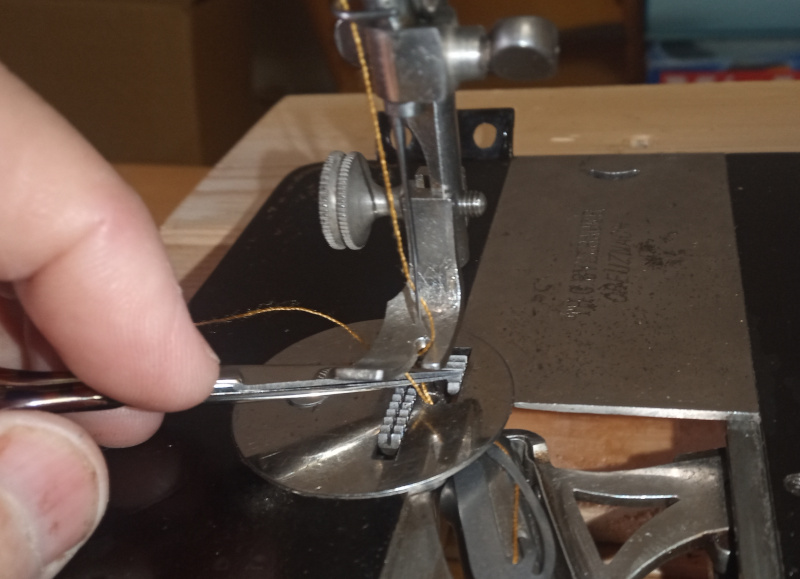
Crank the balance wheel one turn counter clockwise. The needle will go down and pull up the lower thread. Pull the loop of the lower thread out with the point of your scissors. Again, you’ll need about four inches of thread behind the presser foot.
| Pull up the lower thread |
|---|
 |
 |
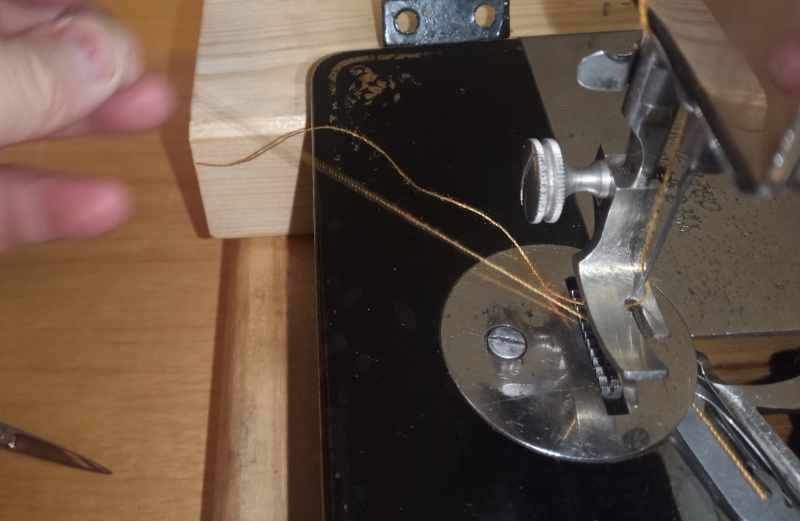 |
Push in the slide cover, and you’re ready to sew.
| Ready to go |
|---|
 |
As always, the sheer number of pictures makes threading a sewing machine look complicated and time consuming. In truth, the only time consuming part is winding the bobbin. The rest takes only seconds once you’ve done it a few times.