The Pfaff 30-31 sewing machine - Fixing a small problem
Jams are for music and toast, not sewing machines.
Click here to see all the Pfaff 30-31 posts.
The last time I wrote about the Pfaff 30-31, I mentioned that I couldn’t give it a good try out because it kept jamming.
I’ve been thinking about it over the last week and looking for causes and solutions.
The typical cause is grunge or a ding in the shuttle race. I took things apart, cleaned them up, and polished out all the dings - and still couldn’t get it to go. The cause turned out to be something that I can’t explain. I know how to fix it, but not how it got in that state.
Here’s what to do when your Pfaff 30 (or Pfaff 31 or Pfaff 30-31 or Singer 15 or any one of the numerous copies) jams:
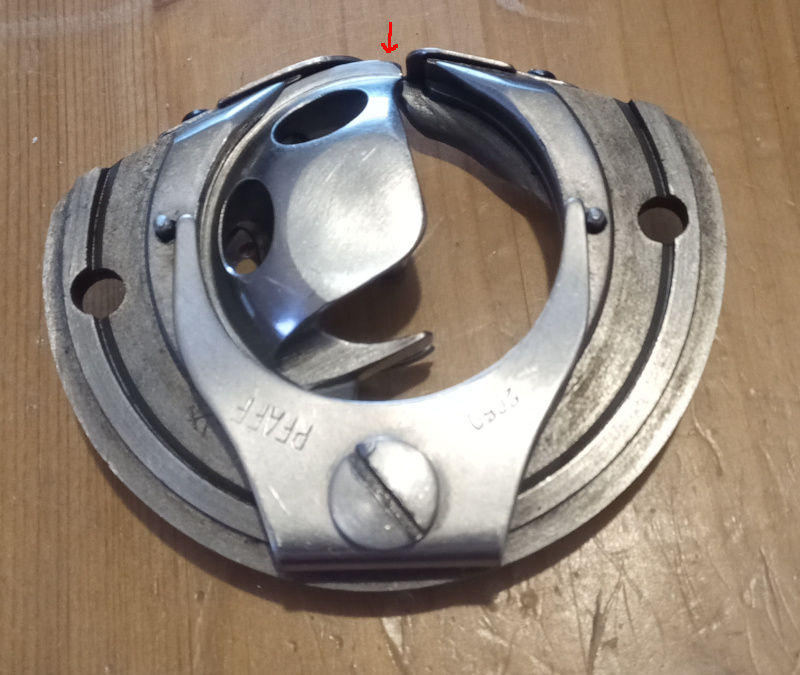
| Scene of the crime |
|---|
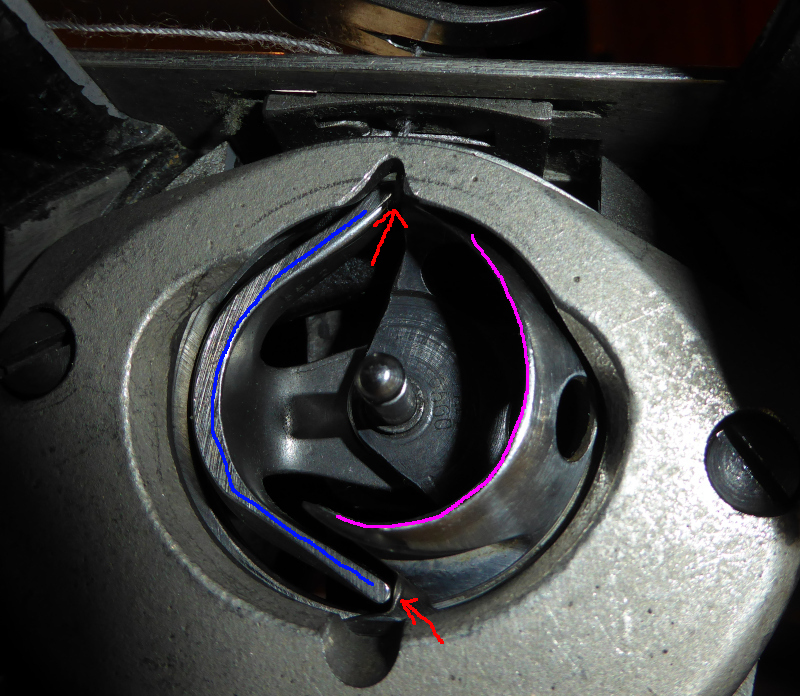 |
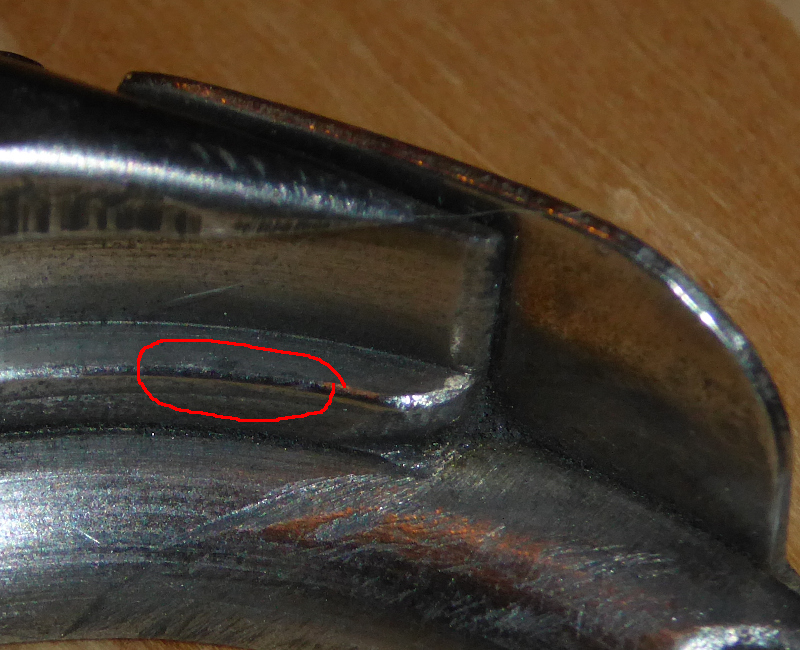
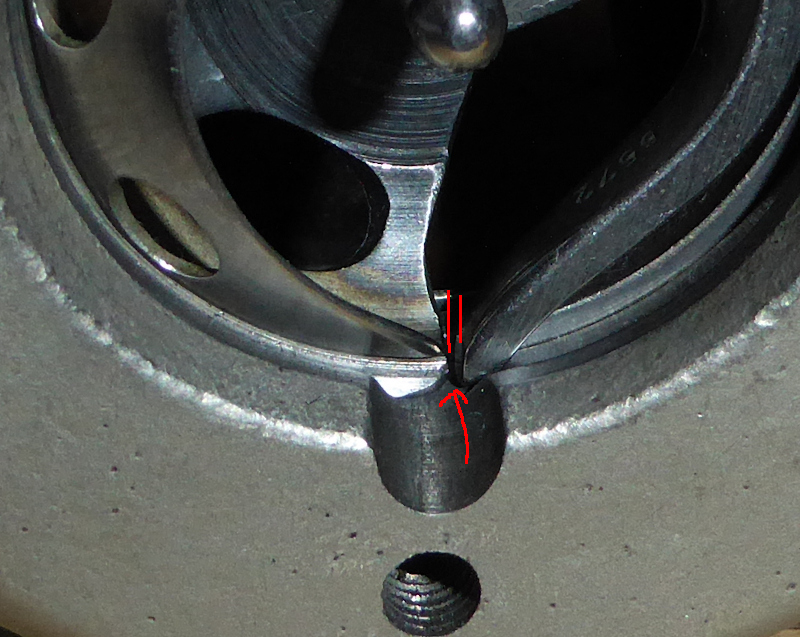
Your central bobbin sewing machine may start jamming at some point. This is usually due to grunge (dust and dry oil) building up in the shuttle race. It may also be due to a piece of thread getting stuck in the shuttle race. Dings and scratches in the shuttle race from broken needles will also cause jamming.
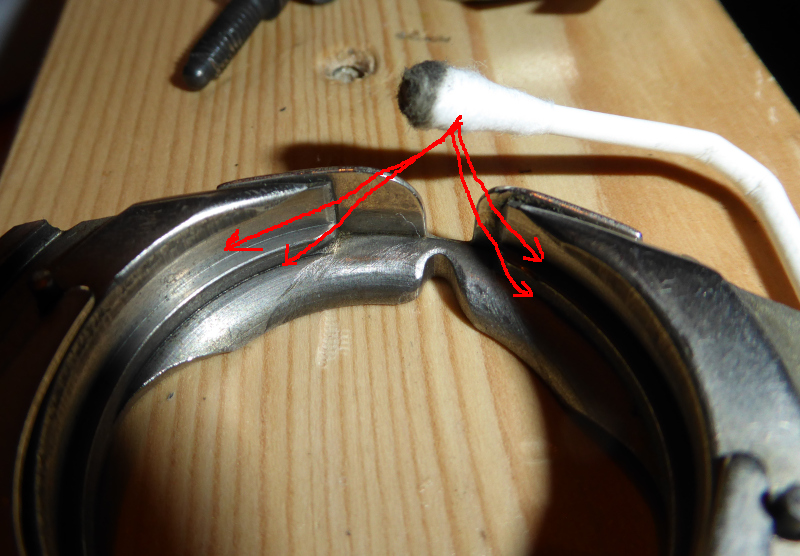
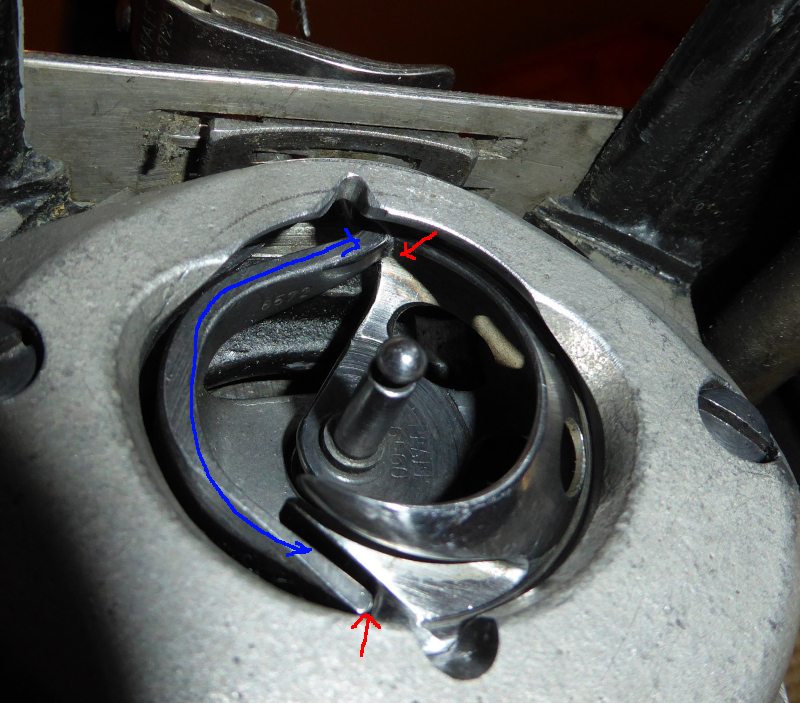
If the shuttle hook can’t move freely in the shuttle race, the thread will hang when passing through one of the two places indicated by the arrows. In my case, the thread would hang in both places - if I managed to get it past one, it would hang in the other.
The blue line marks the shuttle driver. It oscillates back and forth.
The purple line marks the shuttle itself. It has a pointed hook on one end to catch the thread from the needle and pull it around the bobbin.
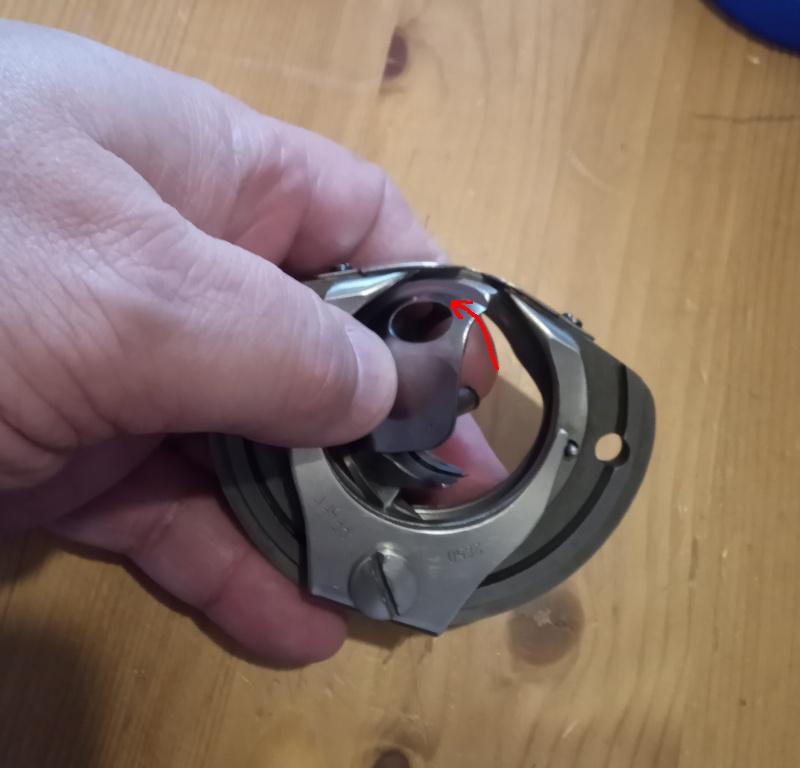
| Hung thread |
|---|
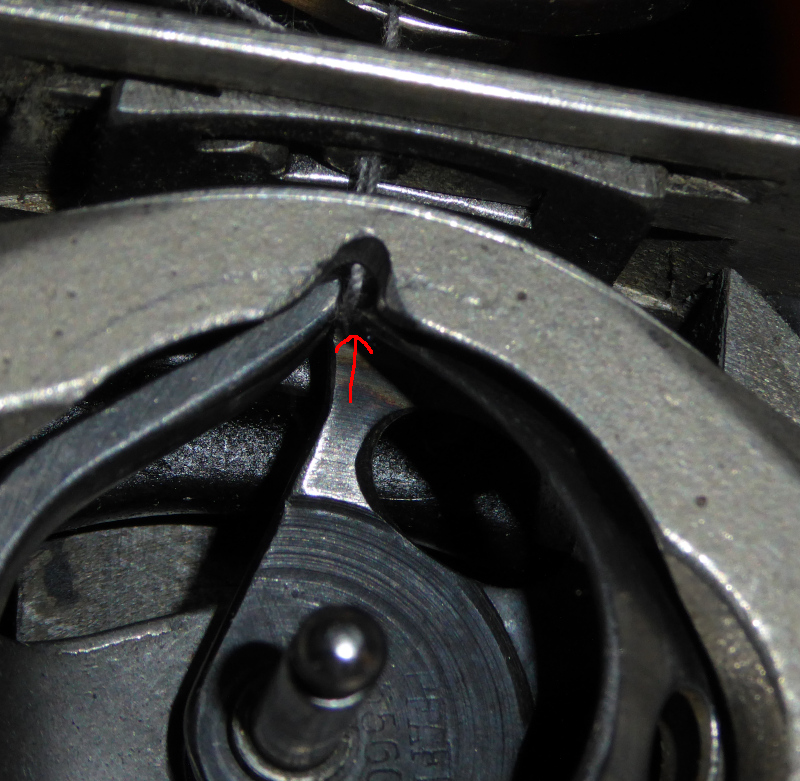 |
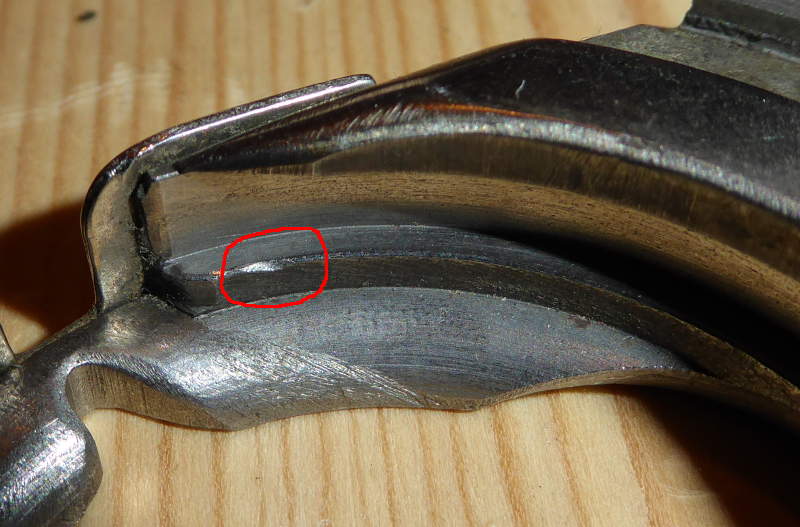
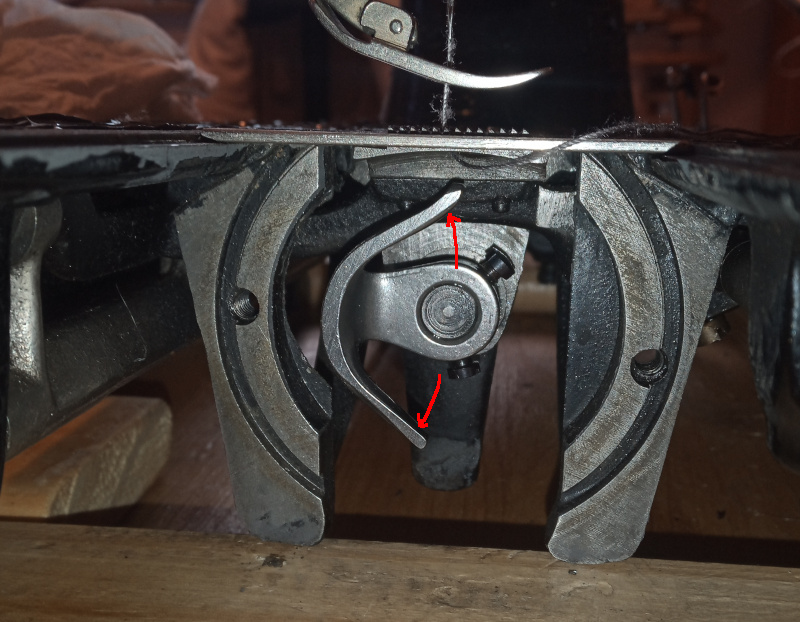
That’s what it looks like when the upper thread gets trapped. It simply would not pass between the shuttle driver and the shuttle. It has to pass through it, though, to make the stitch. Worse, when the thread hangs the whole machine jams. You have to take the bobbin out and pull the thread back up through the needle plate to get the thread out again.
| Disassembly |
|---|
 |
 |
 |
 |
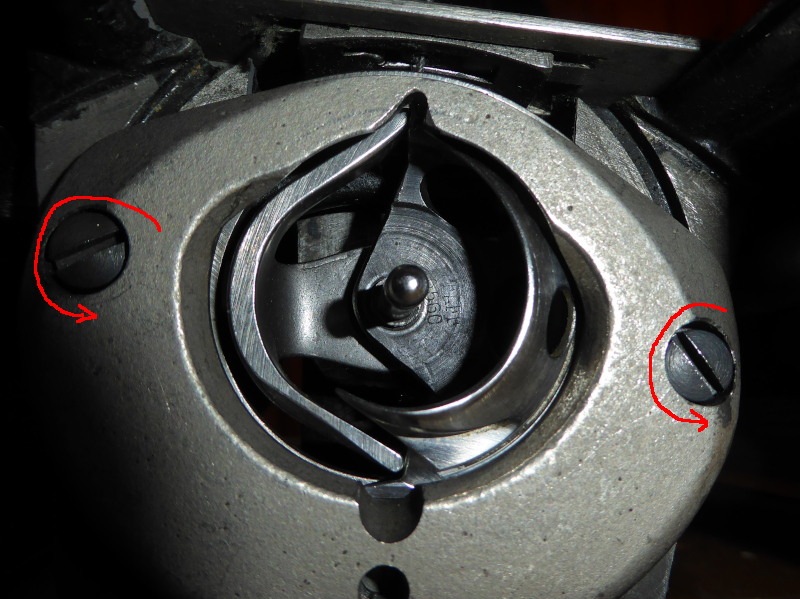
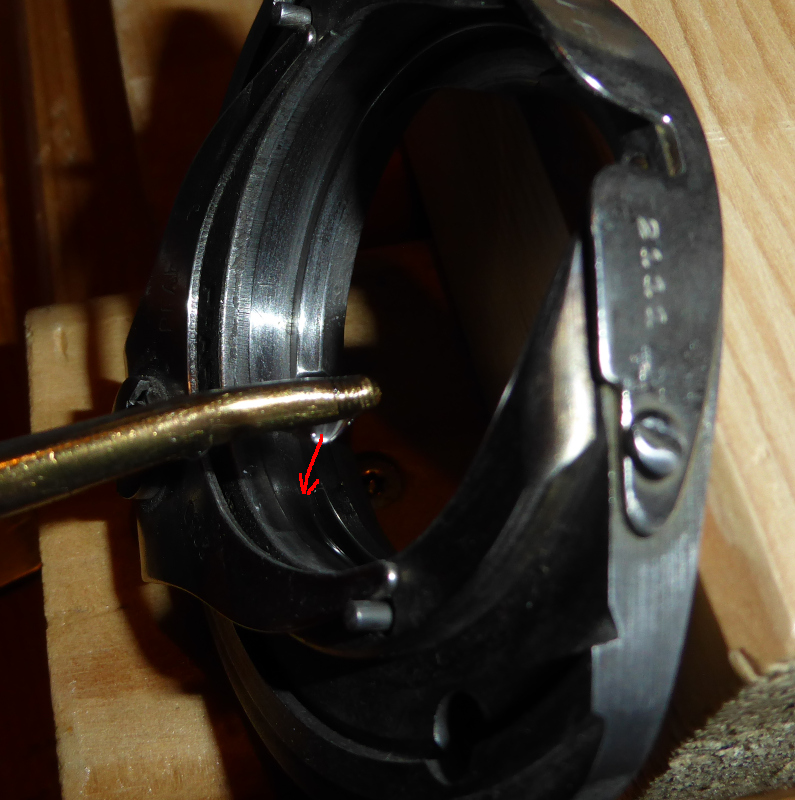
- Take the shuttle race out of the machine by removing the two indicated screws.
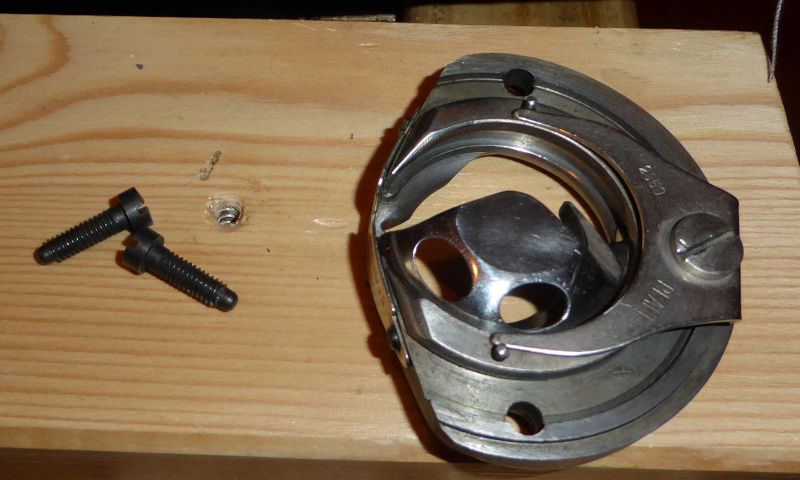
- Rotate the shuttle so the that rounded end (the one without the hook) is in the opening at the top of the shuttle race.
- Push the rounded end of the shuttle out of the race from below. It is tricky, and really hard to get in a photo. It will come out, though. Wiggle it and push up, and it will eventually come out.
Clean the inside of the shuttle race using kerosene or your preferred solvent. Get every speck of grunge and dried oil out of it.
| Clean the shuttle race |
|---|
 |
Clean the back of the shuttle while you are at it. Everything that moves and touches something else needs to be perfectly clean.
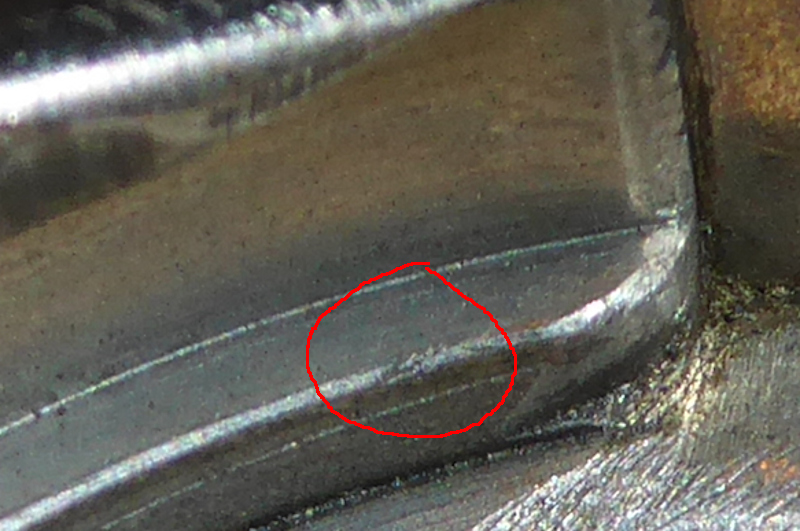
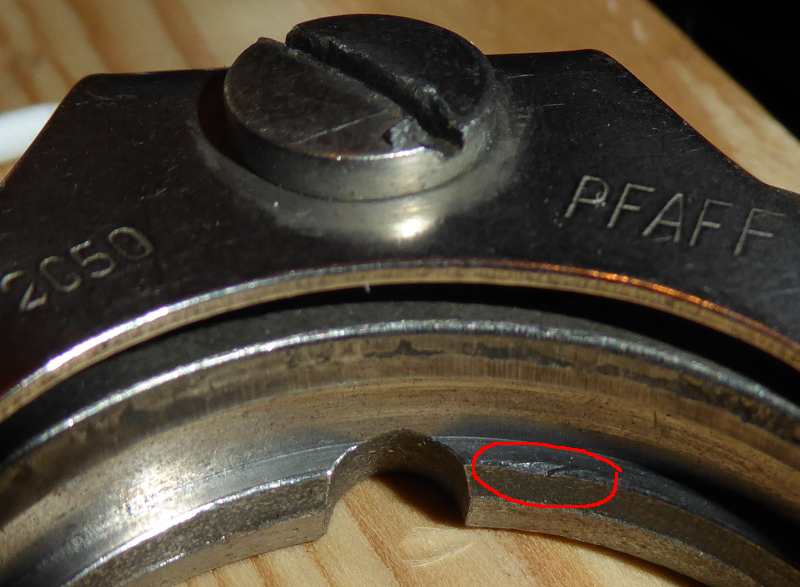
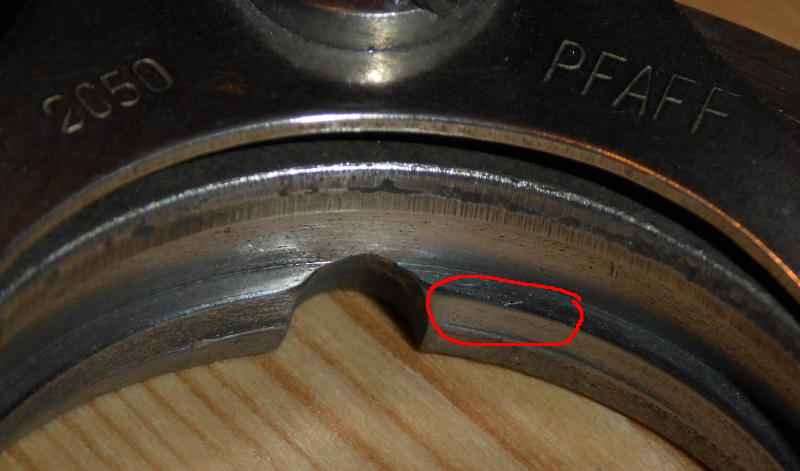
Once you’ve got all the grunge out, check for dings in the shuttle race and on the shuttle. You can’t usually see them with you bare eyes. I find it easiest to run a finger nail around all the edges and surfaces. Any rough spot large enough to catch your finger nail will catch the thread.
| Dings | Un-dings |
|---|---|
 |
 |
 |
 |
 |
 |
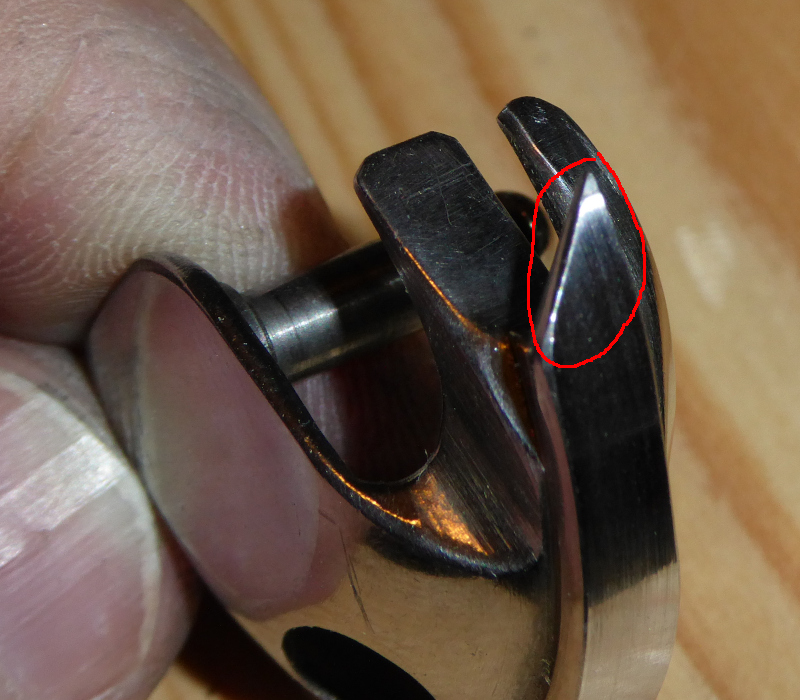 |
I forgot to make a picture of the polished hook on the shuttle. Surprisingly, the shuttle only had dings on the point of the hook.
I used 600 grit sandpaper to remove the dings then polished it using some 1200 grit sandpaper.
Clean out all the grit from sanding and polishing, then put a drop of oil in the shuttle race.
| Oil the shuttle race |
|---|
 |
Put the shuttle back in the race, then put the shuttle race back in the sewing machine.
| Reassembled |
|---|
 |
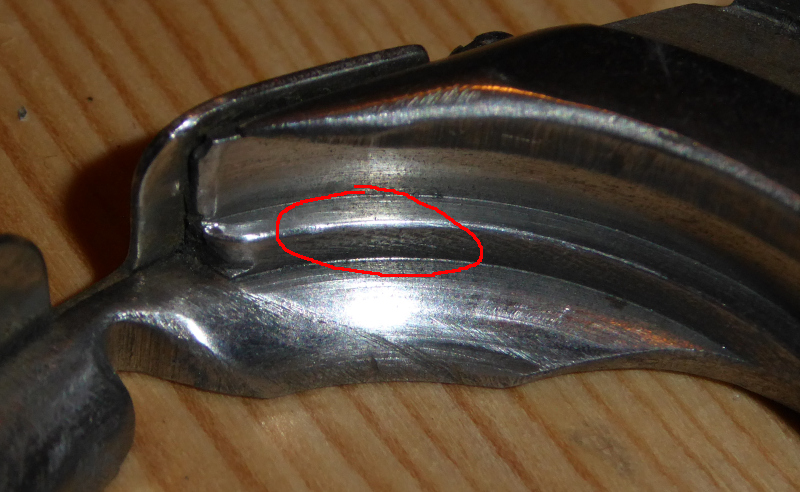
Normally, you’d now be done. There’d be a small gap between the shuttle and the shuttle driver at one or the other end of the driver for the thread to slip through. In my case, there’s still no gap. Something else is wrong. Cleaning it up and polishing and oiling things didn’t hurt, but it didn’t fix this problem.
You should normally have a small gap like this:
| Thread gap |
|---|
 |
As you rotate the hand wheel, the shuttle driver will oscillate back and forth. It makes about a half a turn in each direction. The gap moves from one end to the other as the driver reverses direction.
The gap should be wide enough to pass the thickest thread you will use, plus a little extra.
That picture shows the gap after I corrected the real problem that this machine had. It is a tiny bit wider than it ought to be - I might try to narrow it a bit before I return this machine to its owner.
The solution here was to spread the arms of the shuttle driver just a tiny bit.
| Open arms on the shuttle driver |
|---|
 |
This is not something I’d have ordinarily thought of doing, but I found a recommendation in Wilhelm Renters Der Nächmaschinenfachmann that you can bend the arms of the shuttle driver to open the gap. I don’t know why the arms were too closed up on the machine. Maybe something got bent when a piece of a broken needle got inside. I really just don’t know.
I won’t tell you how I did spread the arms because I don’t like the way I did it. If I ever come up with a nice way to do it, I’ll write it up in another post.
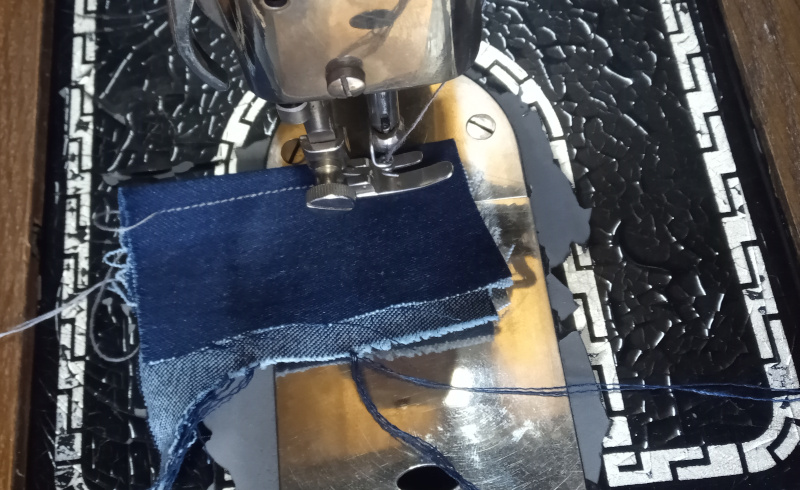
With everything cleaned and oiled (and the driver arms spread,) the Pfaff 30-31 went back to work:
| Test run |
|---|
 |
I didn’t adjust the tension so the back side looks pretty ratty:
| Tension needs to be adjusted |
|---|
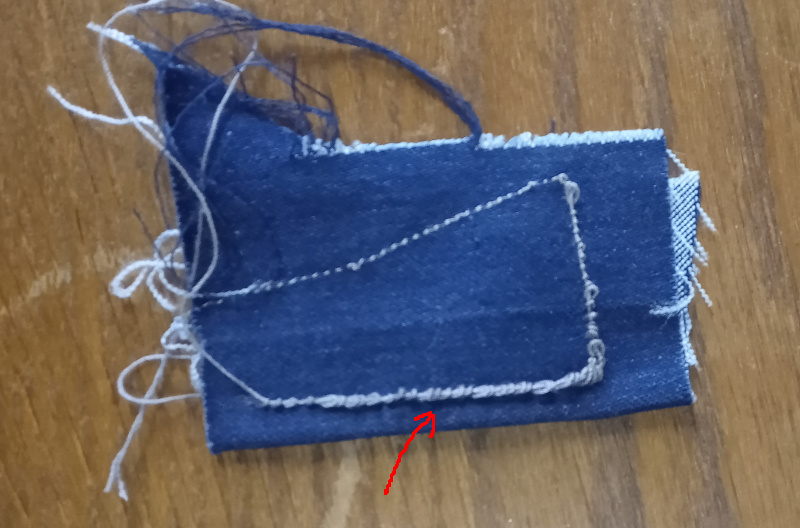 |
At the beginning, I had the upper thread tension set far too low (red arrow.) I ran the tension way up by feel before starting the upper seam - that’s too high. Despite the messed up tension, the Pfaff 30-31 kept right on trucking.
It runs very smoothly:
Now that I know that the machine is a keeper, I can get started with stripping and repainting it - and refinishing the top of the cabinet.
More to come. Stay tuned for further updates.