Black, gold, and blue
A leather phone holster for my Motorola G8 Android smartphone.
The whole point of the Adler class 8 sewing machine that I’ve been working on for the last few months was to make things of leather with it.
All the while I’ve been cleaning it and building it a new wooden base, I’ve been thinking of things to do with it.
The first complete idea I had was to make a holster for my phone. I usually carry my phone in my back pocket, but it has been getting in the way lately. It seems like every time I sit down, the phone gets pressed into my backside. More than anything else, it feels like the phone is being bent by my weight pressing it into the seat cushions.
I have made phone holsters for my phones before but this one is different. First off, it is the first one I’ve ever used a sewing machine to assemble. It is also the first one where I’ve done any stitching just for decoration. Finally, it is the first one that is flat - the others were all made more or less like boxes.
Using a sewing machine makes the stitching easier but it also places limits on how the seams can run and how many layers of leather you can sew together.
From experiments with the Adler, I find that it can’t sew more than two layers of 2.5mm leather.
Since it is a sewing machine, you have to sew things flat and have to have room for the foot and the feed dogs to work.
I sketched out a simple holster to be made of three flat leather pieces. Once assembled, it “poofs out” to be thick enough to hold the phone.
| Sketches |
|---|
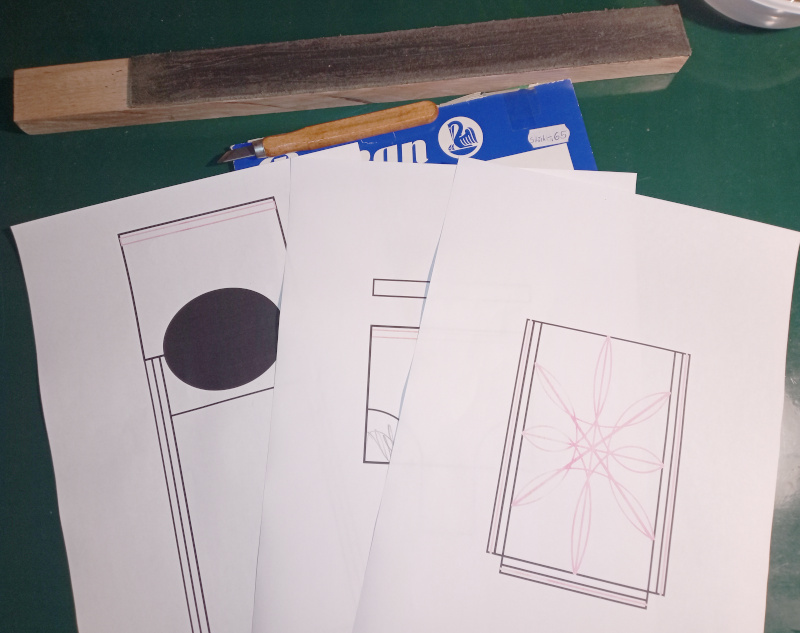 |
The pieces are outlined in black. The red lines mark the seams.
Here’s a more detailed view of just the front piece:
| Front piece sketch |
|---|
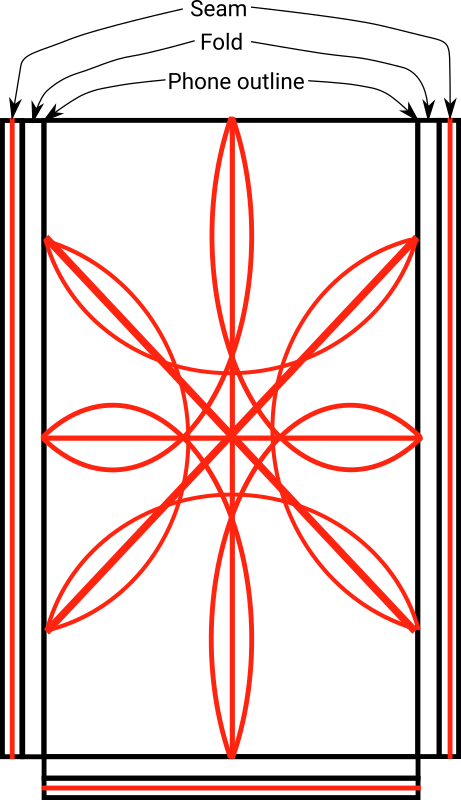 |
The strips outlined in black with a red line through the middle are the seams to hold things together. The black outlined areas marked “Fold” are the places where the leather bends to go from flat to “poofed out” so the phone can fit in. The line marked “Phone outline” is the real size of the phone.
As it turns out, I made the “Fold” areas just a little too narrow. The idea was for each “Fold” to be half the thickness of the phone plus a couple of millimeters extra to allow for the bending radius of the leather. I forgot to add that little bit extra for the bending radius. The phone fits the finished holster, but it is tight. I had to moisten the leather and play other nasty tricks to make the leather stretch so that I could get the phone in and out easily.
The notches at the lower corners allow the leather to flex and fit around the phone. The edges there are not sewn together. That’s the magic bit that allows the holster to “poof out” around the phone.
I cut out the patterns then traced around them on the leather. I cut them out with a knife.
| Cutting leather |
|---|
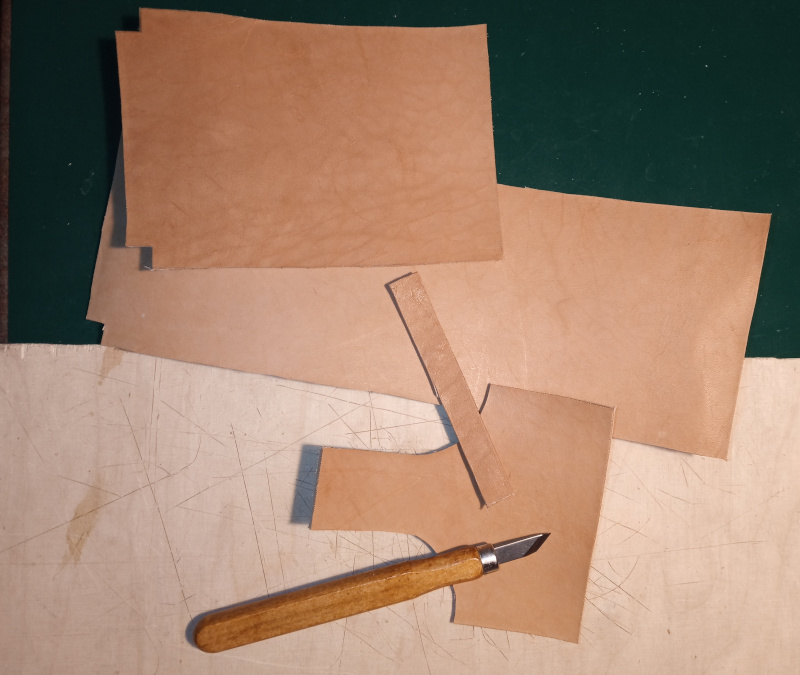 |
That “knife” is actually a wood carving knife that I bought as part of a (cheap) set of wood carving tools. I sharpened it considerably from its original condition. I keep it razor sharp while working by stroking it on a leather strop.
There’s an extra piece in there that I didn’t use. That’s the one centimeter wide strip. I was going to sew it in to make the belt loop, but the Adler can’t handle three layers of thick leather.
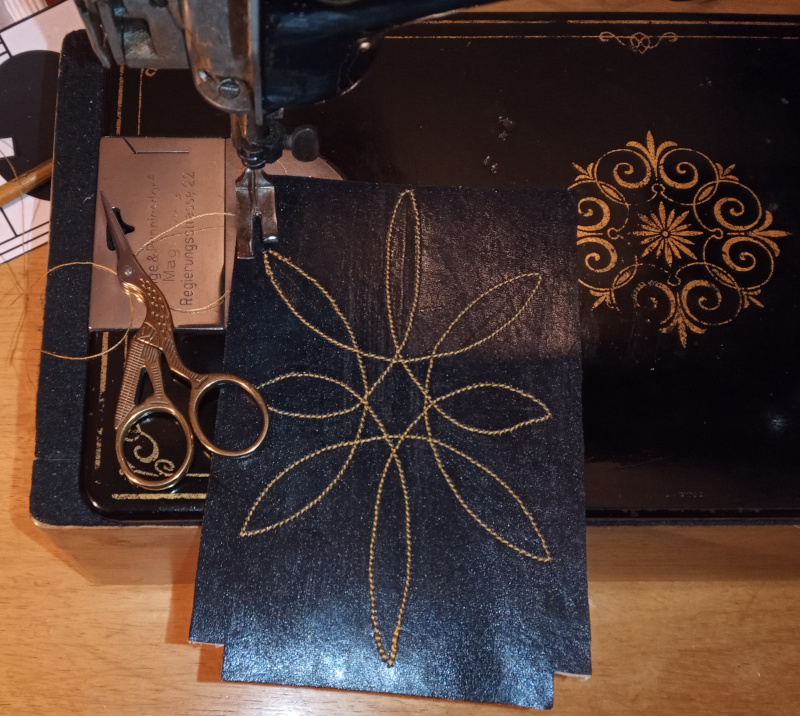
I dyed the leather black then marked the decorative seams on the front piece. The traces are hard to see. I tried using carbon paper, but the carbon wouldn’t stick to the dyed leather. The steel ball of the burnishing tool I used to trace on the carbon paper left indentations in the leather, though.
| Decorating the front |
|---|
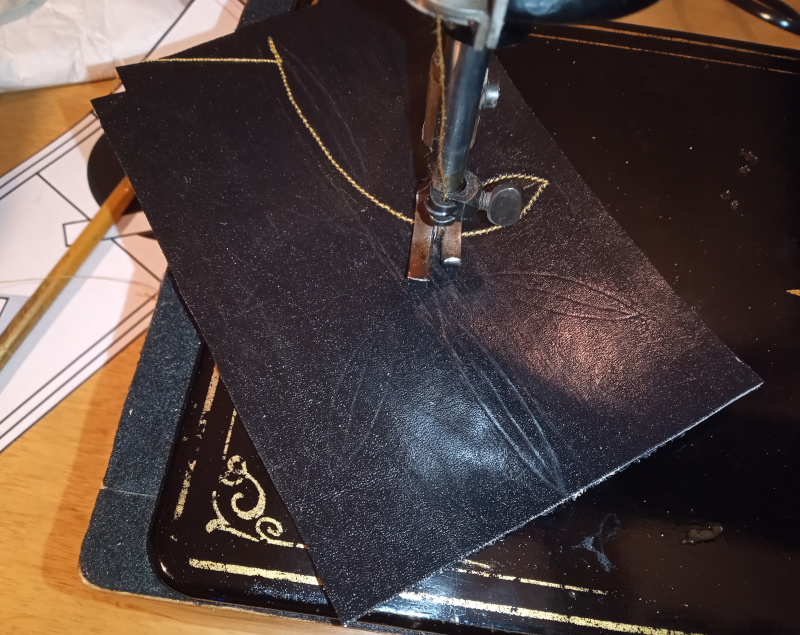 |
The lines are hard to see in the photograph, and they are even harder to see when you are squinting through the dark gap in the presser foot. I lost track of the lines a couple of times, resulting in funky curves. Sewing leather isn’t like sewing normal material. If you mess up a seam while sewing cloth, you can pick it out and do it again. A messed up seam in leather is there to stay. The only way to fix it is to toss the messed up piece of leather and start again.
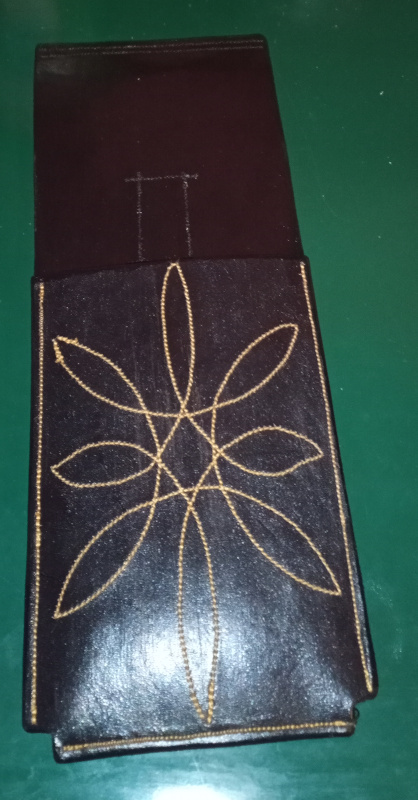
I decided not to sew the straight lines in the decoration. That would have closed up the design too much - and I think it would have been difficult to get the straight lines to match up to the lobes and still be straight.
| Finished pattern |
|---|
 |
As you can see, the color scheme of my holster was inspired by the Adler sewing machine. The curlicue pattern I used is simpler than the one on the Adler, though.
Given the poor visiblity of the lines and how close things are together, I ended up cranking the machine by hand to sew the decorative pattern.
The pattern was sewn in just two seams. The vertical and left right lobes are all one line (started at the bottom.) The diagonal lobes were made with a second seam, starting at the upper left.
There’s a couple of spots that look rather hinky, but I think I did alright for a first time (and considering that I was guessing where to sew most of the time.)
The straight seams should have been straight forward, but turned out to have some hidden difficulties. I’ll go into that in a separate post about the using the sewing machine - there’s too much to be said to wedge it in here.
With all the pieces sewn together, I took the holster out in the garage and used the belt sander to make the edges nice and straight.
I used a “slicker” on all the edges to make things slick and smooth.
| Slickering |
|---|
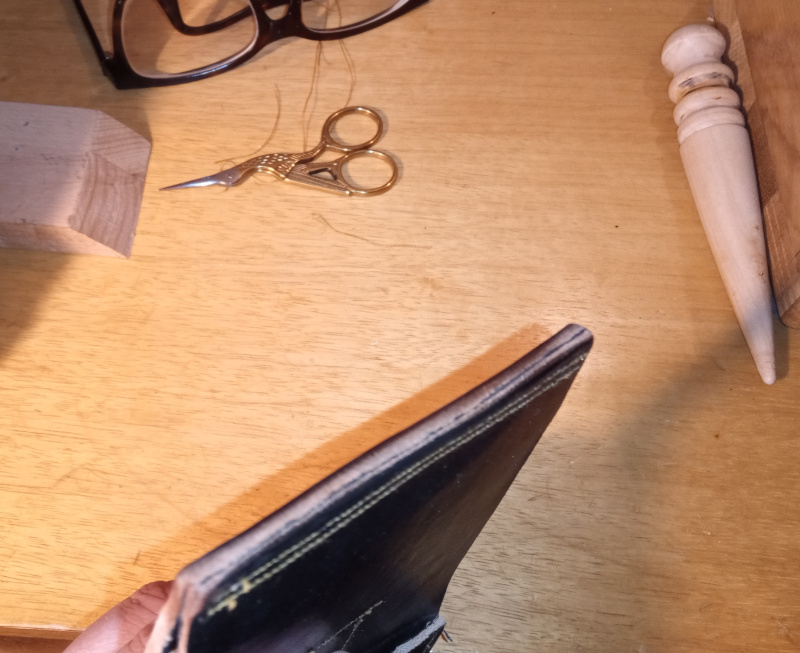 |
The “slicker” is that nubbly, pointed wooden rod to the right there. Put a little water on the edges, then rub the leather in the slicker groove that most nearly matches the thickness of the leather.
After all the edges were smooth I dyed them black. I covered some of the seams in black as well.
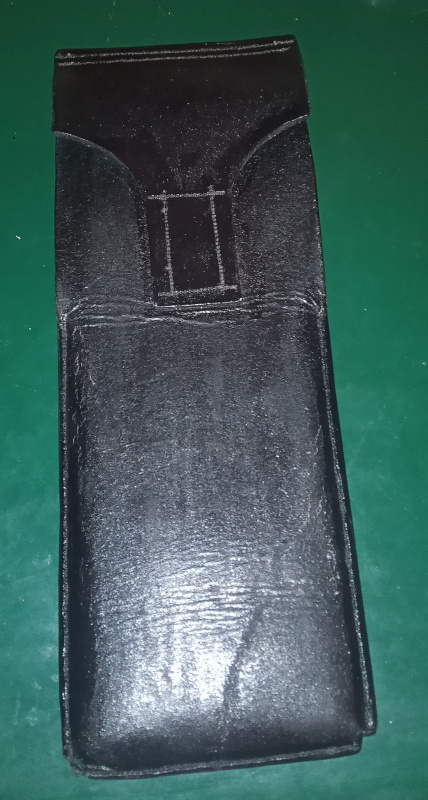
That was pretty much it.
| Finished |
|---|
 |
 |
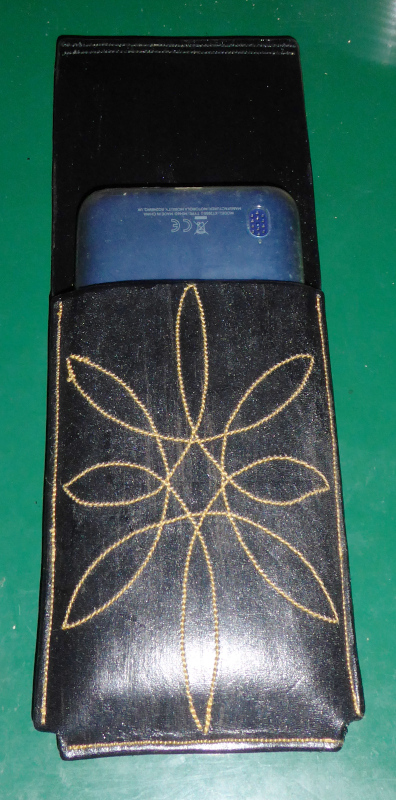
Here’s the holster with the phone:
| Holster and phone |
|---|
 |
 |
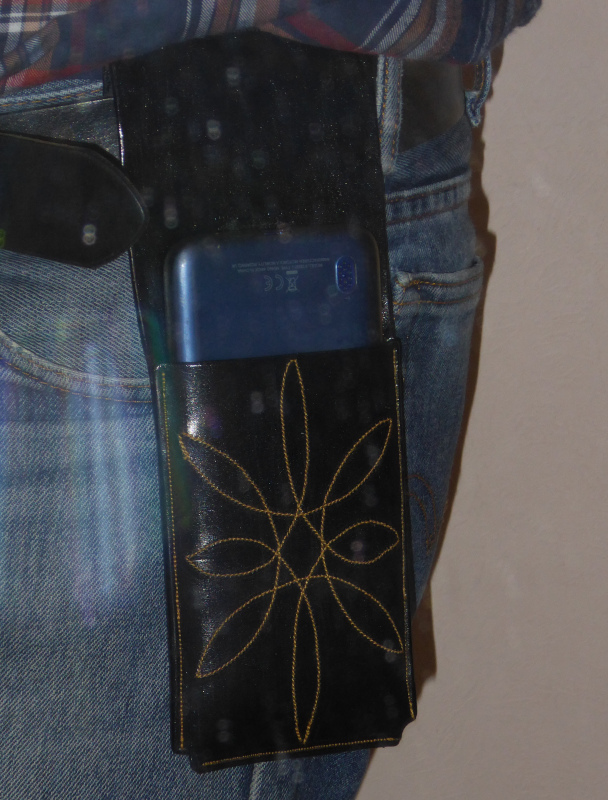
Here’s the whole shebang hanging on my belt:
| Usage |
|---|
 |
As mentioned above, I had to stretch the leather a bit so that the phone would go in and come out easily. I expect I’d have had to do a bit of stretching even if I had left enough space in the folds.
Regardless, you can stretch leather to improve the fit fairly easily.
I rubbed warm water on the front and back with a cloth, then pressed the edges and squeezed them together to encourage them to fold as needed.
It took several rounds (dampen, squeeze, let dry, trial fitting, repeat) to make the holster fit decently.
I found a suggestion somewhere on the internet that hot air from a hair dryer would help, but that didn’t do much.
I had to put some talcum powder in the holster at the beginning. The phone fit so tightly that it was very difficult to pull out (it took several minutes of squeezing and pulling to get the phone out of the holster.) The talcum powder made it possible to pull the phone out despite the tight fit.
It doesn’t look “child scaring ugly,” so I’ll use it to carry my phone for a while to see if it is practical - that is, to see if it is any better than just sitting on my phone occasionaly.