A rustical picture frame
“And Now for Something Completely Different” - Monty Python’s Flying Circus
Most of my projects involve electricity or electronics. This post is about a project whose only contact with electrical anything was the electrical power used to power the tools.
The roots of this project go back to Christmas a couple of years ago.
My wife gave me a poster of a scene in Louisiana. I was born in Lousiana, and lived there for several years at various times.
The poster was pretty nice, but you can’t really put a poster on the living room wall with thumbtacks and call it done.
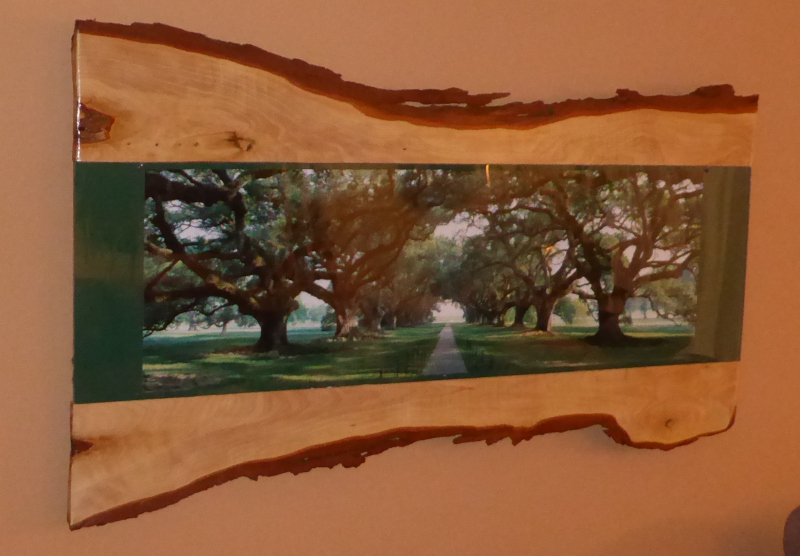
For that poster, I found a place selling cypress wood on the internet and ordered a rough cut slab with the bark still on it and made this picture frame:
| Oak alley framed in cypress |
|---|
 |
I thought that looked pretty cool, so I planned to make something similar for my wife.
We had a picture in the living room that our daughter shot of my wife’s favorite local scene.
It’s the view from the top of the last hill on the highway before you get to the town we live in.
The one we had up was a mistake or maybe a misunderstanding. I had been trying to find a way to reduce the haze in the picture, and my wife walked by as I had one of the intermediate stages on the screen. She thought it looked really nifty in an abstract sort of way, so we had a poster made of it, which I simply glued to a piece of beech wood.
It looked like this:
| Valley view - abstract |
|---|
 |
We replaced that with the oak alley poster because the framed oak alley poster looked better, and because the glued down poster was starting to throw waves - the wood shrank, but the paper didn’t and that made the surface all wavy.
It has only taken me a year and a half to get around to it, but I finally had a new copy of the valley view printed and got a frame made to hang it in.
The valley view is now on the wall in our bedroom.
It looks like this:
| Valley view - new |
|---|
 |
I made that frame from a piece of black alder. The poster is simply a section of the valley view - no “artistic” changes with the photo editor.
I didn’t make any photos when I built the first frame of cypress, but I made several pictures this time around.
There’s nothing especially magical about the frames, except for one thing that I did accidentally with the cypress frame and decided to do deliberately with the alder frame.
In both frames, the length is the width at the widest point multiplied by the golden ratio (about 1.62.)
The golden ratio is often used by artists to make pictures nicer. The ratio of 1.618.. to 1 is somehow pleasing to the eye - maybe because it shows up often in nature.
At any rate, I made the cypress frame to fit a poster I already had. I added a couple of centimeters to the poster width, and the board itself was already a couple of centimers longer than the poster. When I got it up on the wall, I thought it looked awful good. I later realized that the length and the width of the widest part approximated the golden ratio. Since it looked nice, I thought I’d try to intentionally do it on the new frame.
The alder slab was 101 centimeters long. The width needed to be 62 centimeters. The slab was approximately 22 centimeters wide, so I needed to make a space about 40 centimeters wide for the poster.
The poster itself needed to be about 98 centimeters long and about 38 centimeters wide. I selected a part of the valley view photo of the right proportions, and had a poster made - 98 centimeters long and 38 centimeters wide.
This isn’t intended to be a “howto” or a set of instructions for making a picture frame. It’s just a bunch of pictures and notes about how I made mine. Maybe it’ll give some of ya’ll an idea or two.
The first part was the alder slab. I ordered it from the internet somewhere. I just kept clicking around until I saw a piece of wood I liked that also grows here in our area.
The slab was rough. I left the ends as they were, but sanded the back flat enough to be able to work with it. The front is sanded smooth so that the grain shows through the varnish. (Actually, more of my hardwood floor sealant.)
Once the front and back of the slab were smooth, I cut it in two the long way on a table saw.
I had a piece of plexiglas cut to size, along with a piece of 3 millimeter thick plywood. I also bought a couple of 9x18 millimeter pine strips, 90 centimeters long (I should have gotten three.)
| Alder picture frame materials |
|---|
 |
I think you can figure out where all the parts go if I just show the pictures, so I’ll just put them in and explain the things you can’t see in the pictures.
| Partially assembled - front |
|---|
 |
The only thing to explain here is that I should have put a third pine strip down the middle instead of just along the edges. The plexiglas and the plywood bow inwards because they are so thin. I’ve since added that third strip, and it really helps to keep the picture flat. The cypress frame had three strips - for some reason I only bought two when I was gathering materials for the alder frame.
| Partially assembled - back |
|---|
 |
That’s a little more interesting.
You can see where the two pine strips sit. They’re there to put the plexiglas close(r) to the front surface of the slab. They could have been a couple of millimeters thicker, but it’s OK as is.
More interesting are the two wide beech wood strips (cut from scraps.) Each has a large, 25 millimeter hole in one end. That’s where the hangers go to put it on the wall. I drilled those two big holes with a paddle bit, then drilled a smaller hole from the end of each board. I hung the frames with L shaped hooks. The L goes in through the big hole, then the frame sits down on the hook with the leg of the hook stuck in the smaller hole. I don’t expect the frame to fall down unless the wall comes with it.
Once all the big pieces were assembled, I slathered it all in that hardwood floor sealant. I made sure to sop it all into the bark and along the edge where the bark joins the slab so that it’ll all stay stuck together. The sealant is like a transparent plastic coating - “bedliner” you can see through.
| Felt and plywood |
|---|
 |
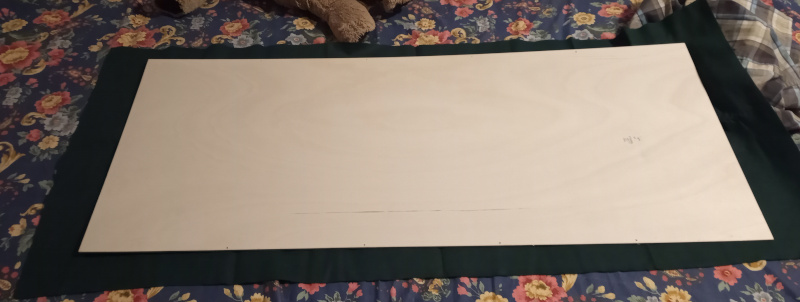
I put a piece of green felt over the plywood back. It was left over from when I made the cypress frame, but it looked like I’d measured it out and bought it on purpose.
| Assembled and ready to hang |
|---|
 |
Not much of interest here, except that you can see the little screws I used to hold the plexiglas to the frame. The bark is a little shiny from the sealant, but you don’t notice that in normal lighting.
That’s it. A rough and rugged (but attractive) picture frame.
What cool things have you made of wood?