Soil moisture monitoring in a flower garden - The Mud-Py monitoring software
Django + MQTT = Easy.
All about my experiments in soil moisture monitoring - Table of Contents
I haven’t been writing much on the blog lately. I’ve been working on the software to collect the data from the sensors, and I’ve been posting logs to my Hackaday.io project page.
There’s a contest running on Hackaday about datalogging, and I decided I’d enter my soil moisture monitoring project - maybe I can get back some of what this project is costing me if I win. It doesn’t matter, though. This is to satisfy my curiousity, and I’d be doing it with or without the contest - though maybe not as quickly.
At any rate, I’ve gotten a good start on the software side of things.
- I have the Django based “Mud-Py” database and management software up and running, at least on my development computer.
- I have the Mud-Py MQTT bridge working.
- I have a Raspberry Pi readied for the software. I’ll install it when I get the control nodes (the ESP32S modules) ready.
I have just two pieces left:
- Software for the ESP32S modules.
- Power for the ESP32S modules.
I have all the bits and pieces for the power banks laying here, ready to be assembled. I’ll put that together this coming weekend, then I can start on the software for the ESP32S modules.
But, back to what I’ve been doing.
The Mud-Py software is completely Django based.
Django is a framework for quickly creating database backed web sites. You define the data models, and Django provides everything it takes to make a usable web page out of them.
Django also has this nifty addon named “GeoDjango” which makes adding maps and map objects really easy.
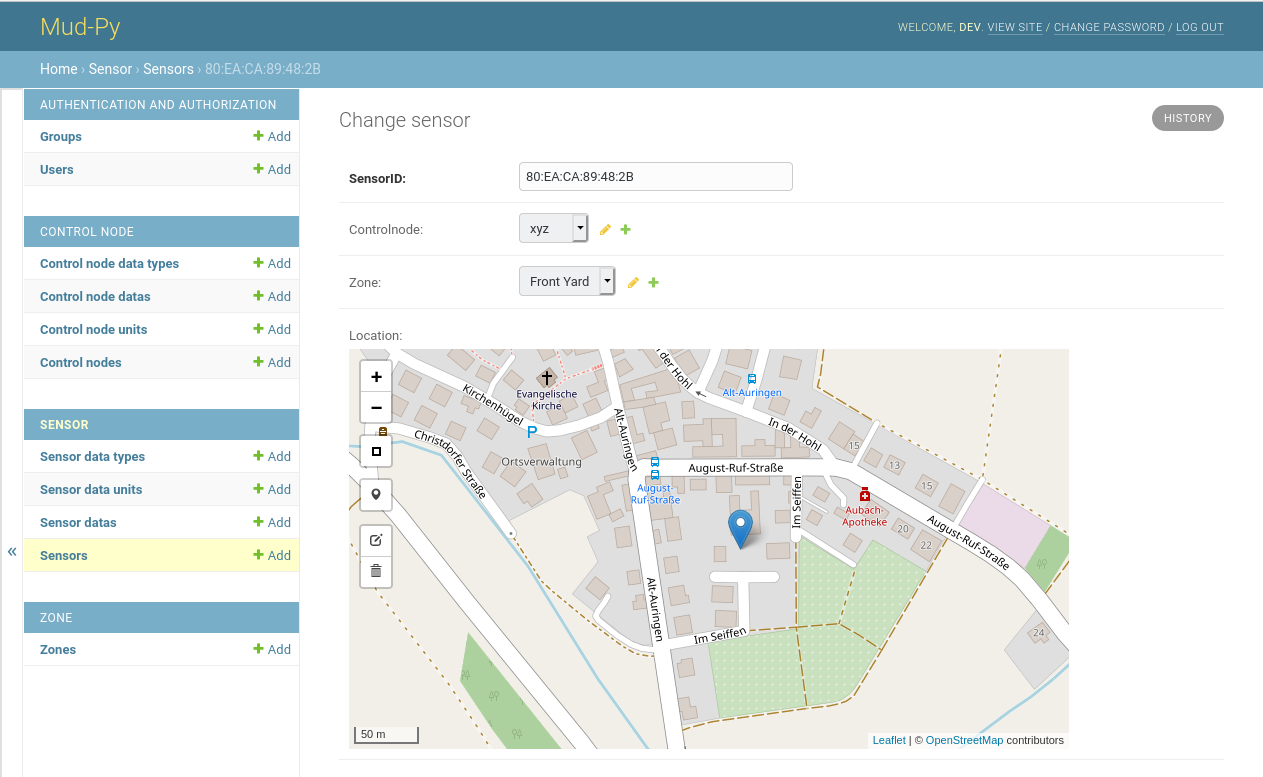
Here’s the Mud-Py page open to the “Sensors” page, showing one sensor.
| Sensor management |
|---|
 |
No, that’s not where I live. I lived in that small town over 25 years ago for a few months, but that marker isn’t even close to the house I lived in back then - I’m not even sure which house it was, to be honest.
At any rate, the map was a snap to integrate. Just define the location of the sensor as a geolocation field, tell Django to use the Leaflet “Admin” page, done.
I’ll use the geographic coordinates when it’s time to make the heatmaps of the yard.
I use Mud-Py as a library in the Mud-Py MQTT bridge. That’s a separate program that connects to the MQTT server to receive the sensor data. It uses Mud-Py’s Django fueled code for access to the database. It pulls needed information out of the database (which control node should collect data from which sensors) and writes the received sensor data to the database.
The Mud-Py MQTT bridge has less than 200 lines of code, and there’s probably about that much more that I actually wrote in Mud-Py itself - Django takes care of the rest.
The down side to Django and GeoDjango is that you need a database capable of geospatial coordinates. Not all database servers are suitable. You can use MariaDb (or MySQL) but only if you feel brave enough to live without the data consistency that you normally expect from a database server - MariaDb has to use the MyISAM tables for spatial data, which don’t support transactions or foreign keys.
I use SQLite+SpatiaLite for development. The “production” server will use PostgreSQL with PostGIS.
With SQLite, the database “lives” in the same directory as the code. That’s fine for developement - I can live with that restriction. In production, the Mud-Py code has to be somewhere that the web server can access it, while the bridge needs to be somewhere else (same machine, but different directory.) They can both use the exact same configuration, though.
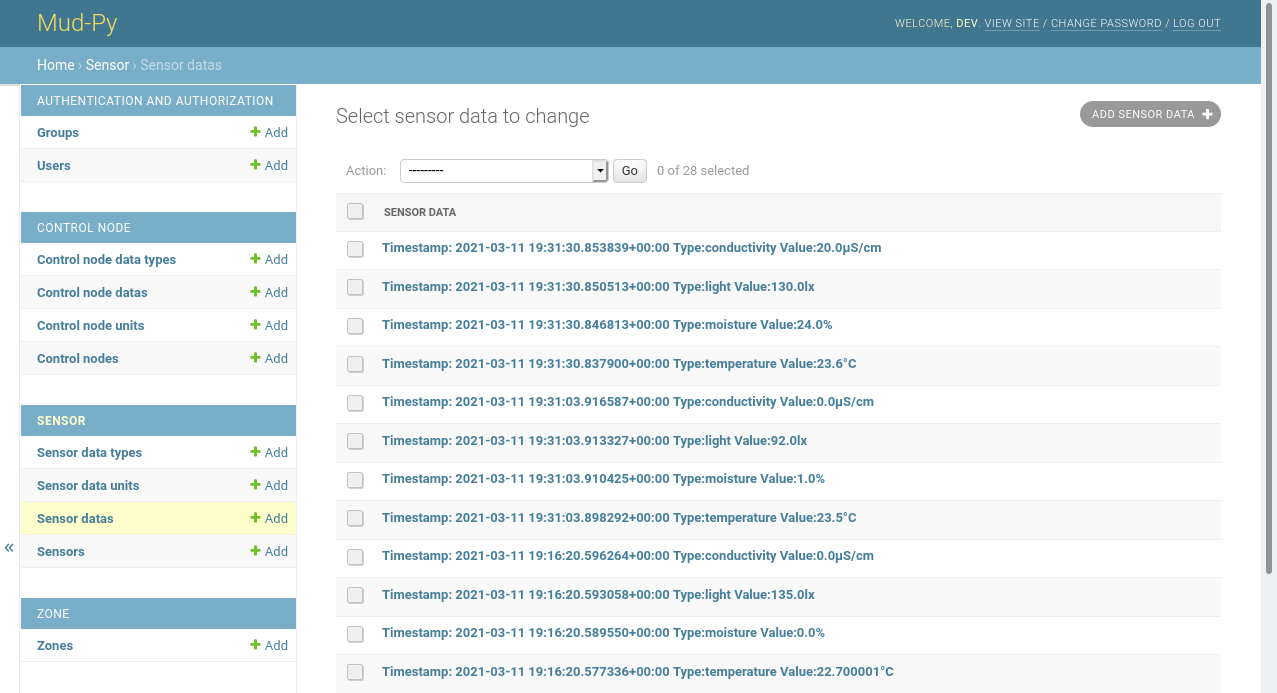
I’ve got an ESP32S programmed with the flora MQTT client. I pointed it at the MQTT server that the Mud-Py MQTT bridge uses, and got data from one of my sensors into Mud-Py.
Like this:
| Mud-Py sensor data |
|---|
 |
Mud-Py itself doesn’t know bean about the sensors, their names, or the measurement units. It has tables and fields for that stuff, but it expects the user to enter it. In the case of the Mud-Py MQTT bridge, the bridge itself knows what its sensors can do so it fills in the needed stuff in the database then links it in with the sensor data - the sensor type names and the units were created by the bridge the first time the sensor data hit it.
That’s the current state of the soil moisture monitoring project - making progress.
I have to be finished before 25 April, 2021 because that’s when the contest concludes. Earlier is better, of course, and I’d like to get the hardware out in the yard before spring really gets going.
I don’t have to have the software all finished now. I’ve got the data collection part ready, and once the hardware is ready I can start things running then make the parts of the software for the evaluation and display while collecting data.
That’s all for this evening - I’m going to try to get to bed on time tonight.
All about my experiments in soil moisture monitoring - Table of Contents