Reversing a universal motor
Easier than you might think.
I’ve been working on an old sewing machine for a while. Now that it is finally at a stage where I can use it, I’ve been going through the collected photos and making blog posts about the work I’ve done on it.
Getting my old Adler to run with a modern electric motor was a little tricky. The Adler turns clockwise to sew, while modern(er) machines turn counter-clockwise. I could have simply mounted the motor so as to reverse the direction, but because of the way I built the motor mount I ended up needing to electrically reverse the rotation of the motor.
Sewing machine motors are universal motors - they can run on AC or DC. Since they run on AC you can’t change the rotation direction by swapping the input leads like you can with a DC motor.
To reverse a universal motor you have to change the phase relationship between the field windings and the rotor windings.
The simplest way to do that is to change which brush is connected to which field coil. There are two brushes and two field coils. Each brush is connected to one coil. Swap the positions of the brushes and the motor will run in the opposite direction.
This seems to be regarded as black magic in the sewing machine world - you either mount your motor differently to reverse the direction like the peons do, or you are regarded as a wizard for making the motor run backwards electrically.
There’s no magic involved and no wizards needed. Just some ordinary tools, an hour’s time, and (maybe) a soldering iron.
I say “maybe” because there’s a lot of these sewing machine motor kits out there that all look the same. If they’re all built the same then you can reverse them without soldering like I did with mine.
Here’s how you reverse a universal motor:
| Motor |
|---|
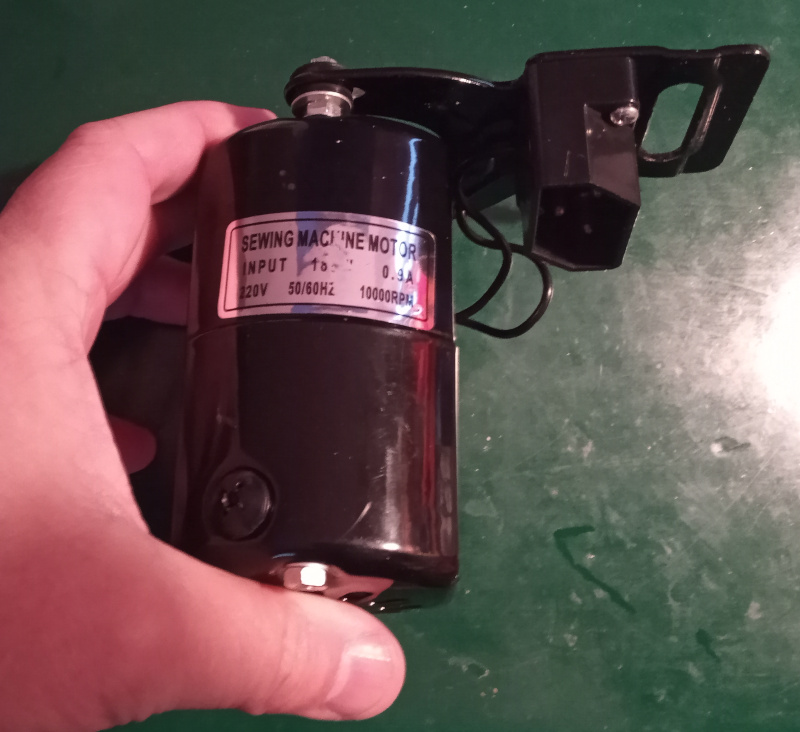 |
It doesn’t say it is a universal motor, but it says it is for AC and it has brushes - that means it must be a universal motor.
| Remove the brushes |
|---|
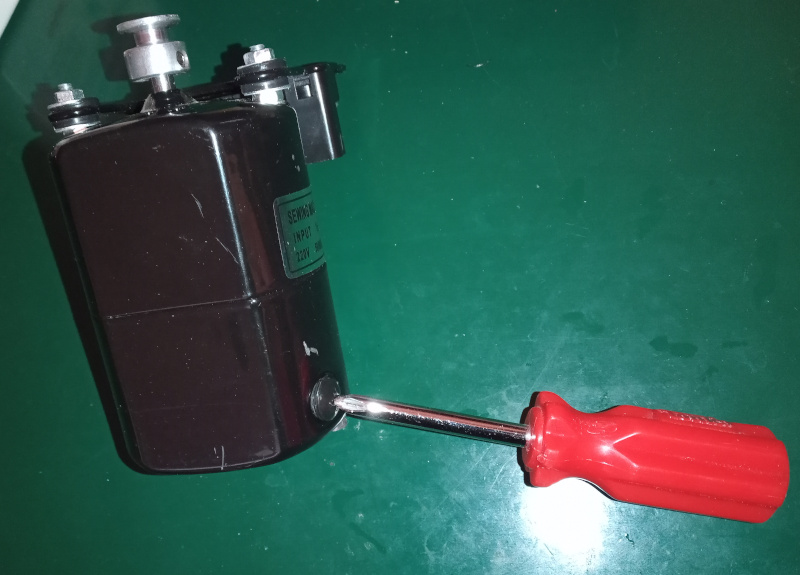 |
 |
The brush holders go through the housing. If you don’t remove the brushes you’ll break them when you try to remove the housing.
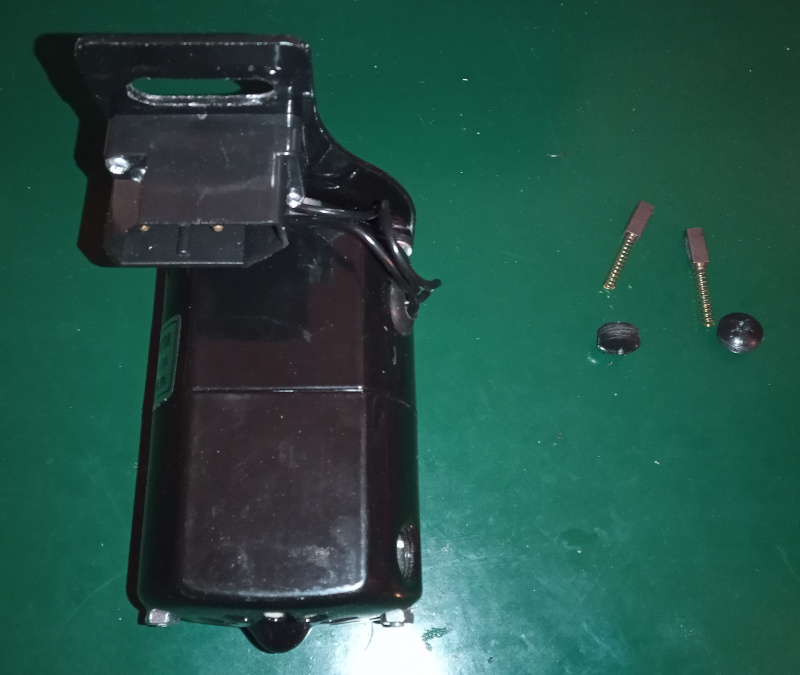
| Remove the housing |
|---|
 |
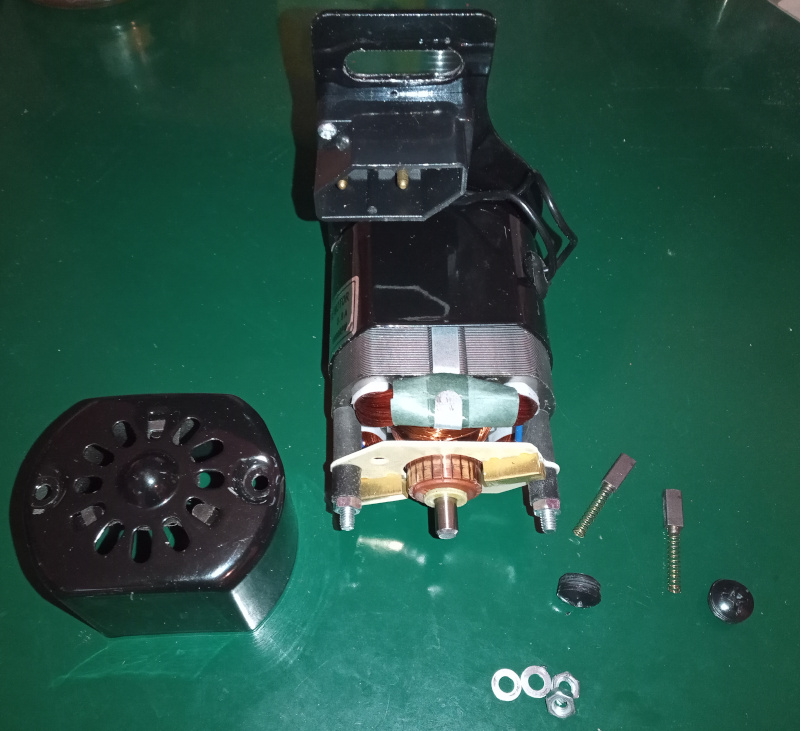 |
Remove the nuts on the same end of the motor as the brushes, then pull the housing off. This motor (and most likely all the similar ones sold on eBay, Alibaba, Amazon, and other places selling cheap junk) has the brushes mounted on a small circuit board.
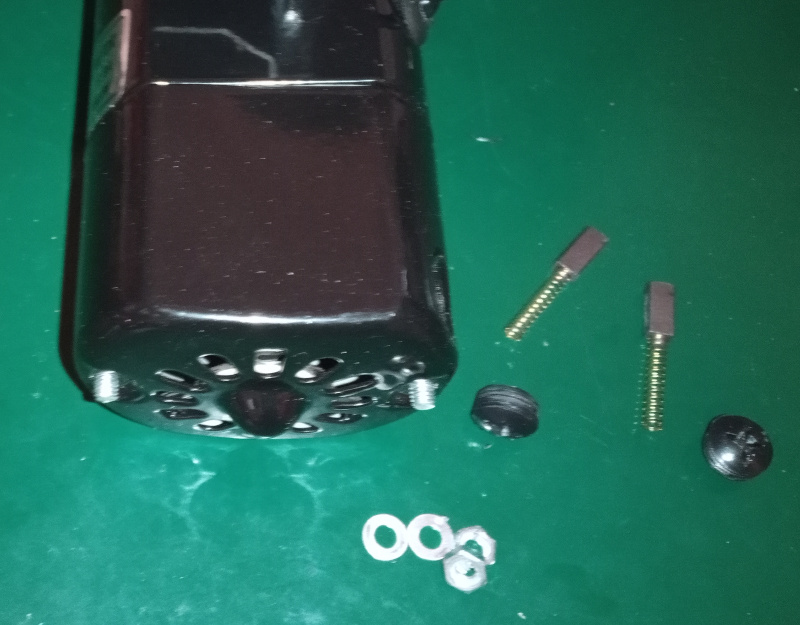
| Remove the circuit board |
|---|
 |
Take off the nuts holding the board in place.
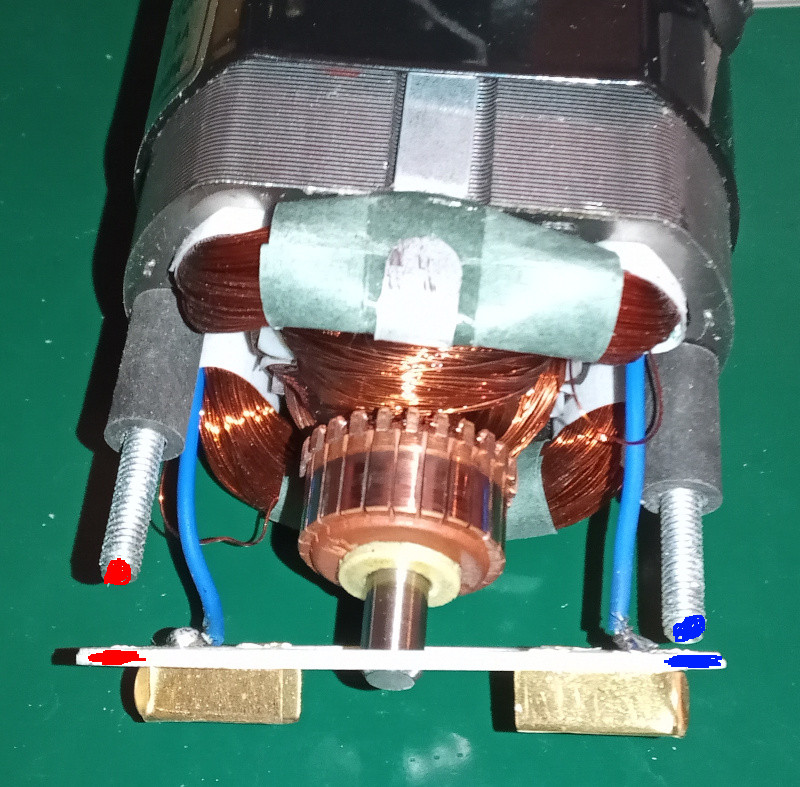
At this point, I expected to have to cut the blue wires and solder in some extensions so that I could rotate the board. That would reverse the brush positions and make the motor run backwards.
| Surprise |
|---|
 |
I got a small (pleasant) surprise here. When I pulled on the board, I found that the blue wires were connected to relatively long wires from the field coils. They are long enough that I didn’t need to extend the blue wires.
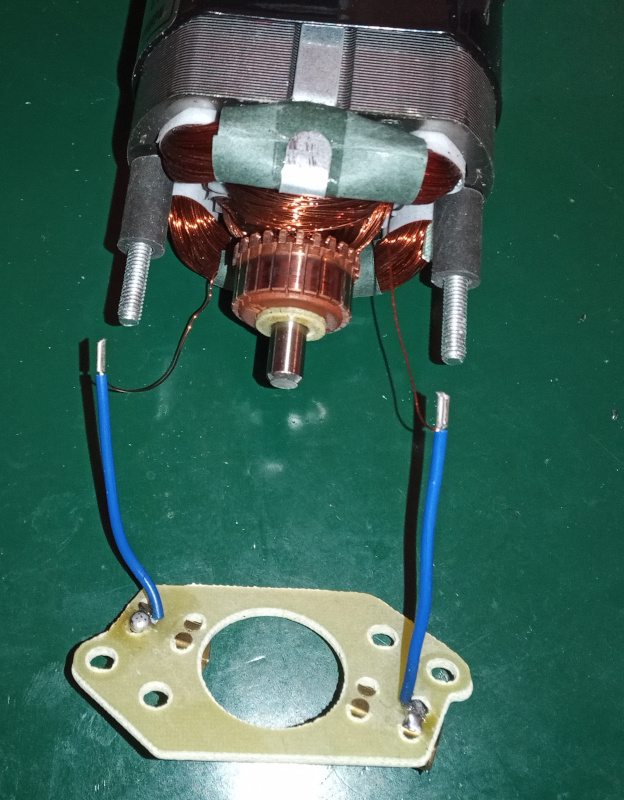
| Insulation |
|---|
 |
The blue wires and the field coil wires were joined with crimped on metal junctions. They were originally stuck inside the white tape you see around the field coils to keep them from causing a short circuit.
I insulated them with short pieces of heat shrink tubing.
| Reversing the motor |
|---|
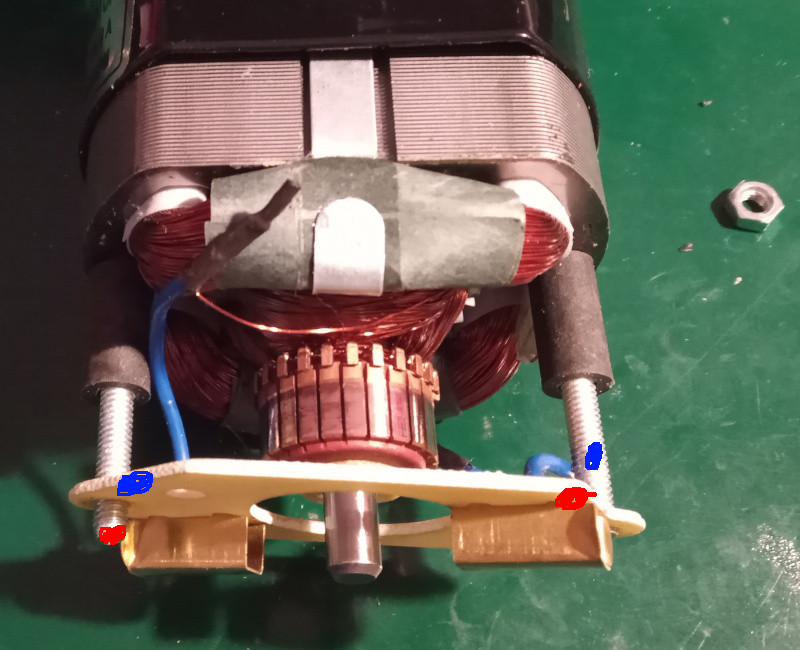 |
This is the bit that makes the motor run backwards. I’ve rotated the board 180 degrees before putting it back on the screws.
When I took it apart each brush was connected the end of the field coil closest to it.
Put back together the way I have, each brush is connected to the end of the field coil opposite from it.
That’s all the “magic” there is involved.
| Be careful |
|---|
 |
When you go to reassemble the motor make sure that the wires are run so that they won’t touch any moving parts. The blue line I’ve drawn there runs parallel to the field wire to show that it is tucked in far away from the commutator and the rotor.
Watch out with the spacers, too. They have to be in the right places to hold the board and the brushes in proper contact with the commutator. It would be a good idea to sketch or photograph things as you are taking the motor apart so that you can be sure of putting it back together correctly.
Reassemble the motor the same way you took it apart - put the brushes back in last.
Try it out carefully before installing it in your sewing maching.
I’ve written this with a sewing machine motor as an example, but it applies to (almost) all universal motors.
There may be motors where the brushes are positioned so that they only work properly for one rotation direction. I don’t have an example to show you. You’ll recognize it when you put the motor back together and it runs poorly in the reverse direction and/or spits lots of sparks.
The brushes in such “one way” universal motors will be offset from the center. In a reversible motor, you can draw a line straight down one brush through the center of the axle and on to the second brush.
Like this:
| Motor types |
|---|
 |
 |
If the brushes are not in line like in the first picture then the motor won’t run well in reverse.