Fixing up a Dual HS135 - First sniff
What’s that smell?
Fixing up a Dual HS135 - Table of Contents
I brought the HS135 home from my father-in-law’s house, and set it up on the workbench next to the computer I use for most of my hobby stuff.
I figured I’d just hook it up to the sound card, toss a record on, and have at it.
It almost was that easy - for about five minutes. Then something inside the HS135 started sizzling and smoke and a horrid stench came out and the player stopped playing.
Bummer.
My hobby room still smells like a cat pooped in a hidden corner somewhere - that burned capacitor stink doesn’t want to go away, no matter how often I air out the room. (Yes, I did double check to be sure the cat hadn’t hidden a stink bomb. She’s not innocent, but she’s not responsible for this stink.)
I’m going to have to fix the old thing up before I can transfer my wife’s old choir records to mp3.
Let’s take a look at the HS135.
| Dual HS135 |
|---|
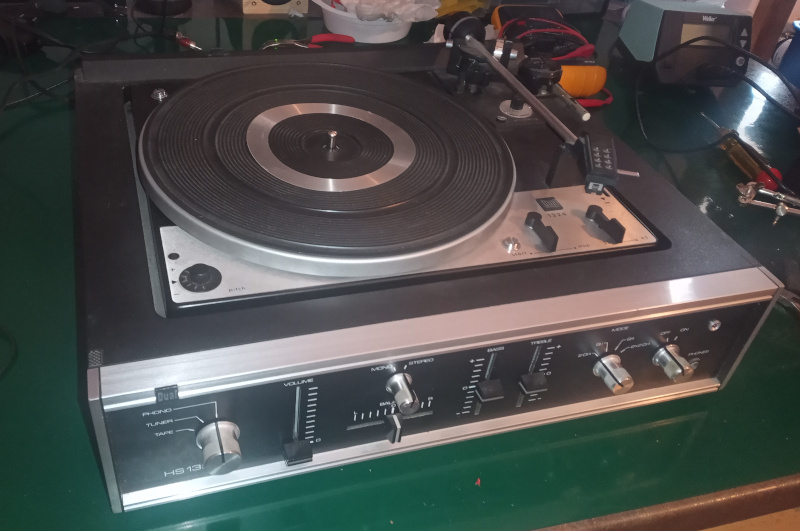 |
It doesn’t look too bad just sitting there, but it does have some problems.
The most obvious thing was that the original plexiglas cover was cracked long ago.
| Cracked lid |
|---|
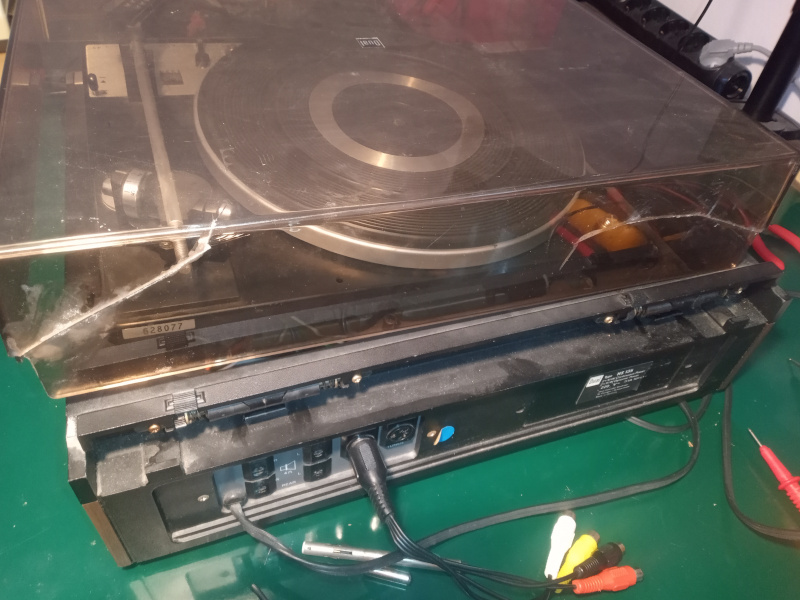 |
I don’t think I’ll try to fix that. My brother-in-law seems to have tried to use cyanoacrylate glue on it - with bad results. I have no idea how to really fix the cracks.
As long as you don’t put the back edge into the clips on the spring loaded hinges, you can use the lid as a removable dust cover. Good enough for the use I’ll be putting it to.
The rubber mat on the turntable is coming unstuck. The contact cement used to glue it to the metal has lost its grip. It is still slightly sticky, but the rubber won’t stay stuck to it.
| Loose rubber mat |
|---|
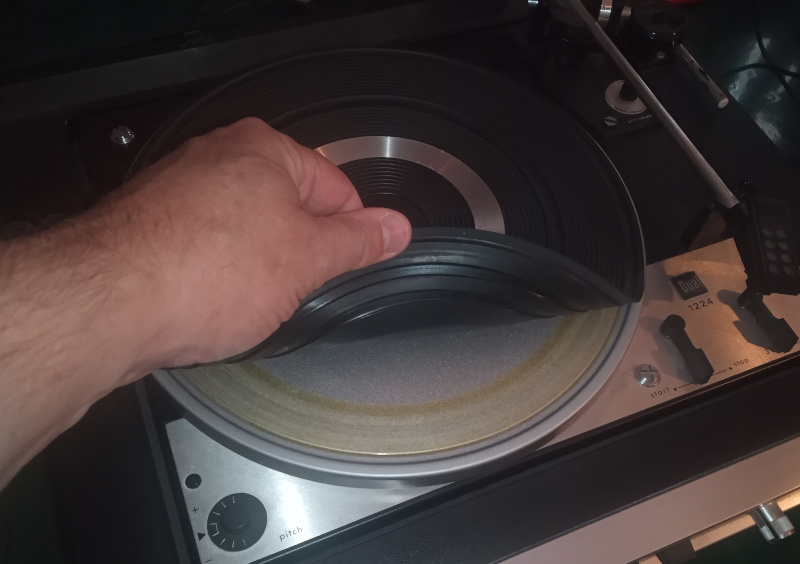 |
I’ll have to tack the mat back down. I have a spray can of contact cement that ought to give it a smooth, even coat so that the mat lies flat.
The real problem is inside somewhere.
Taking the Dual 1224 out of the HS135 is a bit tricky. None of the pictures and videos I found accurately explain how to do it. Maybe the mechanism is common to all turntables and you are just expected to know how to do it. I dunno.
At any rate, I’ve made some photos of how to take the turntable out of the housing. Maybe it’ll save someone else a little time figuring it out.
First, unplug the HS135 from the mains, then lock the tone arm in place and remove the counterweight.
| Preparation |
|---|
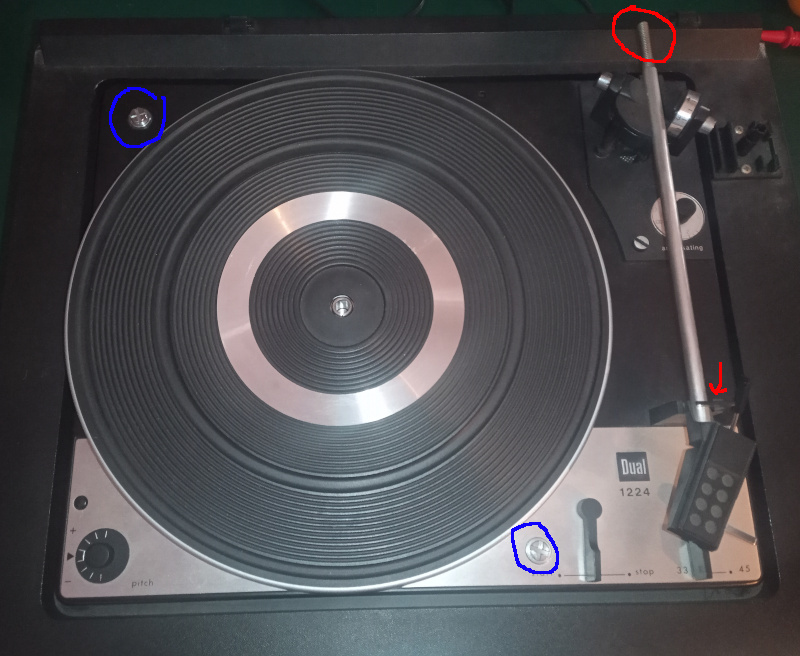 |
The counterweight unscrews. It is adjustable. Take note of where it is - you’ll want to put it back in the same position.
Loosen the two screws marked with blue circles. They hold the 1224 turntable in the housing of the HS135.
You can’t just pick the turntable up and remove it. There’s a trick to getting the turntable out.
To understand it, I’m going to show you what it looks like from the inside first and then show you how to unhook it from the outside.
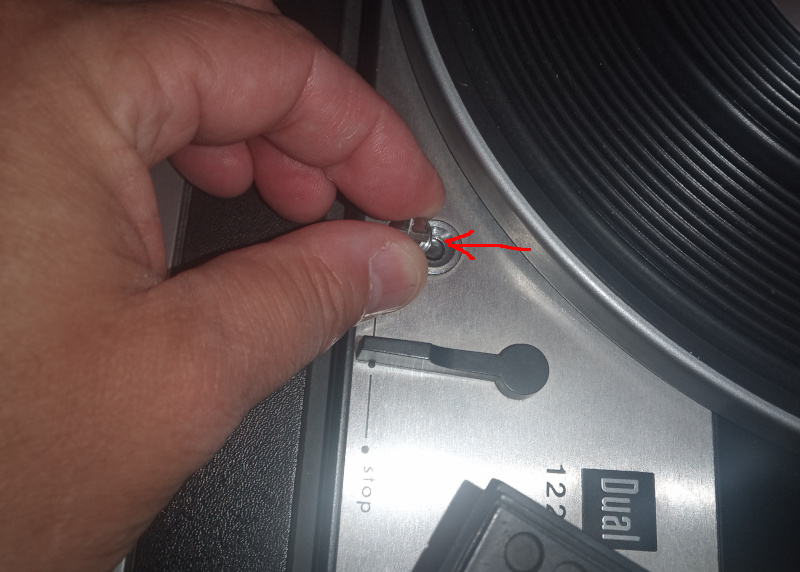
Each of those two screws has a big flat washer with a rubber disk underneath it.
| Screw end |
|---|
 |
Each of those two screws fits in a slotted holder inside the HS135.
| Slotted holder |
|---|
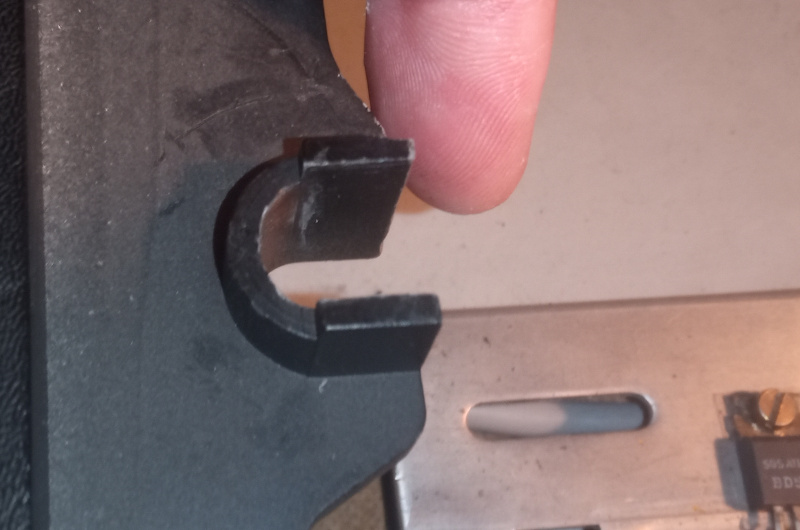 |
When the screws are tightened, they point straight down. The shank passes through the slot and the washers are under the slot. They keep you from lifting the turntable out.
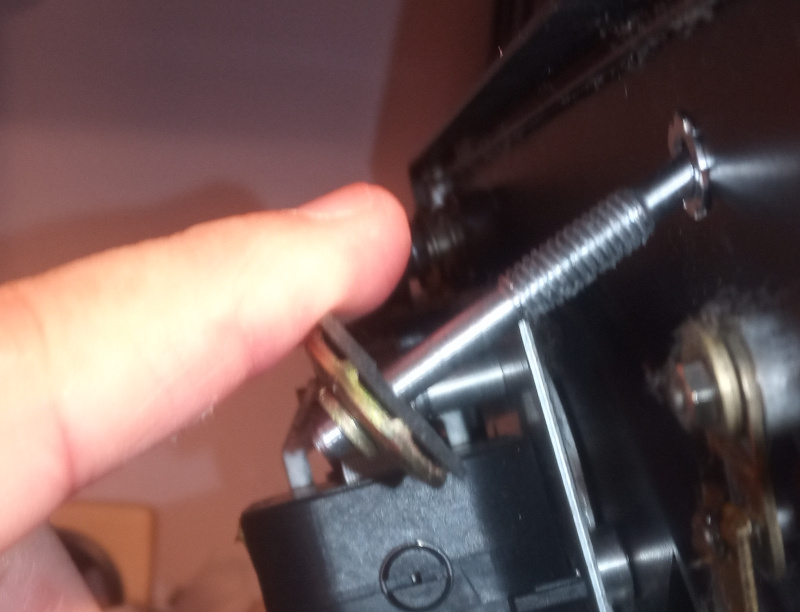
To get the screws out of the slots, you have to angle the screws by pushing the heads to the outside of the HS135.
| Angle the screws |
|---|
 |
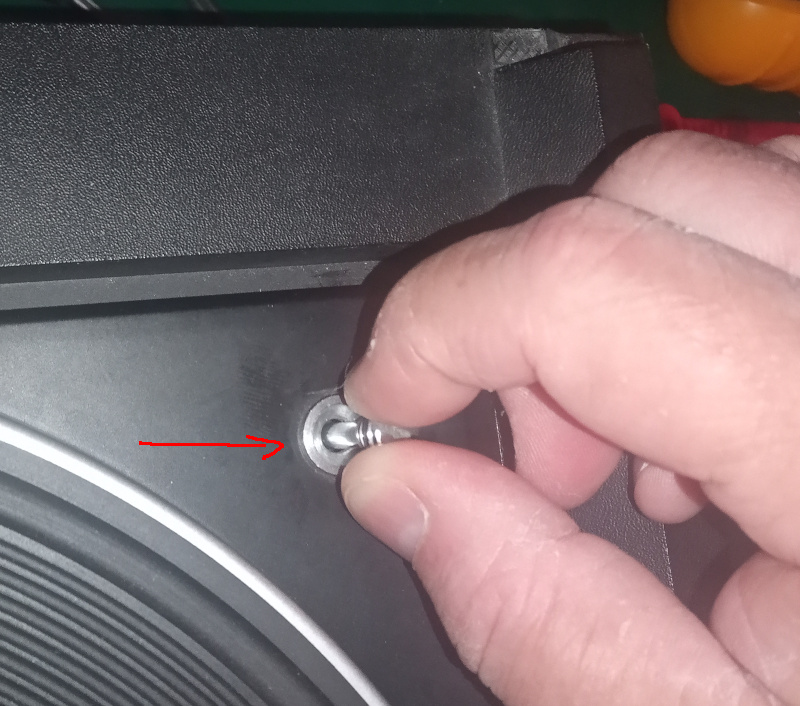 |
To get a screw unhooked, here’s what you do:
- Push the turntable down near the screw you want to remove. The turntable sits on spring loaded buffers, so you’ve got a few millimeters to push it down.
- Hold the turntable down, and angle the screw as shown in the pictures above.
- Hold the screw angled and let the turntable back up.
- Keep the screw angled and lift the corner of the turntable near the screw out of the HS135.
- Repeat for the second screw.
I found it much easier to take apart once I knew what it looks like on the inside.
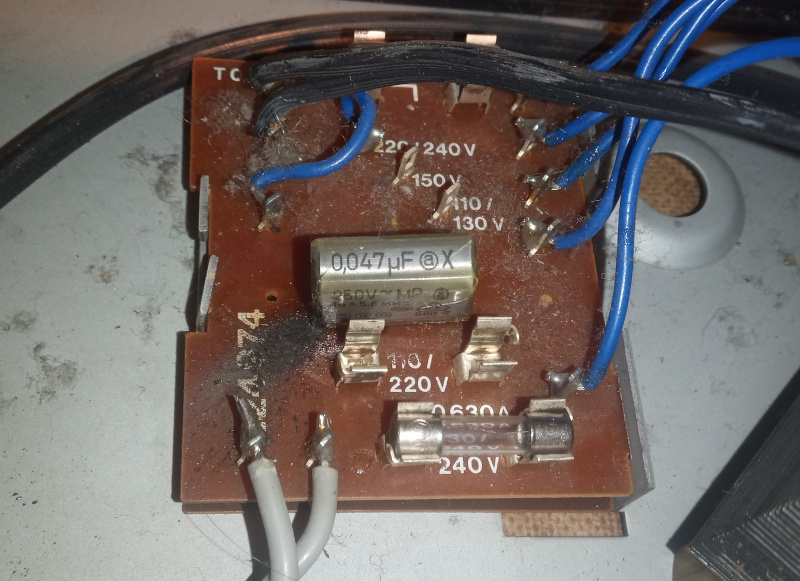
With the turntable out of the way, I found the part that burned out.
| Dead capacitor |
|---|
 |
I tracked down a service manual for the HS135 on the Audio Service Manuals site.
The burned out capacitor is a 47nF, X2 capacitor rated for 250VAC. When it went, it shorted the fused main “line” and neutral. Besides a burned out capacitor, one of the fuses went. That’s the 630mA fuse circled in red.
| Schematic |
|---|
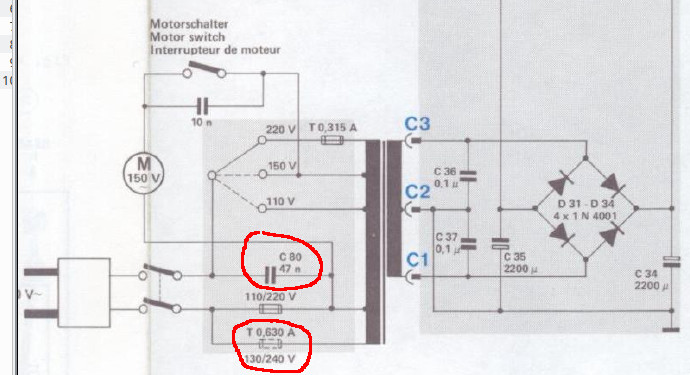 |
There’s two fuses shown there, one right above the other. There’s normally only one of them in the circuit. They are used to select the line voltage. For 240VAC, you use the lower one. For 220VAC you use the other one.
Since C80 is only there to supress interference when turning the motor on and off and since I only need the preamplifier output, I borrowed one of the 1A fuses from the power amplifier and removed C80 to test the HS135. Jiggered like that, the turntable runs and the preamplifier output is OK.
All I need to do is to replace the capacitor and the fuse and it’ll be electrically fine.
I’ve ordered the parts, and I’ll take care of the mechanical problems (including a bit of oil for the changer mechanism) over the next few days.
By next weekend I should have it all reassembled and ready to transfer the choir records.
I’ve done some reading (mostly on German language hifi enthusiast forums,) and it seems that C80 is known for going bad. It’s generally recommended to replace it with a modern part even if it is still OK. It isn’t question of if it will go bad. It’s a question of when it will go bad.
If you’ve gotten hold of a Dual HS135, see if C80 is still original. If so, replace it with a modern 47 nF X2 capacitor rated for over 250VAC.
That “X2” designator is important. Don’t use just any random capacitor with appropriate capacitance and voltage ratings. “X2” means it the capacitor is safety rated. It will withstand over voltage events to a specific level without going “bang,” and if it does fail short it will not catch on fire (though it may smoke and stink like crazy.)
The capacitors I’ve ordered cost 25 cents each. I ordered four of them and a ten pack of 630mA, 250VAC fuses. The shipping cost more than the parts. Don’t skimp on a few cents - doing it wrong may cause a fire.
“What’s that smell?” is a line from a science fiction novel by Joe Haldeman. If you get a chance to read Buying Time, I can highly recommend it.