HowTo: Solder by hand - First steps
Things are finally heating up.
HowTo: Solder by hand - Table of Contents
Check this handy chart to find the temperature you need for this task.
Now that you’ve got everything ready and the iron is hot, it’s time to actually do something.
For a first step, I’m just going to tin a piece of wire.
Tinning is a step you will almost always go through. Wires have to be tinned because they have no solder on them. When soldering through hole parts, you’ll often have to tin the pads around the holes. For surface mount devices (SMD,) you’ll usually have to tin the pads - the parts are usually pre-tinned.
The first thing you have to do is to… Brace yourself.
That’s it. Literally, brace yourself.
Sit close to the edge of your workbench. Pull the soldering iron out of its stand (remember to wipe it clean and poke a bit of solder on to the tip.)
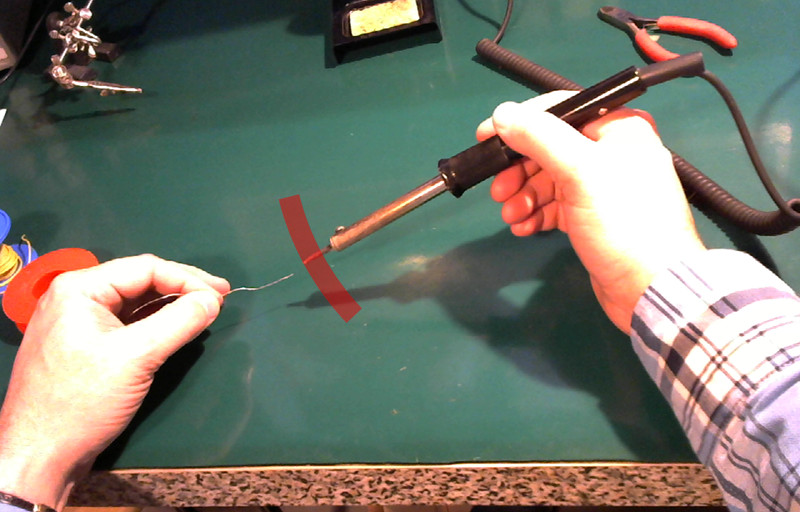
With the iron in your hand, brace yourself on the edge of the workbench.
Like this:
| Brace yourself |
|---|
 |
You will work through your wrist and fingers. You don’t have to put your full weight on your arm where it rests on the bench, but you do have to hold yourself steady with it.
See that red arc I drew down there by the tip of the iron?
That’s where you will work. You move things around to fit the arc. Your hand does not move. Do not stretch or strain your fingers to reach something. If you can’t reach it, move it.
While working, you will have to move the tip of the iron along the wire or work piece. Always arrange it so that any motion you have to make is along that arc.
| Setup |
|---|
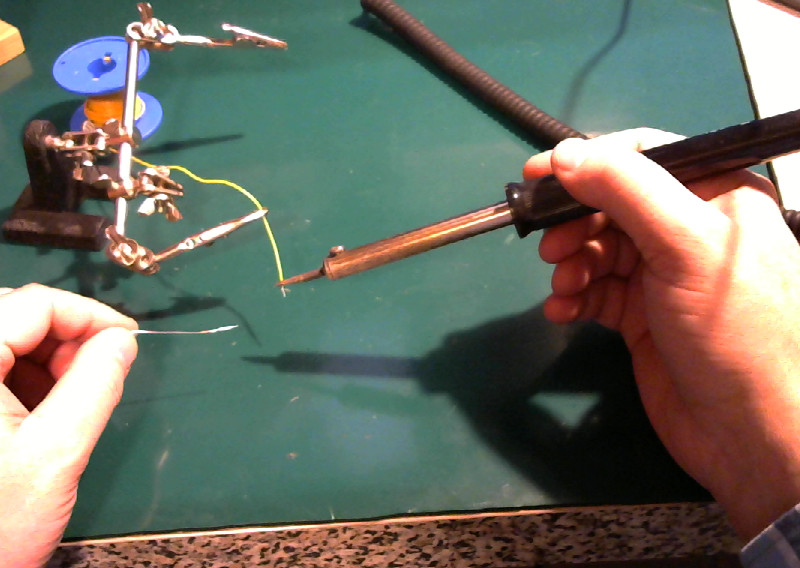 |
See how I’ve arranged things so that I can easily reach the wire and run the tip of the soldering iron up and down the length of the stripped wire?
Now, let’s bring things together.
| Blob of solder on the iron |
|---|
 |
I know you just put solder on the tip of the iron when you picked it up. Do it again, but we’re going to move right on to working on the wire. You want the surface of the tip covered in liquid solder- nice, bright, shiny. If you fiddle around getting to the next step, then the solder will turn gray. If it turns gray, poke some more fresh solder onto the tip.
Every time you do something with the iron, you want the tip to be shiny and clean.
So, poke the tip with the solder and get it shiny.
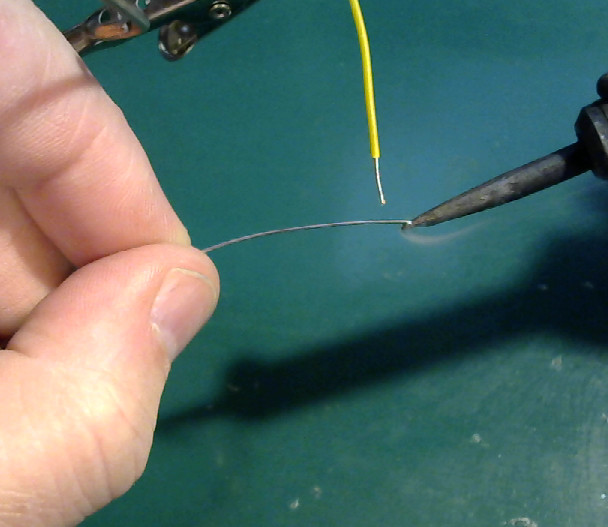
| Heat the wire |
|---|
 |
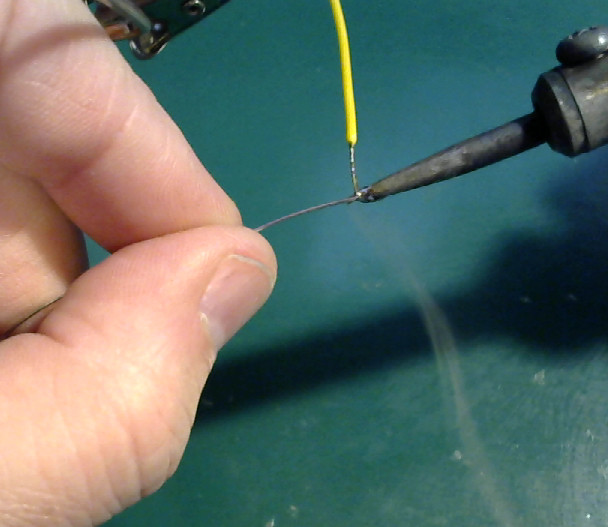
Put the tip of the iron under the wire, and touch it from the bottom. Lift up a little bit to make good contact.
Put the solder on the wire from the top, right above the tip of the iron.
Solder will melt and flow into the stranded wire. It will also flow down on the tip of the iron. That’s fine. It will actually help. Solder conducts heat better than just the contact between the tip and the wire.
Run the solder and the tip of the iron up and down the length of the stripped wire. The solder stays on top, the tip of the iron stays underneath.
The solder for the joint should always be heated by the work piece, never directly by the iron.
Solder only flows properly if the work piece(s) are hot enough.
In a good joint, the solder flows onto the work piece.
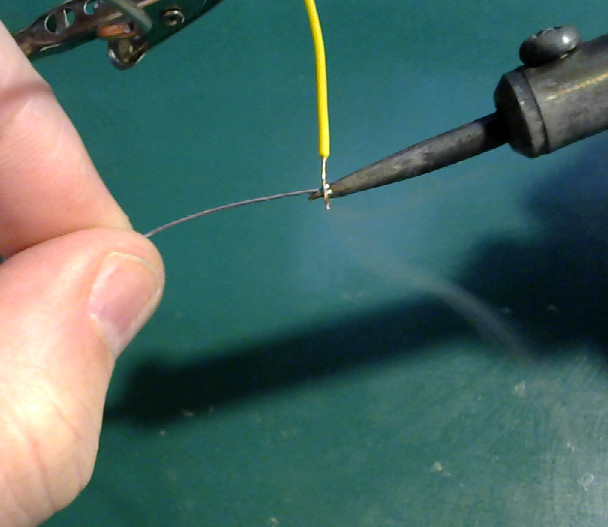
It should look like this when you are done:
| Tinned wire |
|---|
 |
Clean, shiny, evenly coated.
Try it yourself. Practice a bit. You should have no trouble tinning a piece of wire without burning the insulation or getting burned black gunk all in everything.
Solder will collect on the tip as you work. Wipe it off on the sponge.
If black junk builds up on the tip, wipe it off on the sponge. Then, turn the heat down a bit and add a bit of fresh solder to the tip of the iron.
If you find that the iron no longer melts the solder, turn it back up a bit. With a little practice, you will find a setting that lets you make clean joints quickly without burned black gunk building up on the tip of the iron.
You should prefer to work hot. That is, it is OK for the iron to be hot enough to slowly make black gunk. You can clean it off, and the higher temperature lets you work faster. It is better to be hot and fast than cooler and have to hold the iron on the work piece for a long time.
That ought to keep you busy for a while.
When you are done, poke the tip of the iron with some solder then put it back in its stand and turn it off.
The next post will explain how to solder wires together.