Reassembling the upper thread tensioner on a Pfaff 297 sewing machine.
Surprise: It’s broken!
One of my wife’s friends asked me to take a look at her Pfaff 297 sewing machine. It seems that the upper thread tensioner wasn’t working right and that it wouldn’t do embroidery/darning any more. She had already taken it to someone to have it looked at, but whoever it was couldn’t fix it. Sadly, it appears to have been a regular repair shop since there was a claim stub still stuck to it.
| Pfaff 297 |
|---|
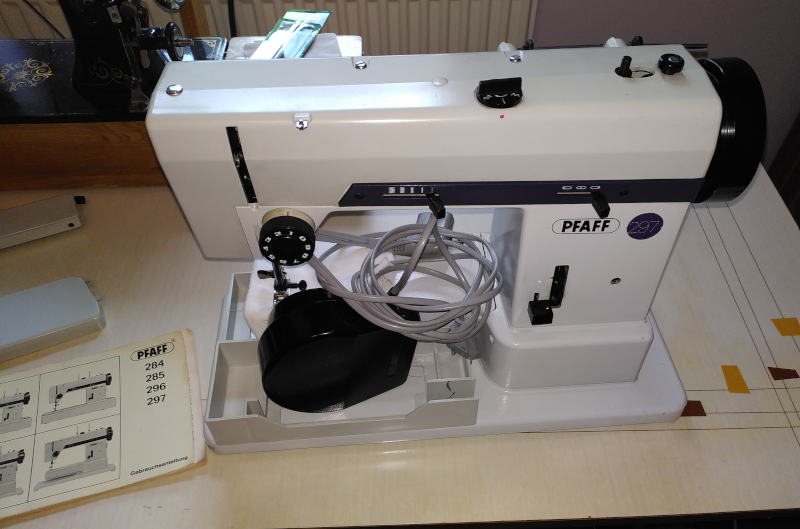 |
A quick turn of the upper thread tensioner knob showed that it could be turned far further than normal. I could crank it up until the slot for the thread was closed or loosen it so far that it fell off. I saw something similar a few weeks ago at the repair cafe when someone had disassembled the tensioner to clean it, then put it back together wrong so that the end stops on the knob didn’t work. I figured I had the same problem here.
| Not right |
|---|
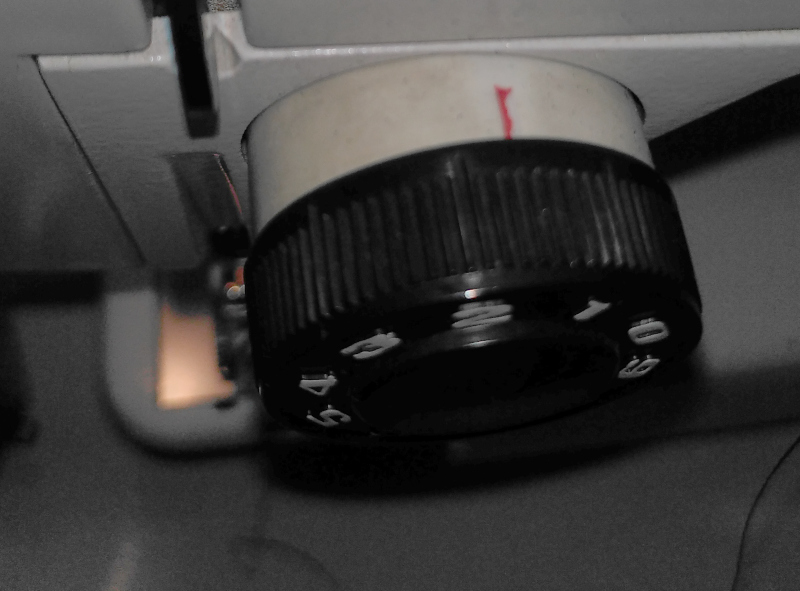 |
A quick search of the internet pulled up this German language forum post about someone trying to reassemble a Pfaff 294 tensioner. Since the 294 uses the same tensioner mechanism as the 297, the diagrams and discussion apply to the 297 as well.
The most immediately useful part was this diagram showing how all the pieces go together:
| Tensioner diagram |
|---|
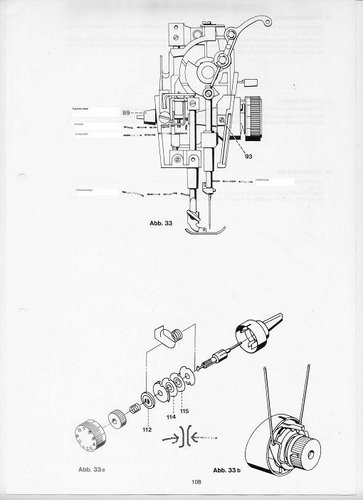 |
Unfortunately, the diagram doesn’t explain some of the trickier parts of putting things together. Since what description there is is in German, I thought it would be a good idea to put together a full description with photos.
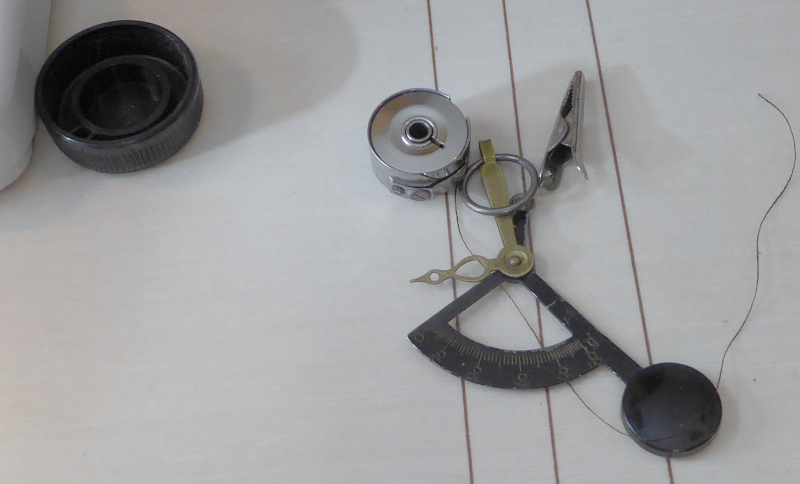
First off, all the pieces:
| Pieces parts |
|---|
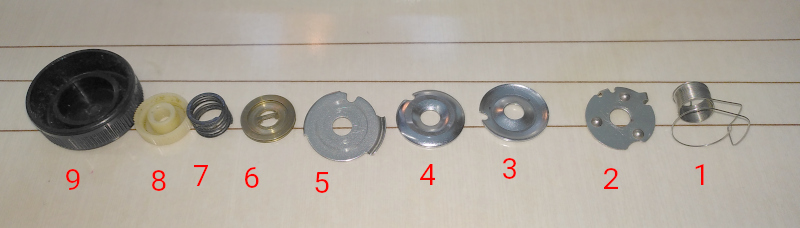 |
The parts are numbered in the order they go on the machine. Start on the right with number 1, then work your way to the left.
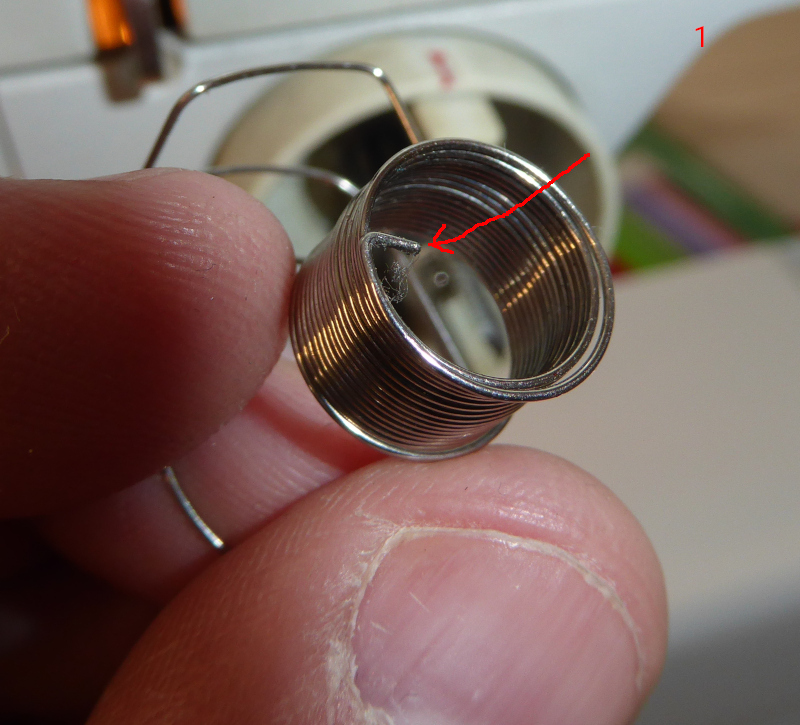
Number 1 is the trickiest of all the parts. You have to pre-tension it and keep the tension while installing all the rest of the parts.
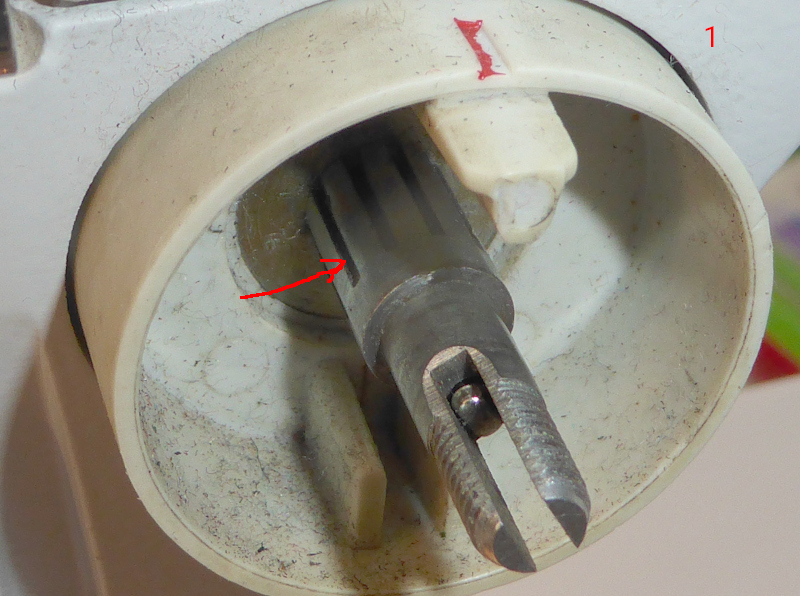
There’s a little nub on the inside of the main spring loop on number 1. That little nub goes in one of the slots in the screw inside the machine.
| Nub |
|---|
 |
| Slots |
|---|
 |
You want about 1/4 turn of tension on the spring when things are all assembled. You get that by installing the spring with the thread catch pointing down instead of up.
| Spring down |
|---|
 |
 |
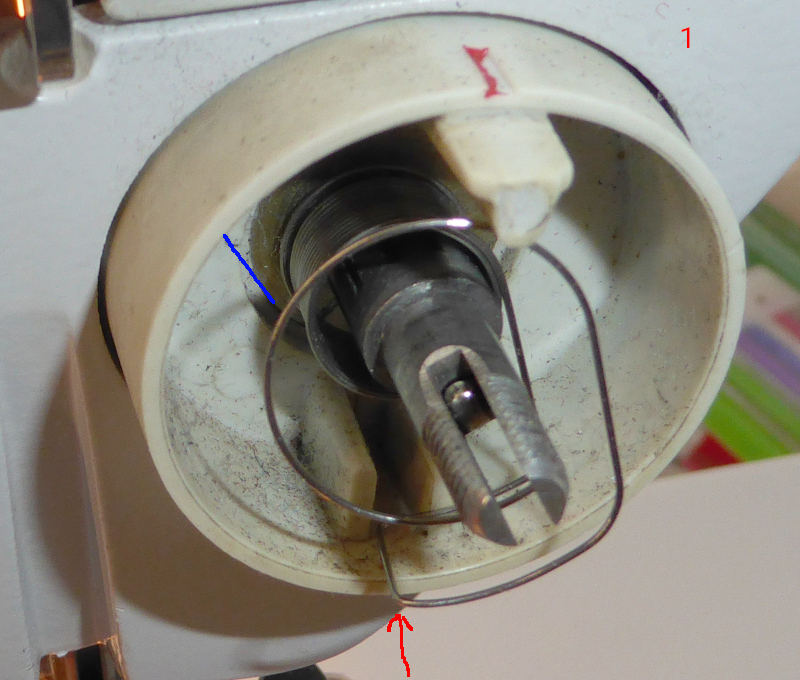
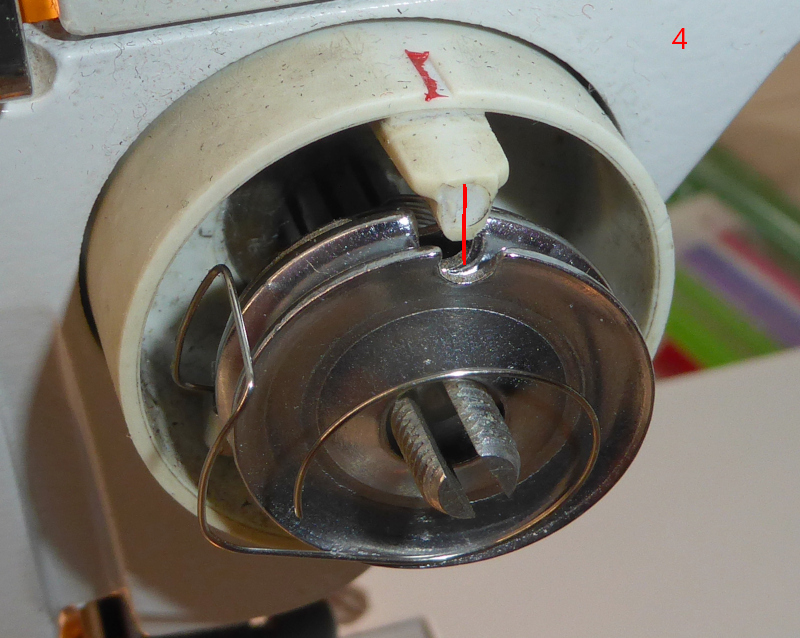
Put the spring in as shown and let the nub slip into whichever slot it fits in. The first picture shows the spring at the bottom of the hole. Put the spring in in that position and get the nub in the slot. When finished, the straight side of the spring (red line) will be up where the blue line is.
Once the spring is in and the nub is in the slot, push the spring clockwise so that it can sit on the plastic stop inside the hole. That’s the second picture up there.
During all the following steps, you have to make sure that the nub stays in the slot and that the spring doesn’t get jammed between the other parts.
Next up is number 2, the pressure plate.
| Pressure plate |
|---|
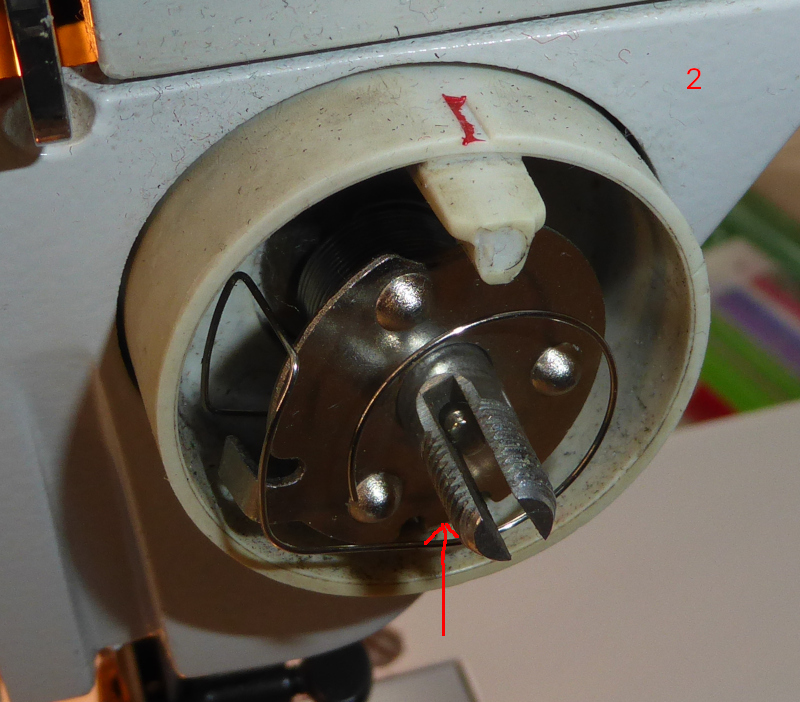 |
The pressure plate only goes in one way. Make sure the tab goes in the slot in the housing (red arrow.)
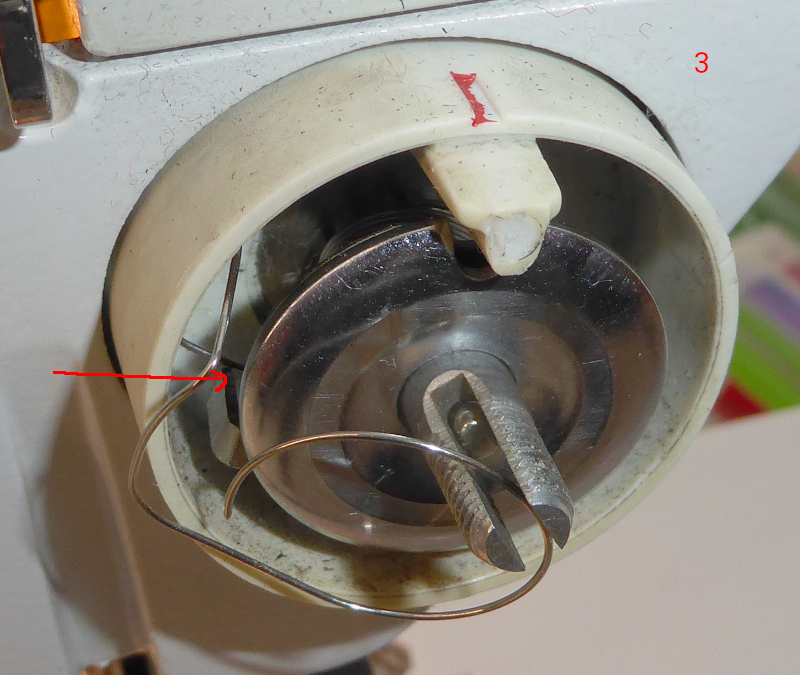
The tensioner disks come next. Put number 3 in with the round side out then number 4 with the rounded side in.
| Tensioner disks |
|---|
 |
 |
Raise the spring up over the tab on the pressure plate (red arrow.) This puts the spring in the correct position. Keep your eye on it while installing the other parts and make sure the spring stays above the tab.
The tensioner disks have cutouts that go over the peg in the housing to keep them aligned (red line in the second picture.) Make sure that the disks are aligned with the peg.
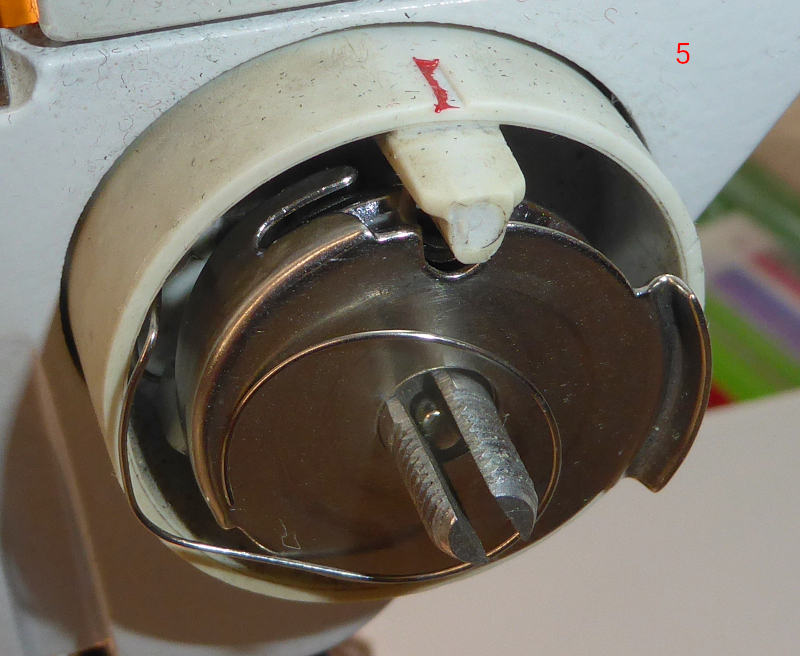
Part number 5 is the thread guide. Put it in as shown, making sure that the cutout is aligned with the peg.
| Thread guide |
|---|
 |
Next is part 6, the tension release plate.
| Tension release plate |
|---|
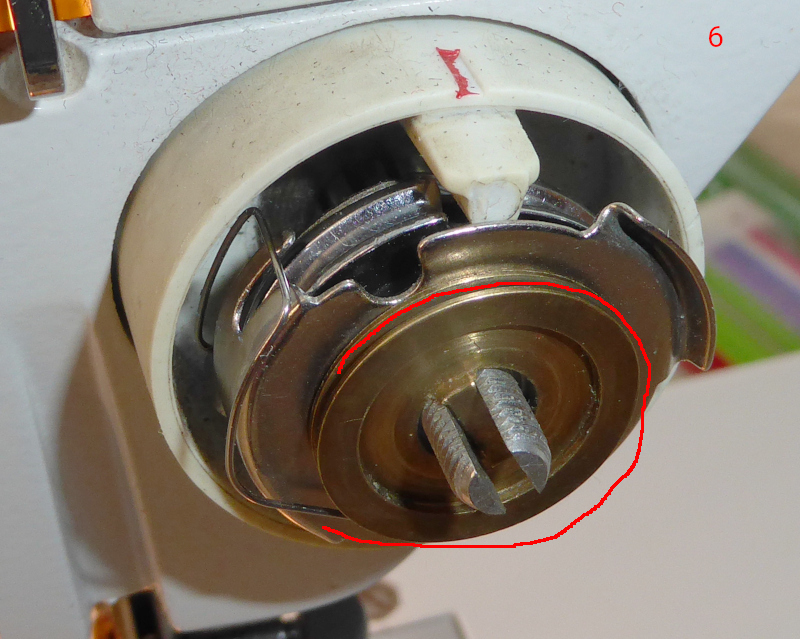 |
Put the plate in as shown, then loop the free end of the spring in the groove around the tension release plate. You should be able to push the spring up. It should snap back down when you release it.
Now put in part number 7, the tension spring. You’ll have to hold it in place until you get the next part installed.
| Tension spring |
|---|
 |
Part number 8 holds the whole thing together. Screw it on carefully. It is made of nylon. If you cross thread it or strip the threads on the metal screw, then it is ruined and you’ll have to try and find replacement.
| Tensioner knob |
|---|
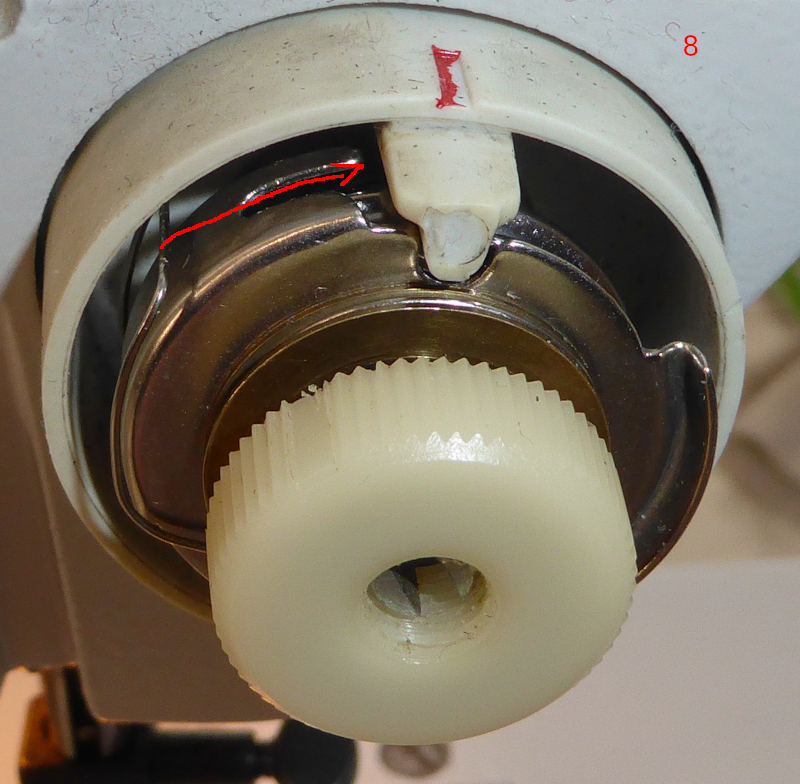 |
Check to make sure the spring still moves freely. You should be able to push it as shown (red arrow.) It should snap back when you release it.
Adjust the thread tension following the guide in this earlier blogpost.
| Adjust the thread tension |
|---|
 |
- Adjust the bobbin case to 40 grams.
- Adjust the upper tensioner to 40 grams.
- Fine tune the upper tension so that the stitch forms properly (the twist inside the cloth.)
- Press the black tensioner knob on the white tensioner knob with the number 5 next to the red index mark on the machine.
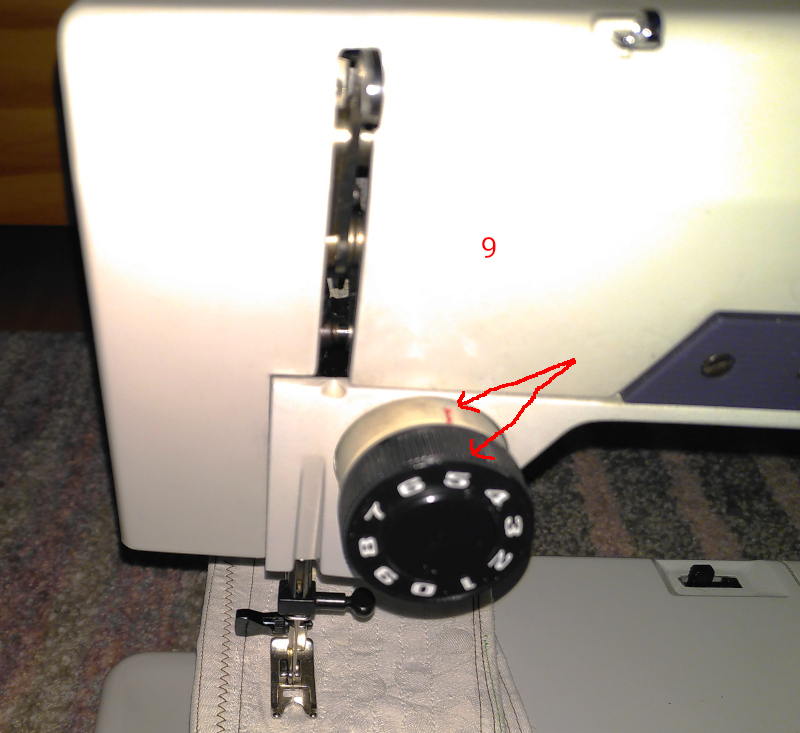
Part number 9 is the black tensioner knob with the scale marked on it. With the upper and lower tension set the same, putting the knob on at position 5 allows you all the adjustment range you should need when sewing.
| Reinstall the tensioner knob |
| –————————— |
 |
At this point, you should have a functional upper tensioner.
At this point, however, I did not.
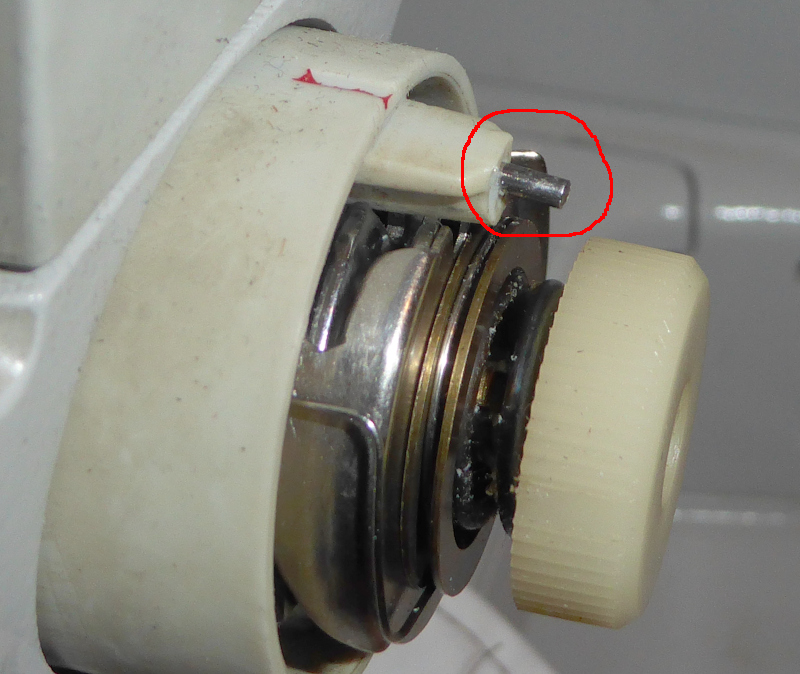
It turned out that the alignment peg in the machine was broken. It allowed you to rotate the black knob outside of the 0-9 range - as in the beginning, you could crank the tension up so high the thread slot closed or back it out so loose the knob would fall off.
The solution here was to drill a 1.5mm diameter hole the long way through the peg, then glue a 1.5 mm diamter steel pin in place. The hole is about 15 mm deep, the pin is about 20 mm long. The pin needs to be long enough to engage the stops inside the black knob but short enough not to drag on the inside of the knob.
| Replaced peg |
|---|
 |
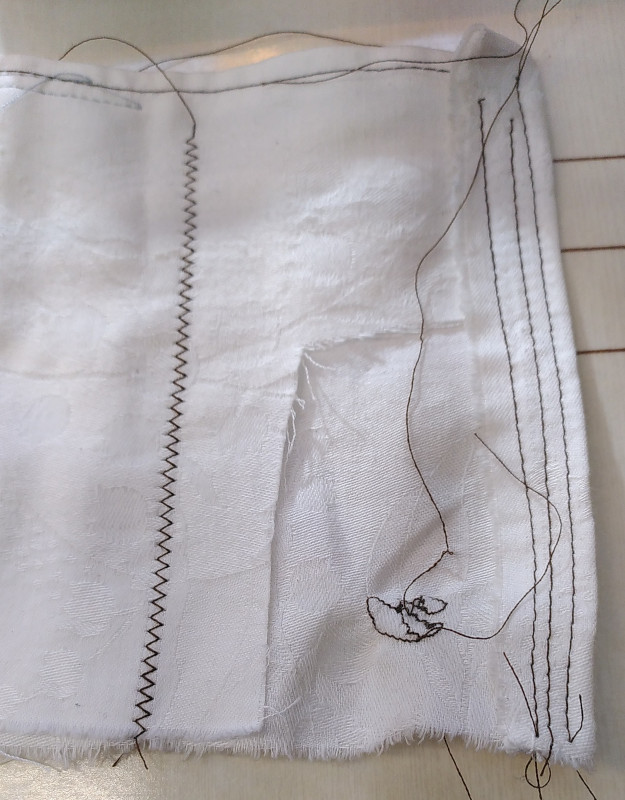
With all that done, the machine sews straight stitches and zig-zags just fine - even the embroidery/darning function works.
| All done |
|---|
 |