Thread tension adjustment in vintage (and not so vintage) sewing machines
Get it right the first time.
Skip the story telling and go straight to getting things done.
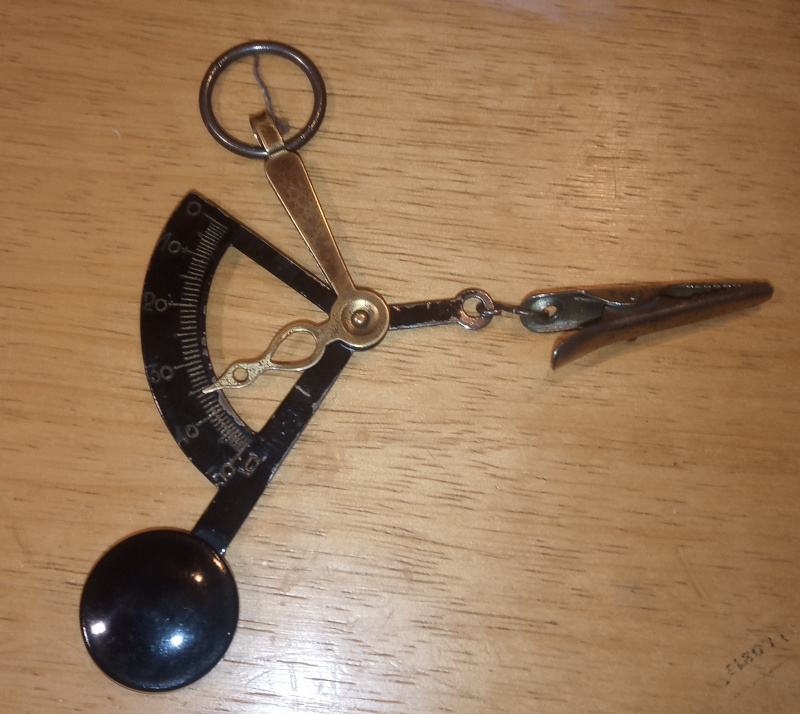
| Use a postage scale for sure-fire thread tension adjustment |
|---|
 |
At the moment, we have four sewing machines in the house.
- We have the Pfaff 262 from the mid 1960s that is my wife’s main machine.
- We have the Pfaff 31 from about 1939 that I’ve been restoring for my daughter.
- We have my Adler class 8 from about 1926 that has been the subject of a long series of posts on getting an old machine back in shape.
- We have the heretofore unmentioned AEG 376 that my wife uses when she needs a machine with a free arm. She’s had it for several years, but you can still buy them new on Amazon.
That’s a fair range of vintage to new, plenty enough to try out my theories on how to properly adjust the thread tension.
There’s been an incredible amount of ink and electrons wasted on the subject of adjusting sewing machine thread tension. Everywhere you look, people tell you the same thing: Thread it up, sew a test seam, increase or decrease the upper tension as needed. Sew another seam and repeat until the seam looks good.
That does work - if you don’t mind the wasted time, the wasted thread, the wasted cloth, and the frazzled nerves - and the bird nests, of course. Always the bird nests.
There is a much easier way that reduces the waste and the wear and tear on the nerves - and eliminates the bird nests entirely.
I spent a couple of hours this evening proving my ideas by adjusting the thread tension on three of our machines. The Adler is sidelined at the moment - I have the bobbin holder assembly (“Brille” in German) removed and the tensioning mechanisms disassembled for a more thorough cleaning and polishing . There’s a story behind that. I’ll tell you all about it in a separate post.
To adjust the thread tension on your sewing machine, you need two things: a small scale and the user’s guide for your sewing machine.
I use a vintage postage scale that is marked in grams. That’s it up there in the first picture.
You can buy such scales new fairly cheaply. You can purchase spring scales that do the same job (though they tend to be more expensive.) You can also scour the fleamarkets, garage sales, and eBay to find a vintage scale to go with your vintage sewing machine.
You’ll find some marked in grams (like mine) while some will be marked in ounces (more typical in the United States.) The spring scales are often marked in newtons as well as grams.
The range your scale needs depends somewhat on the machine you use.
- The Pfaff 31 needs a scale up to about 40 grams - that’s about 1 and 1/2 ounces (1.5 ounces.)
- The Pfaff 262 and my Adler class 8 need one that goes up to maybe 50 grams (1.75 or 1 and 3/4 ounce.)
- The AEG starts at around 45 grams (1.6 ounces.) That’s the lowest you can set the upper tension. I couldn’t check how high it goes on the highest setting because it was off the top end of my little postage scale.
It doesn’t matter whether the scale reads in grams, ounces, or milliapples. All that matters is that it can cover the range of tension that your machine uses and that you can read it with some accuracy. You are comparing two values on your machine, not values from some chart somewhere.
How to adjust the thread tension with a scale
Starting:
- Get out the user’s guide for your machine and thread it according to the instructions. Do it exactly as described.
- Wind a bobbin with thread and load the bobbin into your machine according to the instructions.
- Follow the instructions for pulling the lower thread up for use.
You should now have something like this:
| Ready for tension adjustment |
|---|
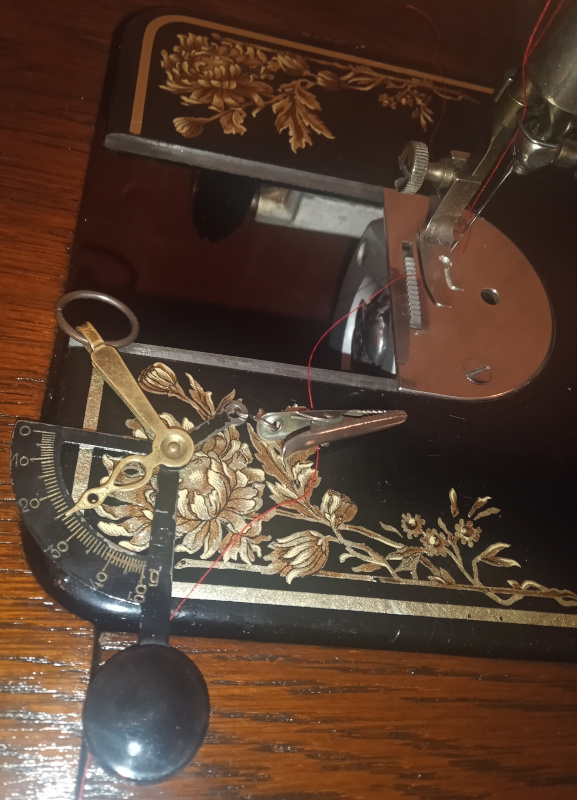 |
- Clip the lower thread (from the bobbin) to your scale.
- Measure the tension on the lower thread by pulling the scale slowly up from the machine. Make sure that the thread runs freely and doesn’t drag on anything.
- You want to pull the thread slowly and evenly so that the scale needle doesn’t jump around. Take note of the scale reading as the thread is moving - that’s the value that matters.
| Measuring the lower tension |
|---|
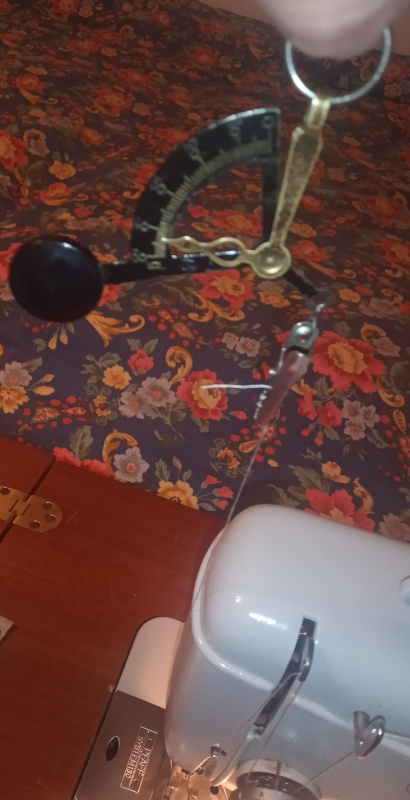 |
Take note of the tension - in this case about 45 grams. You will have to adjust the upper tension to match this value.
- Pull the upper thread out of the needle back to the first part of the tensioning system that will let you pull the thread upwards.
| Unthread the needle |
|---|
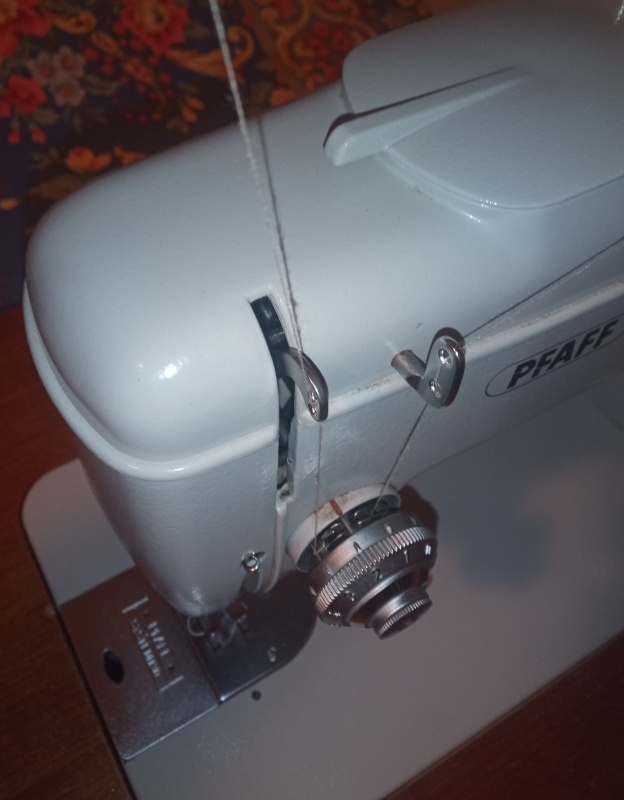 |
- Lower the presser foot. This is needed because many machines (including my Adler) release the thread tension when the presser foot is up.
- Measure the upper thread tension.
| Measure the upper tension |
|---|
 |
- Adjust the upper thread tension to match the lower thread tension by turning the tension adjuster and remeasuring. Measure, adjust and repeat until the upper thread tension matches the lower thread tension.
- Thread the machine again - following the instructions in the user’s guide exactly.
- Sew a test seam and give the upper thread tension a little fine tuning to make the stitches perfect. This is where all the other descriptions on the internet start - look to see that the top and bottom are even and that the knot is in the fabric rather than on one side or the other.
| Fine tuned tension |
|---|
 |
That image is from the Adler class 8 user’s guide - the “guess, adjust, sew, repeat” method has been around for a long time.
By adjusting the thread tension with the scale you avoid setting the tension so loose that the thread can form bird nests on the bottom side.
Adjust by the scale, sew a test seam, fine tune, done. Only one test seam on one scrap, and no bird nests.
Dealing with problems
That description will get you through most things.
If the bobbin tension has been maladjusted, you may run into other problems - including one that looks like a bird nest but isn’t.
Simply strange things
You would be surprised how often you don’t do things “by the book.” If the stitches look funny or you get really bad loops on the bottom side, check to make sure you threaded everything like the user’s guide says. I messed up like that several times while making pictures this evening.
Not a bird nest
All machines have a certain minimum tension that they need to work properly. If you go below that tension you will get long loops of string on the bottom of your material.
| Worse than a bird nest |
|---|
 |
I made that picture with a really low bobbin thread tension on my Adler. The scale says 15 grams - about 0.35 ounces. The thread simply could not make it around the bobbin case and just hung up. If you follow the usual howto descriptions on the internet, you’d try to increase the upper tension or lower the bobbin tension - both are the wrong thing to do. The solution here is more tension on the bobbin.
When the upper and lower tension match, but are too low, the machine can’t pull the thread through the bobbin race and the hook mechanism. The hook pulls the thread out of the bobbin and releases it as it should, but the thread isn’t pulled tight enough for it to go around the outside of the bobbin case. You get great long loops that can jam a machine worse than bird nests.
For the Pfaff 31, the lower limit is something below 20 grams - about 3/4 ounce (0.75 ounces.) For the Adler it is about 35 grams - about 1 and 1/4 ounce (1.25 ounces.) The Pfaff 262 is around 30 grams - about 1 ounce.
If you adjust the tension as described above and get long loops, adjust the tension on the bobbin upwards by about 10 grams - about 1/3 ounce (0.33 ounces.) Adjust the upper tension to match and try it again. I have never found a table of proper thread tensions for various machines. If yours is incorrect, you’ll just have to figure it out the hard way then make a note to yourself to never adjust the bobbin tension below the value you find.
This minimum tension is also the reason some machines are better at sewing fine cloth (chiffon and similar materials) with fine thread. For that type of cloth, you need a low tension to keep from puckering the material. If the minimum tension for your machine is higher than the low tension it takes for fine cloth and thread, you will get bad loops - and there’s nothing you can do about it except use a different machine that has a lower minimum tension.
Of all our machines, the Pfaff 31 is best suited for fine cloth and thread - I’ve had it adjusted down to about 20 grams without loops. The Pfaff 262 is next, followed by the Adler. The AEG is just completely out of the running - its lowest tension is stupidly high.
Complete mismatch between bobbin tension and upper thread tension
The AEG was completely off kilter.
The bobbin case was adjusted to about 25 grams while the lowest setting for the upper thread tension is about 45 grams. The upper tension adjustment has stops at zero and nine. Turned all the way down to zero, the upper thread tension was reading 45 grams.
There was no way to adjust the upper thread tension to match the bobbin case tension.
The solution here was to adjust the bobbin case tension.
- Set the upper tension to mid-scale (the AEG ranges from zero to nine, so set it to five.)
- Measure the upper tension with the scale.
- Adjust the bobbin case tension to the same as the upper tension.
| Adjust the bobbin tension |
|---|
 |
Tighten the screw for higher tension, loosen the screw for lower tension.
You mostly shouldn’t need to adjust the bobbin case tension. A thicker or thinner thread changes the tension up or down, and you can compensate for that with the upper tension adjustment.
Sometimes you’ll get a bobbin case on a used machine that has been incorrectly adjusted, or some clown at the factory was daydreaming instead of adjusting the bobbin case on your new machine.
For really fine cloth and thread, though, you may need to lower the bobbin tension to keep from puckering the material. It’s probably best to get an extra bobbin case and use it for such specialties while keeping another case adjusted for everyday stuff.
That’s pretty much it. Everybody who tells you that the upper thread tension and lower thread tension must match is correct - they just don’t tell you how to do it properly.
If you try my method and find it works, drop me a line in the comments and let me know what tension settings you use on your machine.
If you try my method and it doesn’t work, drop me a line and explain what went wrong. Include pictures and measurements, and I’ll correct my descriptions to make it work.
I’ve not been doing this very long, so it is entirely possible I’ve missed something or gotten something wrong. Corrections are welcome, as well as hints to things I don’t have the experience to think of by myself.