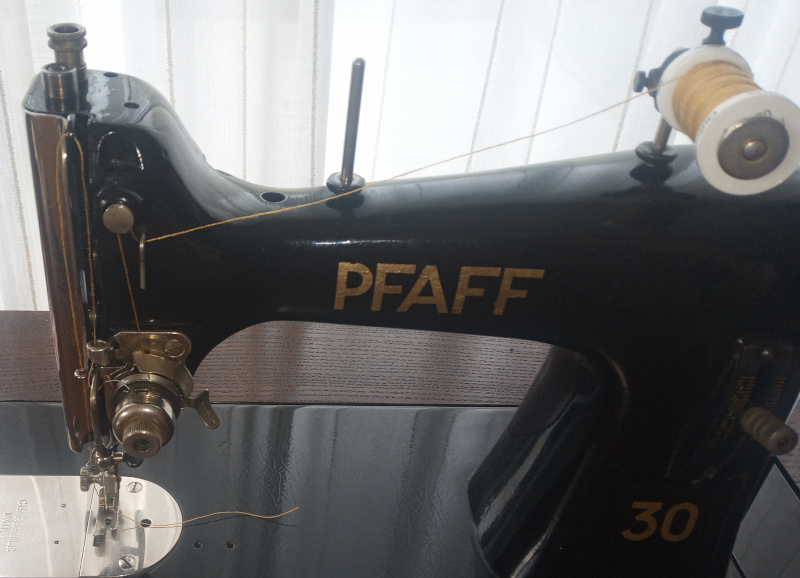
The Pfaff 30 sewing machine - Threading the Pfaff 30
Another change in plans.
Click here to see all the Pfaff 30 posts.
I was going to write a post about darning with the Pfaff 30 - I had a pair of blue jeans with a hole in the back side that needed to be patched.
I did sew the hole shut, but the results are very far from anything I’d want to use to explain a process. The two biggest problems were an inexperienced user (me) and a hole in a bad spot. The hole was parallel to the seam of one of the back pockets, leaving very little room to work the presser foot around the hole for darning. After several (messy) attempts, I gave up. I probably should have removed the pocket and put it back on after patching the hole, but that didn’t occur to me at the time (total lack of experience, there.)
Instead of showing you how I made a mess, I thought I’d show you something that is hard to see in the user’s guide.
The manual for the Pfaff 30 (and 31) is available from Pfaff in German and in English. Both copies are poorly scanned, rendering most of the photos illegible.
I have taken the liberty of cleaning up the manuals a bit so that they at least make good use of printer pages.
- Resized and scaled Pfaff 30 German manual, two A5 pages per A4 sheet.
- Resized and scaled Pfaff 30 English manual, one A6 page per A4 sheet.
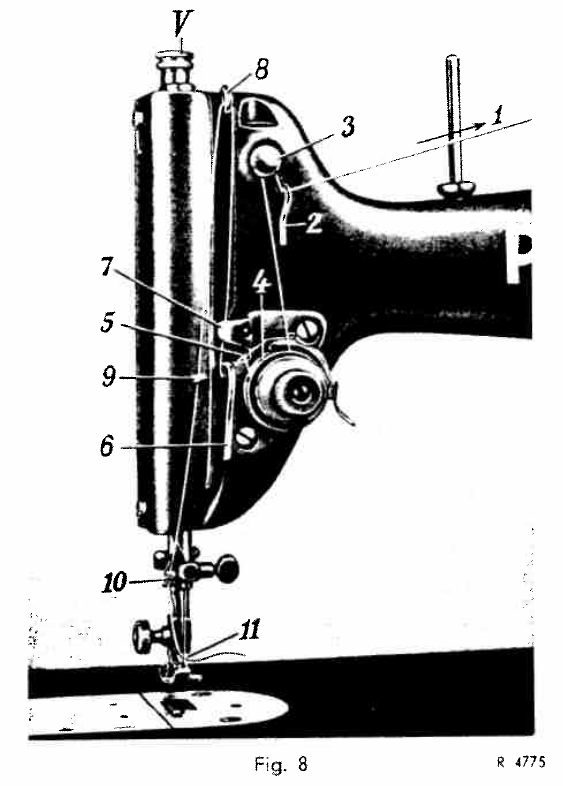
As you can see, the drawings of the threading process in the manuals are not all that great. They probably looked fine in the originals, but the scanning process mangled them pretty badly.
| Original threading diagrams |
|---|
 |
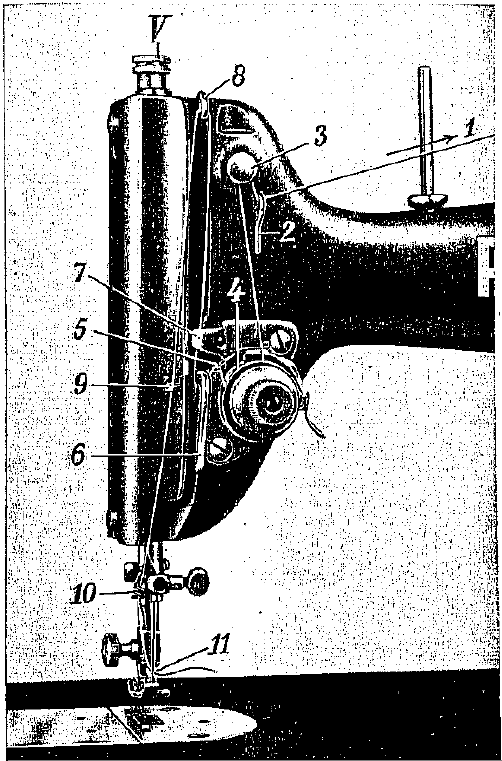 |
Pfaff seems to have used the same drawing in both, but both were mangled in different ways when they were scanned. The copy from the English manual was “smooth filtered” and lost details. The German copy seems to have been scanned in black and white rather than gray scale, again losing details.
To make up for the fuzzy originals, here’s a series of photos showing how to wind a bobbin and thread a Pfaff 30.
Warning: There’s a lot of photos for this. Once you know how to do it, it’ll only take you seconds to thread the machine or to set it up to wind a bobbin. It just looks like a lot of stuff when it’s all laid out step by step.
Wind a bobbin
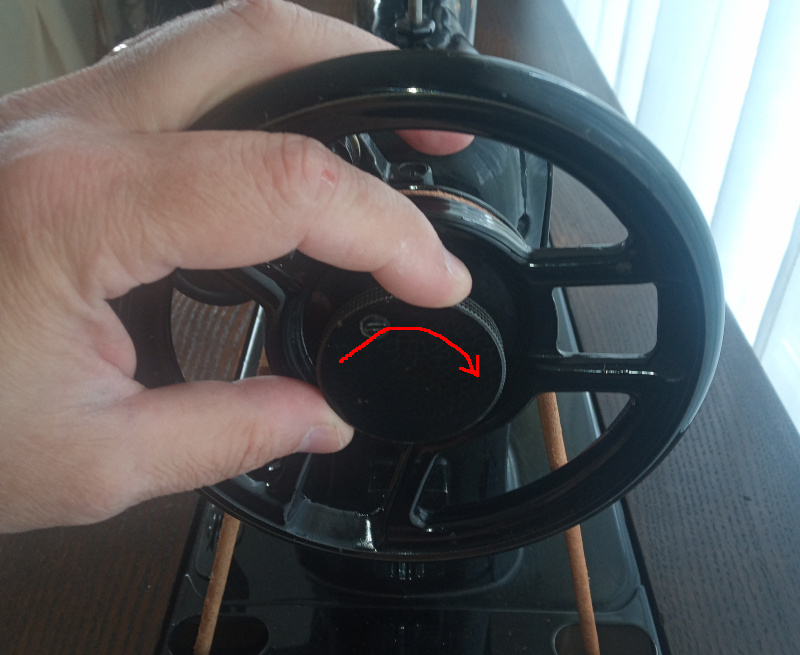
Before winding a bobbin, you have to disengage the drive clutch.
| Disengage the clutch |
|---|
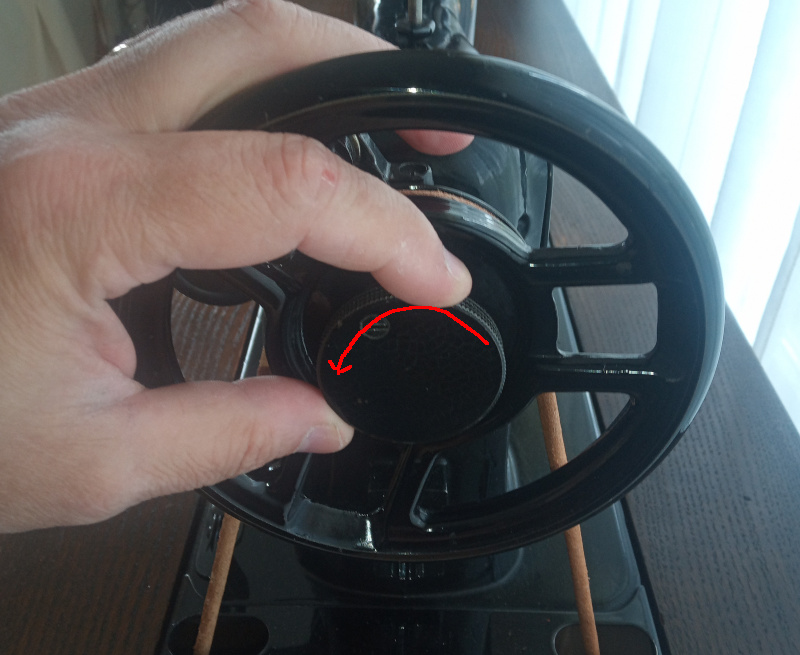 |
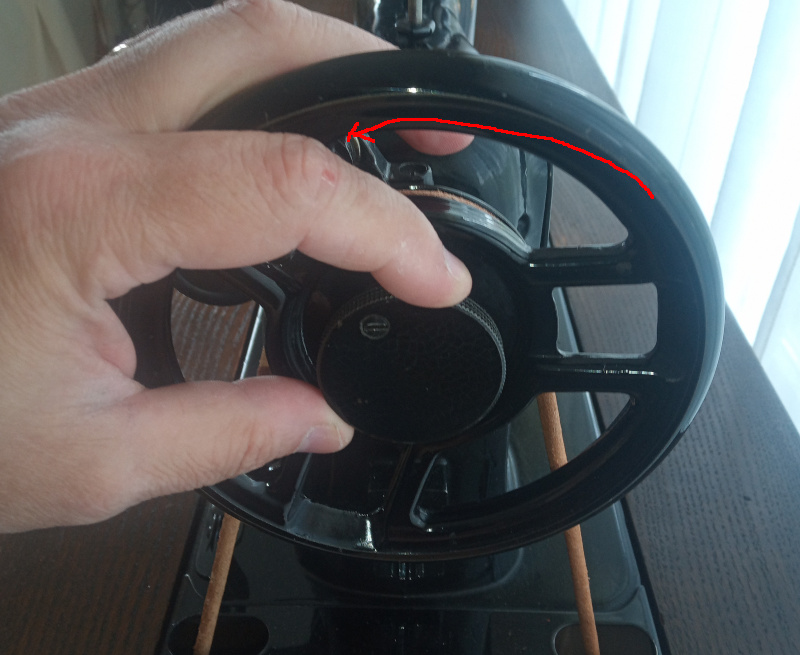
The picture shows me doing it one handed. That’s only because I had to work the camera with one hand. It really takes two. Hold the outer rim of the balance wheel in one hand and loosen the knurled knob in the middle.
This prevents the sewing mechanism from running while you are winding the bobbin.
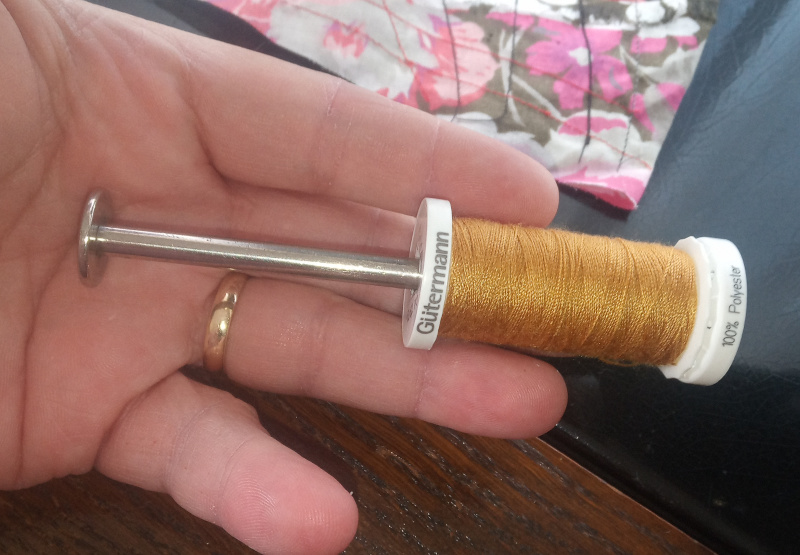
Use the “transverse spool pin” to hold the thread spool. Given that that machines are decades old, the transverse spool pin may have gotten lost. In that case, just put the thread spool on the upright spool pin.
| Transverse spool pin |
|---|
 |
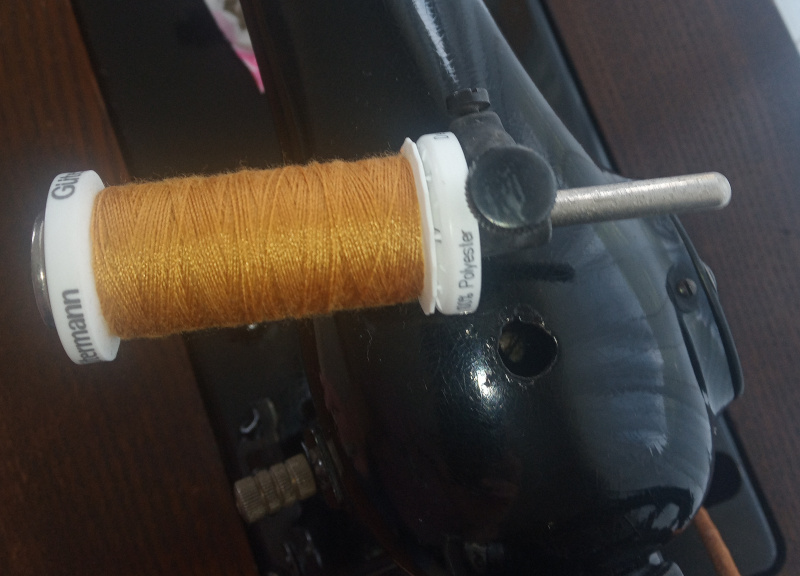 |
The thread goes down from the spool, through the split ring, then between the two spring loaded plates. Make sure the thread goes between the plates - they maintain the tension on the thread so that the bobbin is smoothly wound.
| Bobbin winder tension |
|---|
 |
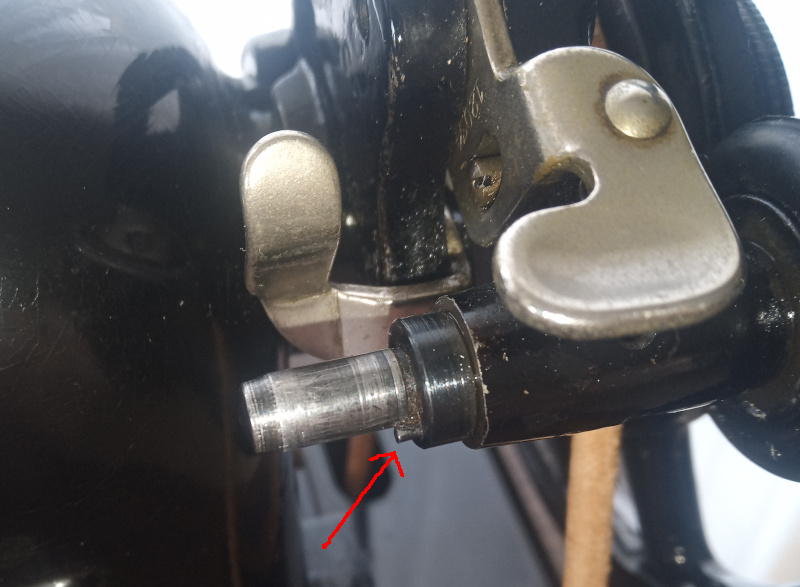
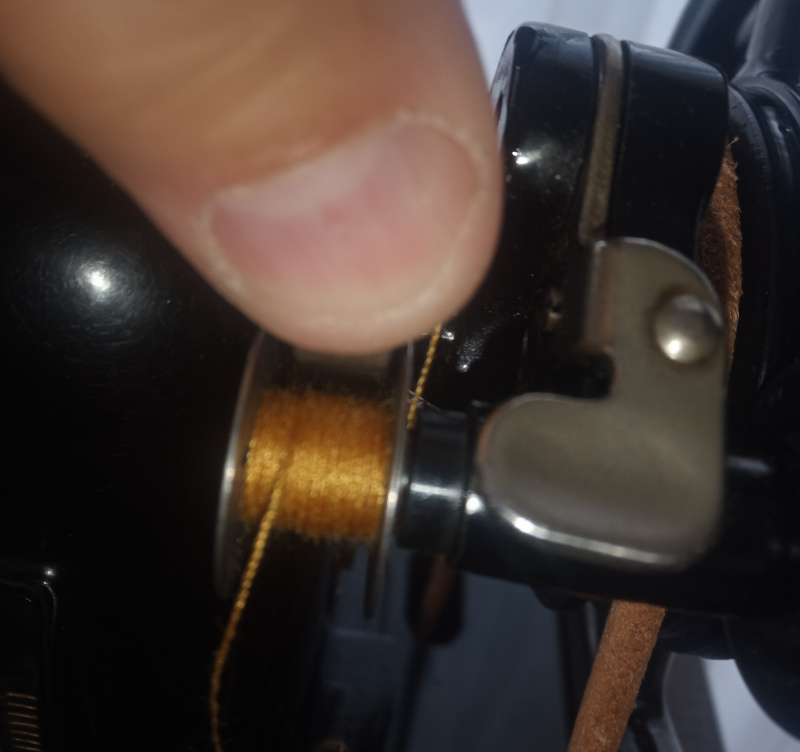
The thread goes through the slot in the bobbin.
| Thread the bobbin |
|---|
 |
The slot in the bobbin goes on the matching peg on the winder.
| Put the bobbin on the winder |
|---|
 |
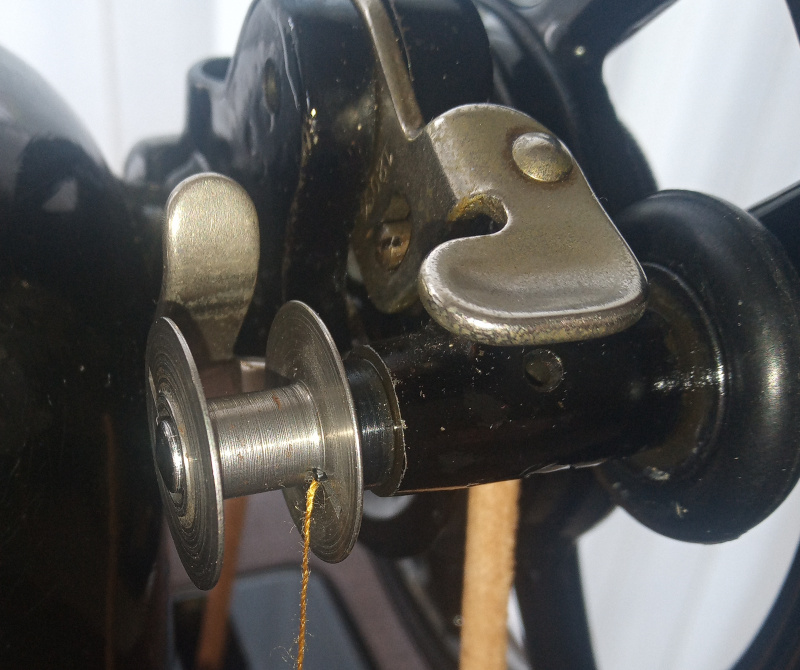 |
The thread is held in place by the peg on the winder.
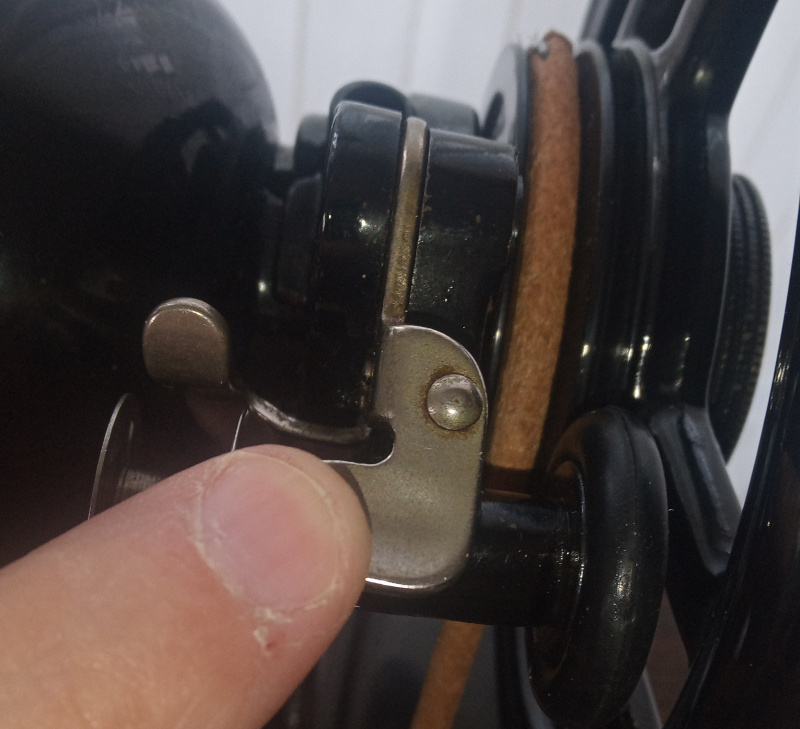
Push the lever to engage the winder. Push it down until it clicks and latches in place.
| Engage the winder |
|---|
 |
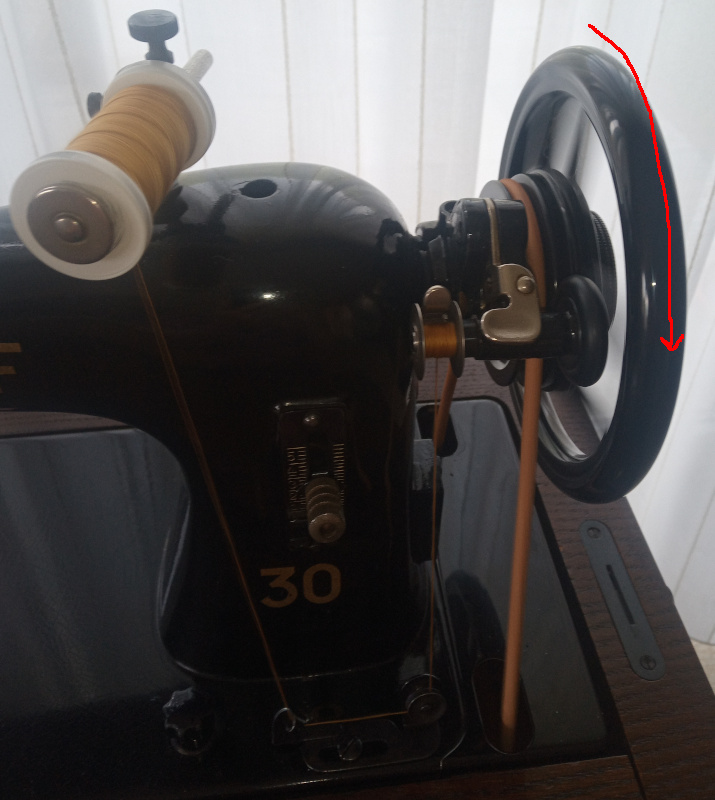
With the bobbin loaded, wind the thread back onto the spool to take up the slack.
Pump the treadle so that the balance wheel rotates counter clockwise, as shown in the picture.
| Wind the bobbin |
|---|
 |
The bobbin winder will automatically disengage when the bobbin is full. If you don’t need a full bobbin, you can stop winding and push the tab back to disengage the winder.
| Disengage the winder |
|---|
 |
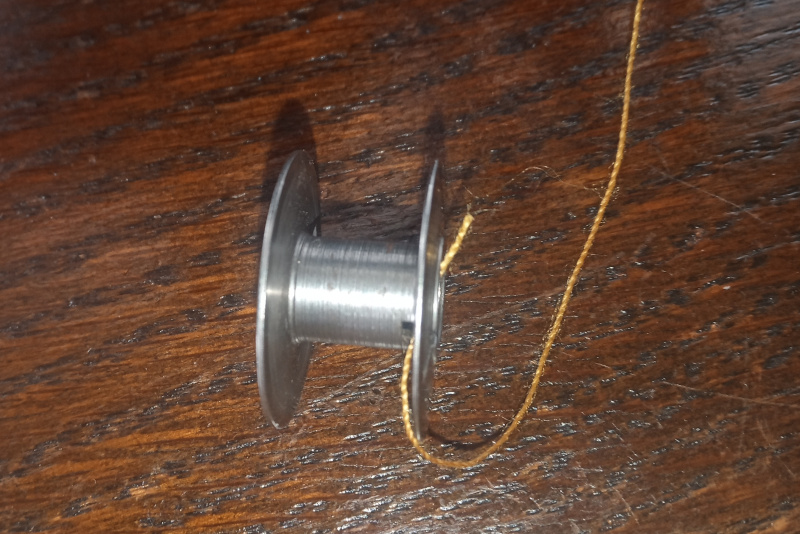
Take the bobbin out of the winder, cut it loose from the spool, and set it aside while you thread the machine.
Remember to reengage the drive clutch so that the machine will sew normally.
| Reengage the drive clutch |
|---|
 |
Again, the photo shows me doing it one handed but you’ll really need two hands to do it.
Thread the machine
Lift the presser foot. I forgot to take a picture. Lift the lever behind the presser foot. Besides raising the presser foot, it also releases the main tensioner. You can’t thread the machine with the presser foot down.
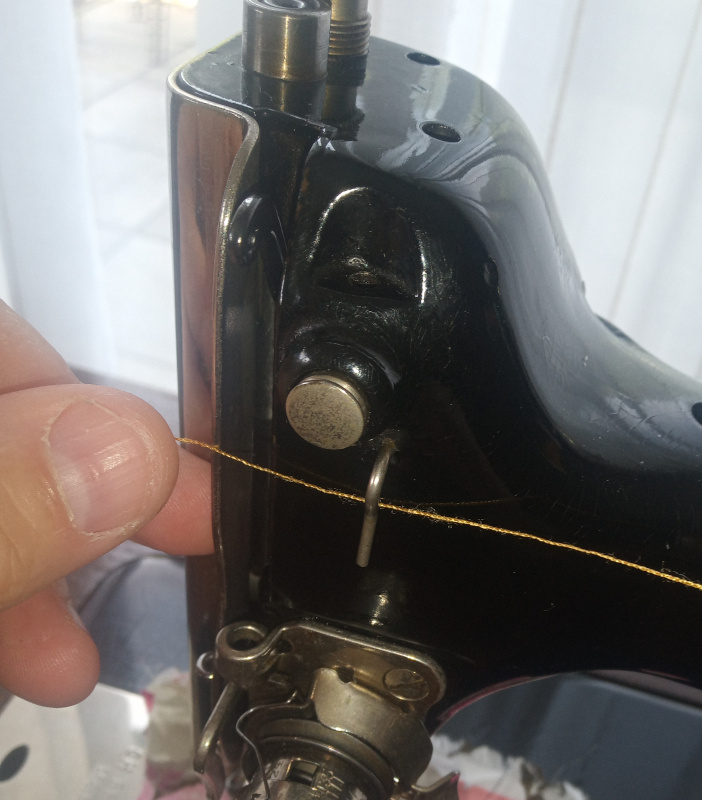
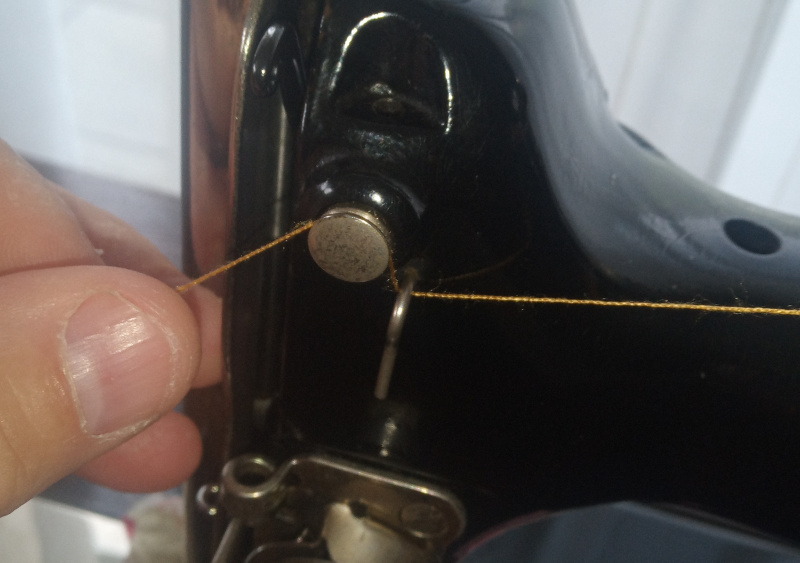
Pull the thread from the spool under the hook then over the pretensioner.
| Pretensioner |
|---|
 |
 |
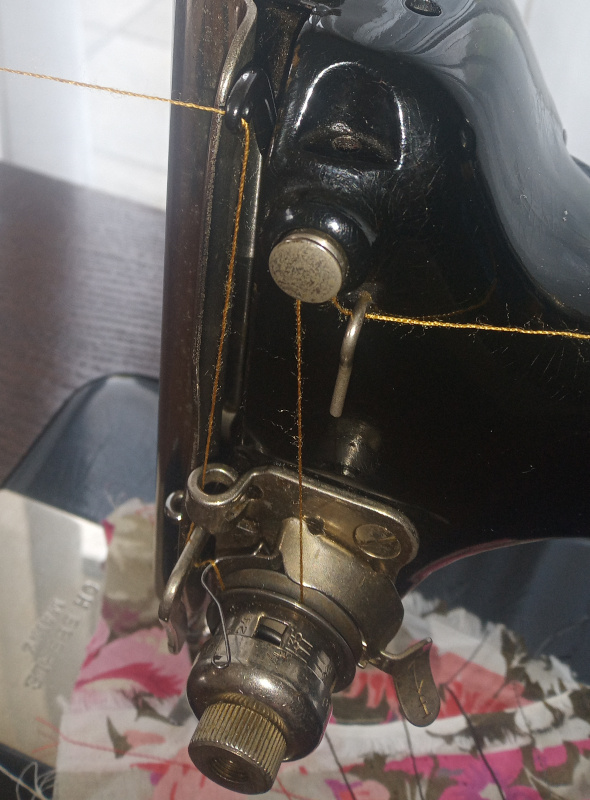
The thread goes around the main tensioner to the right, then between the tension plates. It goes under the tensioner axle, then up behind the tension spring.
| Main tensioner and tension spring |
|---|
 |
 |
 |
The thread goes over the tension spring, then under the hooked bar.
From the hooked bar, the thread goes up through the guide, then through the hole in the end of the take up lever.
| Take up lever |
|---|
 |
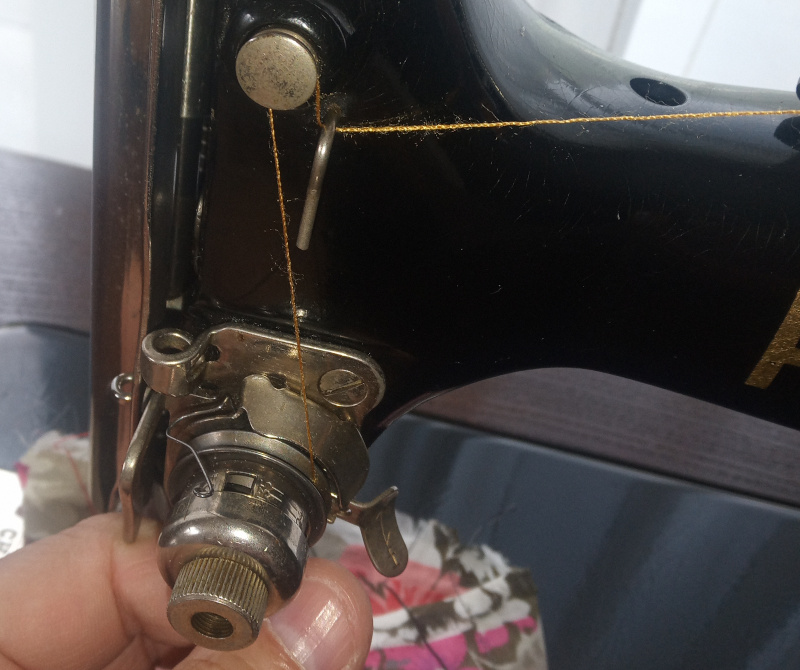
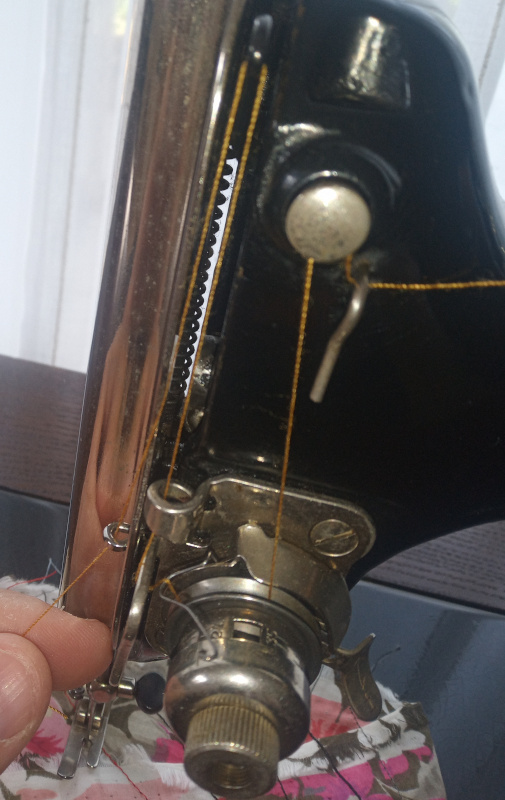
From the take up lever, the thread goes down through the guide on the front plate to the “pig tail” guide on the needle bar - just above the needle.
| Needle bar |
|---|
 |
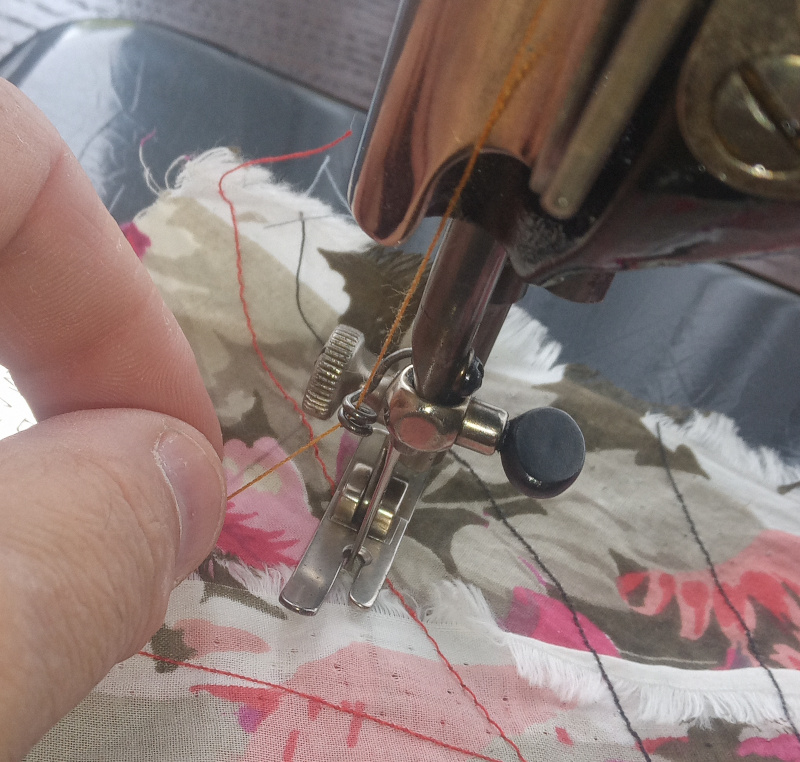 |
Thread the needle from left to right.
| Thread the needle |
|---|
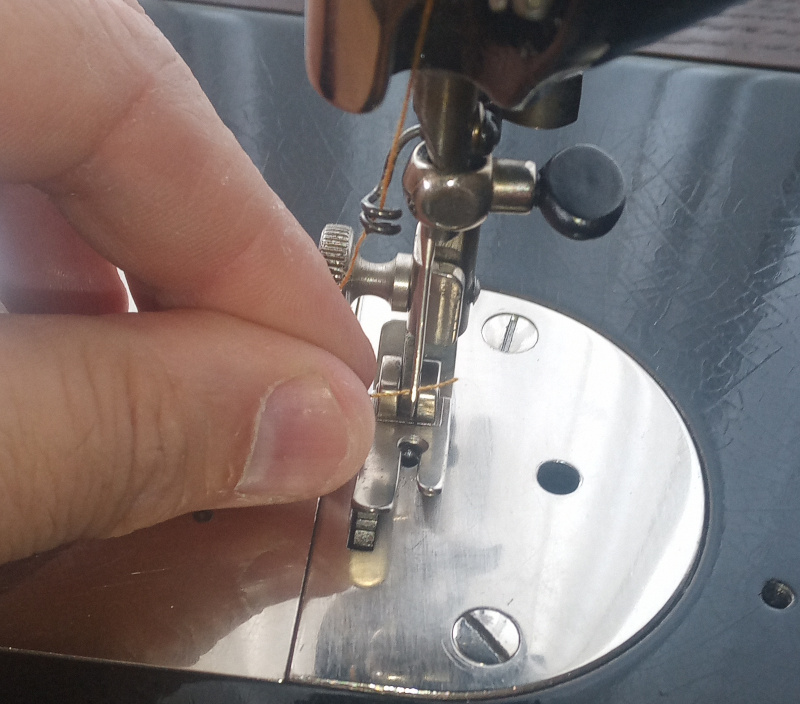 |
The upper thread should look like this when you are done:
| Upper thread finished |
|---|
 |
Pull the loose end out about six inches from the needle. You need the extra loose thread so that it doesn’t pull out of the needle while picking up the lower thread.
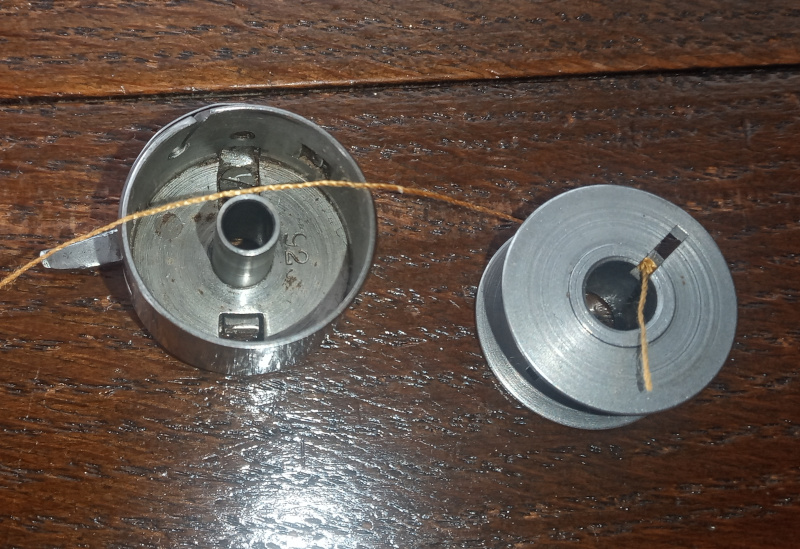
Load the bobbin case
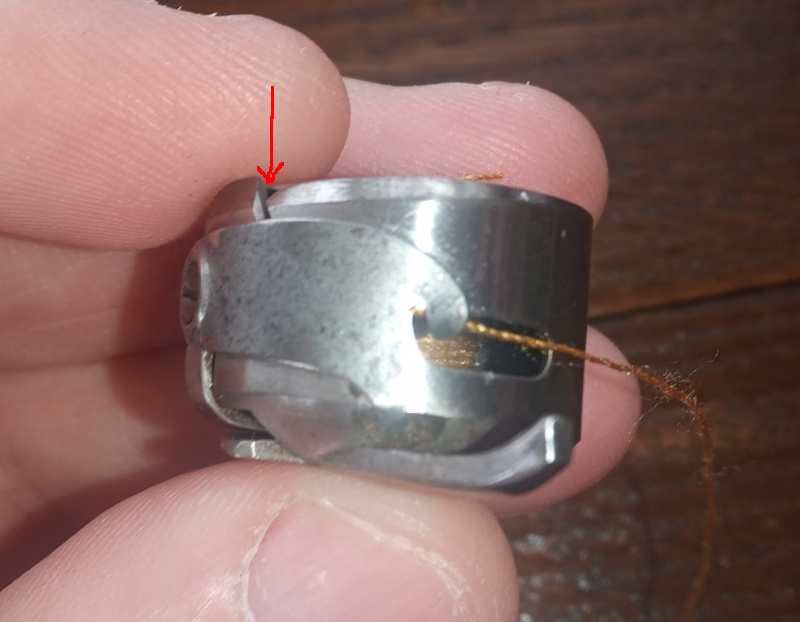
Put the bobbin in the case so that the bobbin spins clockwise when you pull on the thread.
| Load the bobbin case |
|---|
 |
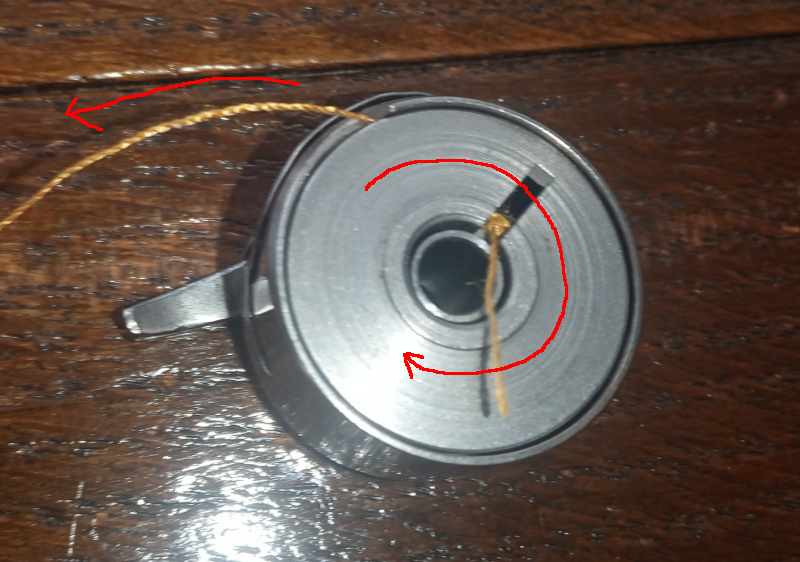 |
The thread goes through the slit in the side of the bobbin case, then under the flat spring and out through the slotted area.
| Thread in the bobbin case |
|---|
 |
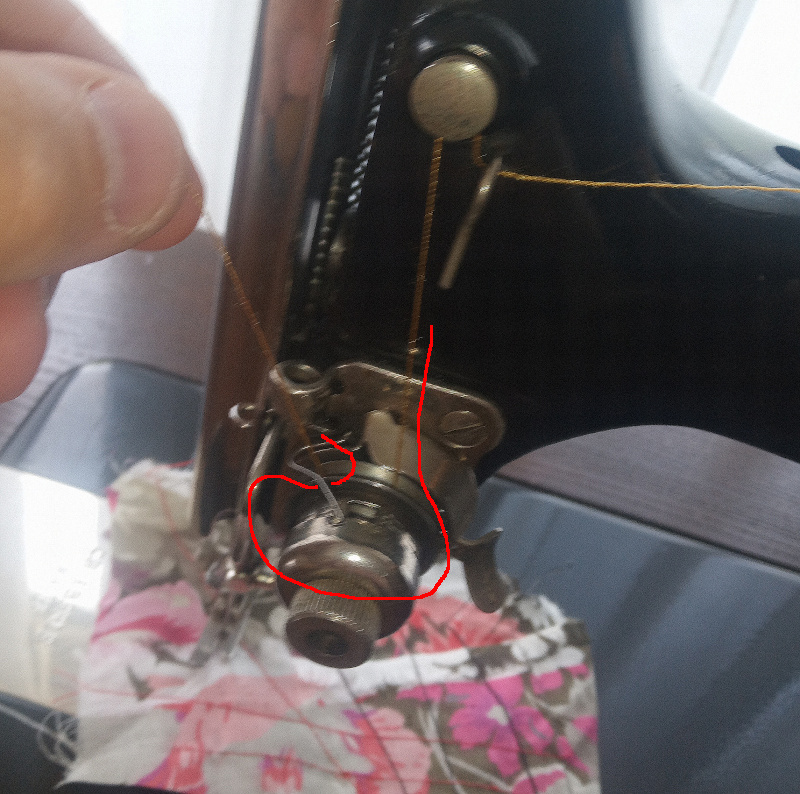
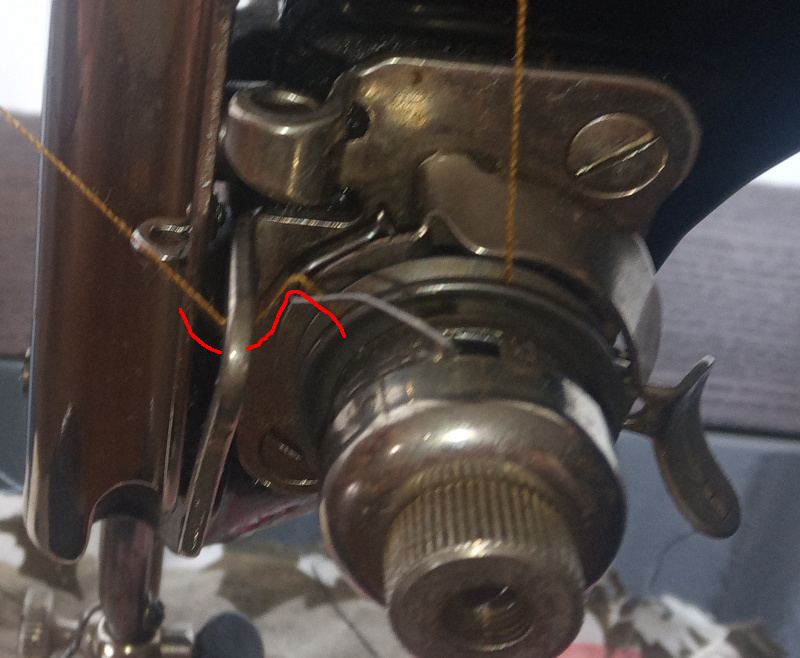
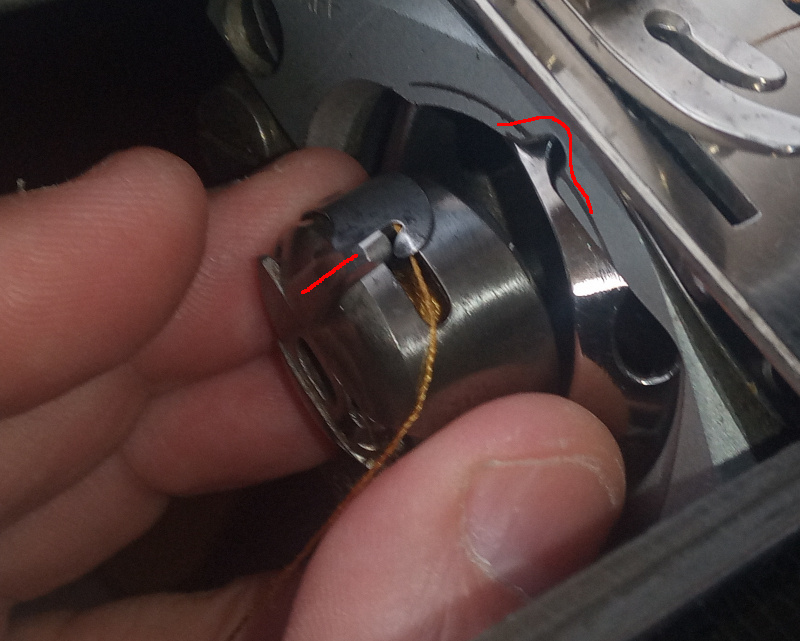
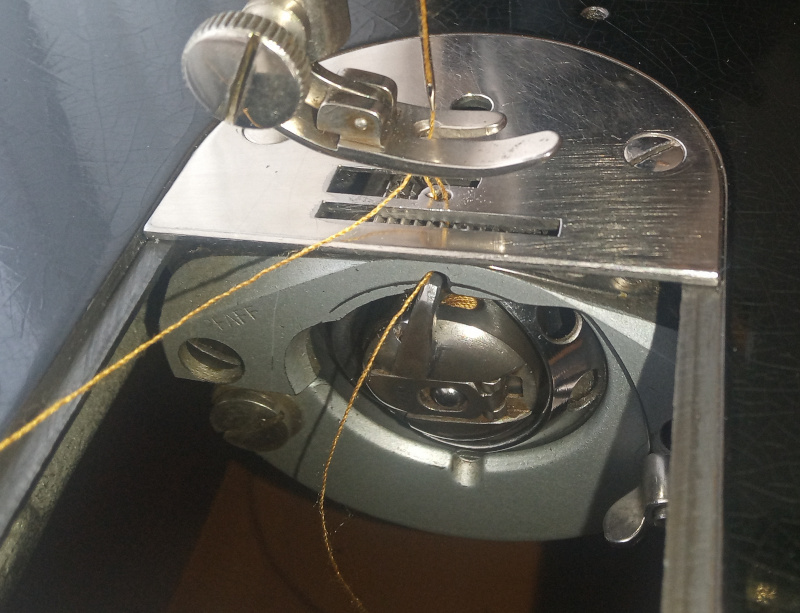
Put the bobbin case back into the machine. There’s a “handle” that sticks off the side of the case. It goes in a matching cutout in the bobbin race. (Red arrow and line.)
| Insert the bobbin case in the machine |
|---|
 |
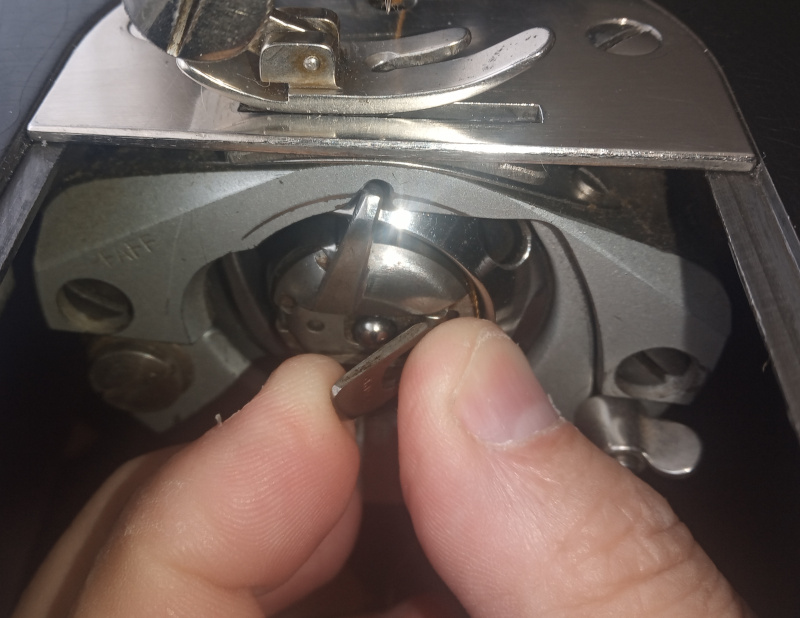 |
Turn the balance wheel one rotation counter clockwise. The needle will go down and pick up the bobbin thread. Hold the loose end of the needle thread while turning the balance wheel to keep the thread from pulling out of the needle.
| Raise the bobbin thread |
|---|
 |
 |
Use the point of your scissors to pull the loop of bobbin thread out. Pull it out to about six inches length from the needle.
All done, ready to sew.
Dang that looks like a lot of stuff. That said, it takes me just seconds to thread the machine and maybe twenty seconds to put the loaded bobbin case in the machine. It took about three hours to make and trim the photos then write this post. Trust me, you can thread your machine much faster than I can write about it.
2022-10-1 Edit: I’ve been asked about a detail that is barely visible in the photos above.
There are two slotted plates on the cabinet, one on the right below the balance wheel and one on the left at the edge of the lid. These two plates form a latch to lock the lid down (closed.)
| Latch plates |
|---|
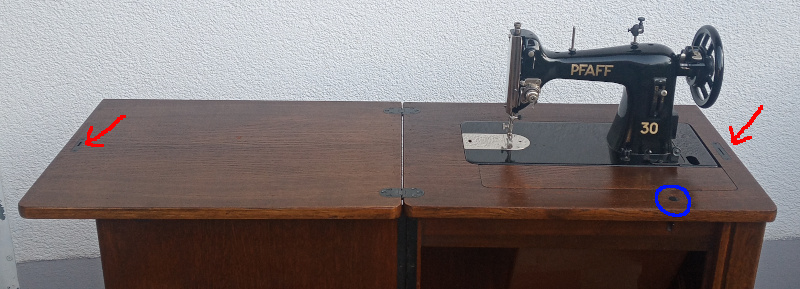 |
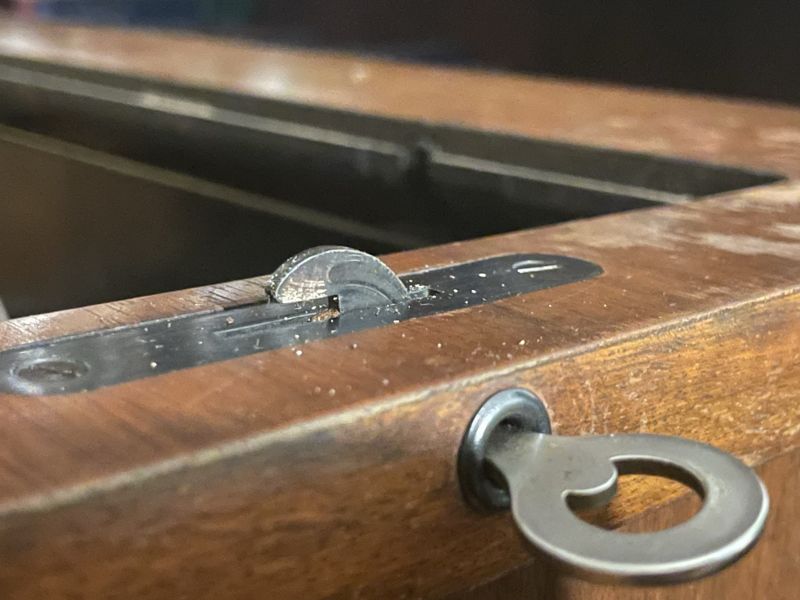
The red arrows point to the latch plates. The release button to open the door is under the lid when it is closed (blue circle) so that when the lid is locked, the entire cabinet is locked shut.
| Keyhole |
|---|
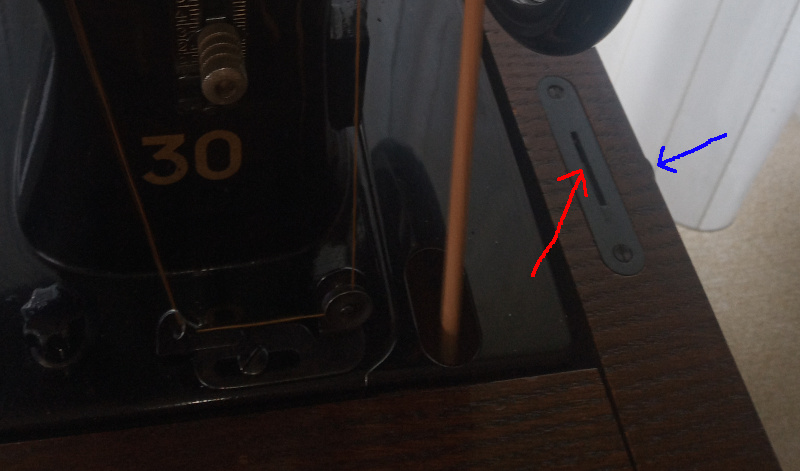 |
There’s a hook that comes up out of the slot (red arrow) in the plate under the balance wheel. The keyhole is to the right, in the edge of the top side of the cabinet (blue arrow.) I don’t have the Pfaff 30 here any more (I gave it back to the owners months ago) so I can’t post a clearer picture of the keyhole.
| Pfaff 30 cabinet key |
|---|
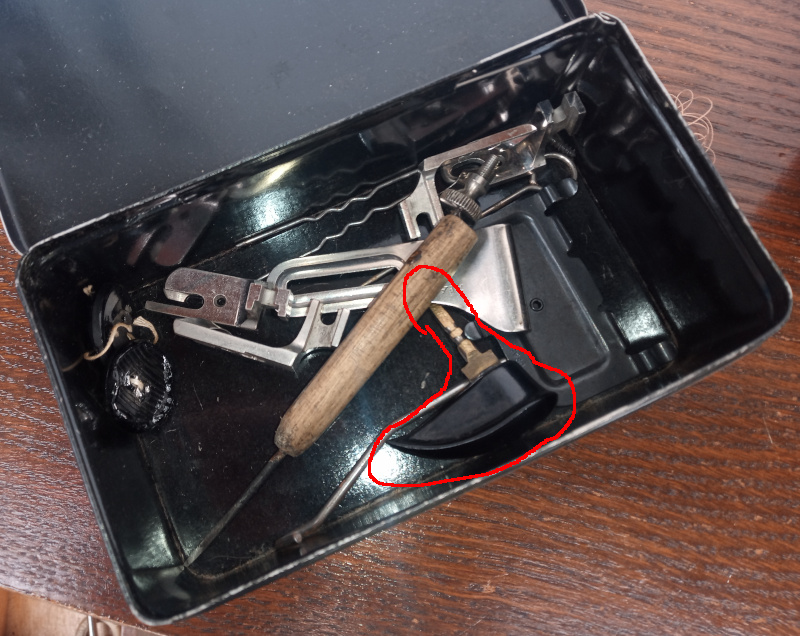 |
I didn’t remember seeing the key in the accessories with the Pfaff 30, but I found one of the photos I made but didn’t use that shows the key. It has a black handle. The shaft of the key disappears under another object in the accessories box. It is outlined in red in the photo above.
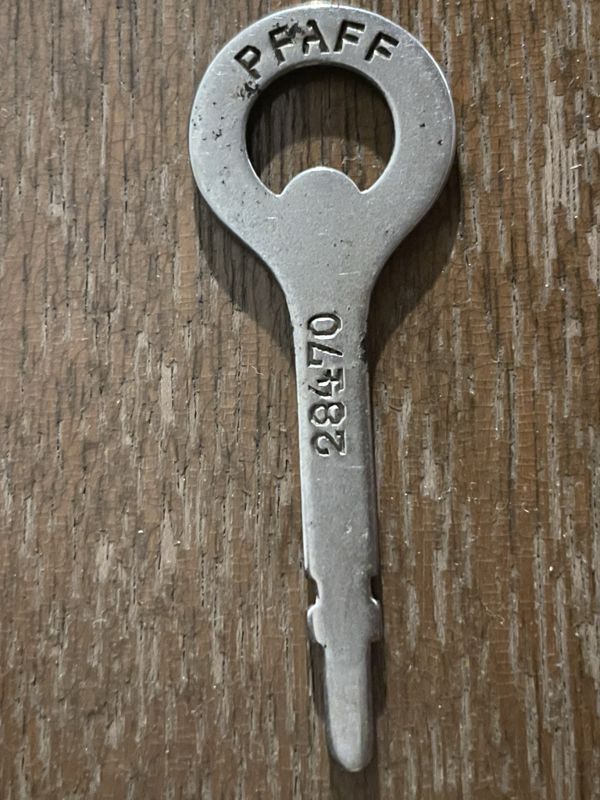
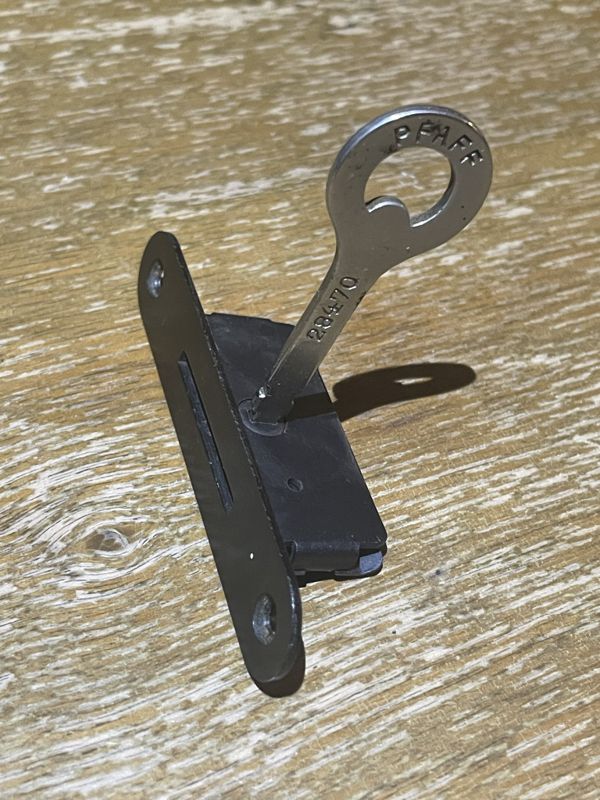
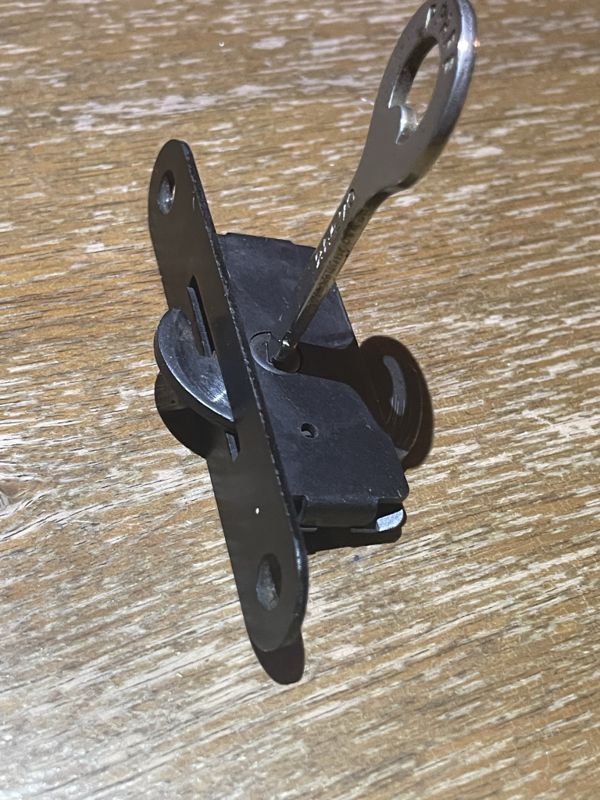
2023-05-27 Edit: Disqus commenter Ivan posted some photos of the key and the latches in the comments. I’ve added them in here since they may not be visible to people who don’t use Disqus.
| Ivan’s latch and key photos |
|---|
 |
 |
 |
 |
Since I wrote this post, I’ve had a chance to work with a Pfaff 30-31. Its cabinet uses the same key and latches. I posted a drawing and some measurements of the key here.