A case for a Fairphone 3 - Plan
Making measurements and drawing plans.
A case for a Fairphone 3 - Table of Contents”
Pretty much any project starts with making a plan. Some projects are simple enough that all you need is a picture in your mind. Others (like this one) need detailed planning and measurement.
I spent a couple of hours over the last week measuring my phone and the rubber “bumper” that I’m going to use to hold it in the case.
The result is an Inkscape drawing of all the parts I’ll need to make the case.
| Drawing |
|---|
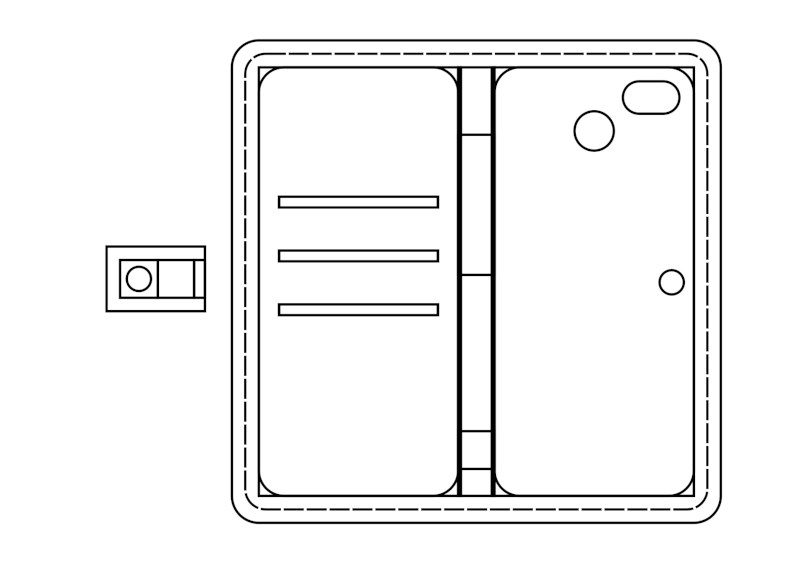 |
That one drawing (printed at the proper scale) contains everything I need to make a case for my phone.
There are actually four parts that I need to make. There’s the main part of the cover as shown above, then there are three smaller parts.
| Parts |
|---|
 |
 |
 |
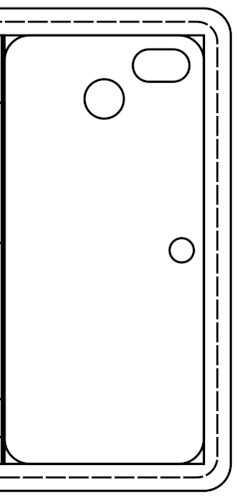
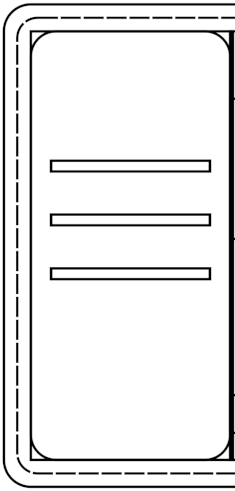
The first two pieces are the inside of the case. They are cut to the same shape as the main cover, but in two “not quite halves.” The main cover has the “back” of the book - the hinge that holds the front and back together. The insides are halves of the main cover without the “back.” That makes the two halves of the cover a double layer of leather while the back is a single layer. This makes the hinge more flexible while the covers are stiffer.
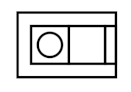
The little box with the circle in it is a tab with a 10mmx1mm magnet. There’s a second magnet between the leather layers under the bumper. I’ll sew the tab on to match the other magnet.
You may have noticed that there’s a rather wide (10mm) border around the bumper. That’s because I need 10mm for the sewing maching foot - or rather, for the feed dogs.
| Feed dog width |
|---|
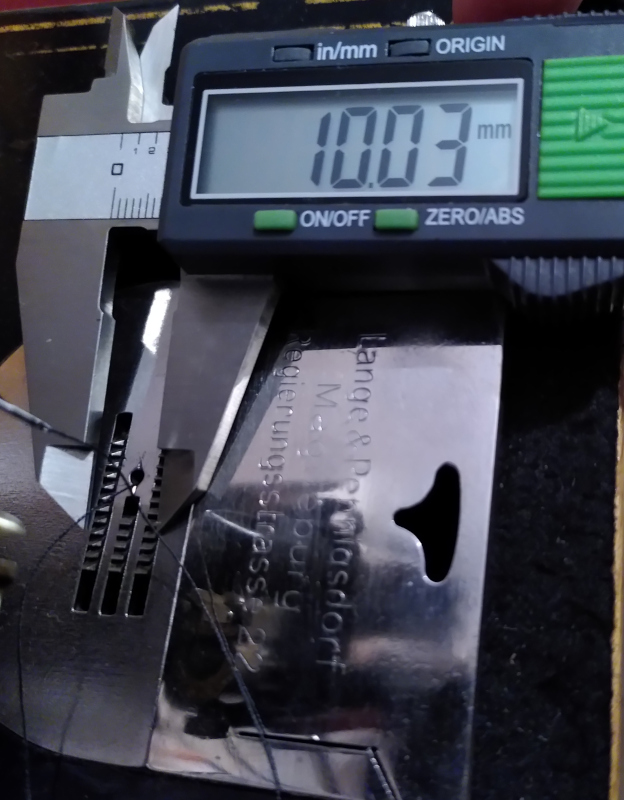 |
When you sew leather on a standard sewing machine, it really important that the seam is at least as wide as the feed dogs. Leather doesn’t slide well on polished steel (or chrome.) It sticks. You need all parts of the feed dogs to engage the leather so that it feeds straight and true.
The plan is to sew the outer edge together just inside the dotted line, then trim the leather just outide of the dotted line. The result will be a 5mm border instead of a 10mm border.
The boxes on the inside of the cover are slots for credit cards or a driver’s license. There’ll be a cloth lining sewn in there. I haven’t drawn that yet - not that it’ll be complicated. It will be a strip as wide as the inside cover and several “credit cards” long. I know how I’m going to get it in there, but I’ll have to show it in photos as a drawing just isn’t clear enough.
I didn’t include the Inkscape file (or a PDF) because I haven’t made the case yet. When I’ve made the first one, I’ll post complete (corrected) plans.
Stay tuned for further updates.