The Adler class 8 sewing machine - Threading the machine
Almost - but not quite - entirely like threading other machines.
Click here to see all the Adler class 8 posts.
After the recent frustrations in building a better motor speed control for the Adler, I decided I’d do something simple this afternoon.
I’m going to describe how to thread an Adler class 8 sewing machine.
Sure, you can look in the Adler class 8 user’s guide to see how it is done. The rub there is that the user’s guide is in German. As an American who has lived in Germany for over thirty years, the language in the original user’s guide is no obstacle to me. For a whole lot of other folks, though, it would be easier to follow an English description.
I find the original guide to be somewhat haphazardly organized, so I’m going to put all the steps from bare machine to ready to sew into an ordered list. I’ll put in the original user’s guide drawings and add photos and descriptions to make it clear just how it all works.
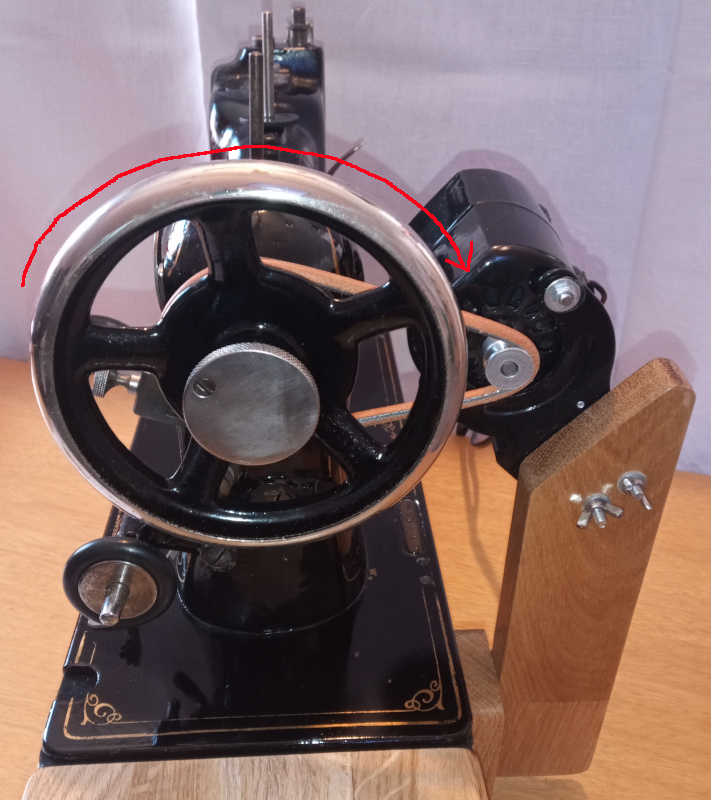
In all of the following steps, keep in mind that the Adler class 8 “runs backwards” compared to most sewing machines. On most machines, the balance wheel rotates counter-clockwise. On the Adler class 8 and related sewing machines, the balance wheel rotates clockwise. When you rotate the balance wheel by hand, push the top of the wheel away from you.
| Rotation direction |
|---|
 |
Steps
Winding a bobbin
The Adler class 8 has a built in bobbin winder. It uses a rubber tire that is driven by the balance wheel. The winder is has a spring to press the tire to the balance wheel and a latch to hold it out of the way when you are sewing.
The original guide has a single drawing that shows how the winder is used:
| Bobbin winder |
|---|
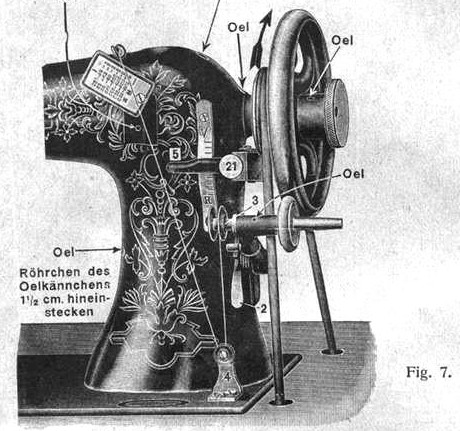 |
| Figure 7 from page 8 of the Adler class 8 user’s guide. |
Figure 7 does double duty - it shows some of the places the machine needs to be oiled as well as how to thread the bobbin winder.
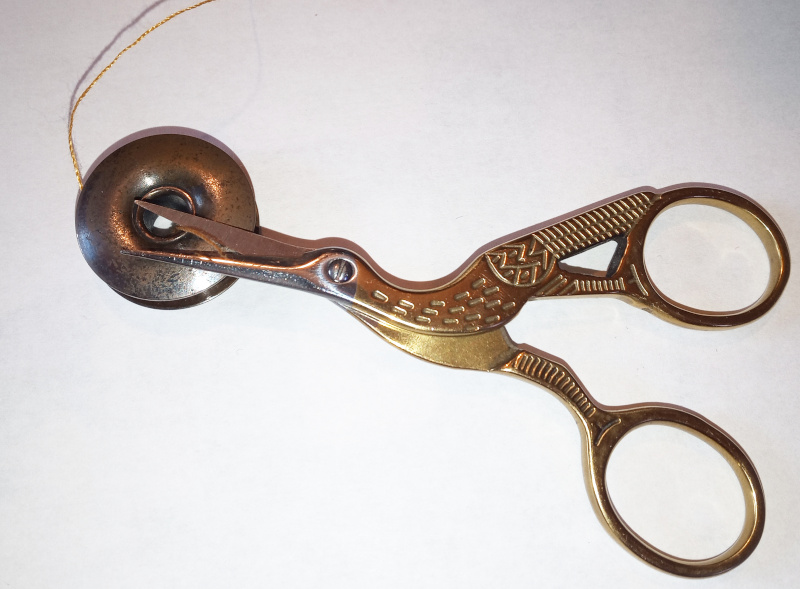
You’ll need an empty bobbin (duh!) and a roll of thread. I chose some gold denim thread so that it is easy to see against the black machine in the photos.
Since my Adler has a little damage, I need an extra little gadget.
| Bobbin, thread, and a pigtail |
|---|
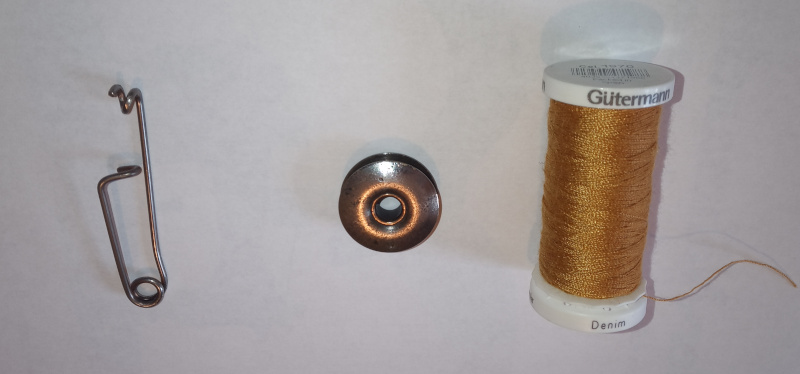 |
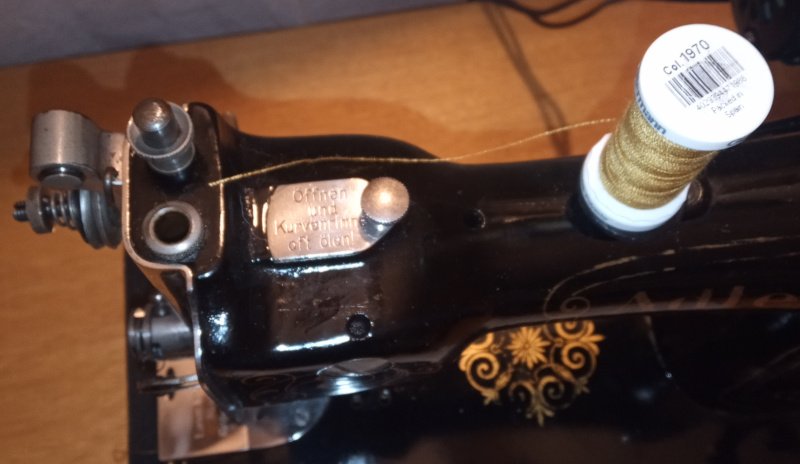
There’s a little pigtail thing on the Adler 8 that guides the thread from the roll down to the tensioner for the bobbin winder. It is broken off of my Adler 8.
| Bobbin winder thread guide |
|---|
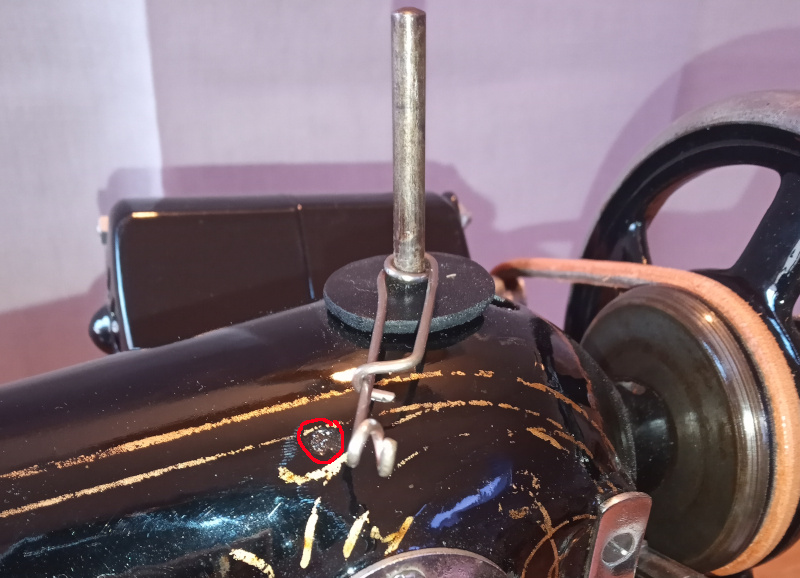 |
The original pigtail was in the spot with the red circle. There was no way for me to replace it without ruining the japanning, so I left it as is and made a clip-on guide. The way I made the guide, closing the clip squeezes the thread spool pin in a coil - the guide stays put when clipped on.
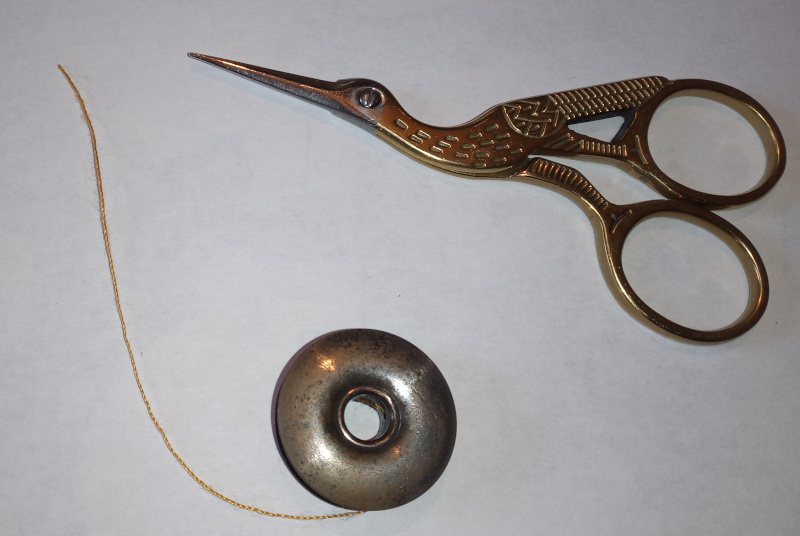
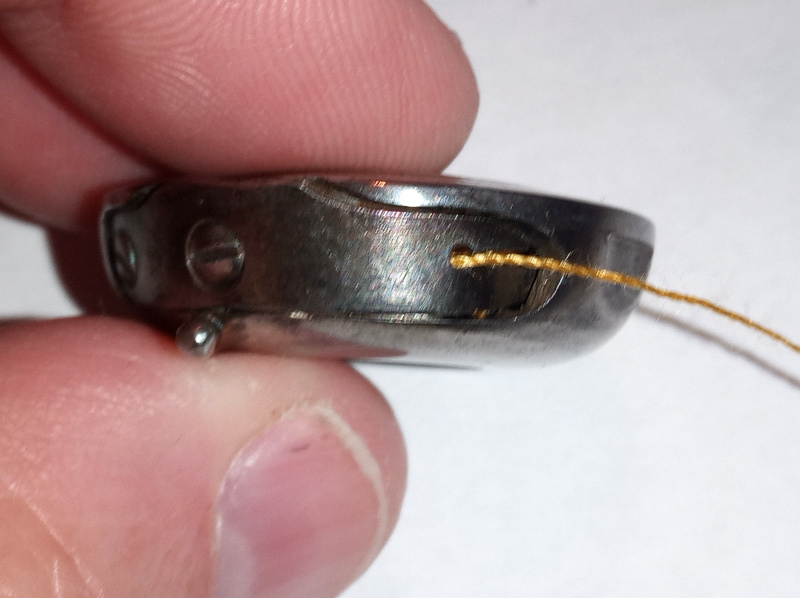
You need to put the thread through a small hole in the bobbin before putting the bobbin on the winder.
| Thread the bobbin |
|---|
 |
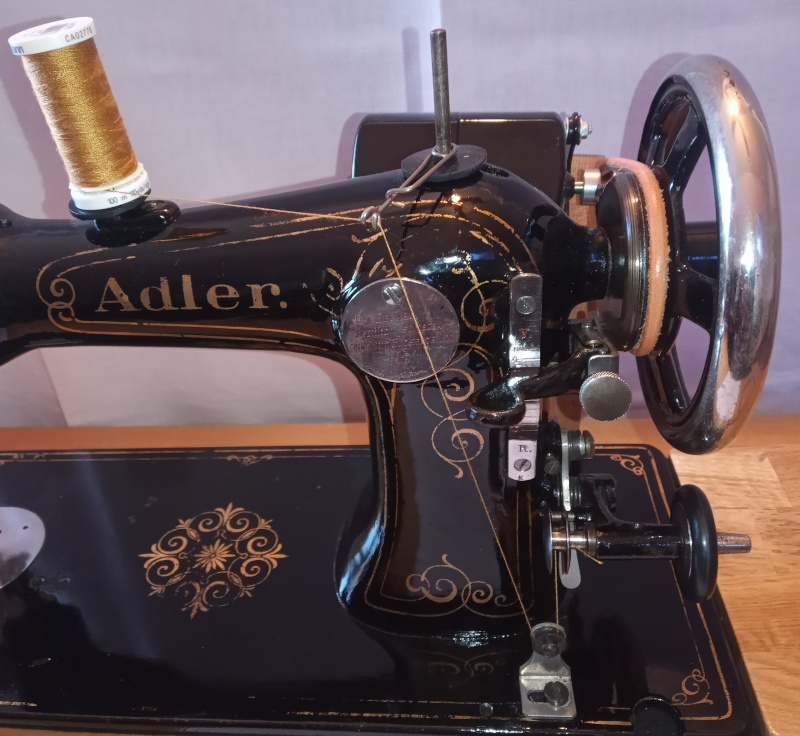
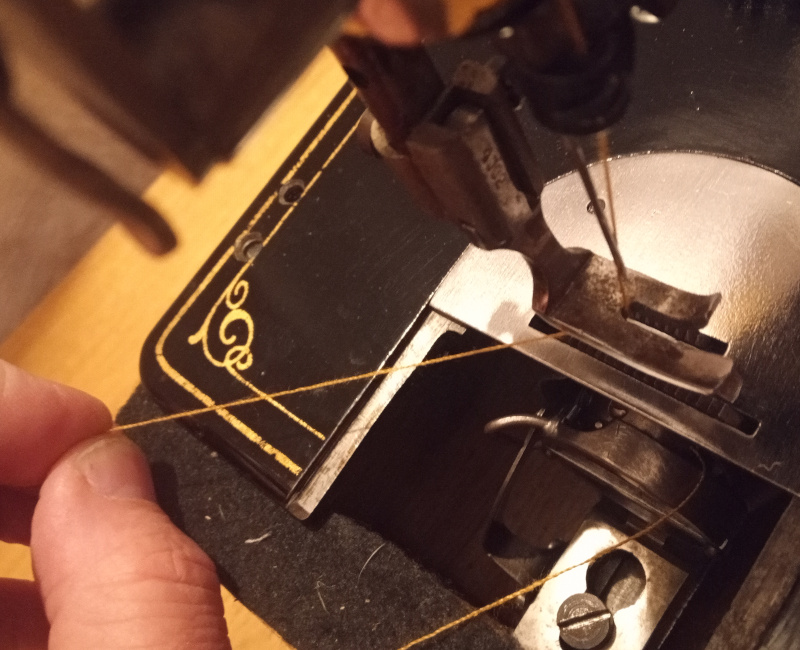
Put the bobbin on the winder peg and push it tight. Run the thread down through the tensioner then up to the guide. Put the roll of thread on the thread roll pin closest to the front of the machine.
| Threaded to wind the bobbin |
|---|
 |
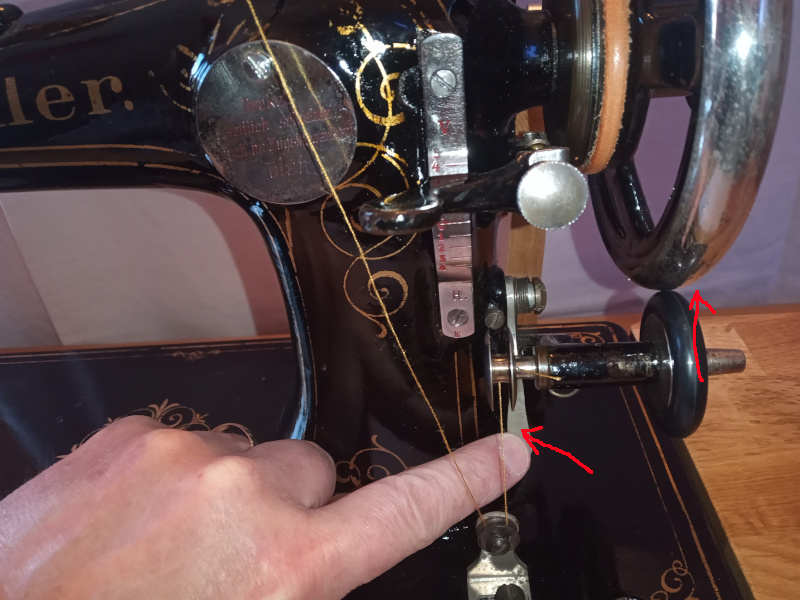
Push the latch down to raise the bobbin winder tire into contact with the balance wheel.
| Release the latch |
|---|
 |
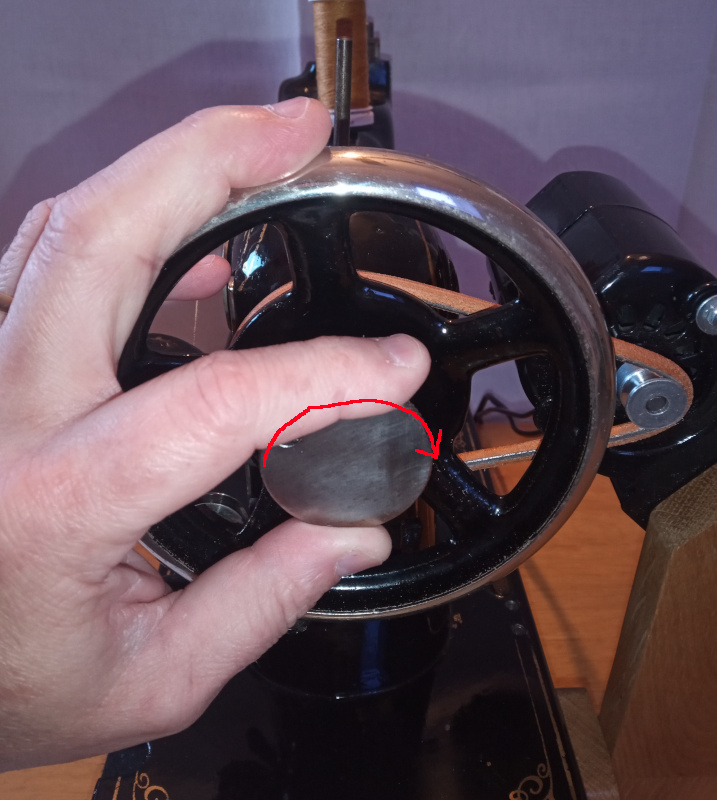
Before winding the bobbin, you need to release the drive clutch. If you leave the clutch engaged, the whole machine will run while you are winding the bobbin. You don’t want to do that. You want the needle to stay still while winding a bobbin.
| Release the drive clutch |
|---|
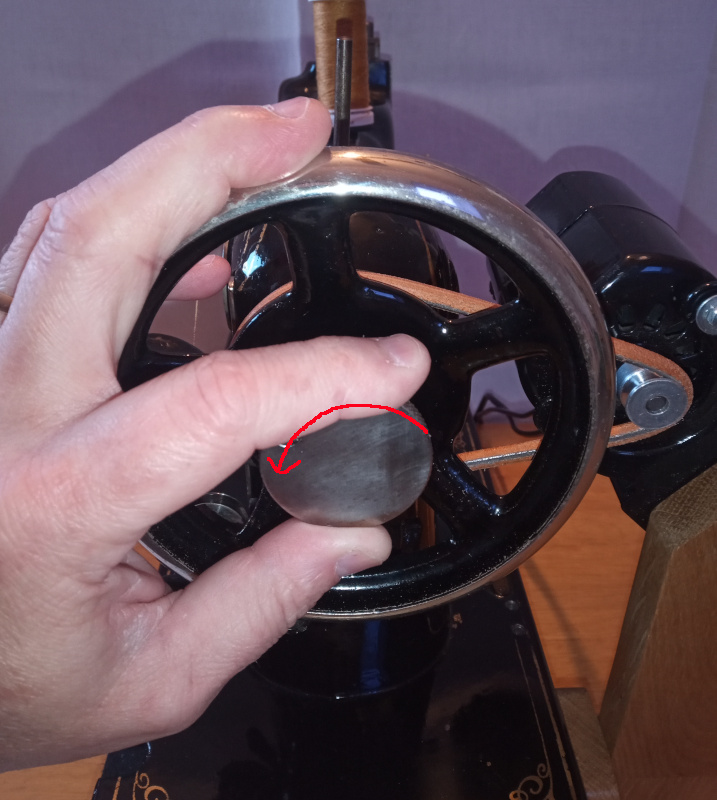 |
You’ll have to hold the balance wheel while you turn the knurled knob of the drive clutch. It normally takes two hands, even though the photo shows me doing it one handed.
Now that you are all set up, either pump the treadle or run the motor to wind your bobbin.
- Try to keep a steady speed.
- Don’t wind the bobbin at high speed.
- Hold the thread roll down with a finger while winding the bobbin.
I find that the thread roll tries to climb off the pin while winding the bobbin. The faster you wind the bobbin, the harder the thread roll tries to climb off the pin.
You want a slow(ish) steady speed to get a smoothly wound bobbin.
Don’t wind the bobbin all the way to the edge. Leave a couple of millimeters (about 1/8 of an inch) free.
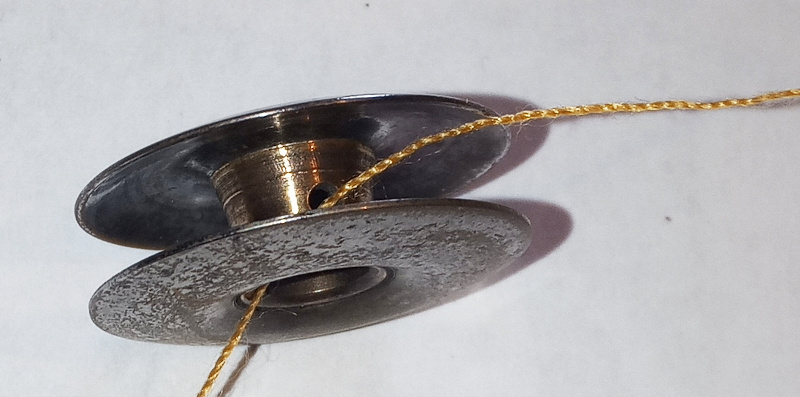
Once the bobbin is full, take it off the winder. Cut it free of the roll, then clip off the little tail from the center of the bobbin.
| Clip the tail |
|---|
 |
Reengage the drive clutch so the machine will run normally.
| Engage the drive clutch |
|---|
 |
Again, that’s normally a two handed task even though the photo shows me doing it one handed.
| Full bobbin |
|---|
 |
Load the bobbin case
The original user’s guide has only a single drawing to show how the bobbin goes into the bobbin case.
| Putting the bobbin in the bobbin case |
|---|
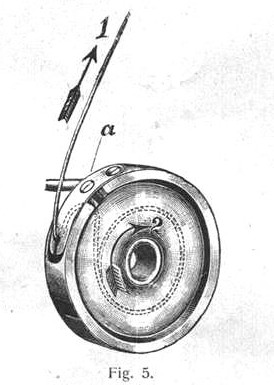 |
| Figure 5 from page 6 of the user’s guide. |
Everything you need to know is in that one drawing. Take note of the way the thread runs. Don’t do it backwards. You’ll get strange results - the thread tension won’t be consistent, and you’ll get skipped stitches or loose stitches.
Here’s a slightly more detailed look at putting the bobbin in the bobbin case:
| Close ups of the bobbin case |
|---|
 |
 |
 |
 |
 |
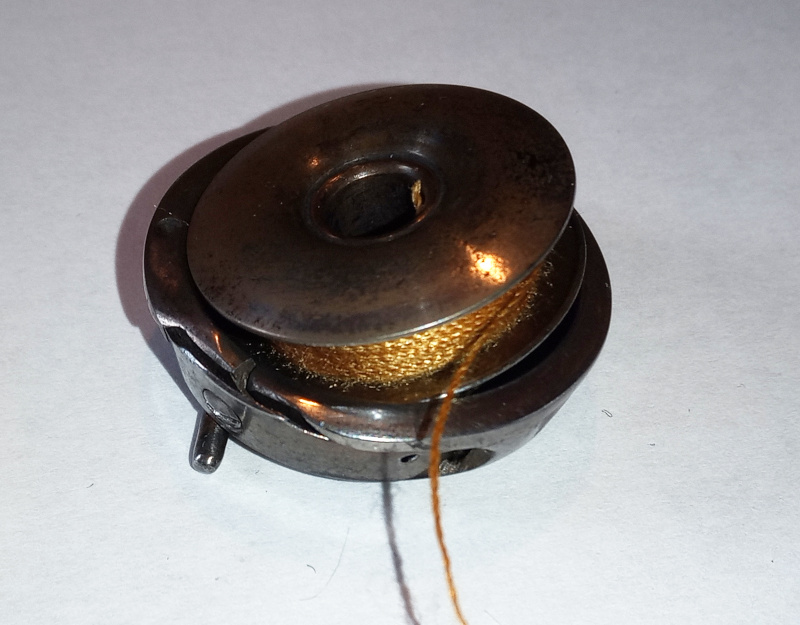
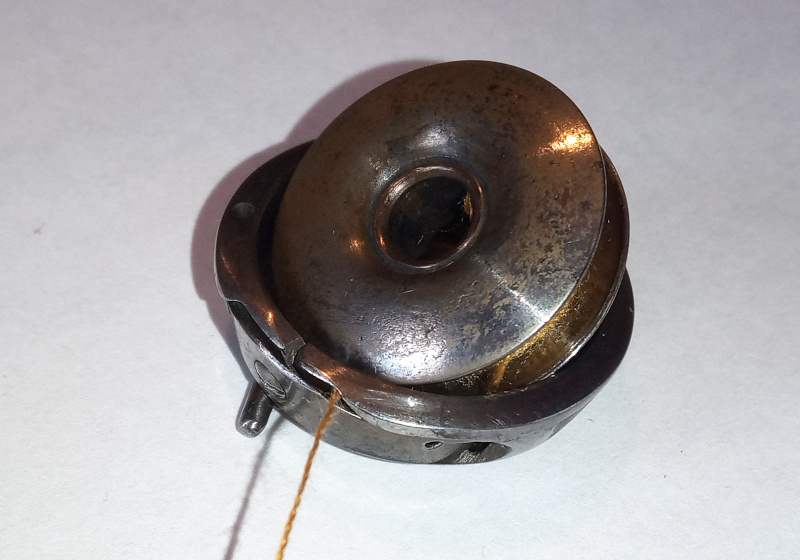
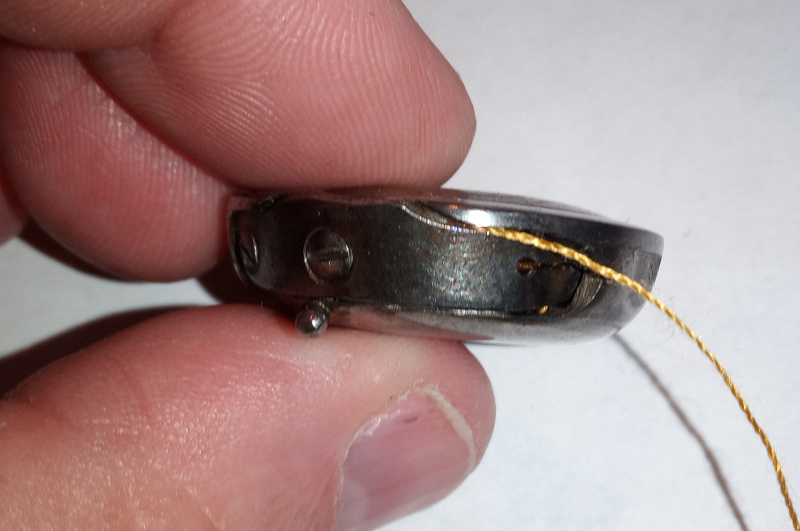
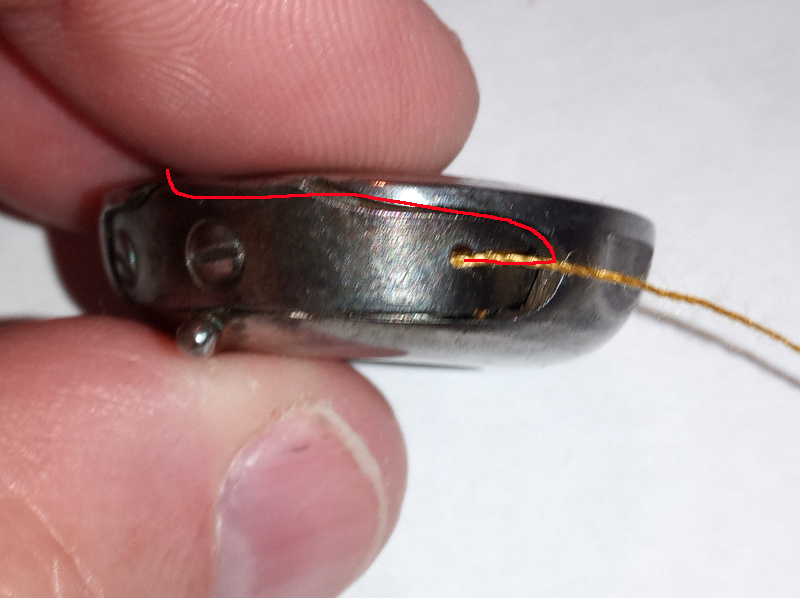
Put the thread in the slot, pull it under the spring as shown until the thread comes out through the hole in the end of the spring. Press the bobbin into the case then pull a few centimeters of thread out. Pulling the thread makes sure the thread isn’t tangled inside the case.
The user’s guide has a single drawing of the spool holder. It isn’t really detailed enough.
| Spool holder |
|---|
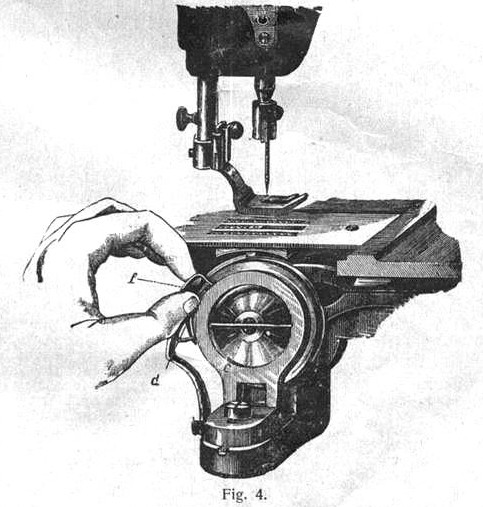 |
The spool holder is below the sliding cover by the needle:
| Spool holder under cover |
|---|
 |
 |
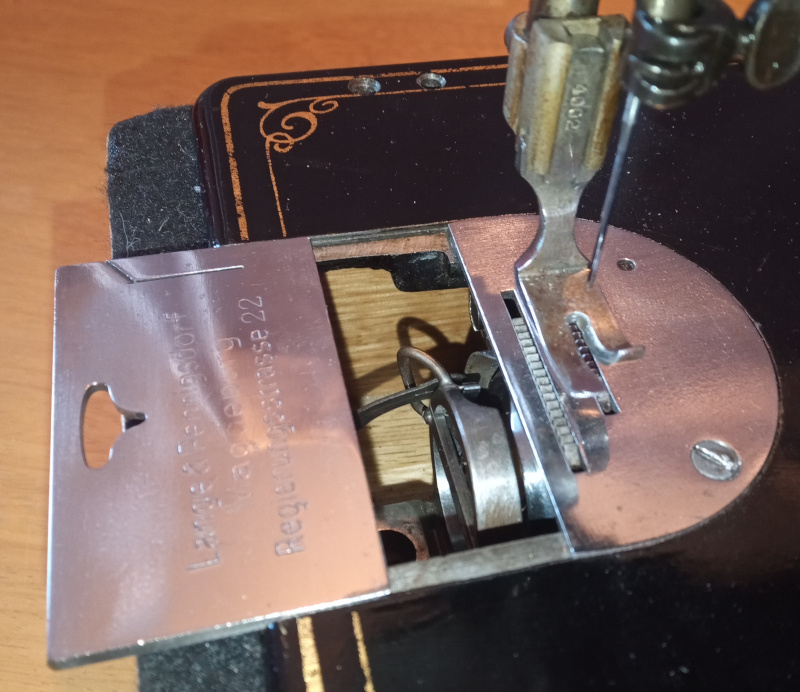
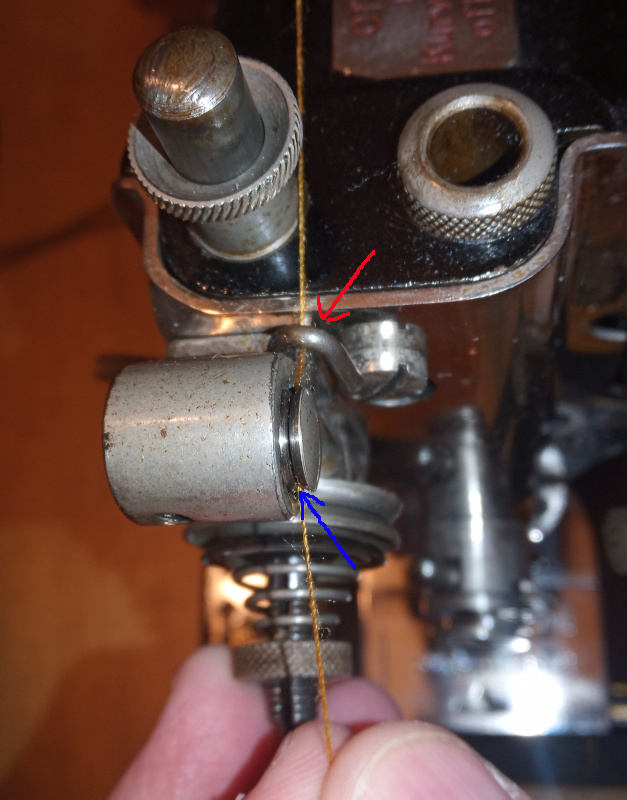
The spool holder is held in place by a spring (red arrow.) It has a sort of handle (blue arrow) so that you can pull it back to put in the bobbin case.
Opening the spool holder is a slightly tricky task.
| Opening the spool holder |
|---|
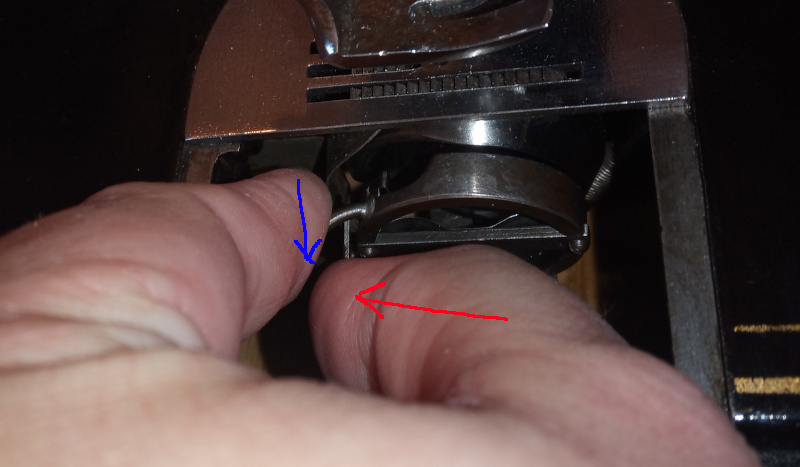 |
Push the spring to the left with your thumb (red arrow,) then push the handle back with your index finger (blue arrow.) Push the handle all the way back and down.
| Open spool holder |
|---|
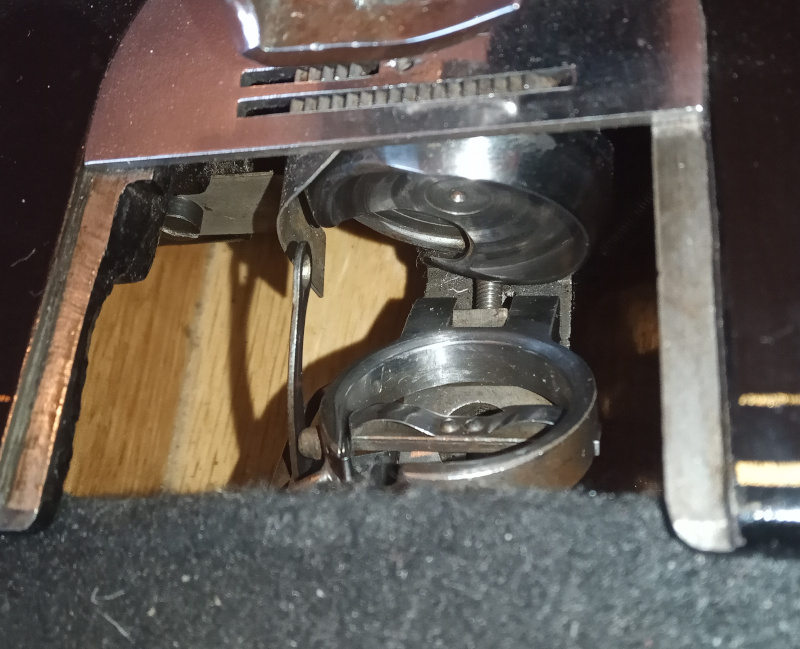 |
Put the bobbin case in the spool holder.
| Bobbin in the spool holder |
|---|
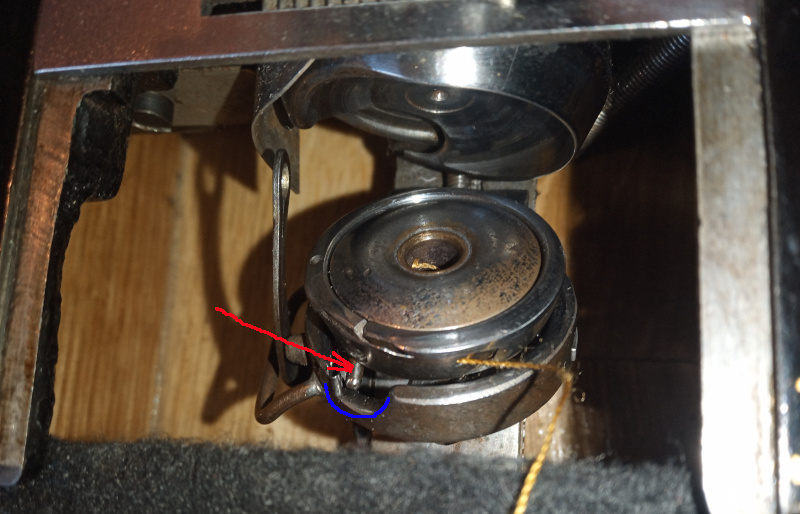 |
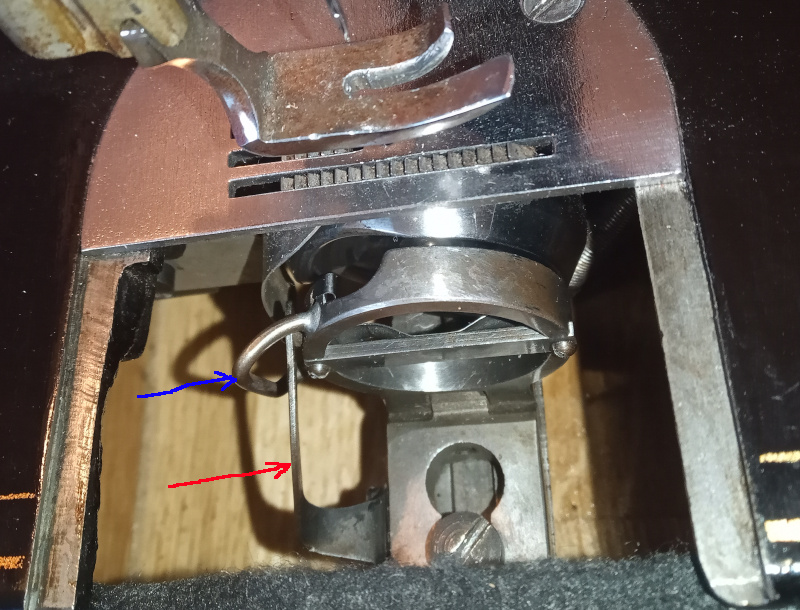
There’s a pin (red arrow) on the bobbin case that goes into a cutout in the spool holder (blue line.) Make sure you get the pin in the cutout. If the pin isn’t in the proper place, then the least that’ll happen is that the thread will get stuck. Worst case, you’ll snap the pin off the bobbin case when you close the spool holder. Don’t do that. Bobbin cases for the Adler are rare.
| Close the spool holder |
|---|
 |
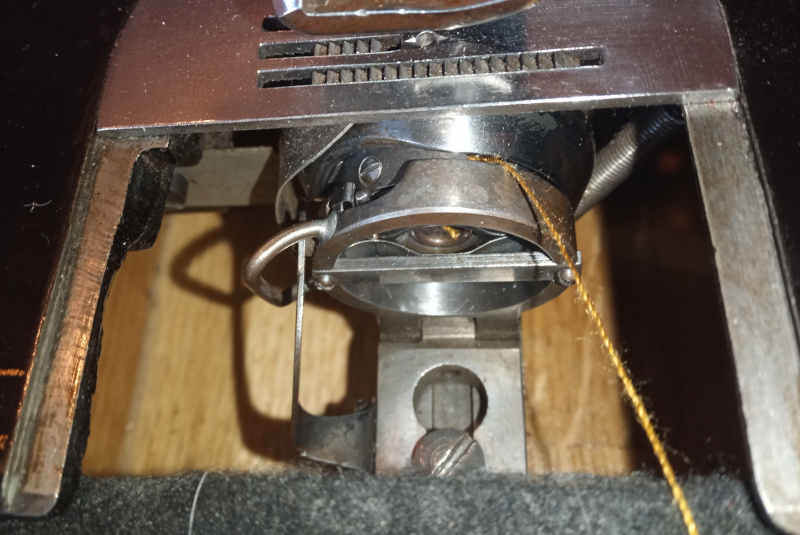 |
Push the spool holder shut with your finger. Watch to be sure the bobbin case pin stays in the cutout on the spool holder.
Once it’s closed, pull the thread out a couple of centimeters to be sure it moves properly and didn’t get tangled.
Install the needle
The needles for the Adler class 8 are a bit different than the needles for most common machines. More common needles have a flat side on the shank that fits into a half round hole in the needle bar. The flat side makes it so that the needle can only go in the right way around.
The needles on the Adler class 8 have a round shank. The operator (you) has to make sure to install the needle the right way around.
This is in some ways the most difficult part of threading an Adler class 8. The original user’s guide only has a description - there are no pictures or drawings to indicate how to install the needle. If you can’t read German, then you are SOL.
The Adler class 8 uses what are called “System 287” needles. They are still available under different names.
I have packs of the following needles for my Adler 8:
| Manufacturer | Model |
|---|---|
| Schmetz | Round shank 287WH |
| Orange | #16 |
| TNC | DBx1 |
DBx1 is the name you’ll most commonly find.
All sewing machine needles have grooves down the side for the thread to pass through when the needle goes through the cloth. The groove on one side runs nearly the entire length of the needle. The groove on the other side is much shorter.
You have to put the needle in the Adler class 8 so that the short groove is to the left and the long groove is to the right.
| Grooves |
|---|
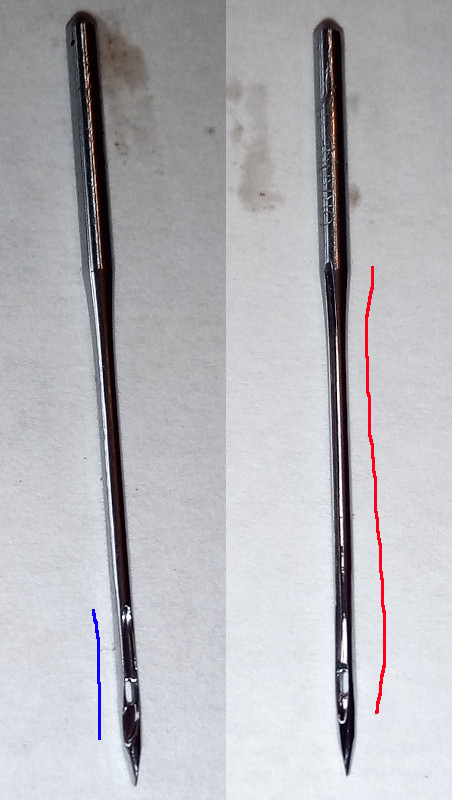 |
The needle goes into the needle bar so that the long groove is to the right and the short groove is to the left.
| Insert the needle |
|---|
 |
The eye of the needle opens to the sides rather than towards the front and back like on many other machines.
Make sure you get the needle in properly (eye opening towards the side, long groove to the right.) Push the needle all the way up into the needle holder, then tighten the little black wing screw to hold it in place.
Crank the balance wheel by hand, and make sure that the needle goes straight down and through the hole in the needle plate. That hole is smaller than on other machines. If the needle is bent it can strike the plate and break.
While you are at it, make sure that the needle passes through the hole in the presser foot. The presser foot holder on my Adler was off a little bit. The needle rubbed against the presser foot sometimes. I actually managed to break a needle on the presser foot before I realized that the presser foot holder was rotated out of line.
Thread the machine
The user’s guide has a couple of drawings and a couple of paragraphs describing how the upper thread runs.
| Overview |
|---|
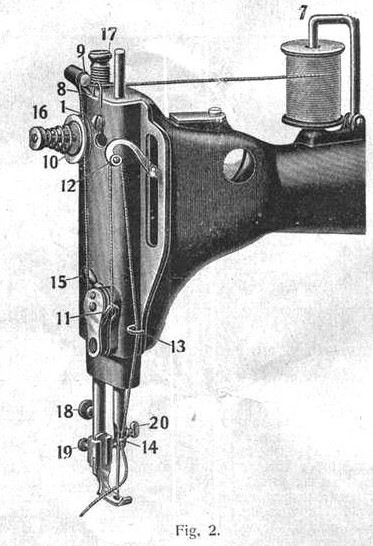 |
| Figure 2 from page 4 |
| Detail of the take up lever |
|---|
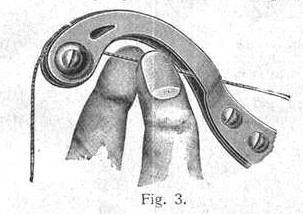 |
| Figure 3 from page 5 |
I’ve made a few photos to show how it’s done.
| Hook and thread check |
|---|
 |
 |
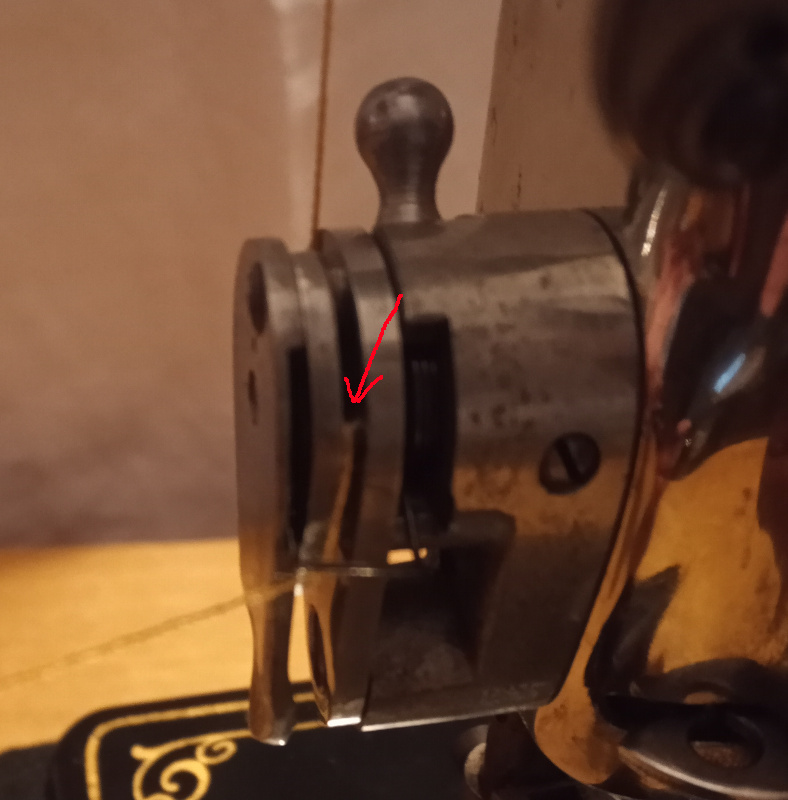
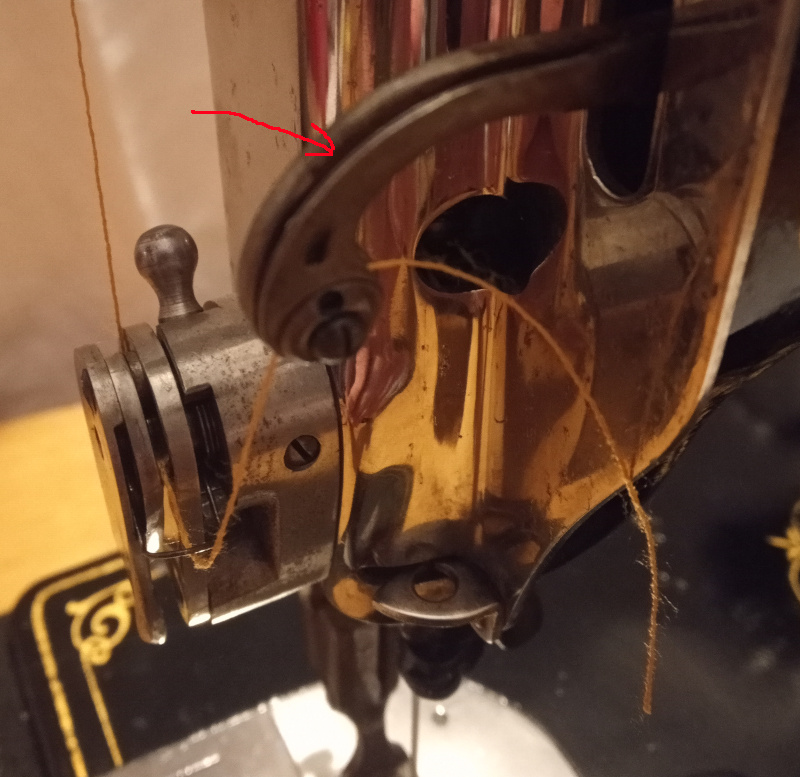
The thread goes under the hook (red arrow) then over the thread check. Pull the thread down into the groove in the thread check (blue arrow.)
| Through the tension discs |
|---|
 |
 |
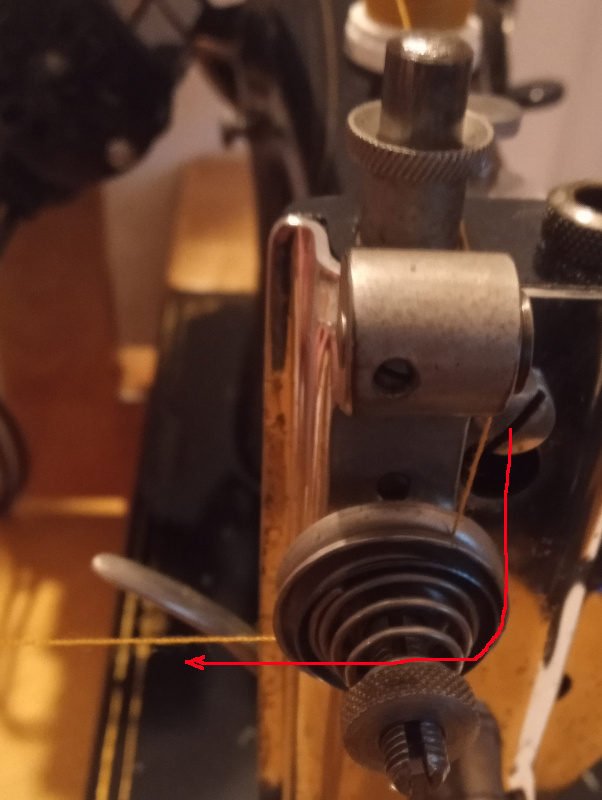
The thread comes down from the thread check to the right of the main tensioner, then between the tension discs. It goes under the axle of the main tensioner, then wraps around to the right and down again. There’s one full loop of thread around the axle of the main tensioner.
| Through the thread controller |
|---|
 |
 |
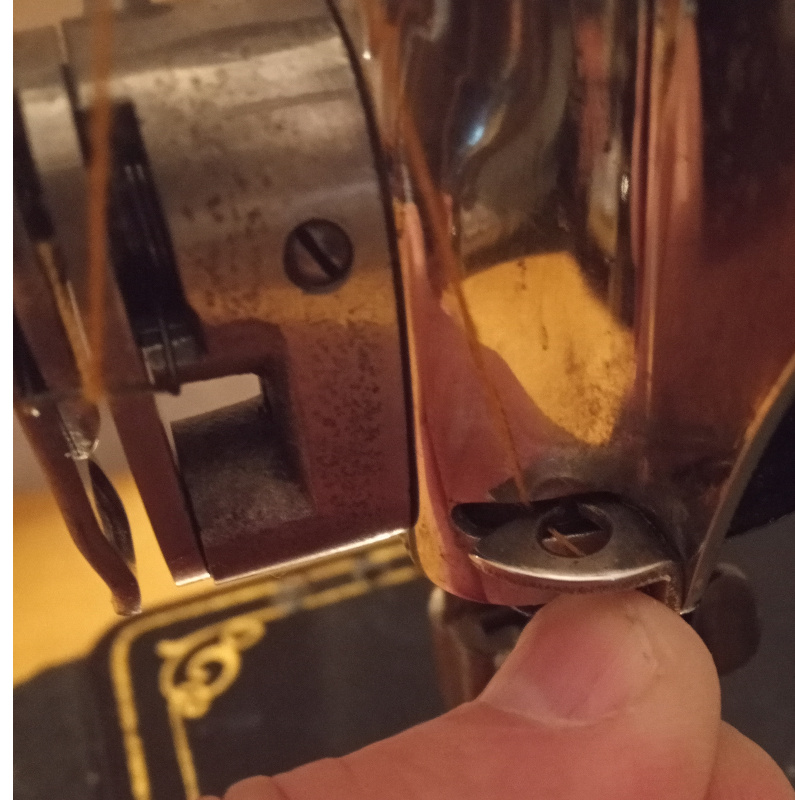
Pull the thread down to the thread controller, then pull it up under the spring on the controller. Hold the thread coming down with your left hand, then pull up on the thread with your right hand. This will lift the spring. Pull up until the thread catches on the little hook inside the thread controller, then let the spring down.
| Take up lever |
|---|
 |
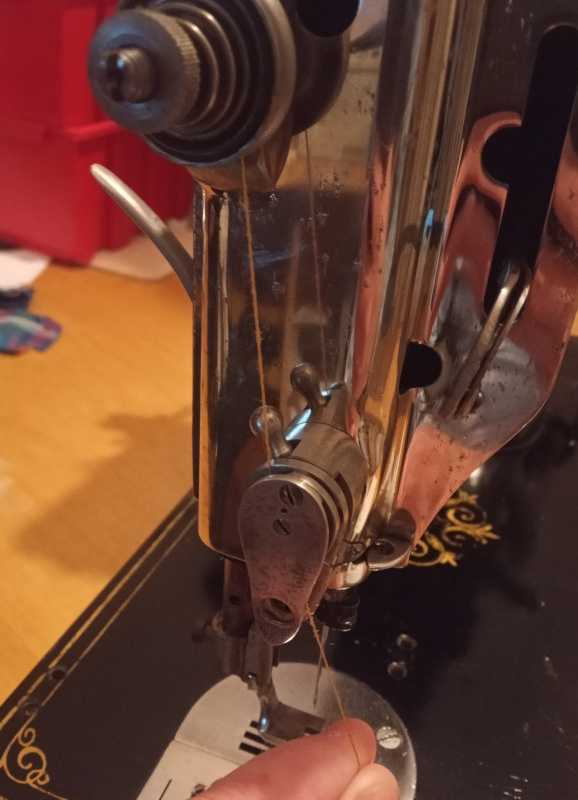
I find it easiest to stick the thread through the split in the take up lever (red arrow) pointing down, then pull the thread down.
| Guide |
|---|
 |
Push the thread through the split in the guide on the left side so that the thread runs through the hole.
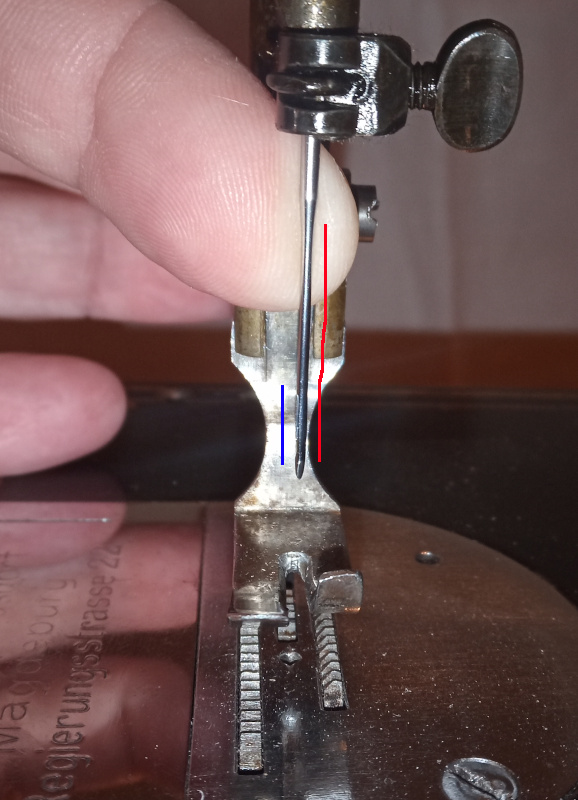
| Needle bar guide |
|---|
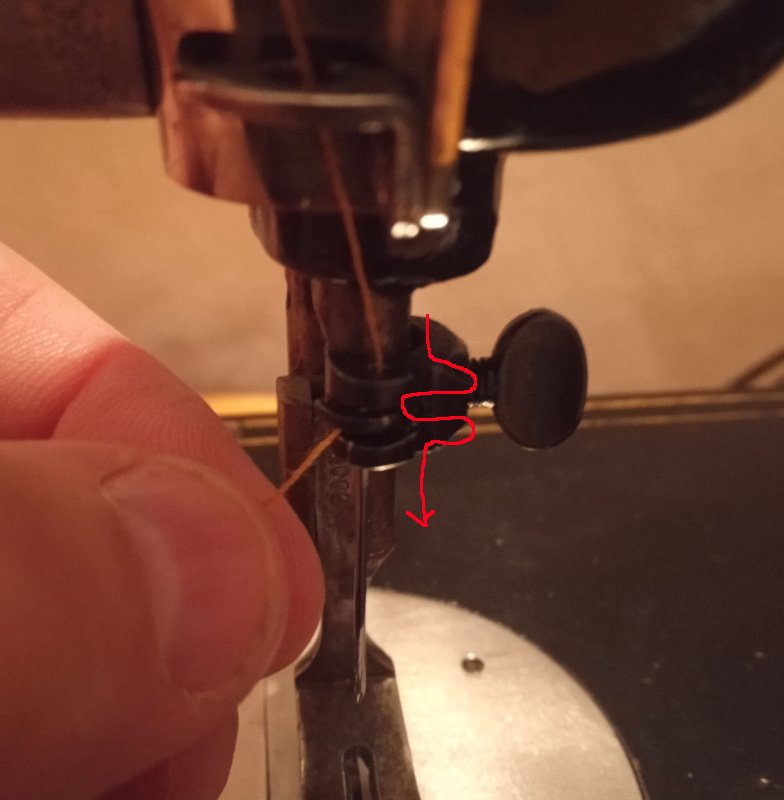 |
You have to take the thread on a zig-zag through the guide on the needle bar (red arrow.) Once the thread is in place, it runs straight down.
| Through the needle |
|---|
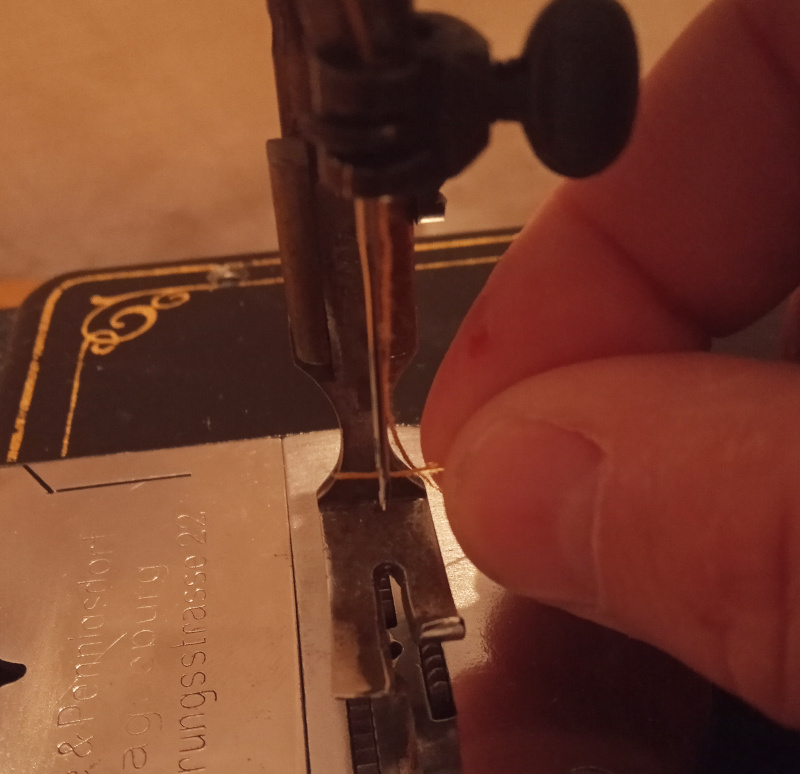 |
The thread goes through the eye of the needle from right to left. It seems like that would be difficult to do, but I find it easier to thread my Adler from the side than to thread my wife’s Pfaff from the front.
| Under the presser foot |
|---|
 |
Run the thread down through the presser foot, then pull it out a few inches.
Hold the thread tight and crank the balance wheel one turn. The needle will go down and pick up the lower thread.
| Pull up the lower thread |
|---|
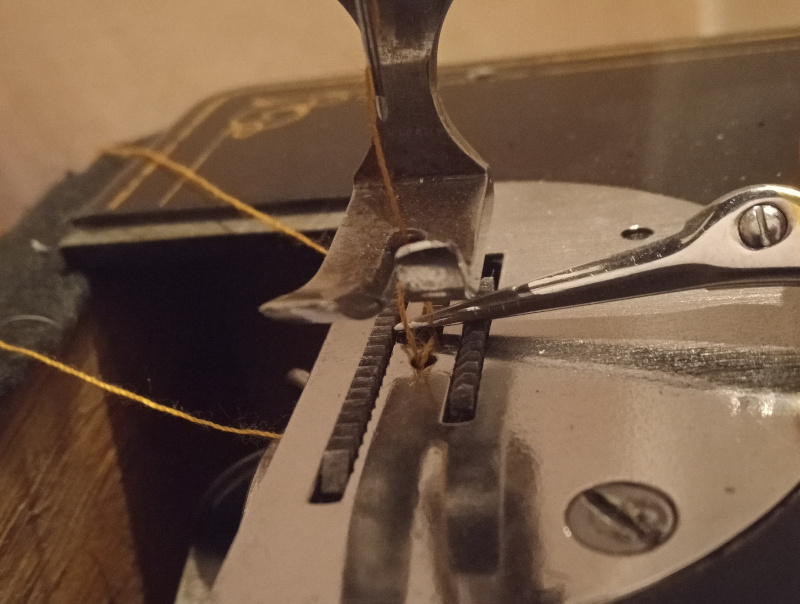 |
Use a toothpick or the point of your scissors to pull the loop of the bottom thread up. Pull it all the way out so that the free end of the lower thread comes up through the needle plate.
| Pull both threads out |
|---|
 |
Pull both threads out towards the back about 15 centimeters (6 inches.) Hold the threads while making the first couple of stitches.
All done. Ready to sew.
Whew!
That’s a lot of stuff. It looks like it would take forever to thread a sewing machine. In actual fact, once you’ve done it a couple of times you’ll manage most of it in just a few seconds. The most time consuming part is winding the bobbin. The threading itself it pretty easy.
As easy as it is, always look it over before you start sewing. If you skip a guide or forget the take up lever, you’ll get all kinds of squirelly messes in your sewing. A couple of seconds of looking can save you a lot of time picking out a bad seam.
Refer back to the guides on the tensioning mechanisms and how to adjust the thread tension any time you change thread or needles.