The Adler class 8 sewing machine - Adjusting the thread tension
Thread tension from scratch.
Click here to see all the Adler class 8 posts.
A typical sewing machine has two adjustments for the thread tension. One adjuster for the upper thread, and one for the lower thread.
The Adler class 8 has those two adjustments, and normally that’s all you need.
If you’ve had to disassemble your machine to clean it (or fix a ding in the spool holder,) then you’ve got a little bit more to deal with.
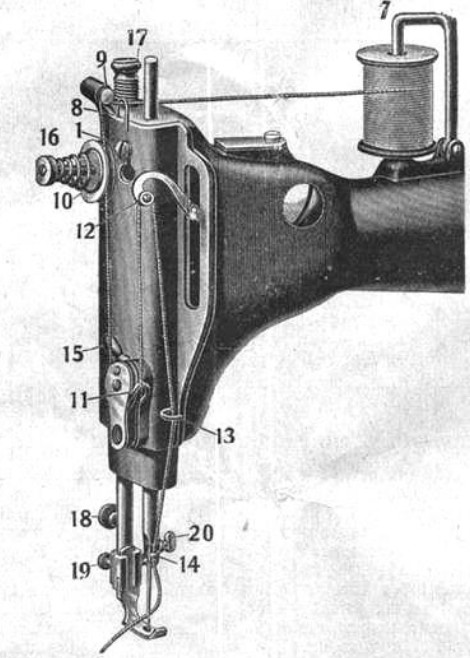
For the upper thread, you’ve got these three parts to adjust:
| Upper thread tension adjustments |
|---|
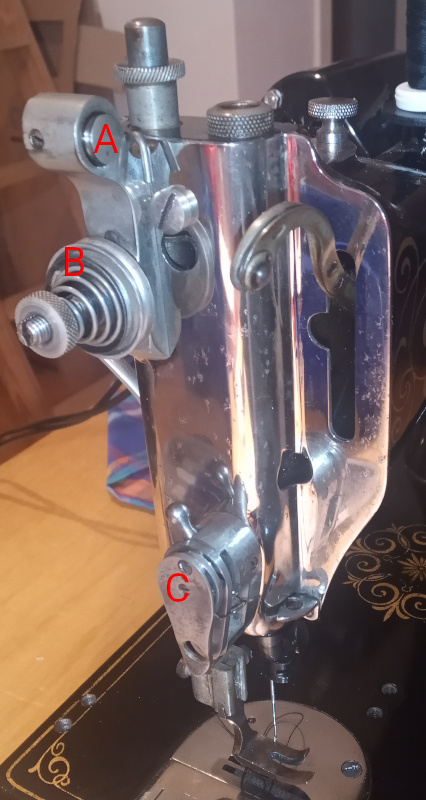 |
| Letter | Name |
|---|---|
| A | Thread check |
| B | Main tensioner |
| C | Thread controller |
There are two parts to the lower thread tension. There’s the typical screw on the bobbin case, just like on nearly every sewing machine ever made.
| Bobbin case |
|---|
 |
You adjust it just like on any machine - tighten the screw for higher tension, loosen the screw for lower tension.
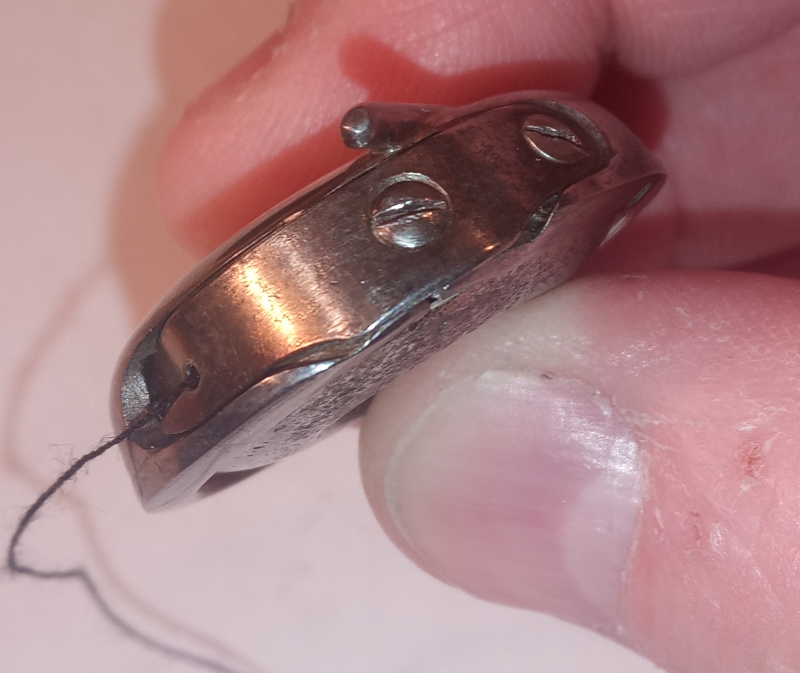
The other part of the lower thread tension is this thing:
| Spool holder |
|---|
 |
You shouldn’t normally have to adjust the spool holder. The bobbin case tension adjustment is usually all you need to worry about.
I’m going to go through the whole thing, just like if you had disassembled everything and have to start from scratch.
I’ll flag the unusual parts. You can skip them if all you need to do is to adjust the tension for a different type of thread.
Spool holder adjustment (not normally necessary)
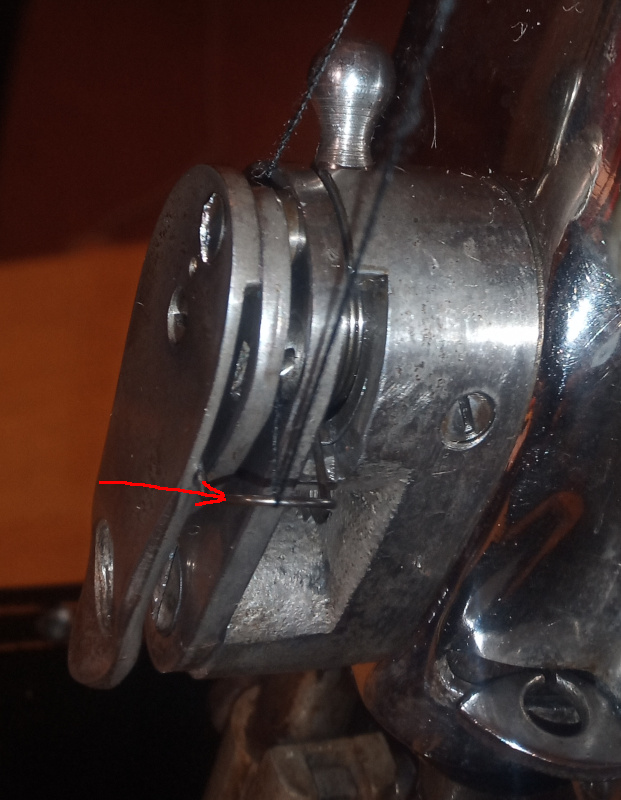
The upper thread has to pass between the spool holder and the back of the bobbin case. It has to be able to slide easily between the two. You can adjust the gap between the spool holder and the bobbin case. The gap needs to be wide enough for the thread to pass, but narrow enough that the bobbin case doesn’t flop around.
Before adjusting the spool holder, check to see if you need to.
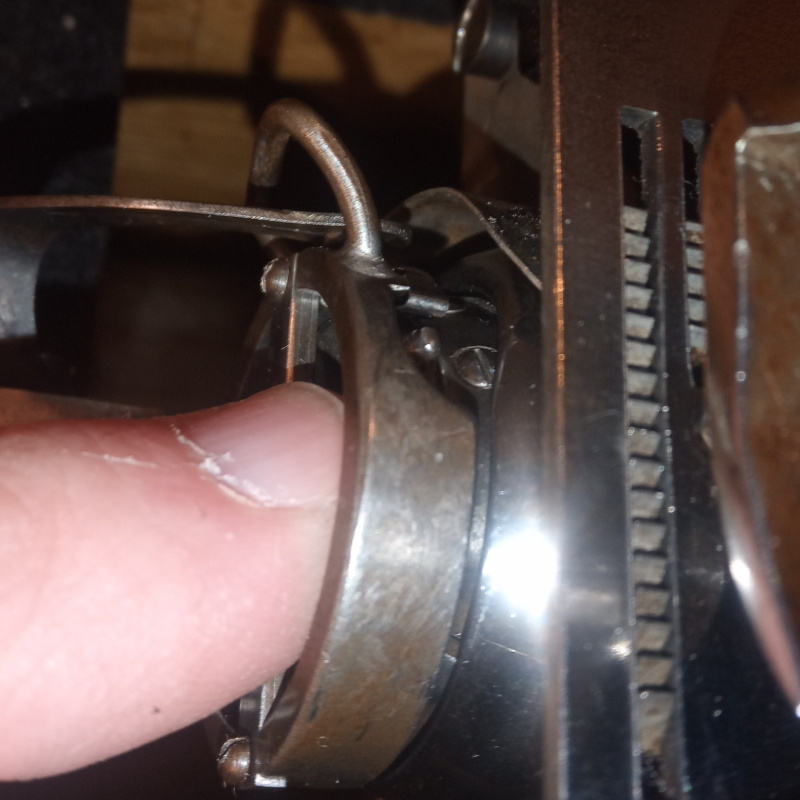
| Check the spool holder |
|---|
 |
 |
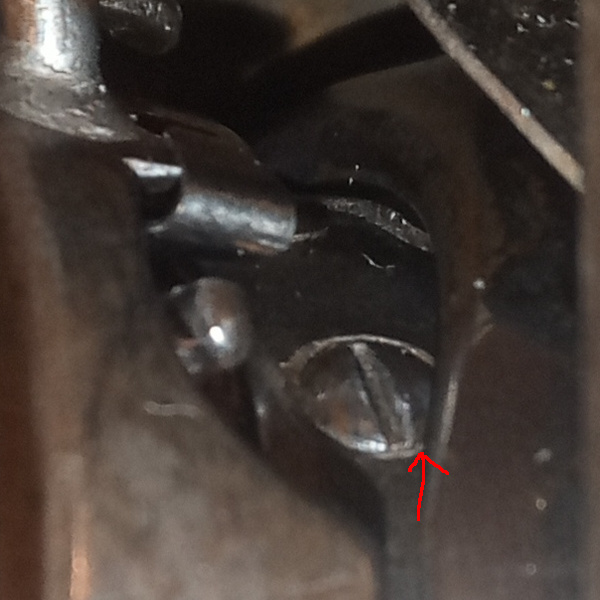 |
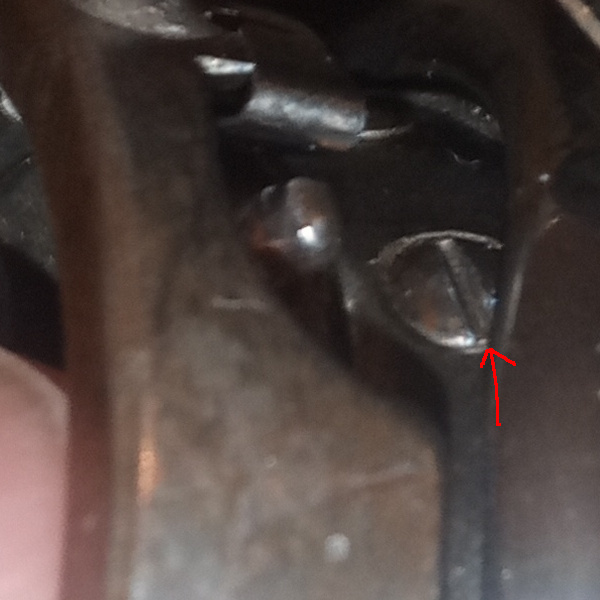
- Put the bobbin case in the spool holder and latch the spool holder closed.
- Push against the bobbin case with a finger. Take note of where the bobbin case is.
- Release the bobbin case. Compare the released position with the pushed position.
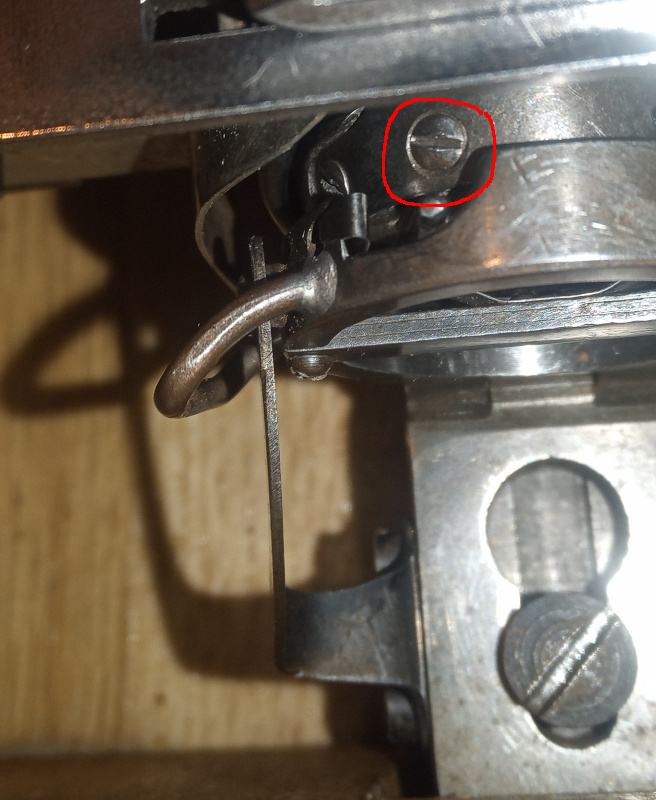
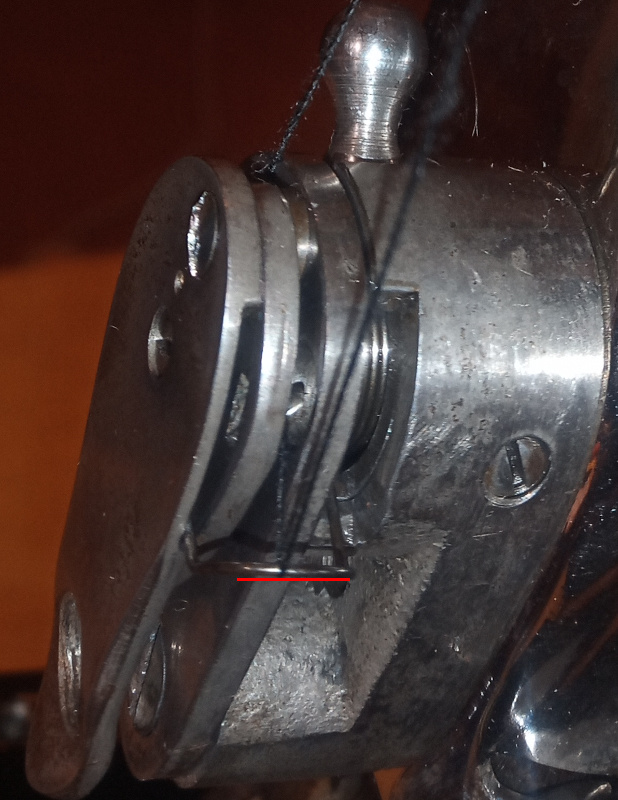
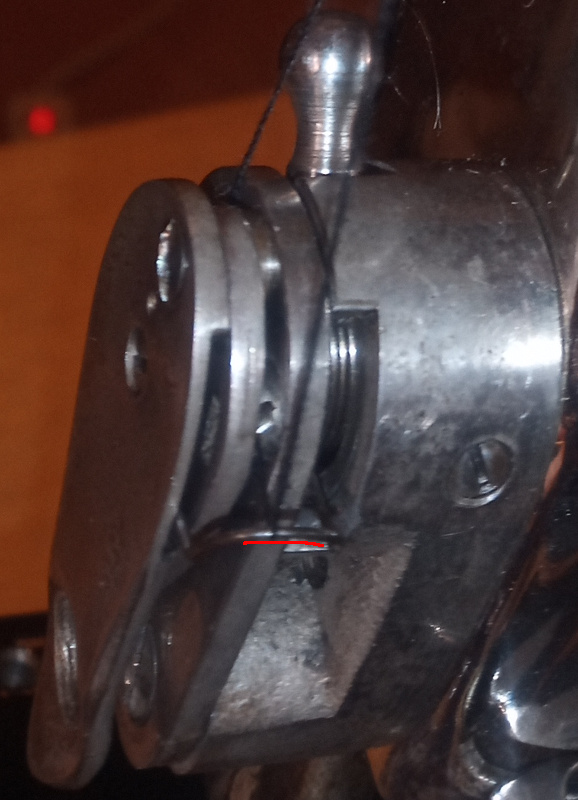
I intentionally positioned the bobbin case screw and the rotary hook so as to have a clear comparison. Look at the lower two pictures and you’ll see that the gap is about the width of the slot in the screw of the bobbin case.
That works fine for typical thread like you would use to sew cloth. For the thicker thread used to sew leather you may have to make the gap wider. It needs to be at least as wide as the thread is thick, and a little extra besides.
You adjust the spool holder gap by removing the spool holder from the machine. Loosen the big screw, push the spool holder back, turn it to the left, then pick it up off the big screw.
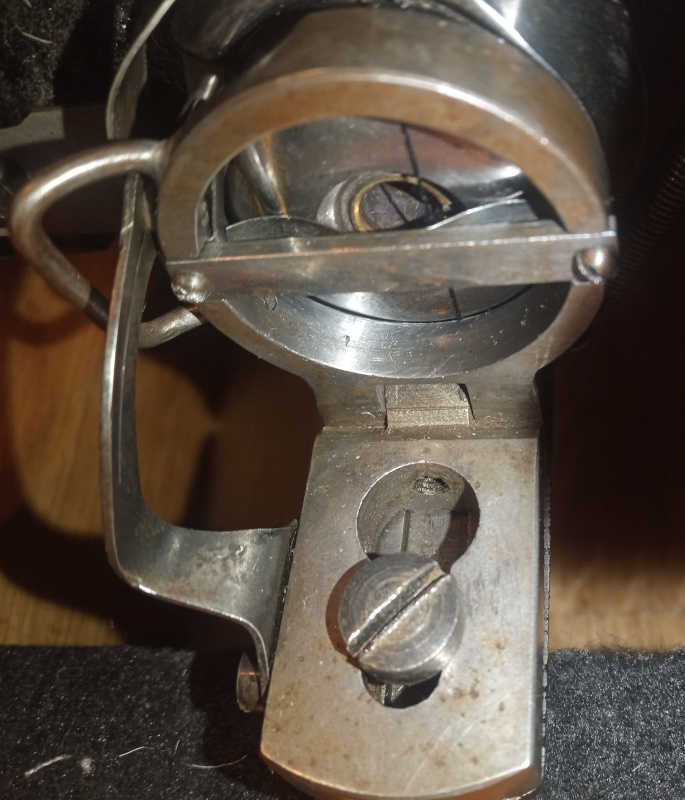
Once you have the spool holder out of the machine, you’ll find the adjustment screw.
| Spool holder adjustment screw |
|---|
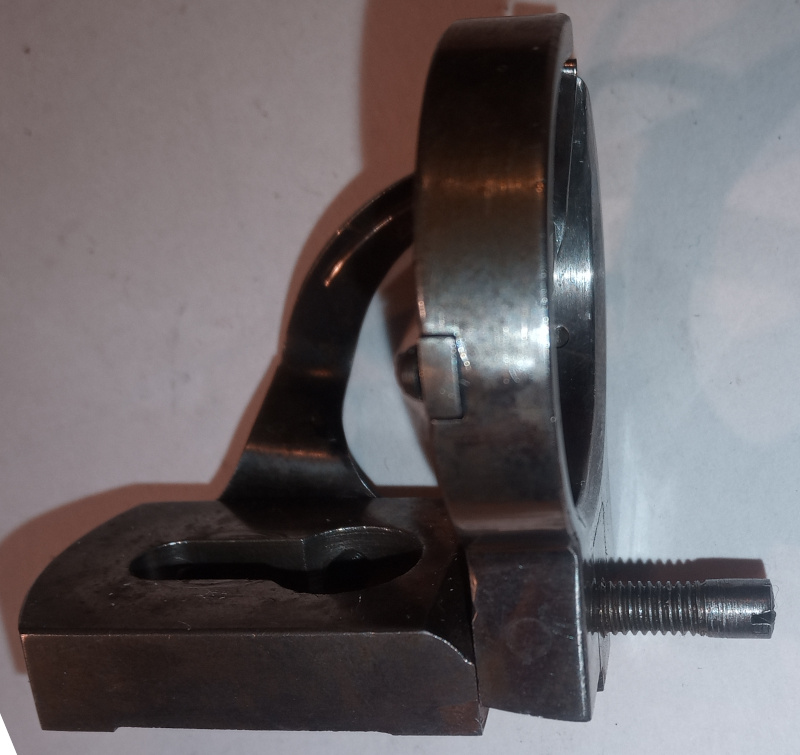 |
Tighten the screw to make the gap narrower, loosen the screw to make the gap wider.
Reinstall the spool holder and the bobbin case, then check the gap. Repeat if needed.
Bobbin case tension adjustment
You should only need to adjust the bobbin case tension screw if you need to use extremely thick (or extremely thin) thread.
Adjust it once using the type of thread you normally use. After that you should be able to change thread and compensate for minor differences using just the upper thread tension adjustment.
I’ve played around with the thread tension on my Adler a little, and found that it takes a minimum of 35 grams (1.25 ounces) of lower thread tension to work reliably. Yours might be able to use a lower tension, but 35 grams should be a good starting place.
Put a full spool of thread in the bobbin case and install the bobbin case in the spool holder.
Thread the machine according to the manual (or use my guide to threading the Adler class 8,) then use the upper thread to pull the lower thread up through the needle plate.
| Thread the sewing machine |
|---|
 |
Hold the loose end of the thread and turn the balance wheel clockwise (push top of the balance wheel away from yourself) so that the needle goes down through the needle plate and picks up the lower thread.
Once you’ve got the lower thread up through the hole in the needle plate, clip the loose end to your scale.
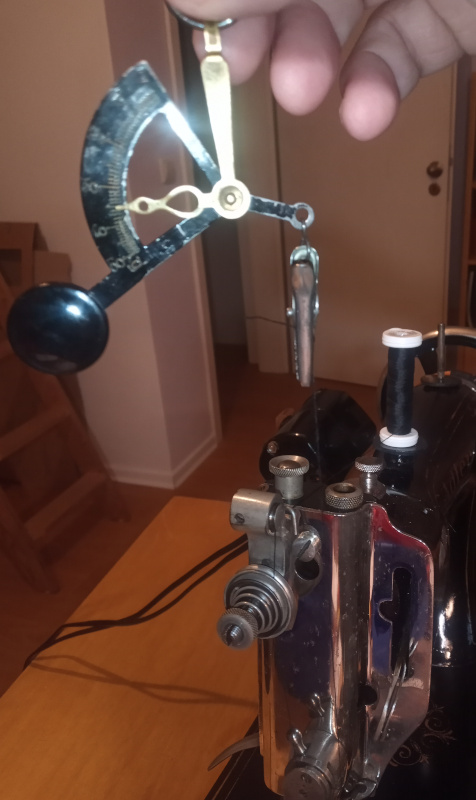
Rotate the balance wheel until the take up lever is all the way down. This positions the rotary hook so that the tension on the thread is at its peak.
| Take up lever all the way down |
|---|
 |
With the take up lever in the proper position, pull up on the scale. It should show 35 grams while the thread is moving.
| Measuring the tension on the lower thread |
|---|
 |
If the tension is not correct, adjust it with a small screwdriver. The tension on mine is a little low because I’ve been experimenting on it - it needs to be set a little higher to 35 grams.
The bobbin case screw can be adjusted with the bobbin case in the machine:
| Adjust the tension on the lower thread with the bobbin case screw |
|---|
 |
Tighten the screw for more tension, loosen it for less tension. Adjust in small amounts, less than one quarter turn each time you adjust it.
Adjust, measure, repeat until you get 35 grams.
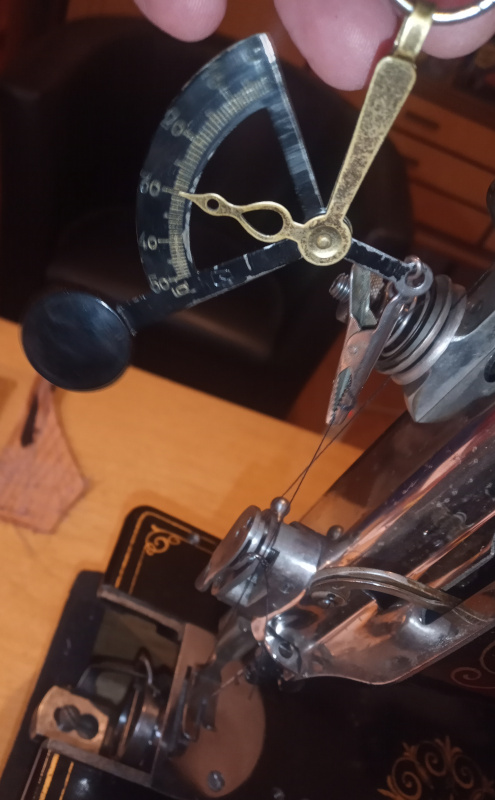
Thread check tension (not normally necessary)
The thread check is this little gadget:
| Thread check |
|---|
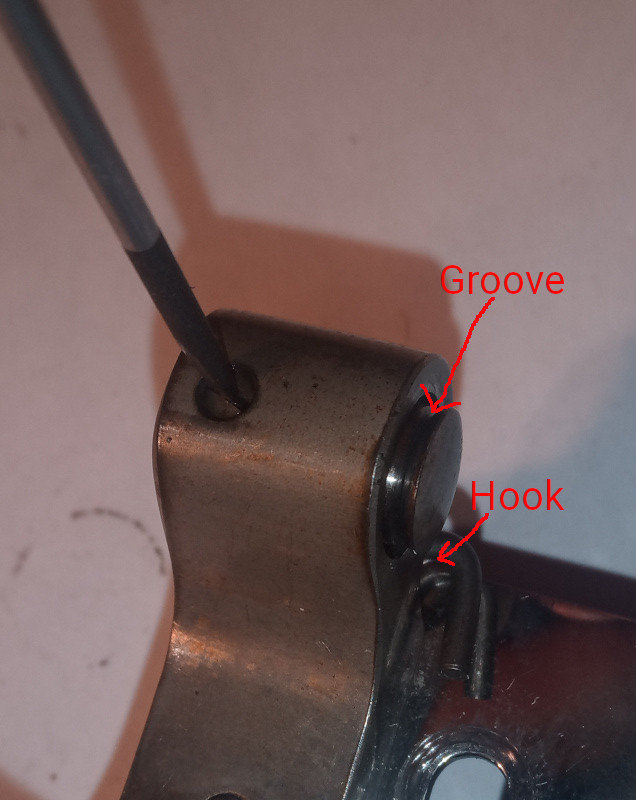 |
Pass the thread under the hook then over the thread check through the groove. The thread should run in a straight line through the hook and the groove. If the groove isn’t in a straight line with the hook, loosen the screw and align the hook and groove.
The thread check is spring loaded. I measure the tension on the thread passing through just the thread check at about 15 grams (around 0.5 ounces.) If it goes over about twenty five or under about five grams there’s probably something wrong. If it is too low then the spring is too loose or missing. If it is too high then the spring has been stretched or there’s grunge keeping the thread from moving smoothly.
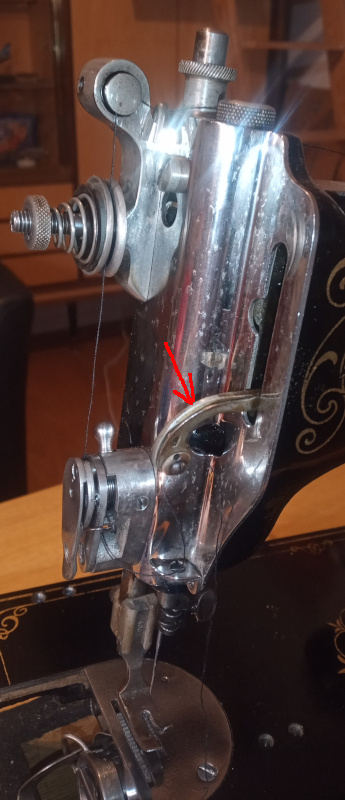
Thread controller (not normally necessary)
This is the thread controller:
| Thread controller |
|---|
 |
The spring (red arrow) is there to help maintain the thread tension. I set mine to about the same tension as the tension on the lower thread.
Tie off the upper thread to the screw on top of the machine:
| Tie off the upper thread |
|---|
 |
That’s the cover for the oil hole on top of the machine, just behind the faceplate.
Pull the thread back so that it doesn’t go through the take up lever. The thread should go from the tied off point, through the hook, the thread check, the main tensioner, and then the thread controller.
Like this:
| Ready to adjust the thread controller |
|---|
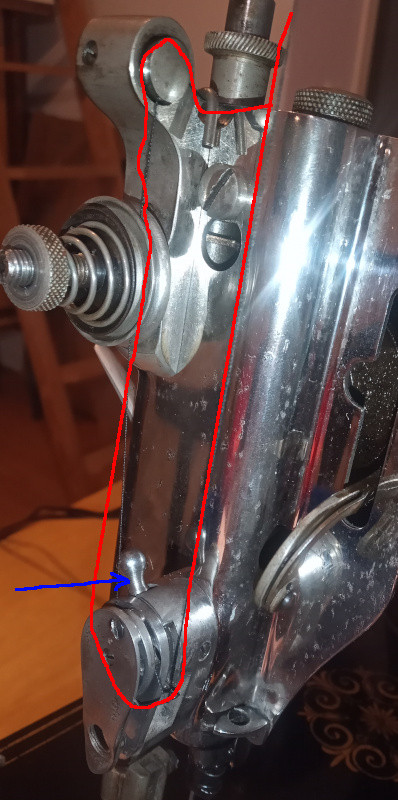 |
Note that the adjustment lever on the thread controller (blue arrow) is all the way up.
With the thread tied off, pulling up on the thread will measure the spring tension.
Clip the scale to the free end of the thread and pull up so that the spring lifts about 5mm (1/4 inch.)
| Lift the spring by 5mm |
|---|
 |
 |
The difference in the spring position (as shown by the red lines) is about 5mm.
I adjusted the spring tension to match the tension on the lower thread - that’s 35 grams.
That may not be optimal, but it does work for normal thread. The only guide I have is the spring on the Pfaff 31 I cleaned up for my daughter. It was working properly, so I made measurements of it. The spring was set to about 25 grams at 5mm, and the bobbin case was set to 25 grams. I figure the spring needs to be set the same as the bobbin case. For the Adler that’s 35 grams.
Measure the tension, then adjust it as necessary.
| Adjust the spring tension |
|---|
 |
You need two small screwdrivers to adjust the spring.
Hold the left screw in place and loosen the screw on the right. Turn the left screw tighter for more tension, turn it looser for less tension. Tighten the right screw, then measure again. Repeat until the spring tension matches the tension on the lower thread.
Main tensioner
Now that everything is approximately correct, you can adjust the tension on the upper thread.
- Put a full bobbin with the thread you intend to sew with in the bobbin case and install it in the spool holder.
- Thread the machine (see drawing from the Adler class 8 user’s guide above) and pull the lower thread up through the needle plate.
- Measure the tension on the lower thread if you haven’t already.
- Unthread the machine back to the thread controller.
- Lower the presser foot lever. Most machines have a tension release. When the presser foot lever is up, there’s no tension on the main tensioner - you must lower the presser foot lever.
| Ready to adjust the main tensioner |
|---|
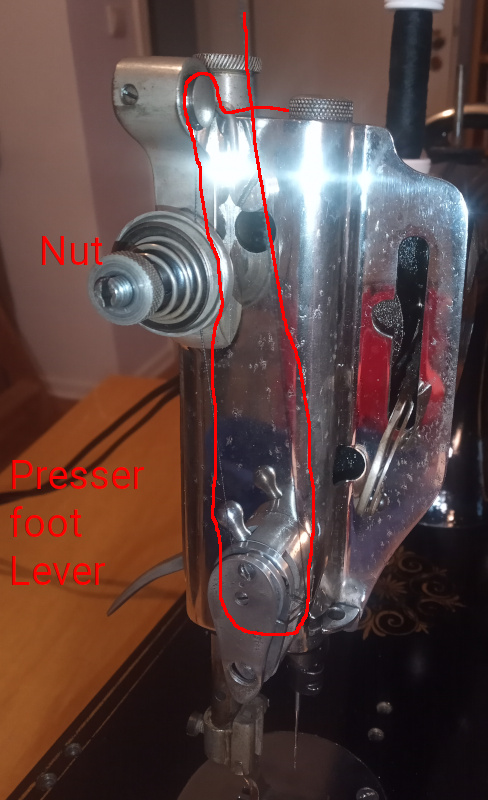 |
- Clip the scale to the free end of the thread and pull up. You want the same tension here as on the lower thread. In my case, I want 35 grams. Measure the tension while the thread is moving.
- Adjust the nut on the main tensioner to get the proper tension. Tighten the nut for higher tension, loosen it for lower tension.
| Adjusted tension |
|---|
 |
I’ve got the tension on the upper thread set to 35 grams, just like the the tension on the lower thread.
| Test seam |
|---|
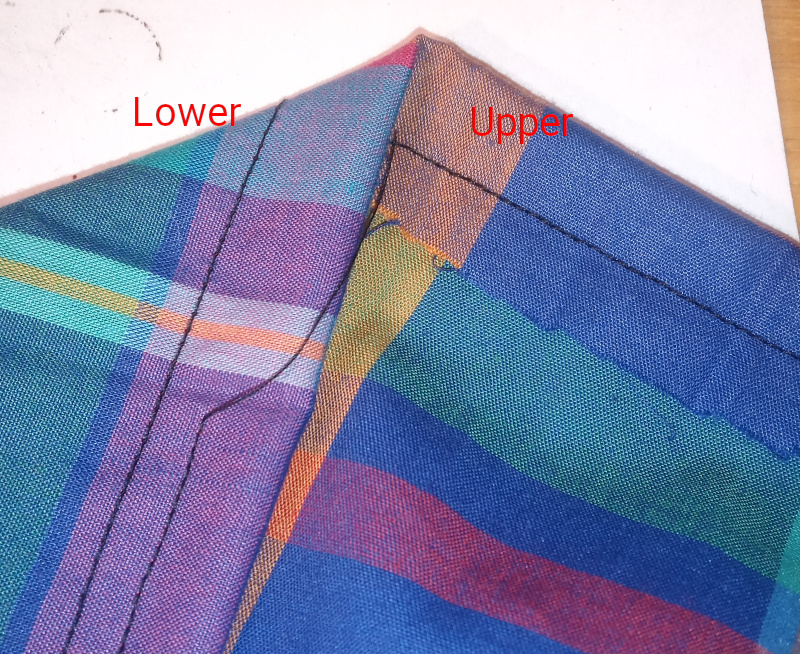 |
It’s not perfect, but it is close.
At this point, you can fine tune the tension on the upper thread. If you look closely, you’ll see that the upper thread is showing on the lower side - the upper tension needs to be a tad higher.
This is the point that all the other guides start at - the fine tuning. Nobody ever mentions how you get things to the point that fine tuning works.
If you follow my guide, you should be able to adjust the tension on your sewing machine with only one or two test seams, and no bird nests at all.
The method I use is not specific to any particular machine - measure the tension on the lower thread, adjust the tension on the upper thread to match by the scale will work on any machine.
The details of the main tensioner apply to any machine that has a main tensioner without a scale.
The details of the thread controller spring will apply to pretty much any machine that has a thread controller separate from the main tensioner.
The details of the spool holder should apply to any Wheeler and Wilson derivative that uses a spool holder. That’s several Adler models that I know of (the 86, the 87, the 187, and possibly other models.) That’s the Phönix class 8, the Jones’ Spool, and (maybe) some FAVTA machines.