HowTo: Solder by hand - Removing simple SMD parts
Anything you can see, you can remove.
HowTo: Solder by hand - Table of Contents
Check this handy chart to find the temperature you need for this task.
Now that you can install surface mount device (SMD) parts, it’s time you learned how to remove them as well.
As with soldering SMD parts, removing them looks more complicated than it is. I’ve got about 16 photos showing how to remove an SMD part. That sounds like a lot, but the fact of it is that it only takes seconds to do. More than half the photos are about cleaning up the part and the pads after removal.
Steps
Tools
You need the same tools to remove SMD parts as you need to install them.
| Tools to remove SMD parts |
|---|
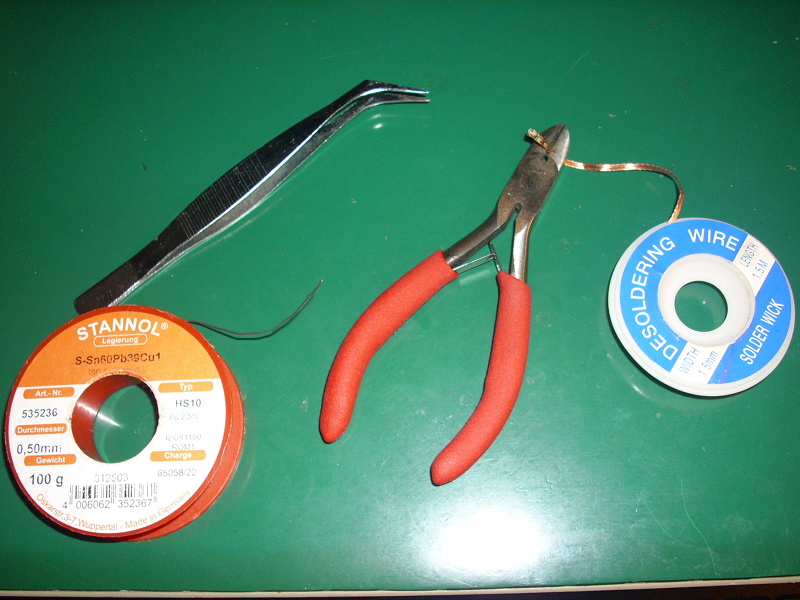 |
- You’ll need the solder wick to clean up the pads after removing a part.
- You’ll need the wire cutters to remove used sections of solder wick from the end of the roll.
- You’ll need a bit of solder to help remove the part.
- You’ll need the tweezers to pluck the removed part off the tip of the iron and hold it while you clean it up.
Positioning yourself
Positioning isn’t as critical for removing as for installing. There’s really only one thing you have to pay attention to: Arrange yourself and the board so that the tip of the iron is parallel to the part you want to remove. It’s not critical enough to rate a separate photo.
As always, though, you will be working with your right hand planted on the workbench. Move the board and the part to where you can reach them with the soldering iron tip without raising your hand from the table.
The task
I’m going to remove a single 1206 size part from a board and clean it up.
The part looks like this:
| The part to remove |
|---|
 |
I’m going to remove that part, then clean up the part and clean off the pads.
Do it to it
- Line things up.
You want to set things up so that the tip of the iron is parallel to the part. The idea is to melt the solder on both ends of the part simultaneously.
Review the things you are supposed to do everytime you pick up your iron, then line up your iron and the board to look like this:
| Get ready |
|---|
 |
I’ve already got things lined up in that photo, and I’m adding a spot of solder to the tip of the soldering iron.
- Add some solder to the part.
Add solder to the joints on both ends of the part. Make a large blob on each end. That will help in touching both joints at the same time with the tip of the iron when you go to remove the part.
| Add solder to the joints |
|---|
 |
 |
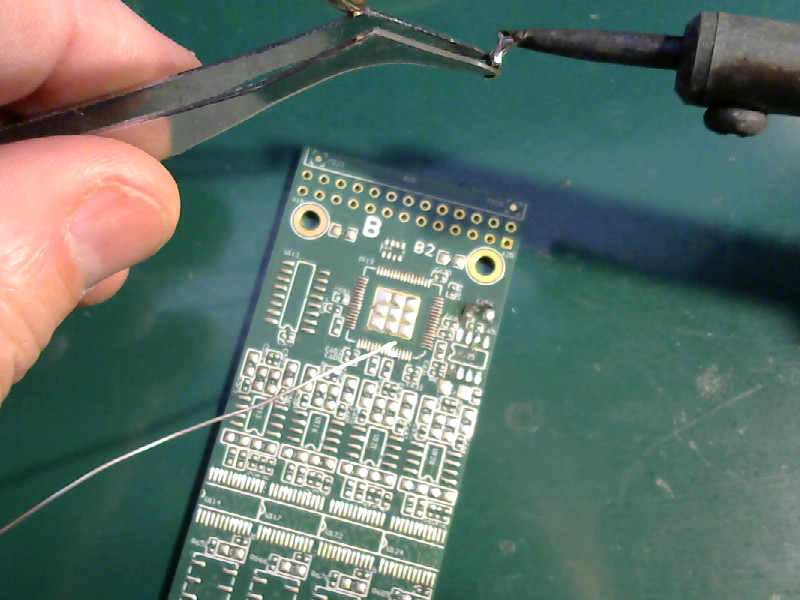
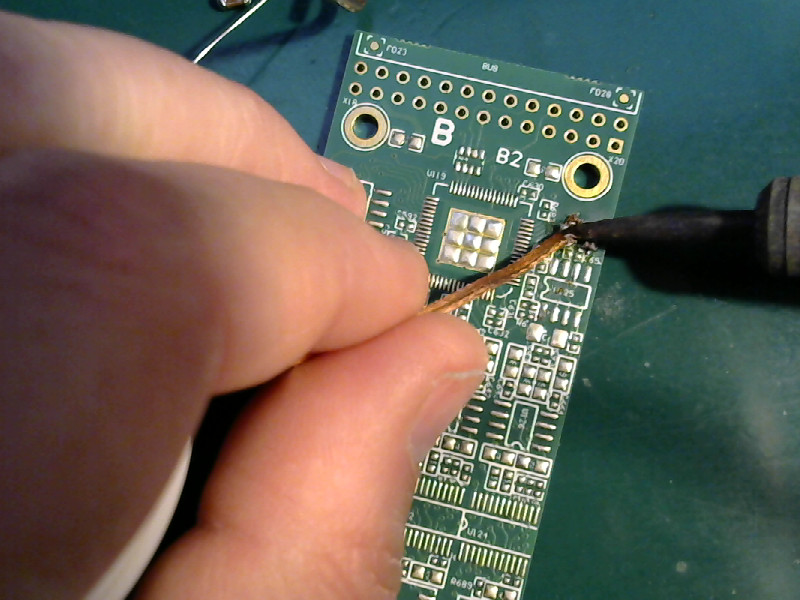
- Heat both joints.
Spread a little solder along the side of the soldering iron tip over a length just longer than the part. Touch the side of the soldering iron tip to the side of the SMD part so that the tinned area touches both joints at the same time.
| Melt it loose |
|---|
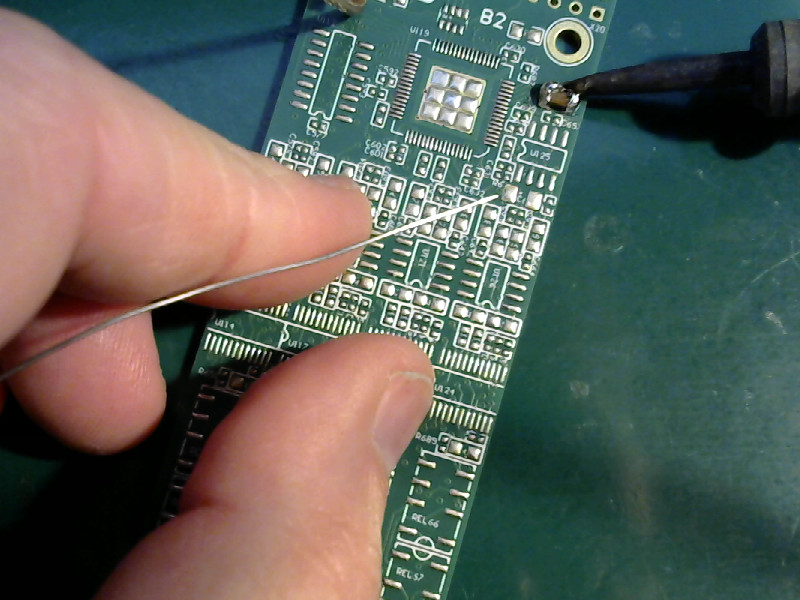 |
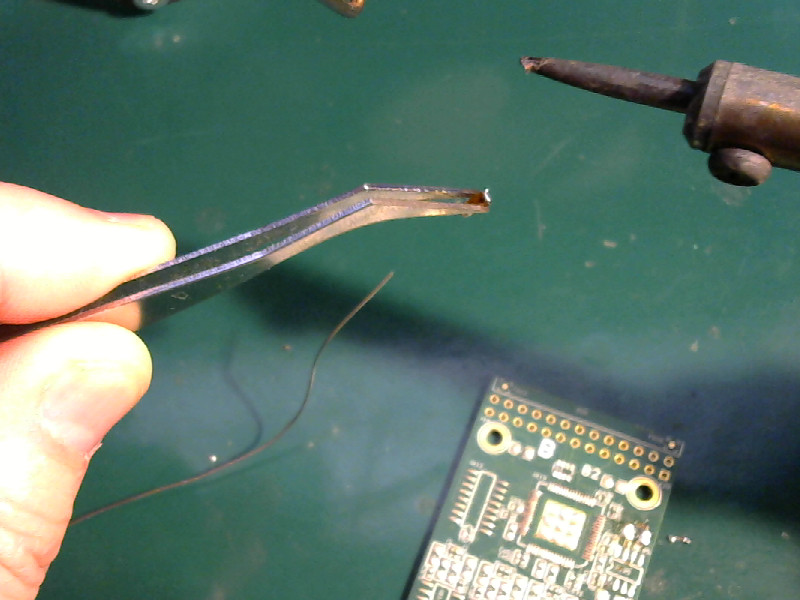
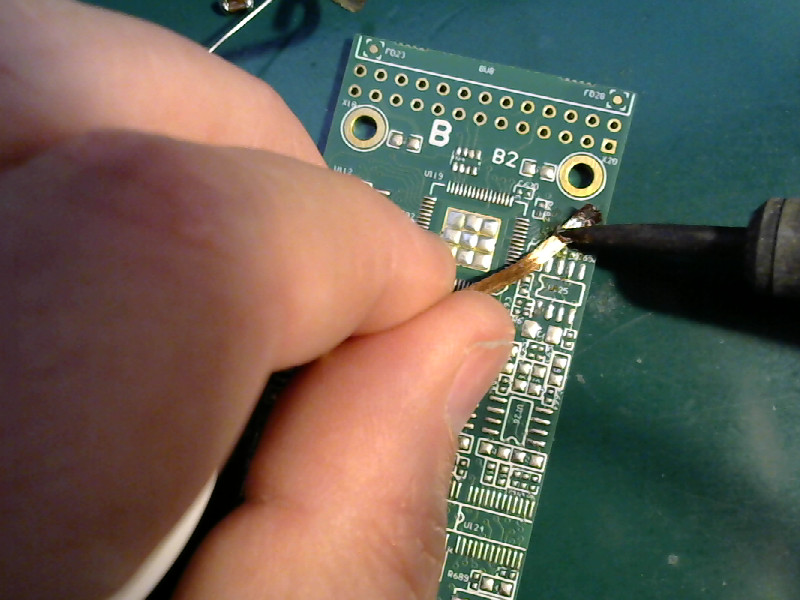
- Take it off.
Watch the blobs at both ends. You’ll see when they melt and turn liquid. When the solder on both ends of the part has melted, push sideways with the tip of the soldering iron. The part will go right along with it.
Move the part sideways a bit so that it loses contact with its pads, then raise up the soldering iron. The part will stick to the tip and be lifted off the board as you raise the iron.
It looks like this:
| Remove it |
|---|
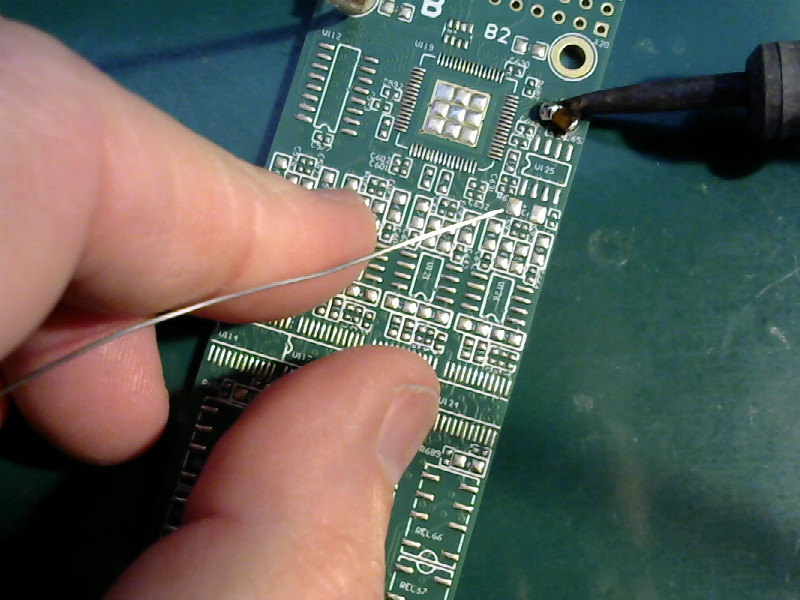 |
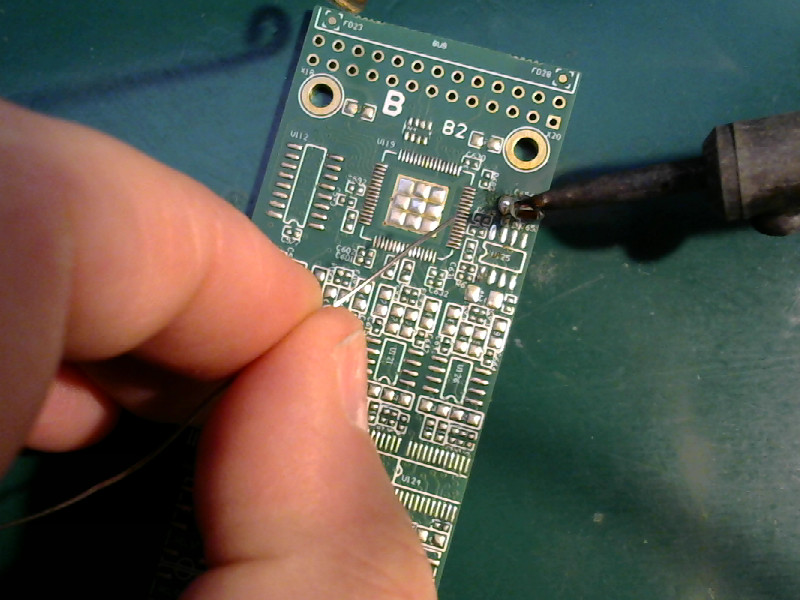 |
 |
That’s the hard part, and it’s the one everyone assumes takes special tools. It is not difficult, and it doesn’t take any kind of special tools at all.
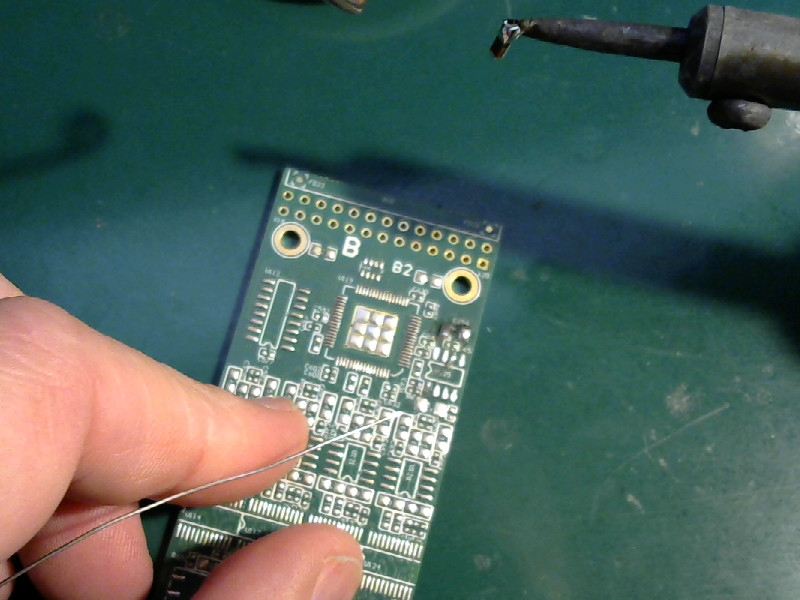
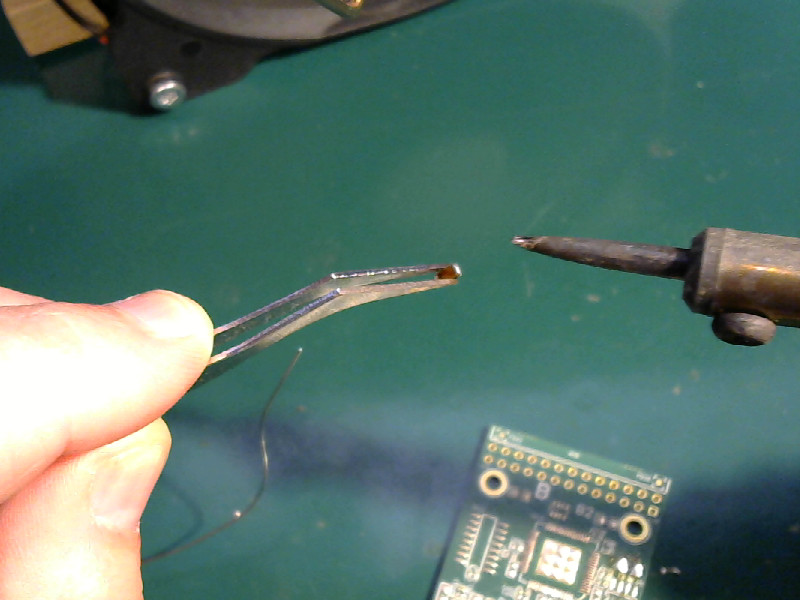
- Clean the part.
With the part off the board, you need to remove it from the tip of the iron. You can flick it into the nearest trash can if you don’t need it anymore, or you can clean it up for re-use.
If you want to re-use the part, pluck it off of the soldering iron tip with your tweezers.
| Recover the part |
|---|
 |
 |
You can see there’s a little pointed blob of solder on the part. That would cause difficulties when soldering the part, so it’s got to go.
Wipe the tip of your iron clean on the sponge, then use it to remove the blob from the part.
| Clean it up |
|---|
 |
 |
Just touching the clean (tinned) tip of the iron to the blob on the part will melt the excess solder. Pull the tip of the iron across the end of the part, and most of the solder will go with it. If you don’t get all of it on the first go, wipe the tip clean and do it again.
Clean up both ends of the part the same way.
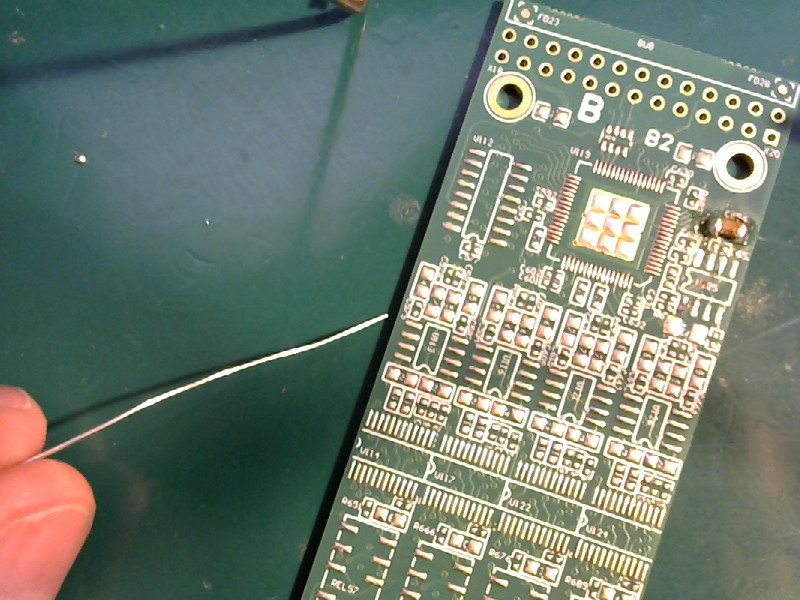
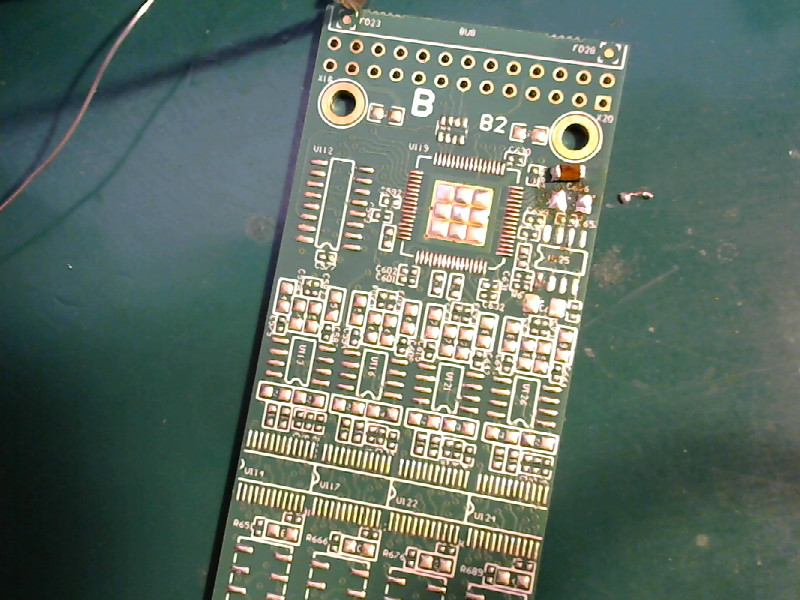
- Clean the board.
If you need to replace the removed part, then you’ll need clean pads. This is where the solder wick comes in.
As you can see, removing the part left a lot of solder on the pads.
| Flooded pads |
|---|
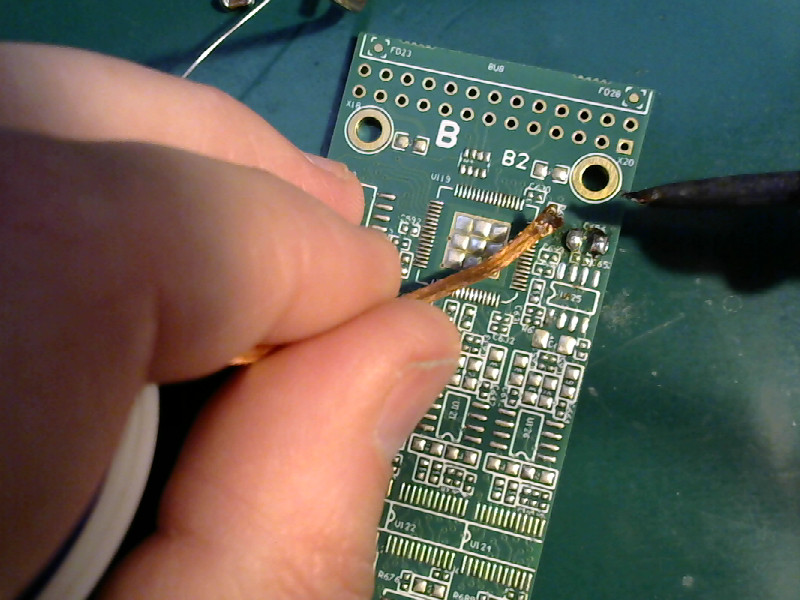 |
There’s no way you can solder a new part in with that much solder in the way.
Clip the end of the solder wick to get rid of any section that already has solder on it. Put a bit of solder on the tip of the iron - yes, you add solder to the iron even though we’re trying to remove solder. The tip touches the wick from above, so it won’t add more to the pad. What it does is to help conduct the heat from the iron to the wick and from there into the solder on the pad.
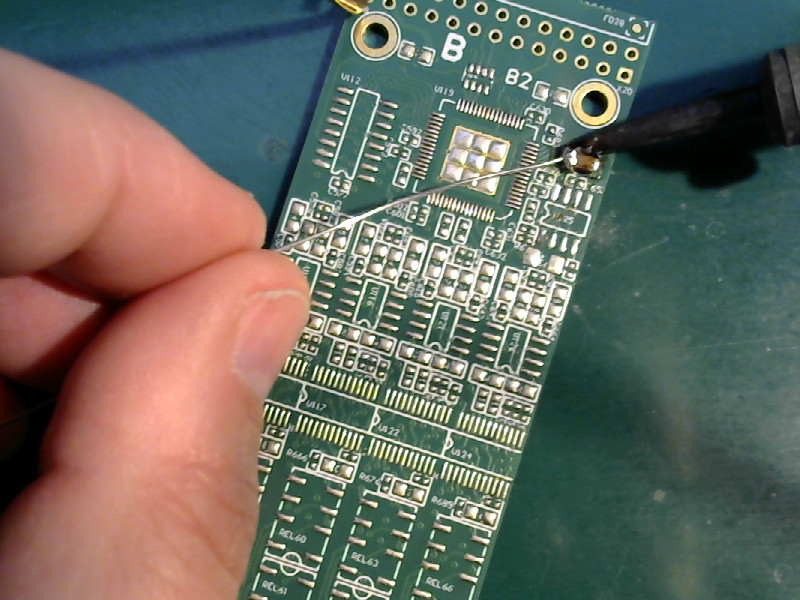
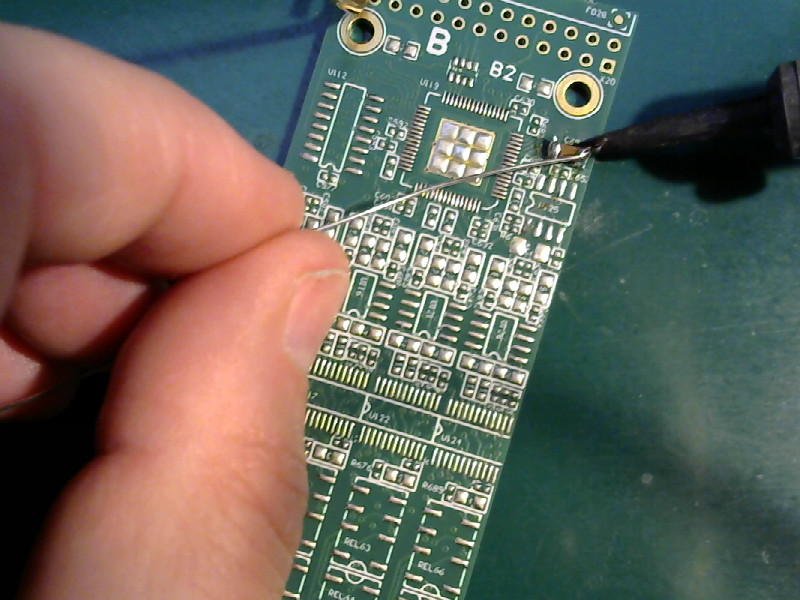
Put the clean end of the solder wick down on a pad. Press the wick down with the soldering iron tip. It will melt the solder on the pad, and wick it away. If you need to move the wick to a different part of the pad, pick up the wick and the soldering iron tip together so that the wick stays hot and the solder stays liquid. Move the wick to the new spot, and repeat the cleaning.
It looks like this:
| Clean the pads |
|---|
 |
 |
 |
- Done
If you’ve done all that, you’ll have a clean, re-usable SMD part and clean pads ready to have a new part soldered in.
| Done |
|---|
 |
That’s a pretty painless procedure, and it works every time. Practice does help (as with everything,) but it shouldn’t be difficult to do at all.
I find it slightly easier with smaller parts. It’s easier to get the needed contact along the length of the tip for smaller parts.
Anything you can see, you can unsolder that way.