HowTo: Solder by hand - Solder wires together
Finally getting somewhere.
HowTo: Solder by hand - Table of Contents
Check this handy chart to find the temperature you need for this task.
What’s up?
I’m going to cover a few things in this post:
- Types of wires
- Stripping wires
- Preparing stranded wire for soldering
- Soldering wires
- Mini project “Fume Fan”
Types of wires
There’s two types of wires you’ll run into when building your gadgets:
- Solid core
- Stranded wires
Here’s what they look like:
| Wire types |
|---|
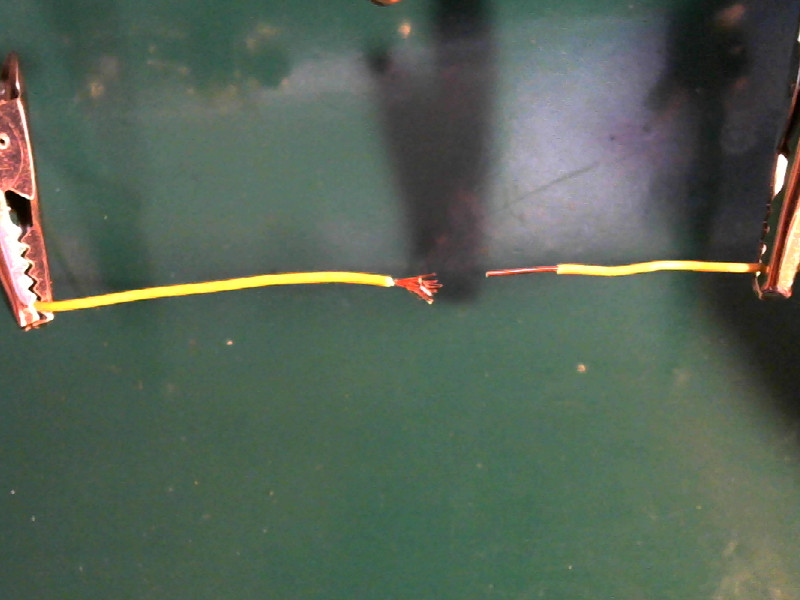 |
| That’s stranded wire on the left and solid core wire on the right |
Stranded wire is more flexible - it bends better and won’t break if you wiggle it around a lot. It’s a little bit more work to solder, so I’ll use it as an example when I show you how to solder wires together.
Solid core wire is the same as stranded wire, only it has just one thick strand. It is stiff and you can bend it into shapes and it will stay put. If you wiggle it a lot, it will break. This kind of wire is commonly called “telephone wire.”
I won’t bother showing pictures of how to solder solid core wire together. It’s just like doing stranded wire, but you get to leave out a step.
Stripping wires
Before you can solder a wire, you have to remove the insulation.
There are special made tools for the task. I don’t own one. I either use my wire cutters, or my pocket knife. It’s trickier with the wire cutters because you can accidentally cut the wire that way. Instead of a pocket knife, you can use the edge of the blade of a pair of scissors - it doesn’t matter if you use the sharp cutting edge or the back edge as you’re not really cutting anything.
My pocket knife has two blades. One is sharp enough to shave with. The other is (intentionally) dull.
I use the dull blade of my knife to strip wires.
Here’s how:
- Hold the knife (or scissors blade) in you right hand, and hold the wire in your left hand.
- Put the edge of the knife blade on the insulation of the wire about 10mm (3/8 inch) from the end.
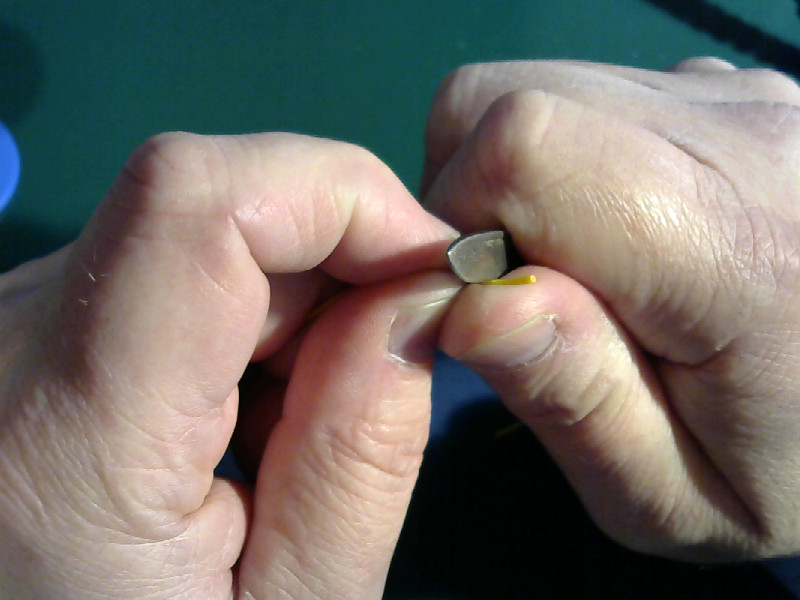
- Squeeze the wire between the knife blade and the thumb of your right hand.
- Squeeze hard and use your right hand and the knife blade to pull the insulation off of the wire.
It looks like this:
| Squeeze the wire between your thumb and the blade |
|---|
 |
| Pull the insulation off |
|---|
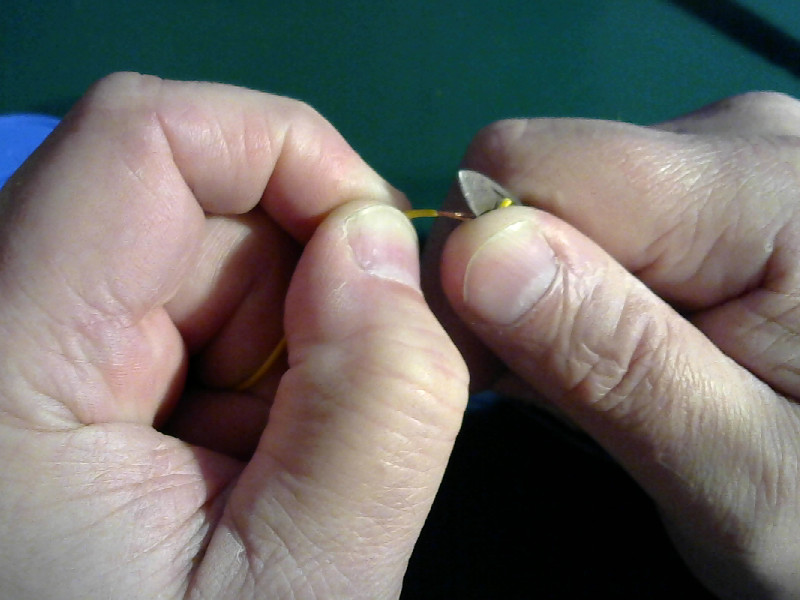 |
You don’t actually cut the insulation. Pressing the wire between your thumb and the blade makes a tiny nick in the insulation on one side. When you pull, the rest of the insulation breaks and comes off.
If you don’t squeeze hard enough, the blade will slide instead of pulling the insulation.
No problem. Just try it again. It takes practice, but it’s a handy skill to have.
If you’d rather use a proper wire stripper, follow the instructions that come with it.
Prepare stranded wire for soldering
You have to get all of the strands of a piece of stranded wire together to solder it. I don’t know of any tool for doing it. I just use my fingers and thumbs.
Here’s how:
- Hold the wire in between the thumb and index finger of your left hand with the stripped end sticking out.
- Squeeze the loose strands between the thumb and index finger of your right hand. Squeeze it tight.
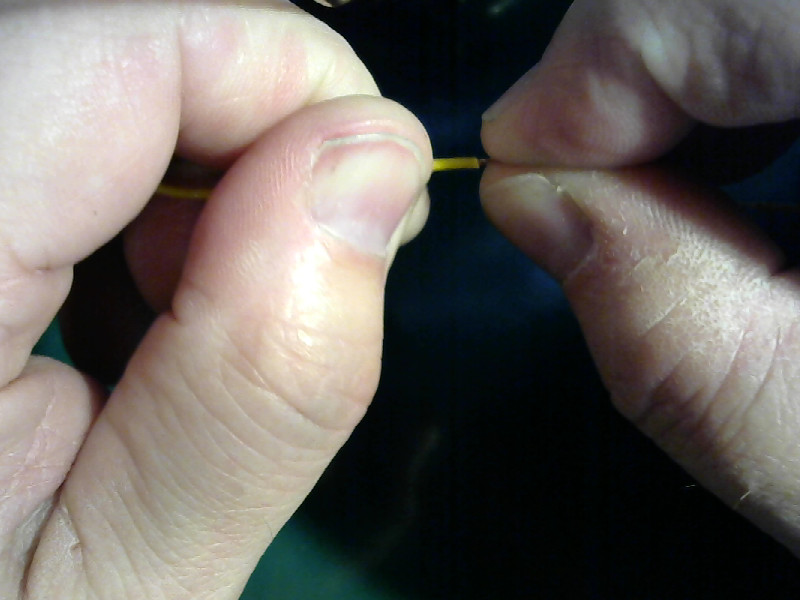
- Roll the wire between the thumb and index finger of your left hand. Like you would roll a pencil between your fingers. Only roll the wire in one direction. It doesn’t matter which way, but don’t roll it one direction then roll back the other - that’ll undo the twist you need to put in the strands.
- The strands will be twisted together and stay that way.
- Ready to solder.
It looks like this:
| Hold the wire |
|---|
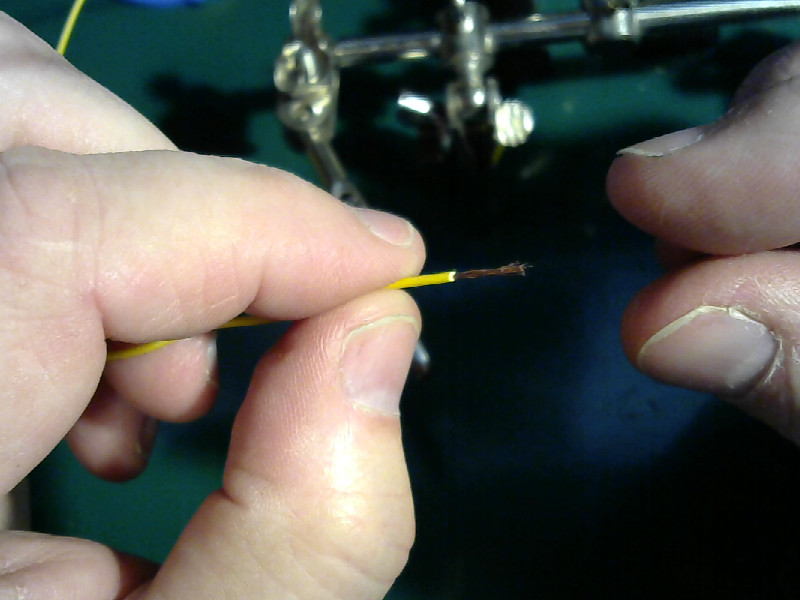 |
Notice how the strands are loose. They can spread and stick out. You either twist them together or you’ll have strands sticking out the side of the finished joint.
| Squeeze and twist |
|---|
 |
| Done |
|---|
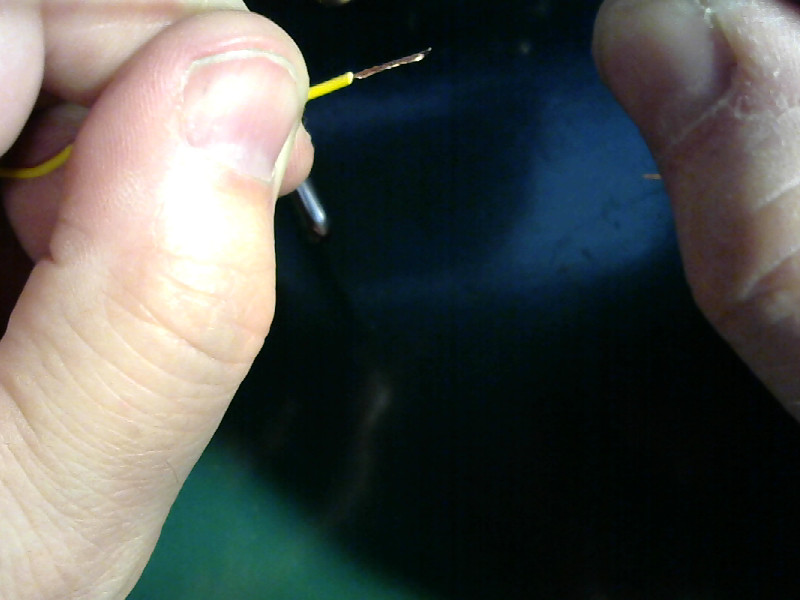 |
All the strands are twisted together. They’ll stay that way while you are soldering, and the finished joint will be nice and neat.
Soldering wires
With the twisting out of the way, I’ll go on and show you how to connect two wires together. Since solid core and stranded work the same from here on, I’ll just show the stranded wire.
It works like this:
- Review the get started page and the first steps - brace yourself properly, and keep the tip clean and protected.
- Tin the bare ends of the wires.
- Arrange the wires close together.
- Join the wires with more solder.
It looks like this:
| Prepare to tin |
|---|
 |
Notice there’s a blob of solder on the top of the tip of the iron. That’s to help get the wire hot. You’ll touch the wire (from the bottom side) with that blob.
| Tinning |
|---|
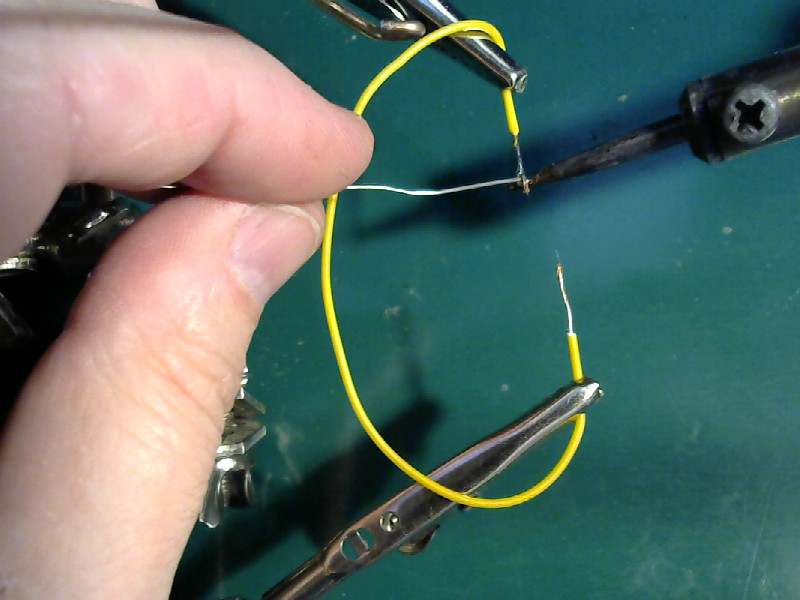 |
Touch the iron to the wire from the bottom. The blob on the tip touches the wire. Touch the solder to the wire on the top side, directly above the soldering iron tip. Run the tip and the solder up and down the wire. The tip and the solder stay together - same place, solder on top of the wire and the tip below the wire and touching the wire.
| Tinned |
|---|
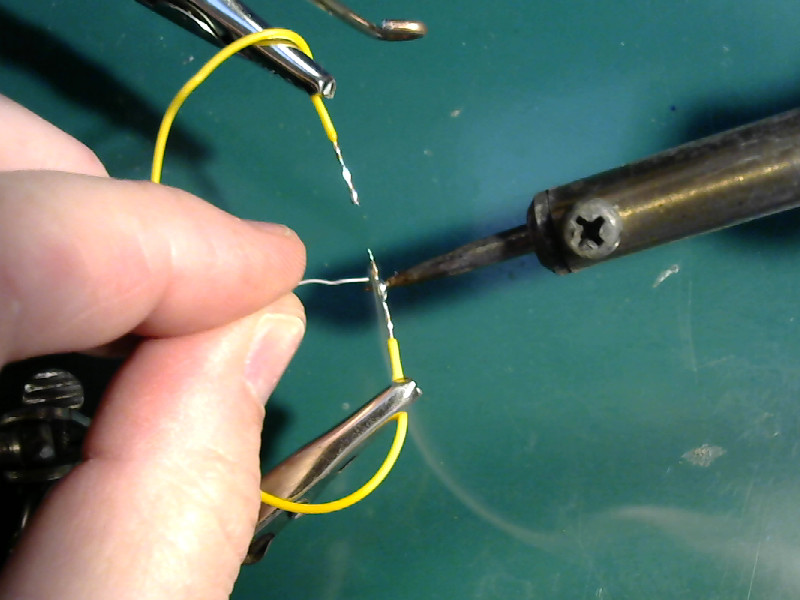 |
One wire is tinned. It’s nice and shiny along the entire length and there are no blobs dripping off of it. Tin the second wire just like the first.
| Positioning the wires |
|---|
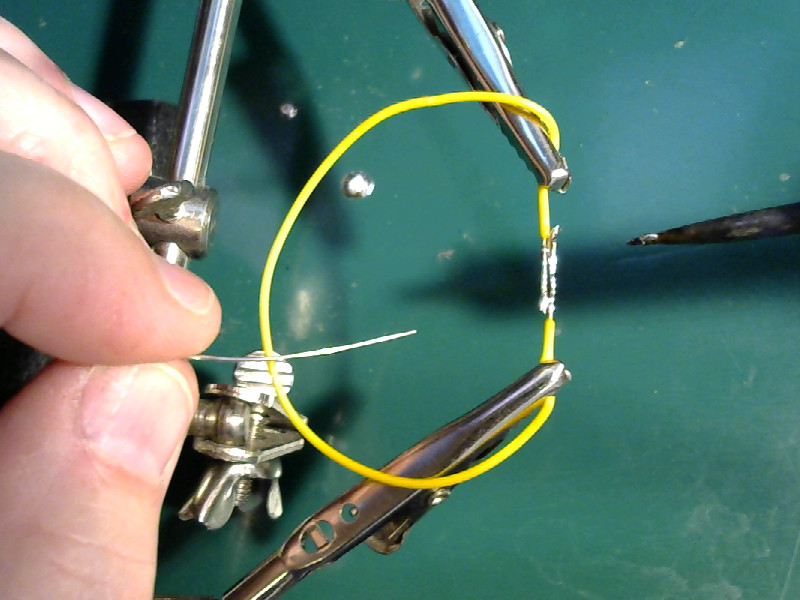 |
The tinned ends are positioned parallel to each other, and touching.
| Solder the wires |
|---|
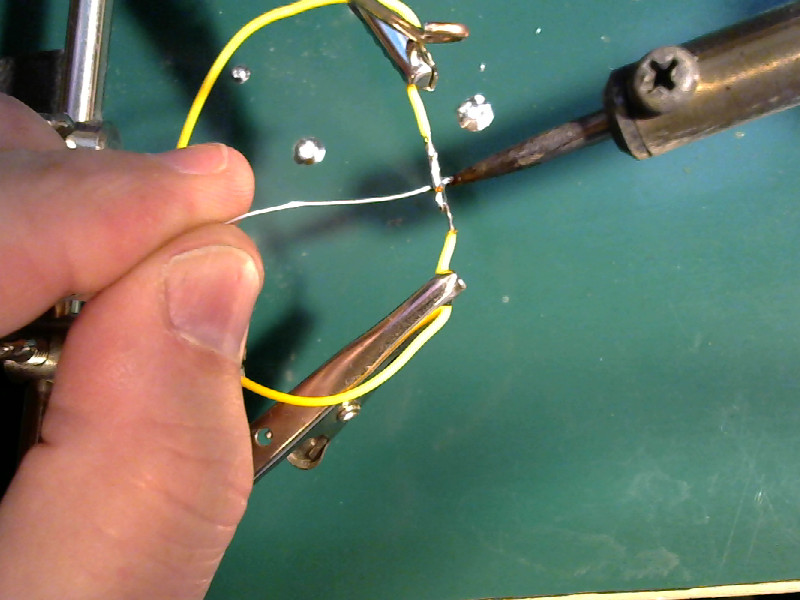 |
This is just like the tinning step, except there are two wires involved. Put a little blob on top of the tip of the iron. The tip touches the wires from the bottom with its blob. The solder touches the wires from the top, right above the tip. Run the tip and the solder up and down the wire ends so that the solder along the entire length melts and flows.
| Done |
|---|
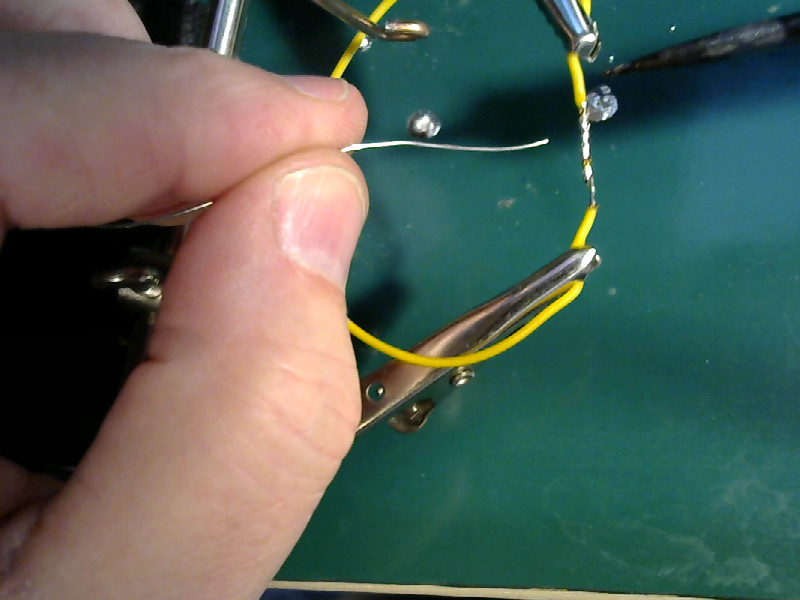 |
The joint is nice and shiny. There are no gaps. The joint is smooth. Nothing is burned.
What to do if the joint isn’t shiny and smooth:
- If the solder is dull then you took too long working. The flux burned off and the solder oxidized. Solder it again just like you did before, but move a little faster. You don’t have to undo the joint. Just run the solder and the iron over the joint again.
- If the joint has sharp, jagged edges then either the iron wasn’t hot enough or the wires moved before the solder was cooled and solid. Heat the wires and pull them apart. Tin them and solder them again.
- If there’s burned black stuff in the joint or the insulation close to the joint is burned or melted then either the iron was too hot or you took far too long making the joint. Clip the joint out with your wire cutters, and start over from stripping the wires and resolder them.
Mini project “Fume Fan”
While making the pictures, I kept getting a snoot full of fumes. That doesn’t normally happen - I usually exhale while actually making the joint and blow the fumes away. This time around, working the camera and framing the shots distracted me to the point that I forgot to blow the smoke away.
Half way through, I went and scrounged an old PC fan and a wall wart power supply out of the attic. I took the fan out in the garage and mounted it on a scrap of wood for a stand.
I connected the power supply to the fan, and made pictures while I was at it.
Here’s what a quickie project looks like:
| Parts |
|---|
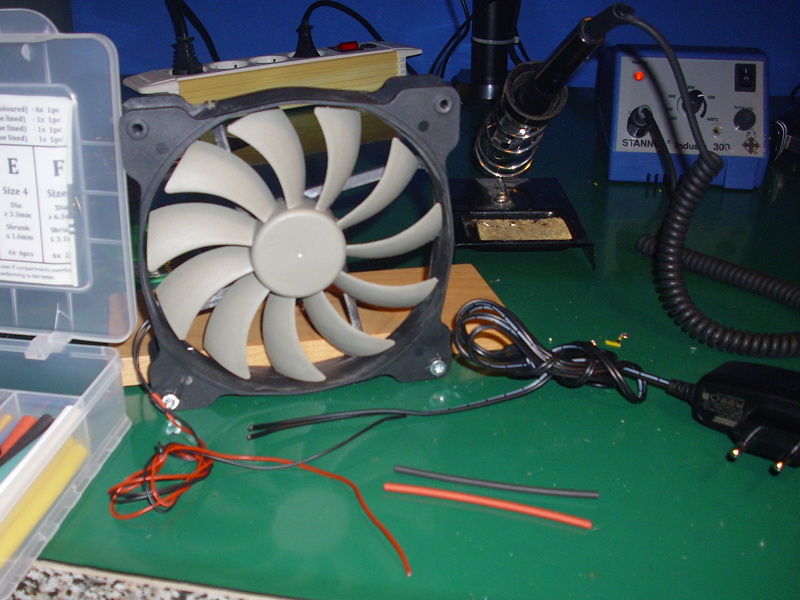 |
I have no idea where that fan came from. It’s bigger than your typical PC fan, but it had a 12 volt PC AT connector on it.
| Stripped wires |
|---|
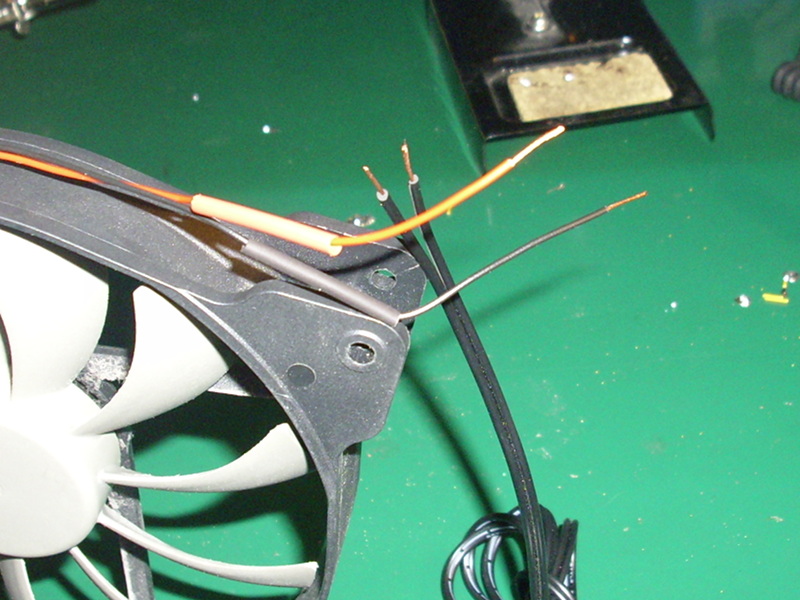 |
Here I’ve clipped the wires to length and stripped the ends. Notice that I’ve also put a couple of pieces of heat shrink tubing over the wires on the fan.
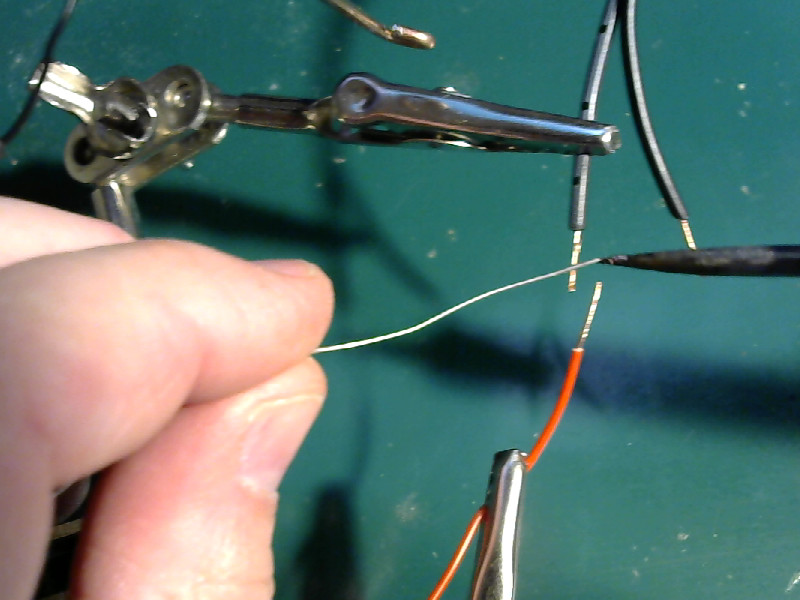
| Tinning the wires |
|---|
 |
| Soldering the red wire |
|---|
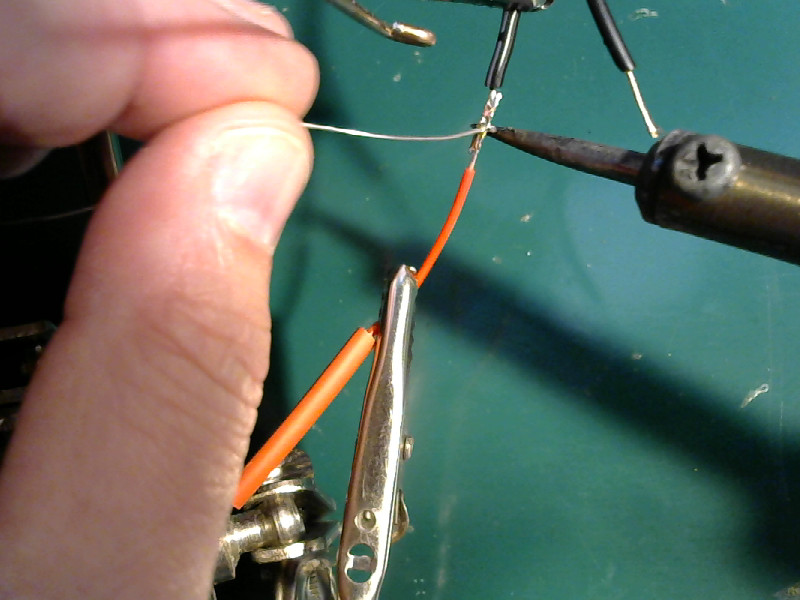 |
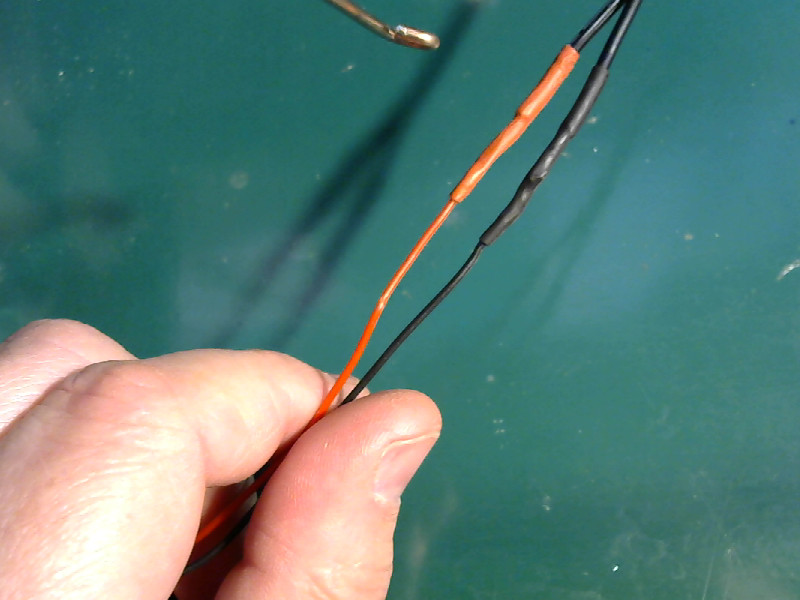
Note that the red wire connects to the powersupply wire with the white stripe. The white striped wire on powersupply cables is usually the positive wire. Red is the normal wire color for the positive terminal. I checked the power supply connection with my multimeter to make sure that the white stripe really is positive - it usually is, but it isn’t always. Double check before you destroy things.
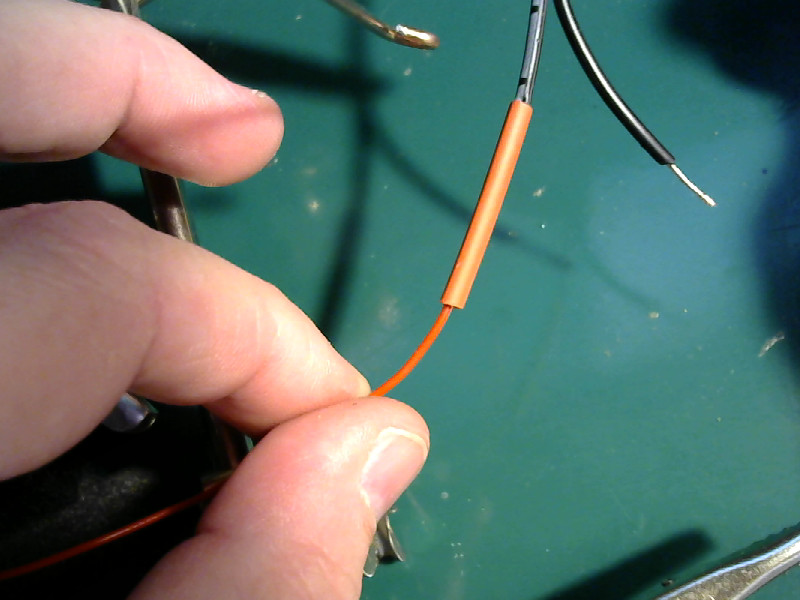
| Tubing in place |
|---|
 |
| Shrink the tubing |
|---|
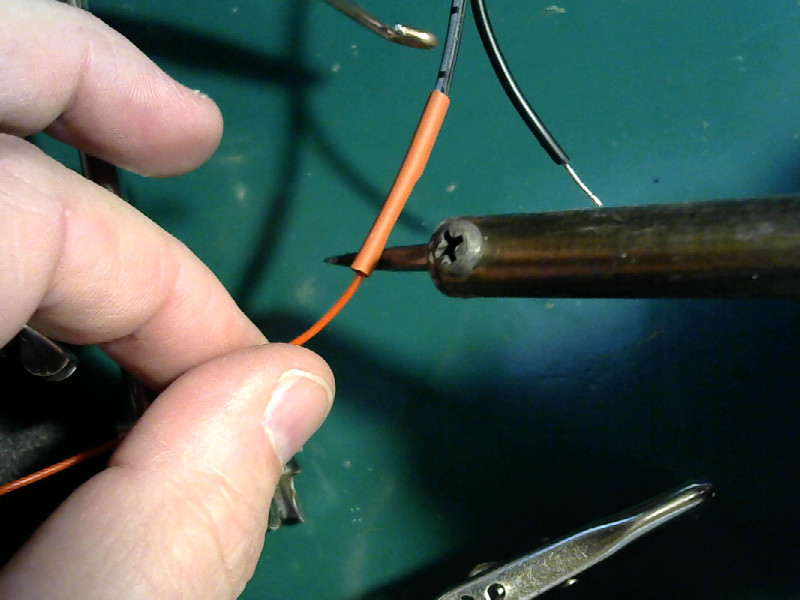 |
I just use the shank of the soldering iron tip. Run it up and down the tubing from all sides. Keep moving, else the tubing will burn or split. You can use a hair drier (high heat, with high air flow.) You can also buy a hot air gun and do it that way.
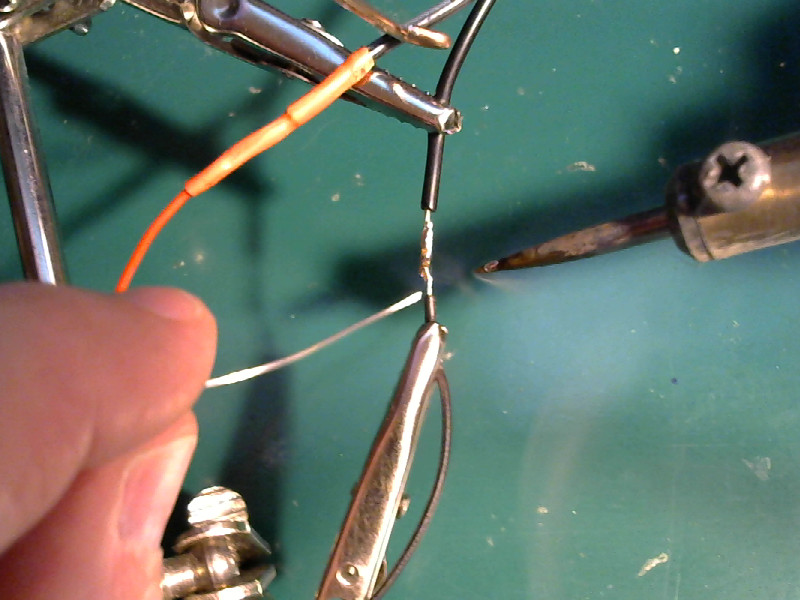
| Solder the black wire |
|---|
 |
| Both wires done |
|---|
 |
| Wires tied down |
|---|
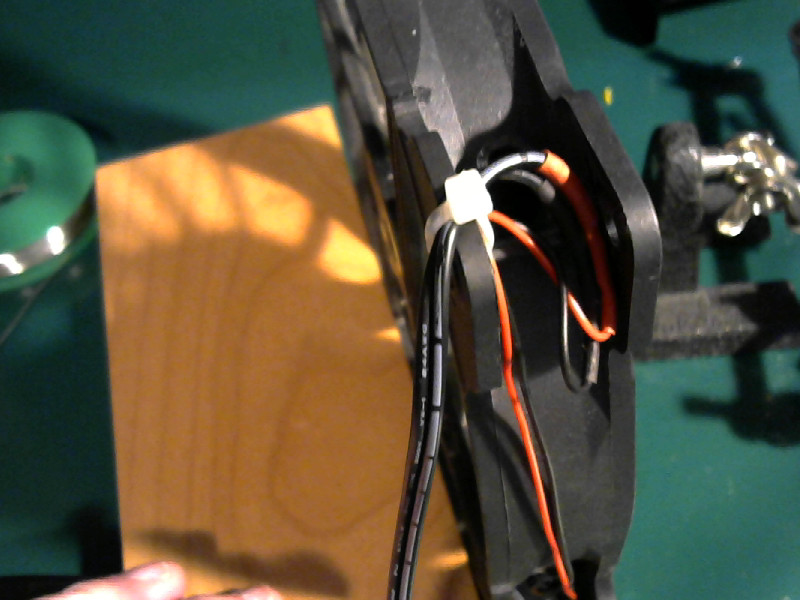 |
I used a tie-wrap to fasten the wires to the frame of the fan. If something jerks on the wire, it’ll pull the fan instead of yanking the wires out of the fan.
| Done |
|---|
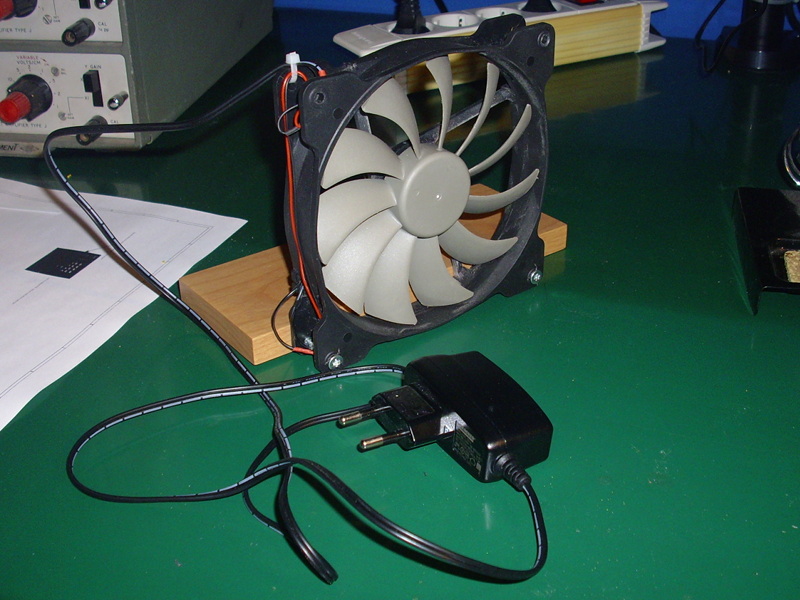 |
Not pretty, but it beats snorting solder fumes. I built it about half way through making the photos for the soldering lesson. Photographing the second half was more pleasant than photographing the first half. :)
You can buy a fume extractor. They have a fan and a filter to clean the fumes out of the air. Mine just sucks the gunk out of the air in front of me and makes it go elsewhere.
There you have a quick example of how to spontaneously make use of your soldering skills. Zip, zap, bing, bang, bong and you’ve got a useful tool on your work bench.