Fishbone tangles on a rotary hook Pfaff sewing machine
When what looks like a thread tension problem is really something else.
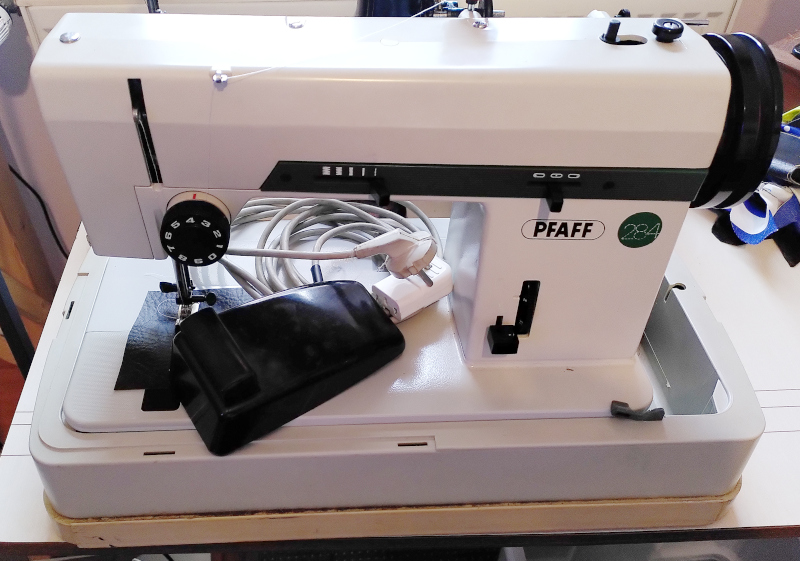
I bought an old Pfaff 284 sewing machine a couple of months ago with the intention of donating it to the local Repair Café to be used in fixing clothing (replacing zippers, sewing on patches, etc.) I knew it was going to need cleaning and adjusting before it could be used, but I didn’t expect the things I found.
| Pfaff 284 |
|---|
 |
First off was that the needle timing was off. The needle would strike the bobbin housing on every stitch. That required learning how to set the timing on a zig-zag machine. That’s a story for another day.
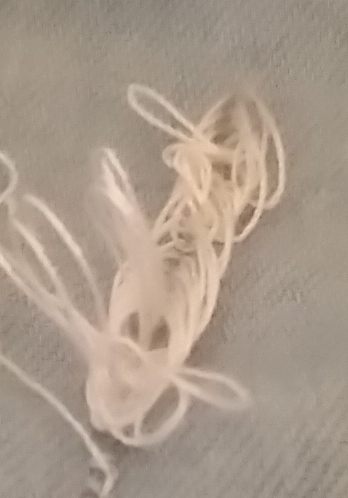
Once I got the timing correct, I found I was getting loops on the bottom side of the cloth when sewing. That is usually caused by incorrectly adjusted thread tension on the bobbin, so I went through my standard procedure for adjusting thread tension. That made the loops neater, but didn’t get rid of them. I even tried adjusting the tension to something stupidly high (upper thread tension and lower thread tension both a 50 grams,) and got no change.
| Fish bone loops |
|---|
 |
My Adler did some strange things with loops on the bottom side back when it had a scratch in a bad place, which gave me the idea to take the hook mechanism apart to see if there was a problem there.
What I found was much simpler and far easier to fix.
The Pfaff 284 uses a rotary hook system rather than the oscillating hook of the older vintage machines. Pfaff seems to have started using the rotary hook system with the introduction of the Pfaff model 130. Pretty much any Pfaff more modern than the 130 will have a rotary hook. The rotary hook runs smoother and quieter than the older oscillating hook. You will find them in machines like the 130, the 260, the 262, and many more besides.
| Rotary hook |
|---|
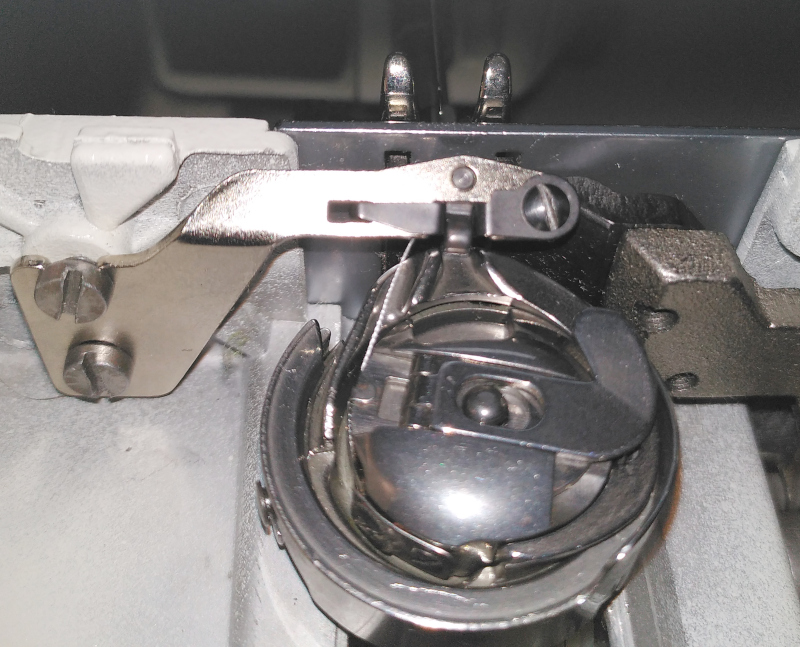 |
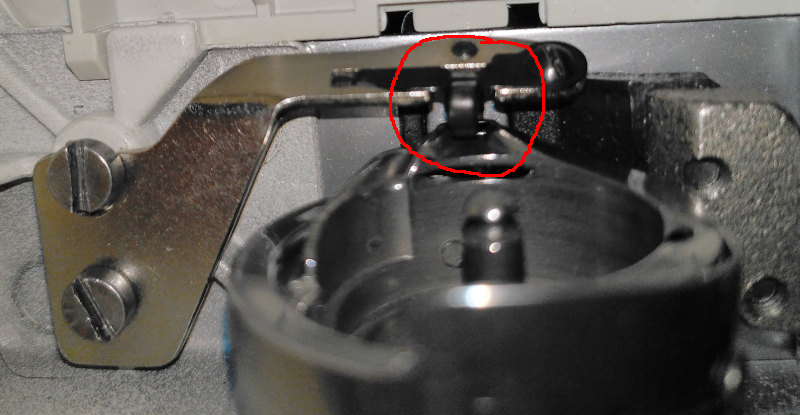
The rotary hook on Pfaff machines makes two rotations for each stitch - in German it is a “doppelumlaufgreifer.” I haven’t been able to find a commonly used term for that particular mechanism in English - most places just call it a rotary hook and let it be.
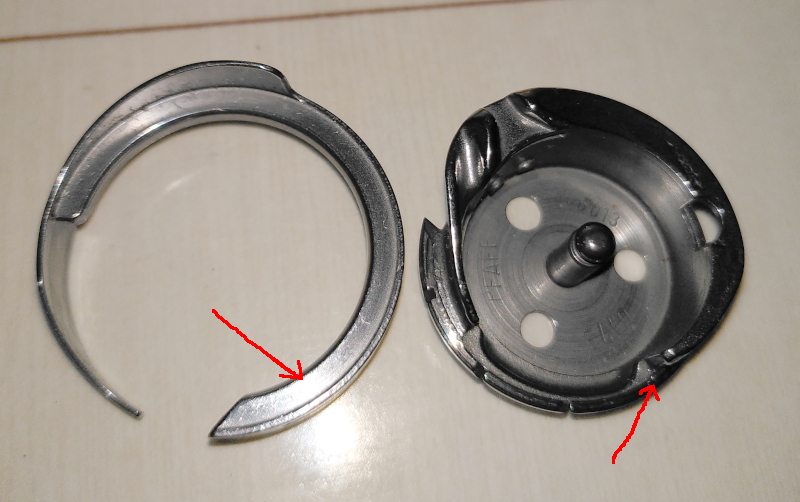
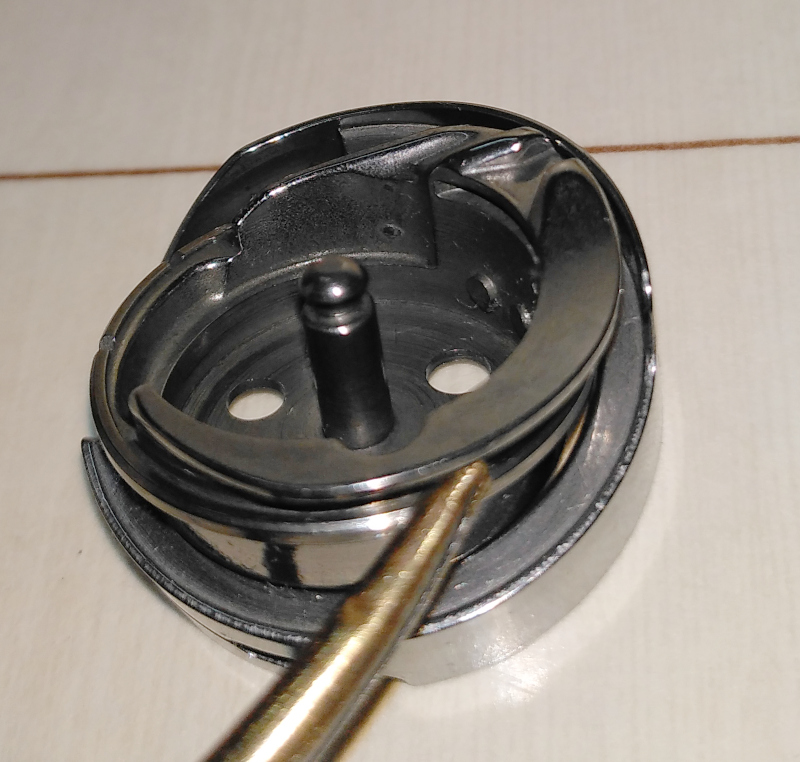
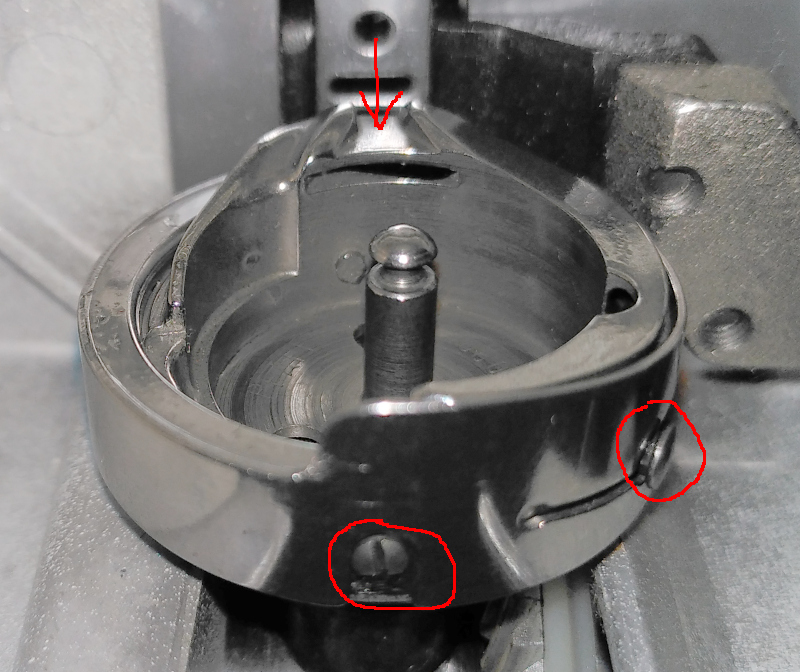
I took out the bobbin then disassembled the hook mechanism. Remember to take out the needle. You’ll see a couple of pictures here with the needle still in place - don’t do that. It makes things more difficult than they need to be.
| Hook disassembly |
|---|
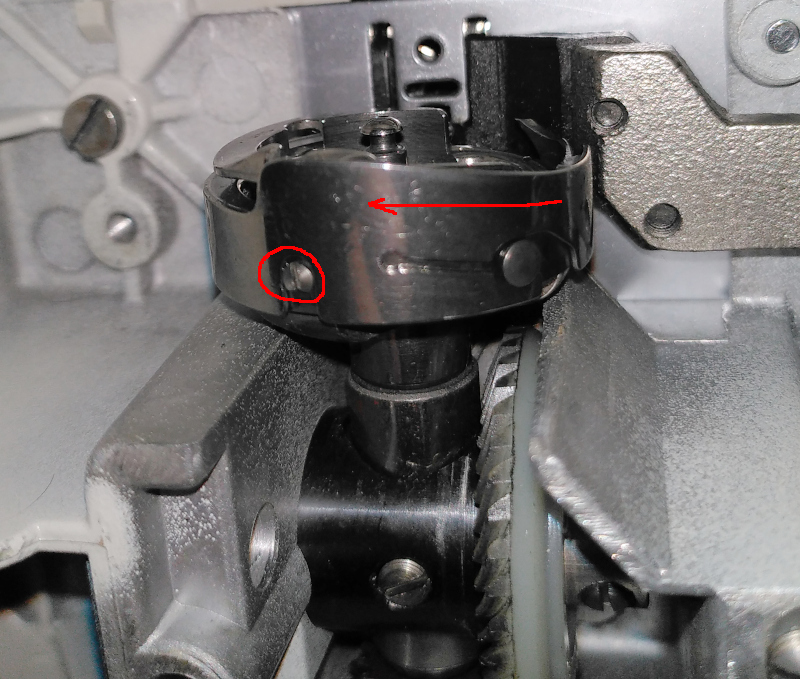 |
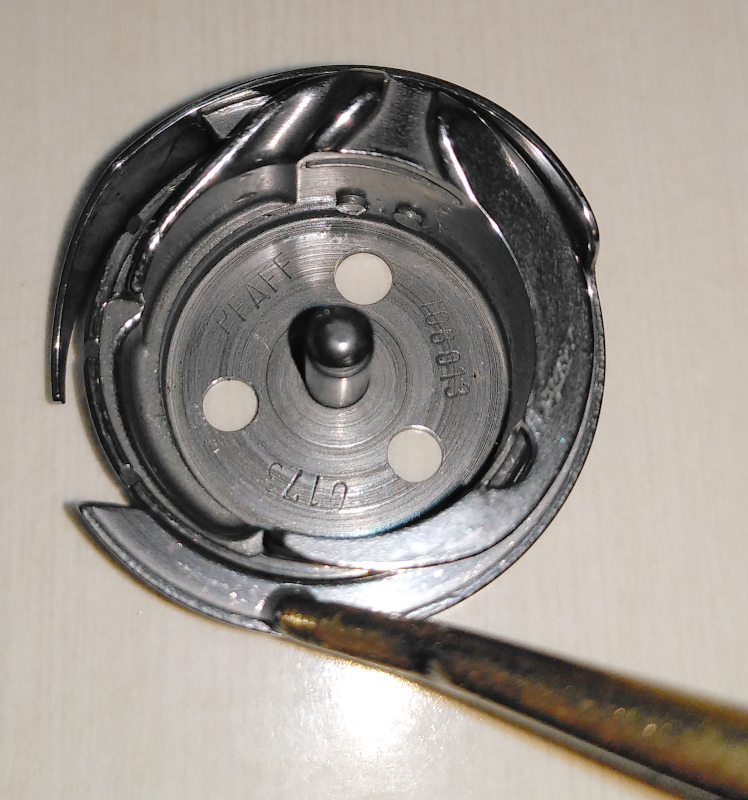
Remove the screw then rotate the outer ring of the hook mechanism as shown by the arrow. You’ll have to hold the hand wheel so that you can push the ring, else pushing the ring will just cause the machine to turn.
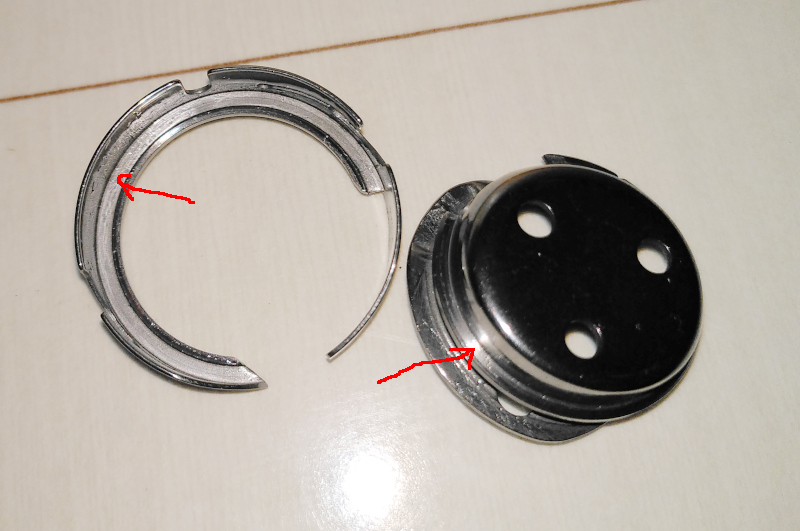
When the outer ring comes off, you will find that it has a second part inside. The ring, the inside part, and the part on the axle in the machine all have grooves and surfaces so that they all interlock while still being able to turn independently.
| Rings and grooves |
|---|
 |
 |
 |
Those interlocking grooves and surfaces are the cause of the problem this machine was having. Rather, grunge in the grooves was the problem.
The part with the V-shaped opening has to “float.” It does not turn with the rest of the parts. The thread passes through the V-shaped part and the spring loaded arm you can see up above in the picture labeled “Rotary hook.” The ring with the V-shaped cutout moves back and forth to allow the thread to pass the peg on the arm. When there’s grunge in the grooves, the part with the V-notch is dragged along by the other rings and doesn’t allow the thread to pass. I’ll show some pictures of that later.
For now, the important thing is that you need to clean all the mating grooves and surfaces in the hook mechanism.
I had done a sort of quick clean up when I found the grunge, but didn’t go at it with a solvent to remove everything.
| Second cleaning |
|---|
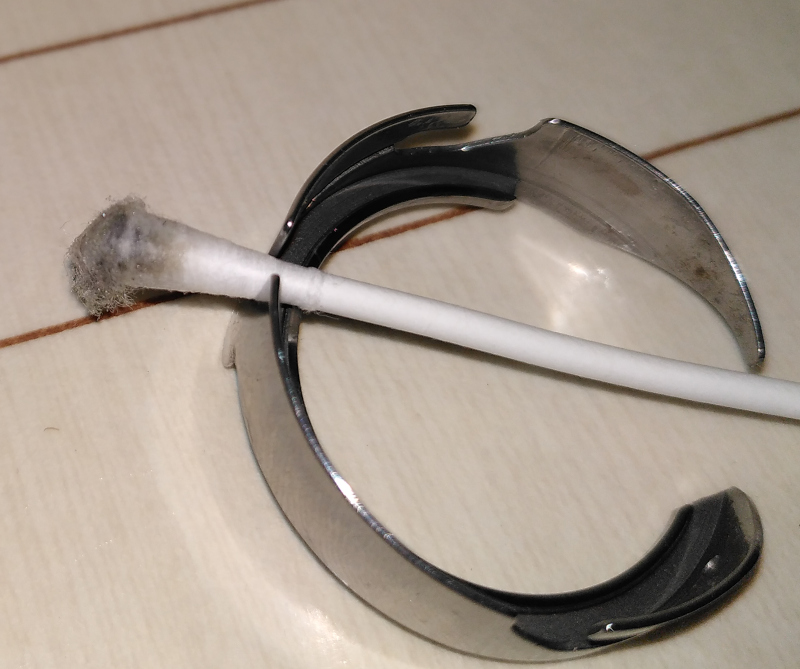 |
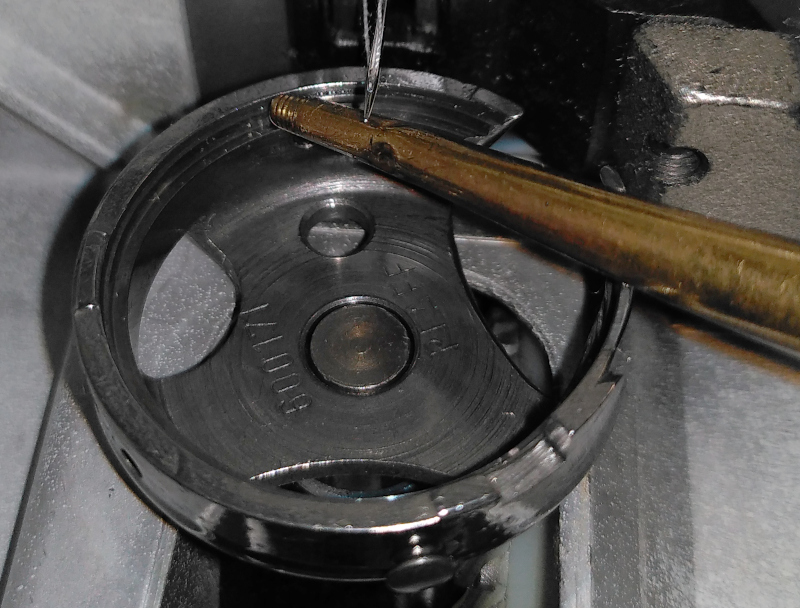
Despite having already brushed the worst of the grunge out, I still got a lot of filth when I swabbed things down with oil and a Q-tip.
With things all cleaned up, it is time to put the hook back together.
You need to oil it as you go because some of the grooves aren’t easily accessible when things are all together.
| Oil the hook |
|---|
 |
 |
 |
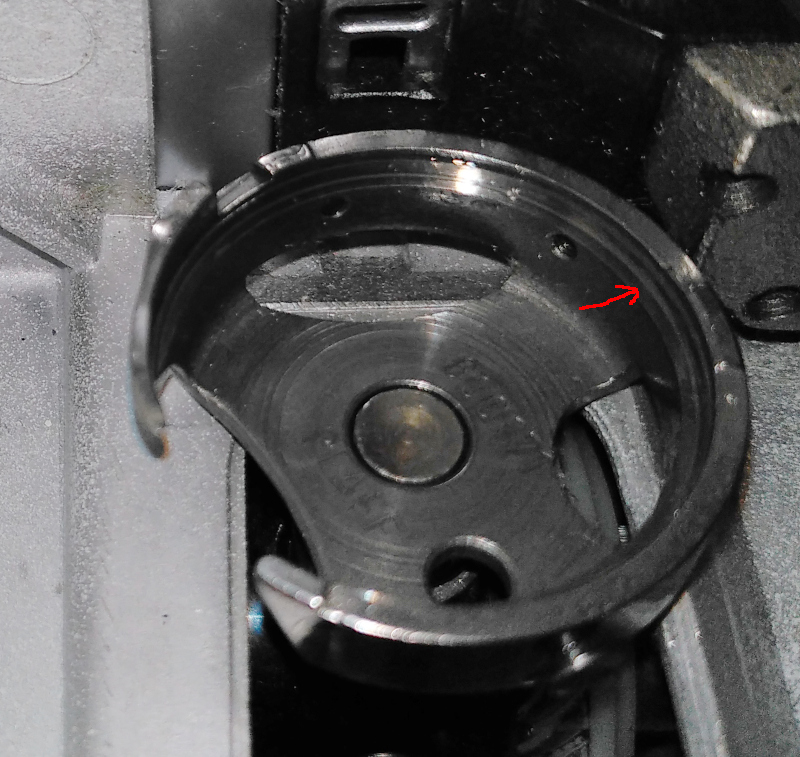
After you oil the part with the V-notch, you have to put it back in the outer ring then you put both of those back in the hook driver in the machine.
| Reinstalling the hook |
|---|
 |
 |
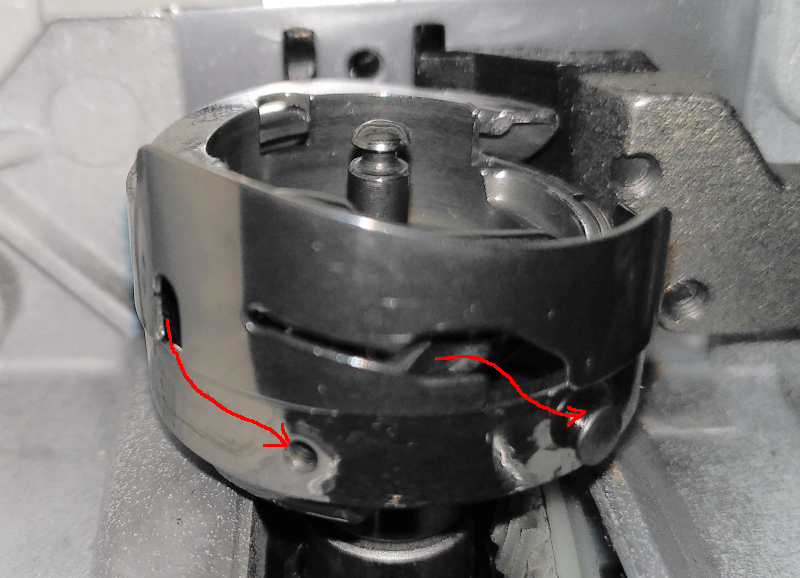
Put the outer ring back on the driver such that the peg on the driver lines up with the slot in the outer ring. Push the ring down on the driver and rotate the ring so that the screw hole shows up in the U-shaped cutout in the outer ring.
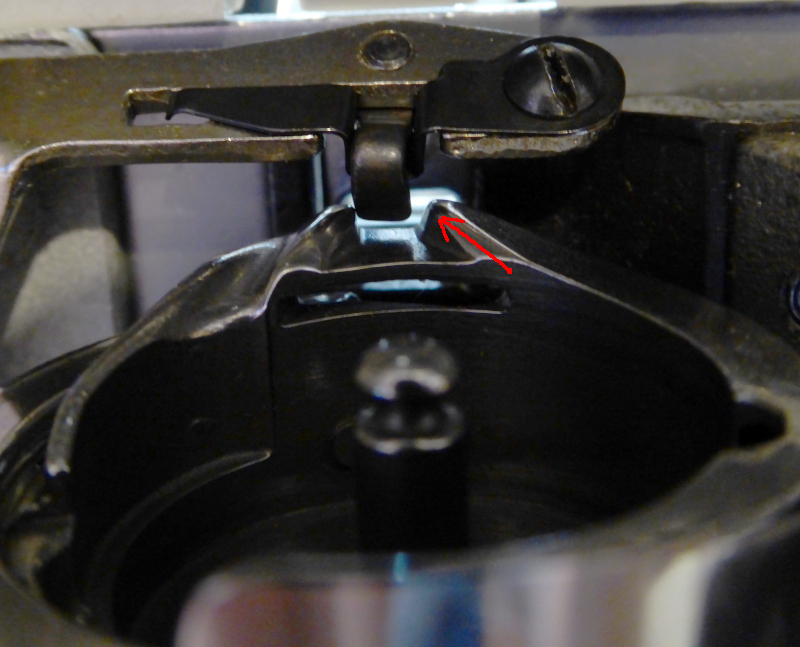
Rotate the V-notch so that it is below the slot the needle passes through, then reinstall the arm that holds it in place.
| Reinstalling the arm |
|---|
 |
 |
The spring loaded peg needs to go in the V-notch, but is has to have a little “slack.” The thread has to pass between the ring and the peg. If the peg is too tight, then the thread may jam and break. If the peg is too loose, then the part with the V-notch will rotate with the driver and you will get tangles and knots - and probably break a needle as well.
| V-notch clearance |
|---|
 |
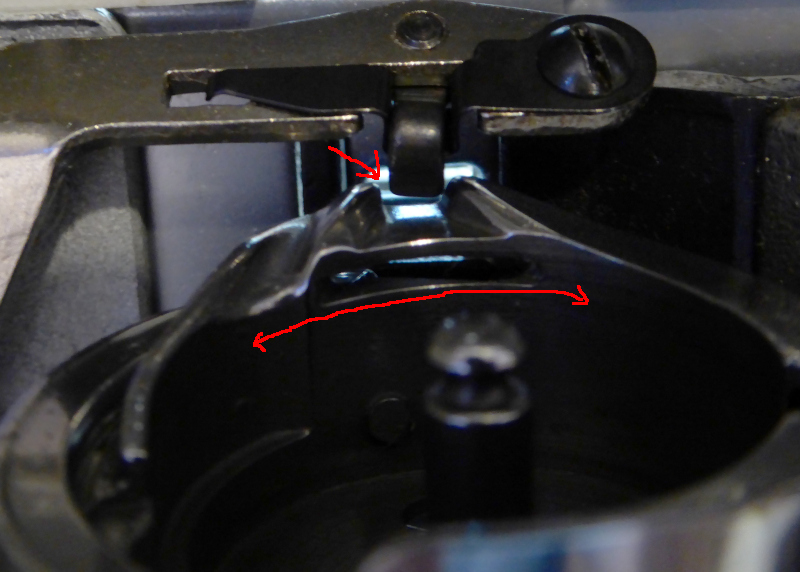 |
There’s just enough clearance so that you can move the V-notch left and right a little and have enough room for the thread to pass. There’s also just enough room at the bottom for the thread to pass, while the peg is deep enough in the notch so that it can’t turn with the driver.
Everything else (thread tension and needle timing) had already been taken care of, so after putting the hook back in I threaded the machine and tried it out - perfect stitches.
| All done |
|---|
 |
If you get fishbone loops on the underside of your cloth while using a rotary hook Pfaff sewing machine, then you need to clean the hook instead of adjusting the tension.