Trying out a commercial electronic motor speed control for vintage sewing machines
Cheaper than DIY, and nearly as good.
I’ve been collecting stuff for a project I’m going to start work on soon.
Among the things I’ve already purchased is a new sewing machine motor with an electronic speed control.
| Sewing machine motor and control |
|---|
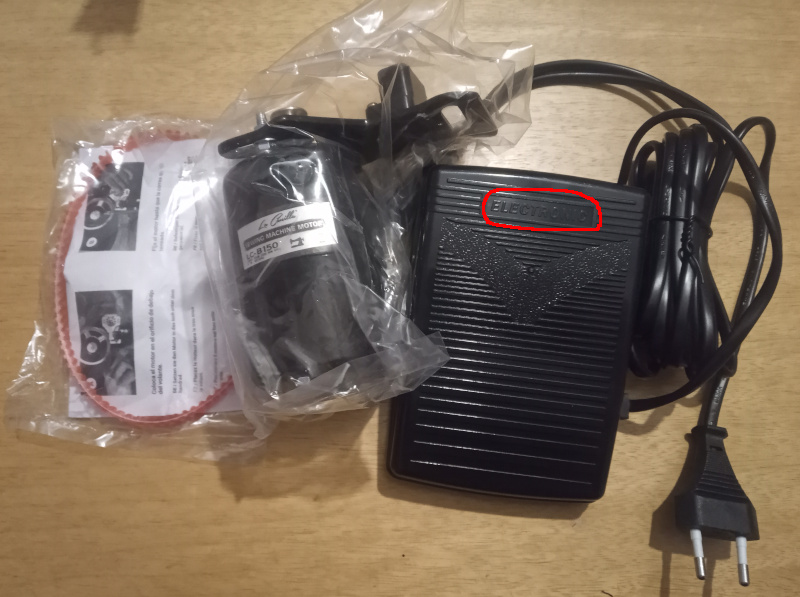 |
Since the Pfaff K is not yet ready for its new motor, I attached it to my Adler class 8 to see how it runs. Along the way, I had a look at how to reverse this motor since it is constructed a bit differently than the one I normally use with my Adler 8. I’ll put that in another post. For today, I want to look at the electronic control.
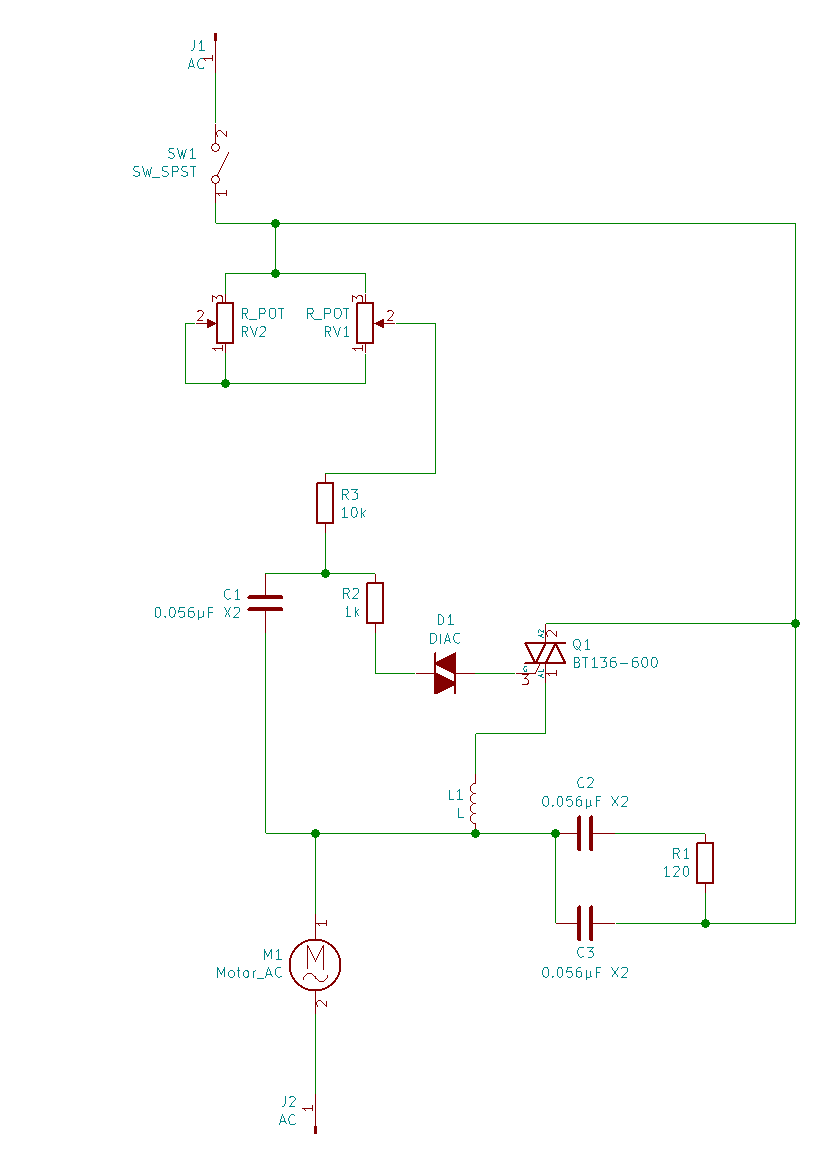
The electronic control uses a triode for alternating current (TRIAC) to control the on-time for the motor. The effect is that of a form of pulse width modulation, using the AC power line frequency for the pulse rate.
Something this controller has that is not mentioned in the user’s guide is that you can open it up and change the maximum running speed. Besides the variable resistor for the foot pedal, there is a second control. Turning it one way raises the maximum speed you get when the pedal is all the way to the floor. Turning it the other way lowers the maximum “pedal to the metal” speed.
This is very handy if you need to do a lot of intricate, low speed sewing. I turned it way down and got very slow stitches out of my Adler 8. If you’ve been following my sewing machine adventures, you’ll know that my biggest problem has been that the Adler is fast.
I am not really familiar with TRIAC circuits, but the circuit in this controller is very much like the one given here which claims to use feedback to maintain the set motor speed. If the circuit in this controller works the same way, then that would make it a true motor speed control rather than just a power control.
EDIT - 2023-10-21 This controller does not use any form of feedback to control the speed. It is a power regulator only. I checked it out more carefully when I connected the same controller to a Pfaff 801 Hobbytronic to replace its broken controller.
| Controller circuit |
|---|
 |
For comparison, the linked circuit looks like this:
| Controller circuit from electroschematics.com |
|---|
 |
My circuit is “upside down” from the electroschematics.com circuit. I am not absolutely sure that they work exactly the same way, but I do think the controller I bought has some feedback to maintain speed.
If so, then both circuits are rather like the MOSFET source follower circuit I played with while gathering ideas for the motor control I am building for my Adler class 8.
Should you happen to purchase a sewing machine motor with an electronic control for your vintage sewing machine, you can easily set the maximum speed.
| Maximum speed control |
|---|
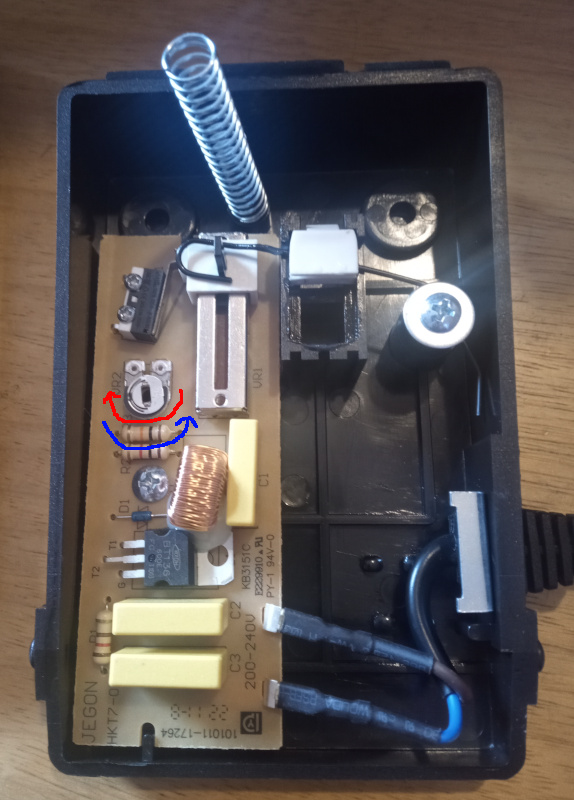 |
Unplug the foot pedal from the outlet, then pop the cover off of it. Start at the hinge end of the pedal - it comes apart easiest that way.
Once you’ve got it open, you’ll find a long sliding potentiometer for the foot pedal. Beside that will be a trimmer potentiometer that you can adjust with a small screwdriver.
- Turn the trimmer in the direction given by the red arrow to lower the maximum speed.
- Turn the trimmer in the direction given by the blue arrow to increase the maximum speed.
You’ll have to reassemble the controller to test it out.
I do not recommend drilling a hole in the pedal so that you could adjust it without opening the case. The circuit in there is not isolated - everything inside is pretty much at line voltage. It would be far too easy to reach in with a metal screwdriver to adjust it and get a (potentially deadly) shock because you forgot to unplug it. It would also be easy for a needle or a pin to get in and cause a short circuit. Adjust the pedal to your needs, then don’t fiddle with it.
As good as this controller looks, I’m going to go ahead with the controller I’m designing for my Adler 8. I’ve got some things I specifically want to try out - and I’ve already ordered (and received) a lot of the parts.
This particular motor/controller combo will be my go-to unit for sewing machines I fix up in the future.
Keep in mind:
None of the commercially available sewing machine motors and controllers have any kind of safety approvals on them. No UL listing in the US, no CE marks in Europe, no TüV in Germany. Use them, but don’t trust them. Unplug them when not in use, and replace them if they show any signs of unsafe operation. If one gets damaged, replace it - you might be able to fix it, but you might miss something that will turn it from “unsafe” to “deathtrap.”