Replacing the broken controller on a Pfaff 801 Hobbymatic sewing machine
Old isn’t always better, especially when it comes to electronics.
My wife got rid of her AEG 376 (mentioned briefly in this post on thread tension) and replaced it with a Pfaff 801 Hobbymatic from the early 1980s. The Pfaff 801 is a zig-zag with a freearm. It doesn’t do all the nifty things her Pfaff 262 can do (and it isn’t quite as quiet,) but she can take it downstairs or out on the patio rather than being stuck in her sewing room.
| Pfaff 801 Hobbymatic |
|---|
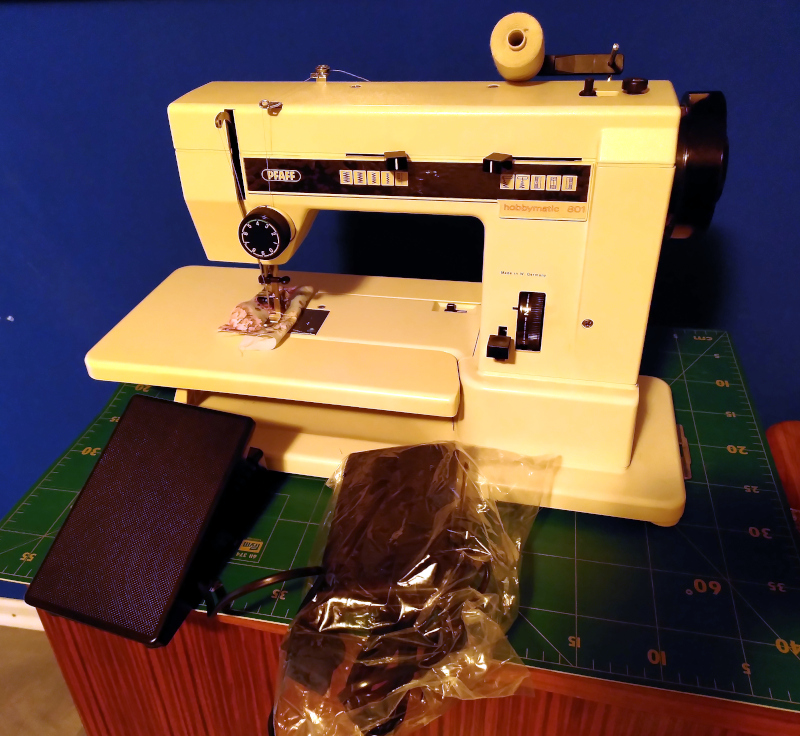 |
While I really need to give the 801 a thorough cleaning, my wife has already used it for several projects.
Just recently, she went to use it again and sparks shot out of the foot pedal.
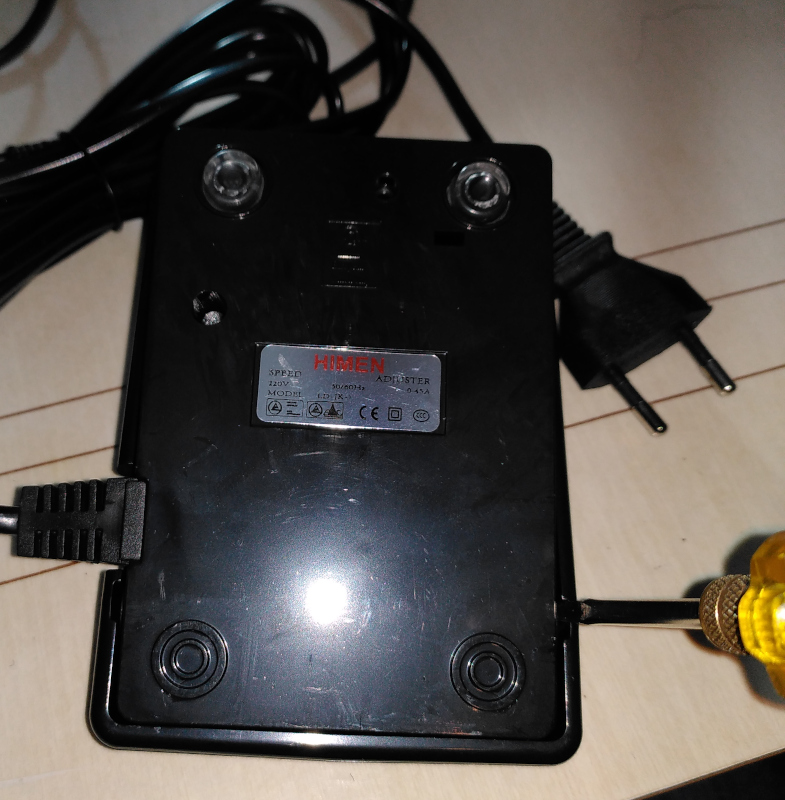
The Pfaff 801 has a weird mechanical/electrical motor controller.
| Pfaff AW 0251 sewing machine motor control |
|---|
 |
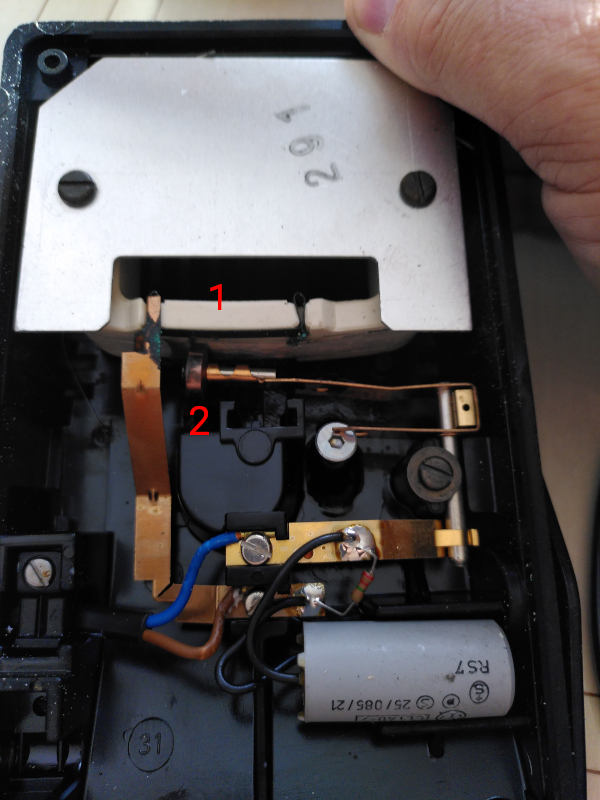 |
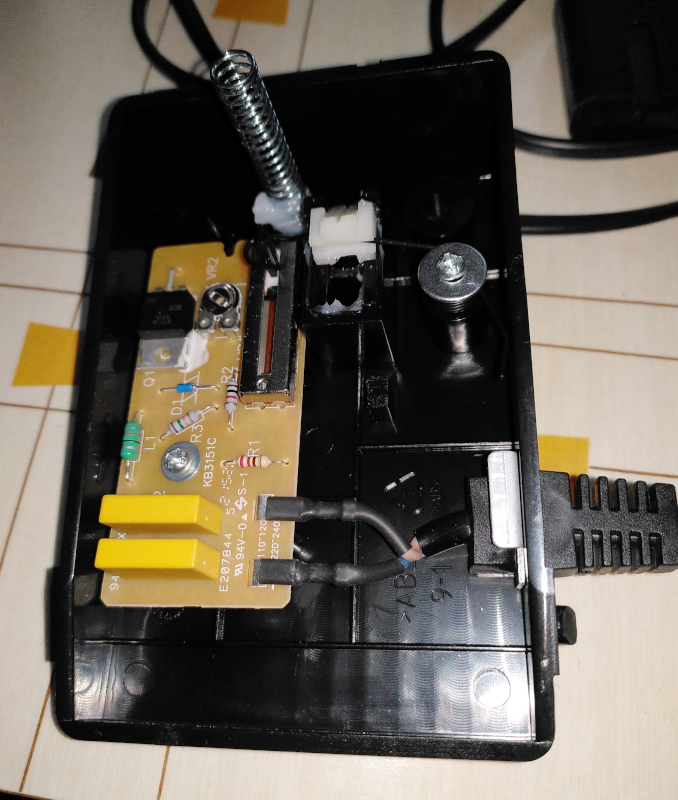
The thing marked “1” is a ceramic cylinder with resistor wire wound around it. The ceramic thing has a metal plate attached to it to help radiate heat.
The thing marked “2” is a little wheel that rolls across the coil of resistor wire. The closer the wheel gets to the top, the less resistance there is and the faster the motor runs.
The resistor wire and the little wheel form a rheostat - a variable resistor. Given the contruction (and the size of the motor,) that rheostat is setup to burn a fair amoutn of power - it will get hot, by design.
Aside from a capacitor to keep the little wheel from sparking and a resistor to discharge the capacitor when you unplug the thing, all the control is done by the mechanical act of rolling the wheel across the coil of resistance wire.
It didn’t look like anything catastrophic had happened until I took a really close look at the wheel and the coil.
| Closer look |
|---|
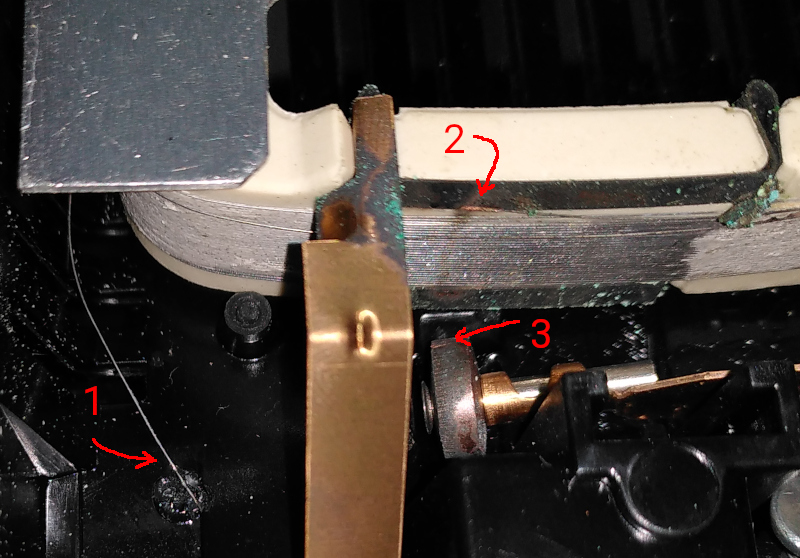 |
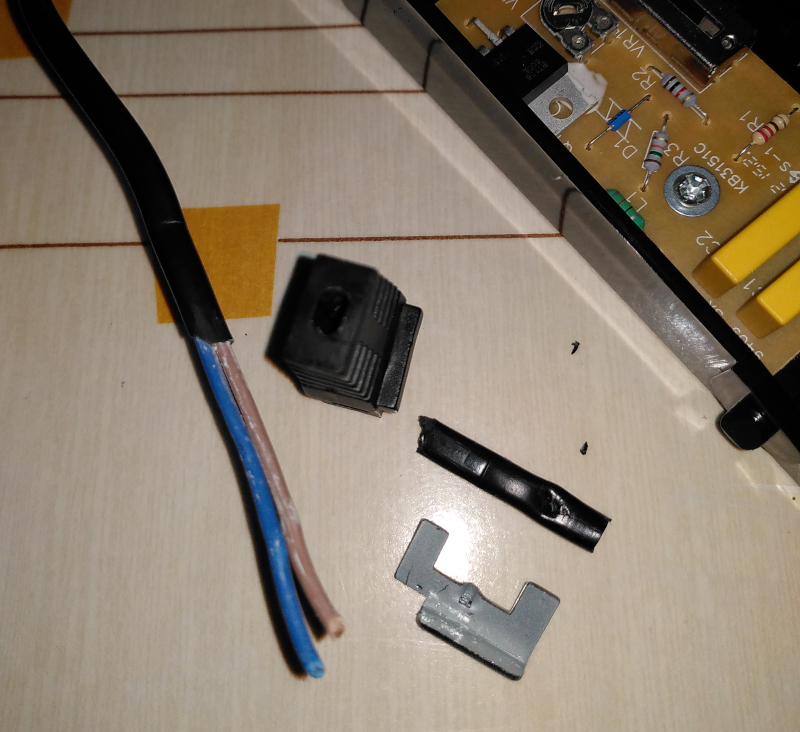
There’s a whisker of wire from the coil laying there to the left side (marked “1.”) That wire should be part of the coil, but it was broken off at the point marked “2.”
What appears to have happened is that the capacitor has gotten old and didn’t catch all the sparks. The wheel sparked (the line pointed to by the arrow marked “3”) which spot welded the wheel to the wire. The next movement of the wheel broke the weld loose from the wheel and also broke the wire.
Since it all still runs, I suppose I could have replaced the capacitor then polished the little wheel to prevent future sparks. I could have clipped off the loose loop and that would have been it - except that I don’t trust that kind of hinky controller. It was probably cheaper (and more reliable) to build it that way back then, but modern electronics should be able to do the job without throwing away power as waste heat.
I could have bought a direct replacement for the Pfaff AW 0251 footpedal - I find them on eBay and Amazon at nearly reasonable prices. That’d have been just the same power wasting variable resistor, though.
What I did was to buy a generic electronic sewing machine footpedal. It’s the same pedal that came with the motor I bought and tried out then installed on a Pfaff model K.
The thing about such controllers is that they don’t come with connectors to fit all sewing machines - there wasn’t one to fit the Pfaff 801 available.
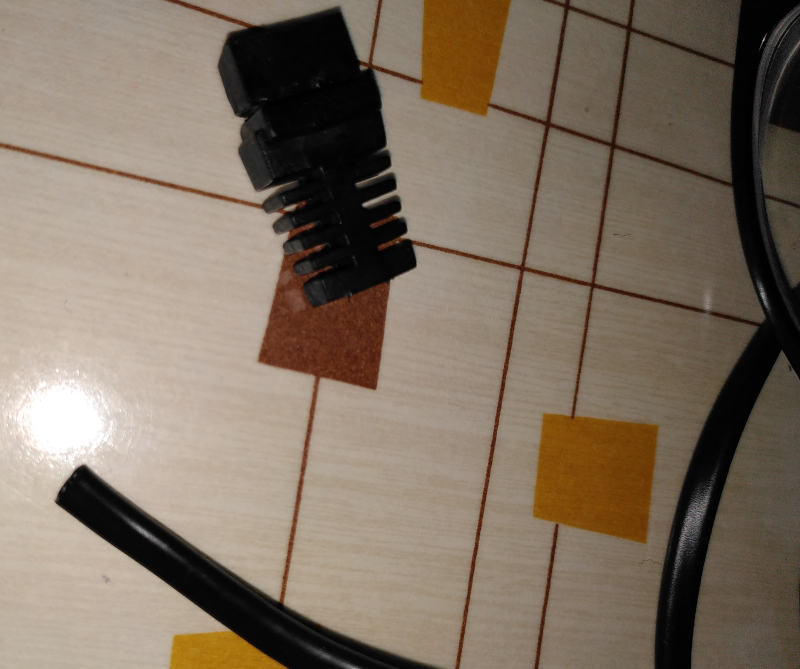
| Plugs don’t match |
|---|
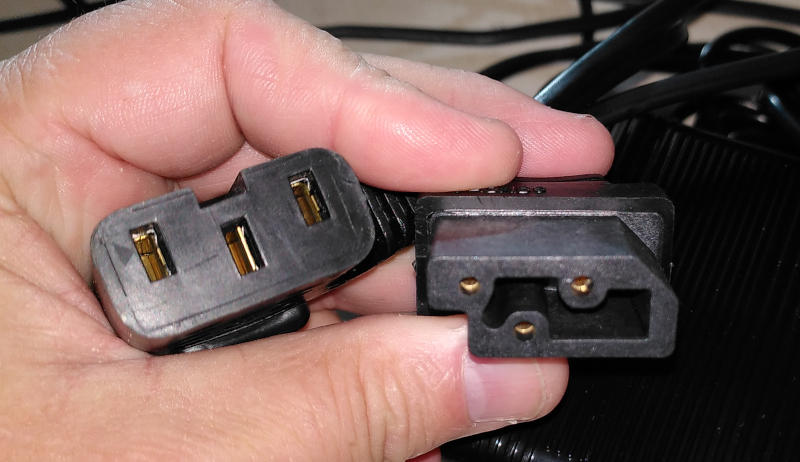 |
The Pfaff 801 (AW 0251) plug is on the left. The connector from the new electronic control is on the right.
For many folks, that would be the end of the story. Plugs don’t match = no way to connect them.
The fact of it is, though, that it is pretty simple to replace such controllers. The wiring is very simple and the modern electronic controls can be wired right in place of the old fashioned resistor controllers.
The catch being, of course, that the wiring is still good. On really old machines, the insulation on the wires may be crumbling so that you have to replace all the cables. In such cases, the plug for the machine can often be salvaged (they are screwed together and have screw terminals for the wires.)
For the Pfaff 801, the wiring is new enough that I could just disconnect the old resistor controller and connect the electronic control in its place.
The safest way to do so is to open the new controller and remove its wires then wire the new controller to the old cable.
The easiest way to open the controller is from the hinge end.
| Open the new controller |
|---|
 |
The hinges are part of the housing and the pedal - there’s a hole in the housing and a peg on the pedal. Put a screwdriver in by the peg and pry the housing apart until the peg pops out. From there you can just pull the controller apart.
Down in the right corner are two wires - one blue, one brown. That’s just like in the original AW 2051 controller.
All you have to do is to connect the blue and brown wires from the old controller to the same points in the new controller.
The old controller has a strain relief (a screwed in clamp to hold the cable) and a couple of screw terminals. Just unscrew the terminals, remove the strain relief, then pull the cable out of the housing.
I used wire cutters to remove the wires from the new controller. The only difficult part was removing the clip holding the cable in place. That took some digging around with a flat bladed screwdriver. There’s a nub on the metal clip that goes in a hole in the plastic housing. You have to get the nub out of the hole then pull the clip off of the plastic block.
| Remove the cable from the new controller |
|---|
 |
 |
You’ll have to pull really hard to get the cable out of the plastic block. It has to come out because you have to put the cable from the original controller through it. Once you get it out, make sure to remove any bits and pieces from inside the block. You have to be able to push the cable through that block.
| Connect the original cable to the new controller |
|---|
 |
 |
I’ve threaded the original Pfaff cable through the plastic strain relief block of the new controller, then connected the wires and reinstalled the strain relief.
That’s it, really. Disconnect the two wires from the old controller, connect them to the same wire connections in the new controller.
When you go to put it back together, make sure to put the end of the spring (“1”) in the hole in the housing (“2.”) If it isn’t in the hole, it might flop over and cause a short circuit later.
| Mind the spring |
|---|
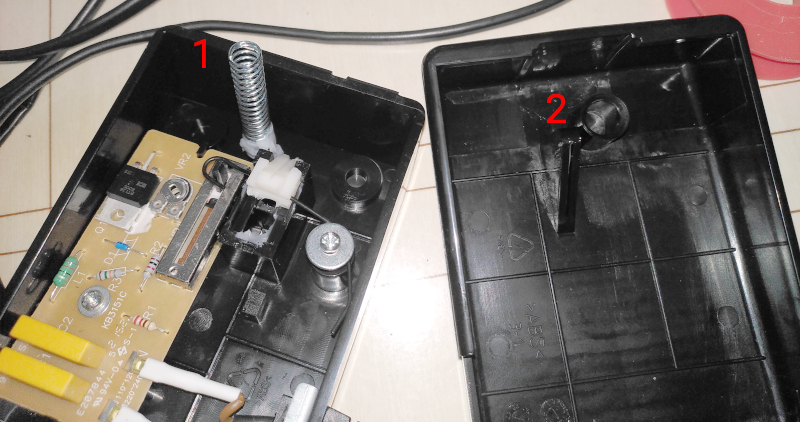 |
All done. We’ve got a Pfaff 801 with a brand spanking new electronic controller.
| Done |
|---|
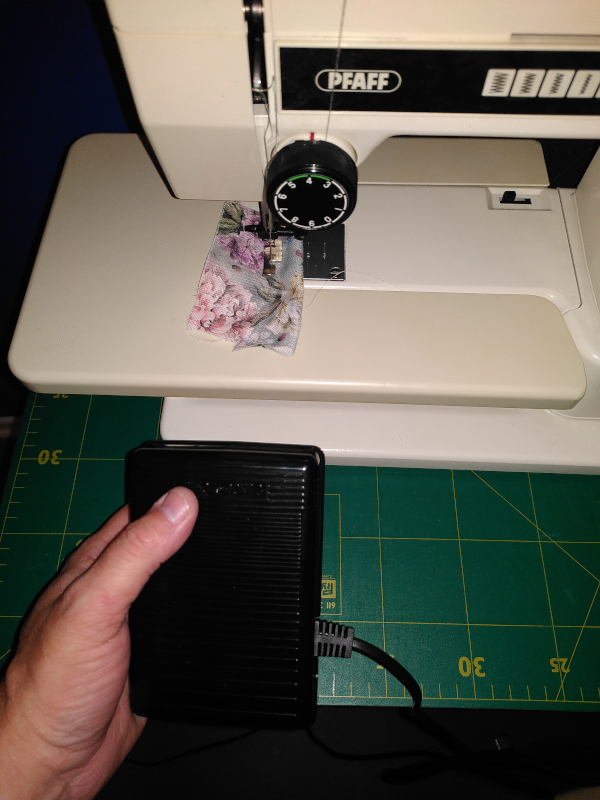 |
It works just fine:
The electronic control is not a speed control as I speculated in an earlier post. It merely regulates the power. If you put a load on the machine at low speed, it will stop. If you want true motor speed control, have a look at the series I’ve been writing on a DIY motor speed control for my Adler class 8 sewing machine. It is nearly there - only some software left to write.