The Pfaff model K sewing machine - Installing the motor
Anachronism time.
Read all about my adventures with the Pfaff model K.
I received the Pfaff K without a sewing cabinet and without a hand crank, leaving me pretty much no option but to install an electric motor on it.
I originally bought a sewing machine motor kit with electronic control for the Pfaff K. I’ve had it on my Adler class 8 for the last few weeks, but now it’s time for the motor to move on to its final home.
The Adler class 8 “runs backwards” compared to other machines - you turn the balance wheel clockwise. The Pfaff K runs the way most other machines run - you turn the balance wheel counter clockwise. Pay attention when you buy a motor for your old sewing machine. They are sold in clockwise and counter clockwise versions - though it is easy enough to reverse them if you must.
| Ready to install |
|---|
 |
I drilled out the screw hole in the hand crank boss and tapped it to accept an M8 screw. I couldn’t figure out the size and thread of the original. Later, while cleaning the bits out of the machine from the drilling, I found that there was enough room inside that I could have ignored the threading in the hole and just put a skinnier screw through it with a lock nut installed inside the machine. I’ll keep that in mind the next time I have a machine that needs a motor - I don’t like modifying the old machines.
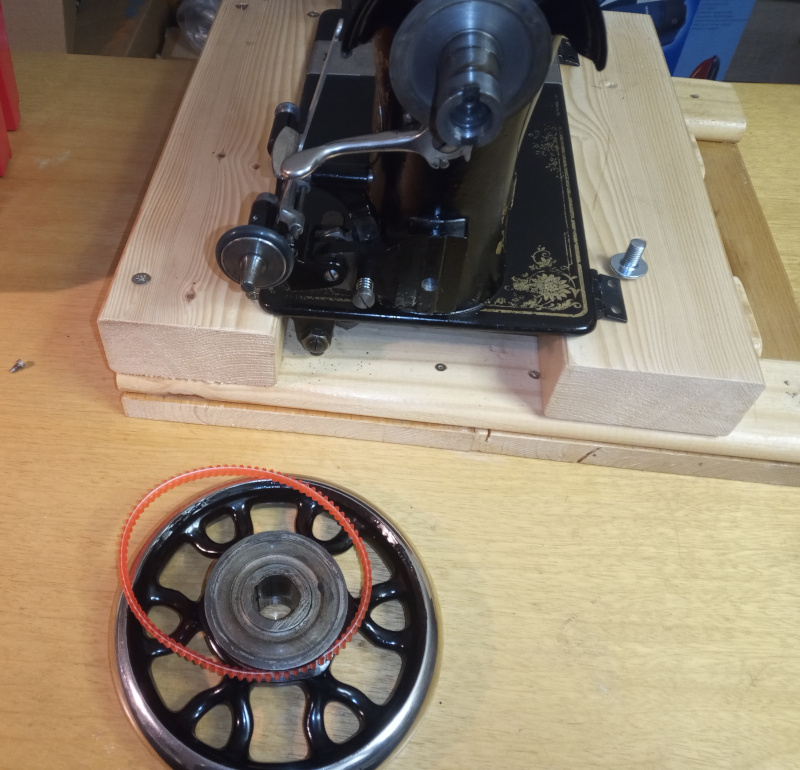
The belt for the electric motor won’t go around the balance wheel. I had to take the balance wheel off, put the belt on the pulley, then put the balance wheel back on.
| Installing the belt |
|---|
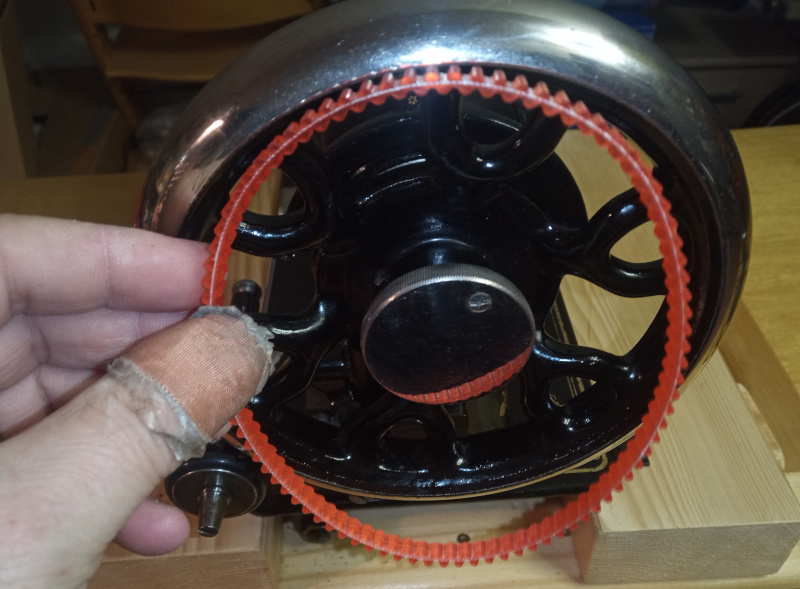 |
 |
 |
If you need to see how the balance wheel comes off and goes back on, have a look at the Pfaff K reassembly post.
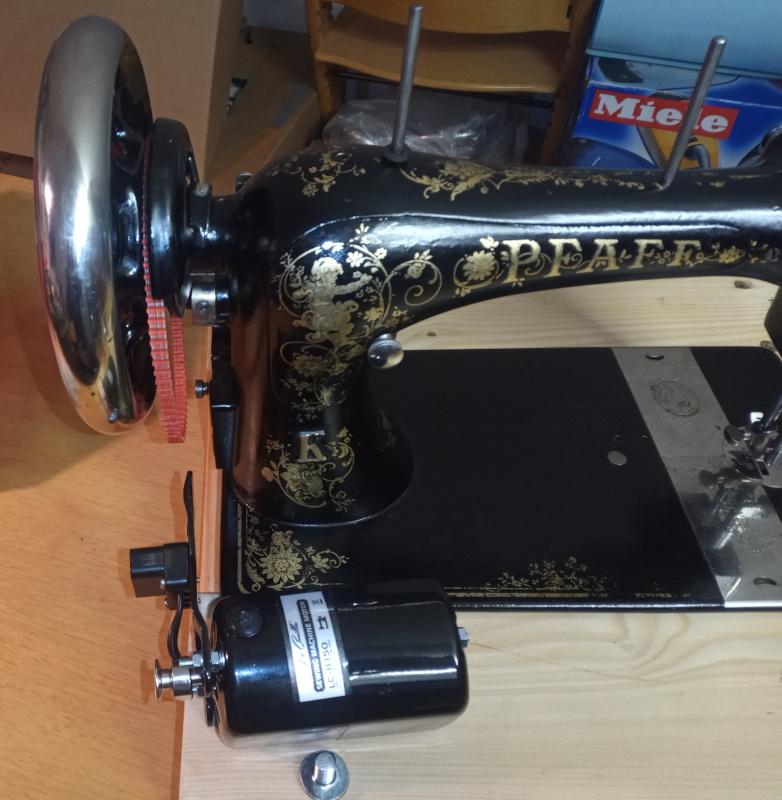
Putting the motor on is easy. Adjusting the belt tension is a bit tricky.
| Install the motor |
|---|
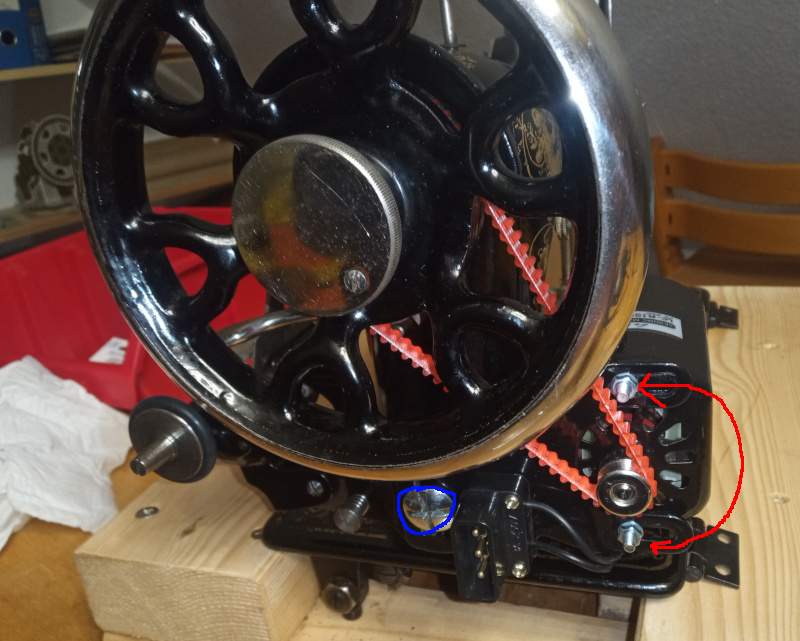 |
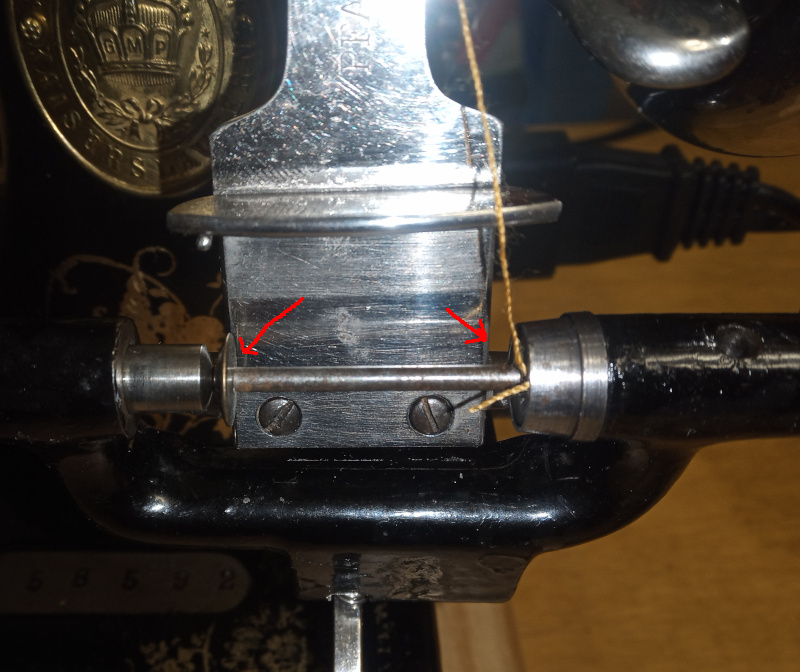
Put the screw (marked in blue) through into the hand crank boss and run it down - but don’t tighten it.
Loosen the two nuts indicated in red then adjust the motor so that the screws are in the middle of the long slots. Tighten the nuts again.
Put the belt over the motor pulley, then move the motor up or down on the boss screw until the pulley is tight. Not “tight, tight,” but just so it doesn’t slip when you turn the motor pulley. Tighten the boss screw.
Now loosen the clutch knob in the middle of the balance wheel. Crank the balance wheel by hand. It should turn easily and the machine itself should not run (the needle should not go up and down when you crank the balance wheel.) If it is hard to turn or the needle moves, loosen one of the nuts (marked in red) and turn the motor a bit to reduce the tension. Tighten the nut, then try the balance wheel again. Repeat trying it out and adjusting it until the tension is right. The tension is right when you can release the clutch and crank the balance wheel easily by hand without the needle moving but still be tight enough that the belt doesn’t slip when you reengage the clutch and turn the motor pulley.
Too tight is bad because it will cause a lot of wear on the bearings. Take your time and get it right. When in doubt, too loose is better than too tight. Too loose just means the belt will slip when you sew something tough. Too tight means you’ll be destroying your sewing machine.
That’s pretty much it for installing the motor.
To try things out, I wanted to wind a bobbin then use it to sew a couple of seams. I put a bobbin in the winder and discovered a mistake I made while disassembling the winder.
| Oops |
|---|
 |
The paddle has to fit inside the bobbin ends. Besides guiding the thread, it is also part of the automatic shut off - when the bobbin is full, the thread pushes the paddle back to disengage the winder.
I had tried to remove the axle for the paddle, then decided not to - after loosening the screw holding it in place. I had tightened the screw back, but didn’t realize I had moved the paddle.
| Adjust the paddle |
|---|
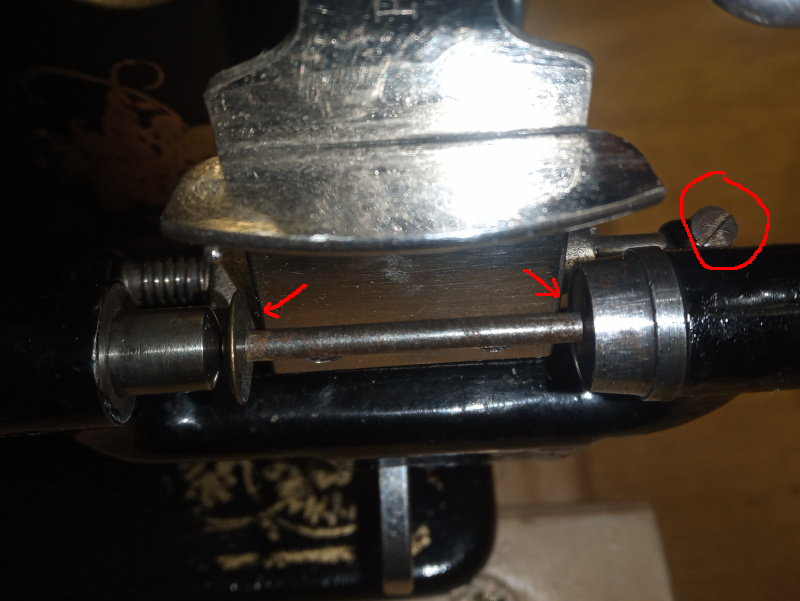 |
Loosen the screw circled in red, then slide the paddle left or right so that it fits in between the ends of the bobbin (red arrows.)
With the paddle incorrectly adjusted, the winder wouldn’t stay engaged when I pulled up on the chromed winder lever.
| Adjust the winder shutoff |
|---|
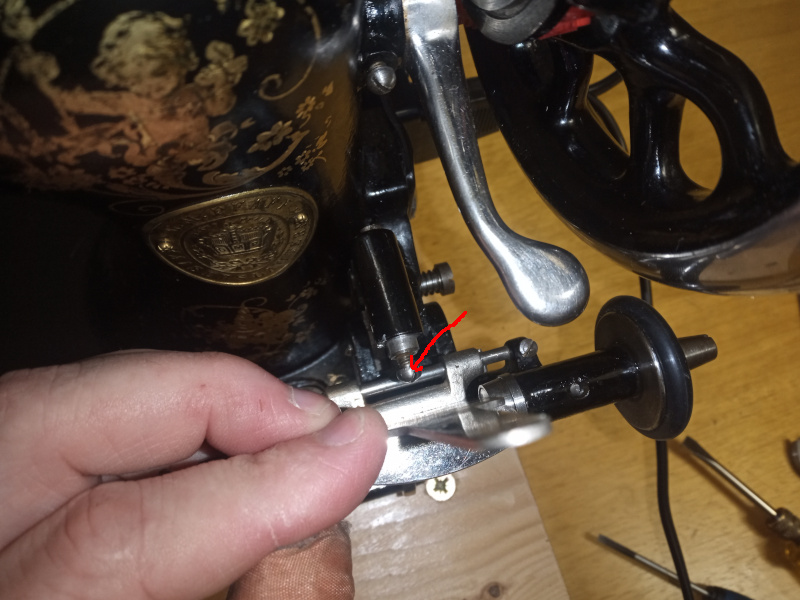 |
You can adjust the automatic winder shutoff using the screw indicated by the red arrow. Tighten it for more thread on the bobbin, loosen it for less thread. You want the wound thread to be about 0.5 mm smaller in diameter than the heads on the ends of the bobbin.
I wanted to use a rolled hem presser foot for the sewing test - and prompty learned something new.
Not all feet are made the same.
| Spot the difference |
|---|
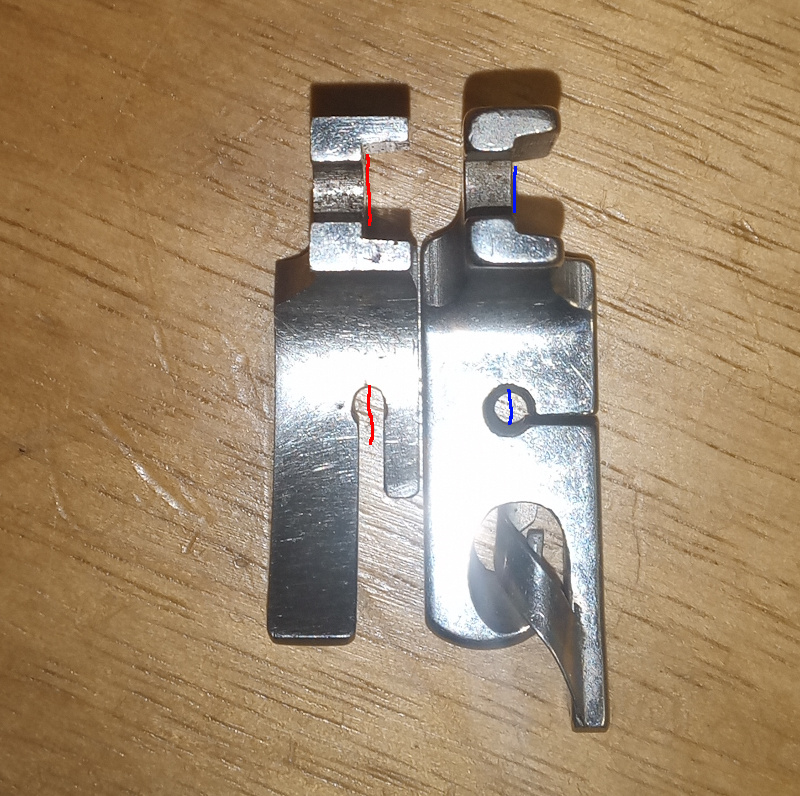 |
The hole on the rolled hem presser foot is about 0.5mm further to the right of the shank than the hole in the original foot. The needle kept missing the edge of the rolled hem - just barely. It would hit here and there, but not reliably.
I thought I was doing something wrong, and tried to make the hem several times. I’m inexperienced but not totally clumsy - at some point, I realized there was something wrong with the machine rather than the operator.
Once I figured out that the foot was off center, I looked and found that you can adjust the presser foot.
| Adjust the presser foot |
|---|
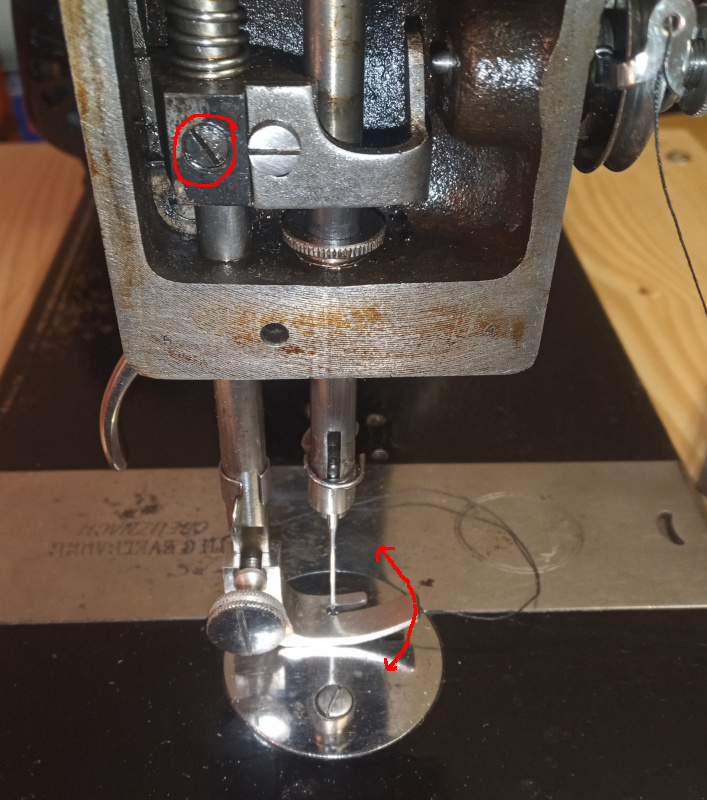 |
Remove the nose plate and lower the presser foot. Loosen the screw marked in red, then rotate the presser foot until the needle passes exactly through the center of the hole.
That got the rolled hem foot to work properly, but you can’t be adjusting the presser foot every time you change it. I’m going to have to buy a good set of feet that are all made the same way (same relationship between hole and shank) then adjust the machine to use them. Bummer. You can’t just mix and match feet from different sources.
With all the nit-noids taken care of, I could finally give the Pfaff K and its motor a try out.
The final rolled hem looked like this:
| Rolled hem from the motorized Pfaff K |
|---|
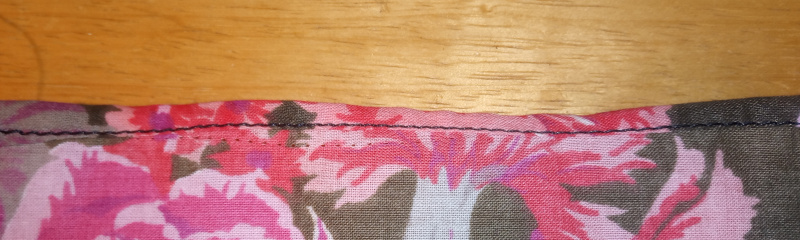 |
You can see a lot of parallel tracks, there. All the holes are from when I was trying to figure out why the rolled hem presser foot wasn’t working.
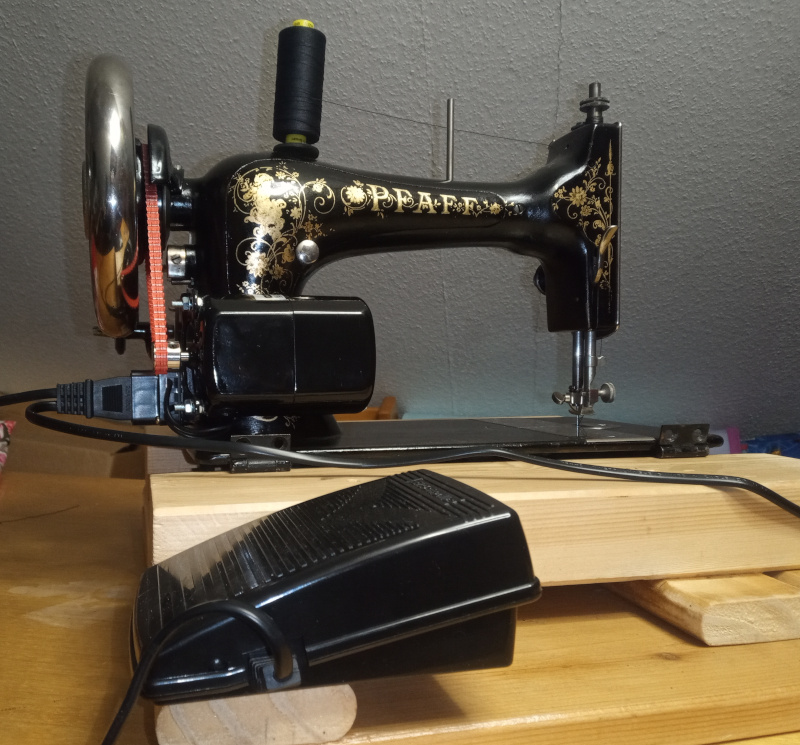
There you have it - an anachronistic Pfaff model K with an electronically controlled electric motor.
| Anachronism |
|---|
 |
I played with the thread tension (of course I did) while working on things. I’m pretty sure I’ll be able to adjust it to less than 20 grams of tension and still have it sew properly. I learned some interesting things about the bobbins and shuttles that I’ll share with you when I get around to describing how you wind a bobbin and thread the machine.
I also found that the original shuttle was slightly damaged - the tension spring had been bent to the extent that I couldn’t adjust the tension at all. Turning the screw did zilch - turned all the way tight, or so loose it almost fell out, the tension was the same. I “unbent” the spring, and now the shuttle tensioner works properly.