Fixing up a Dual HS135 - Repair
Curing a known disease and a little bit more.
Fixing up a Dual HS135 - Table of Contents
I got time to work on the Dual HS135 again this weekend.
The first thing was to fix up the platter.
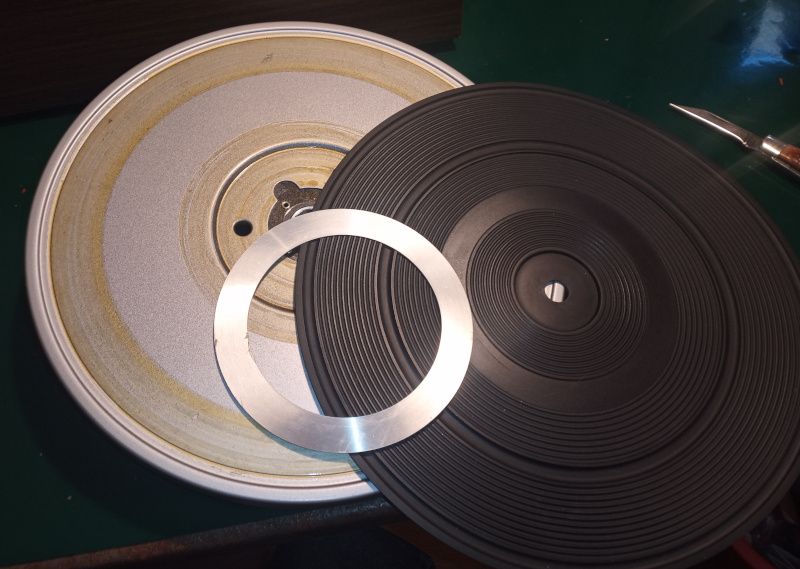
The rubber mat had come unstuck from the platter. The aluminum ring on the top side of the mat needed to be reglued as well.
Before you can glue them down, you have to remove them and clean them up.
Removal
Pull the peg out of the platter. On the Dual 1224, you can use either a simple peg or a multi-record changer. Both just drop in the hole in the center of the platter.
| Remove the peg |
|---|
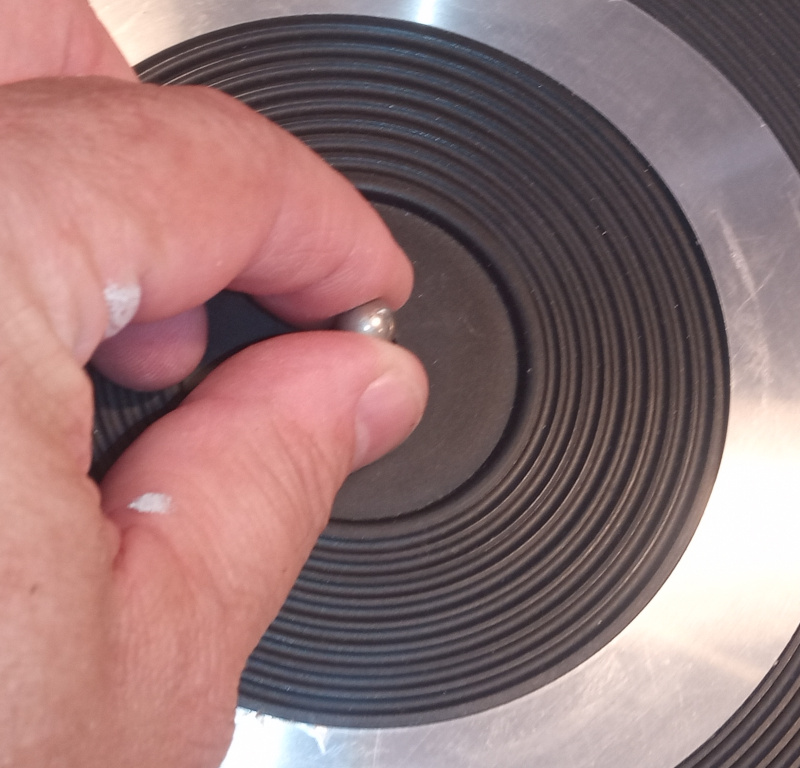 |
With the peg out of the way, you can remove the clip that holds the platter to the player.
| Remove the clip |
|---|
 |
 |
The clip is a simple split ring. I’m sure there’s a special tool for it, but a small flat bladed screwdriver does the job.
The ring fits in a groove around the axle. I found it easiest to push the ring around the axle until one end was in the notch on the axle, then lever it up with the screwdriver. Keep a finger on the point of the screwdriver while levering the ring off - you want to keep the ring from flying away when it comes loose.
The decorative aluminum ring on the rubber mat was half unstuck from the mat.
| Remove the aluminum ring |
|---|
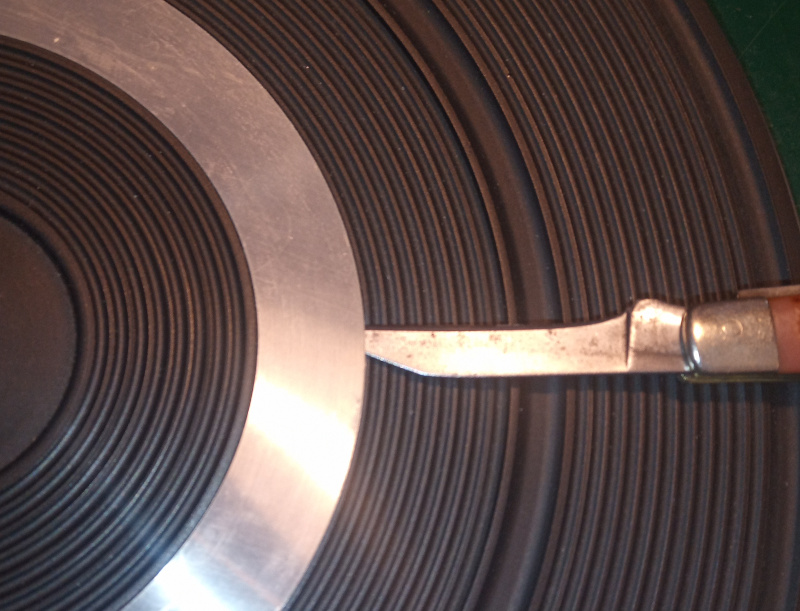 |
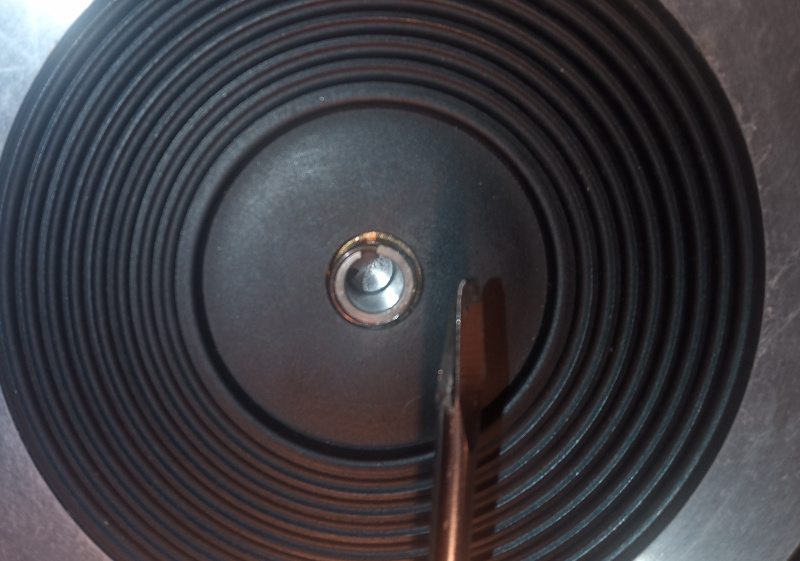
I slid the blade of my pocket knife under the ring and used it to cut through the contact cement holding the ring to the rubber. You want to “cut” so that the blade can never go into the rubber. Angle the blade so that the sharp edge scrape the back of the aluminum, not the rubber.
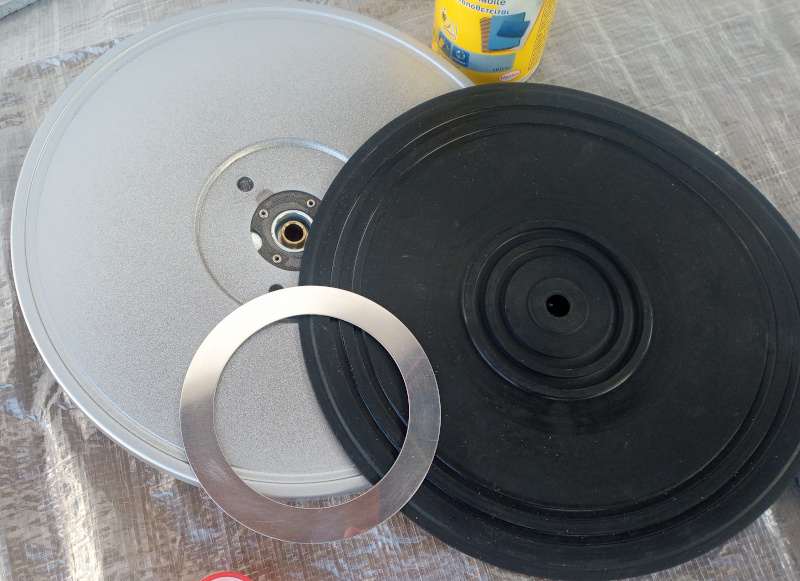
That’s got it all taken apart.
| Disassembled |
|---|
 |
Cleanup
I used ethanol and a cloth to remove the old cement.
| Cleanup |
|---|
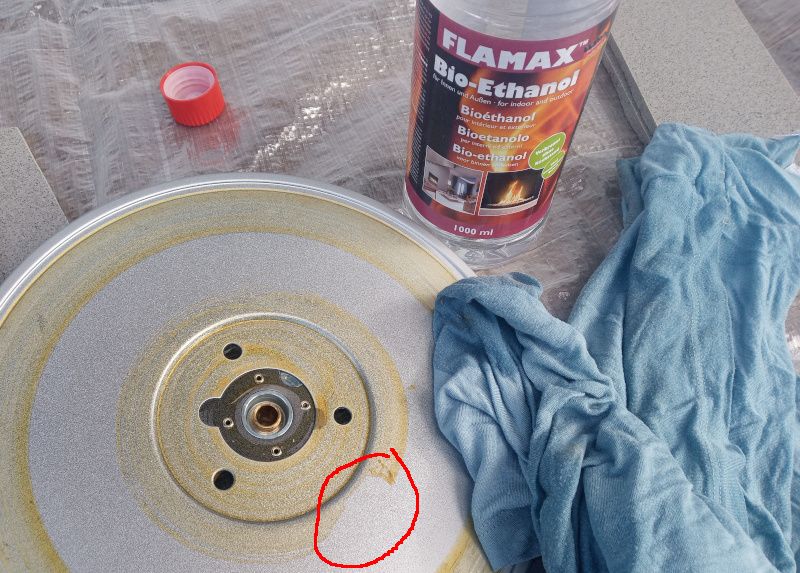 |
As you can see in the circled area, the ethanol will dissolve the old contact cement.
The dissolved cement tends to collect in the cloth, then roll up into little balls. This is a messy process, and it is time consuming. I spent nearly two hours cleaning the grunge off.
- Fresh alcohol on the cloth.
- Rub a spot until the cement dissolves.
- Wipe the cloth on another cloth to remove the collected contact cement clumps.
- Repeat until the whole platter is clean.
I had to remove the contact cement from the back of the aluminum ring, as well. The old contact cement seems to not like rubber all that much - I didn’t have to remove any contact cement from the rubber at all.
| All clean |
|---|
 |
Reassembling the platter
I used a can of spray on contact cement to reassemble things.
I sprayed the front of the platter and the back of the mat with contact cement and carefully aligned the mat with the platter before pressing it in place. I think I got it back in at least as accurately as it was originally.
I only sprayed the back of the aluminum ring with contact cement. I probably should have put some cement on the mat where the aluminum ring goes, but I only had the spray can to work with - I’d have gotten contact cement all over the front of the mat, and that would have been bad. The ring may come off again sometime, but it’ll at least hold until I’m done transferring my wife’s records.
I didn’t make photos while gluing things together. The glue tends to set fast, and I need to concentrate on doing things right rather than fiddling around with the camera.
| Glued together |
|---|
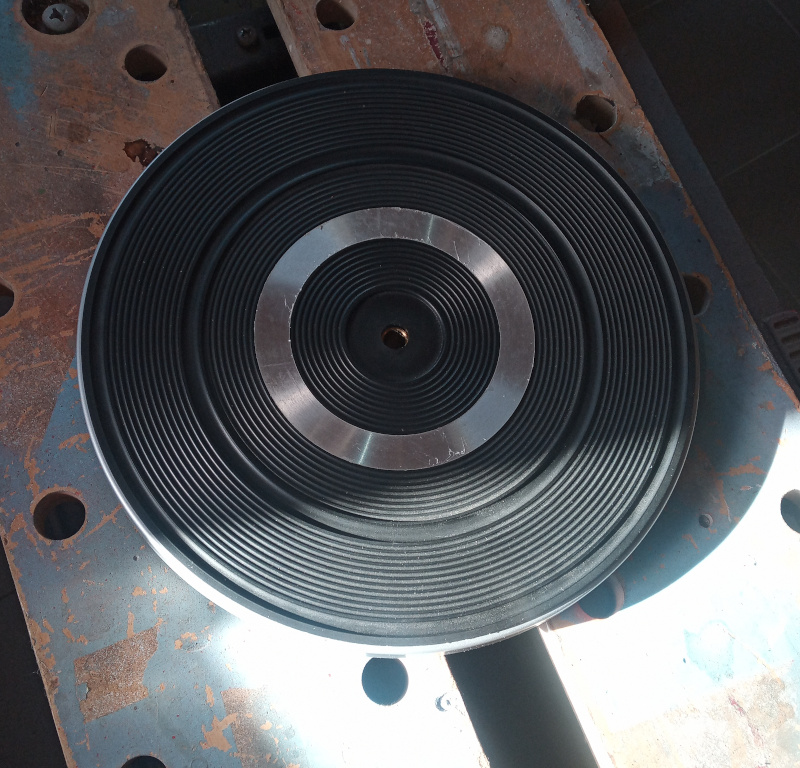 |
Contact cement sticks together, but it needs to be pressed and clamped to really hold tight.
| Apply pressure |
|---|
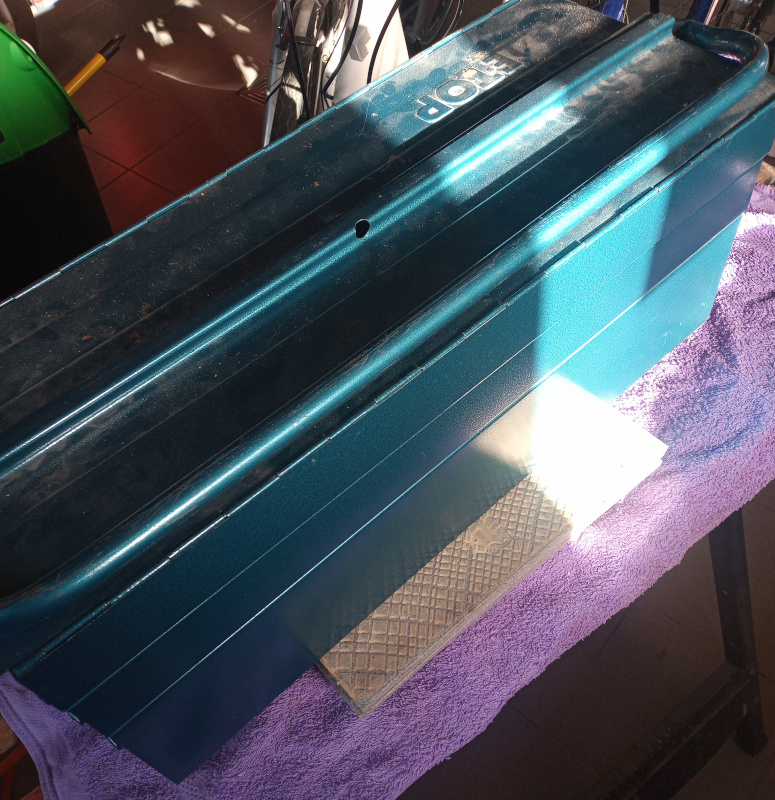 |
I put the platter on my portable workbench with the jaws open so the platter could sit flat. There’s an old towel on the platter to protect it from the grunge on the old floor tiles I used to spread the weight of the toolbox.
I let that sit over night, then fixed the electrical problems this afternoon.
Electrical repair
The parts I had ordered came in on Friday.
| Replacement parts |
|---|
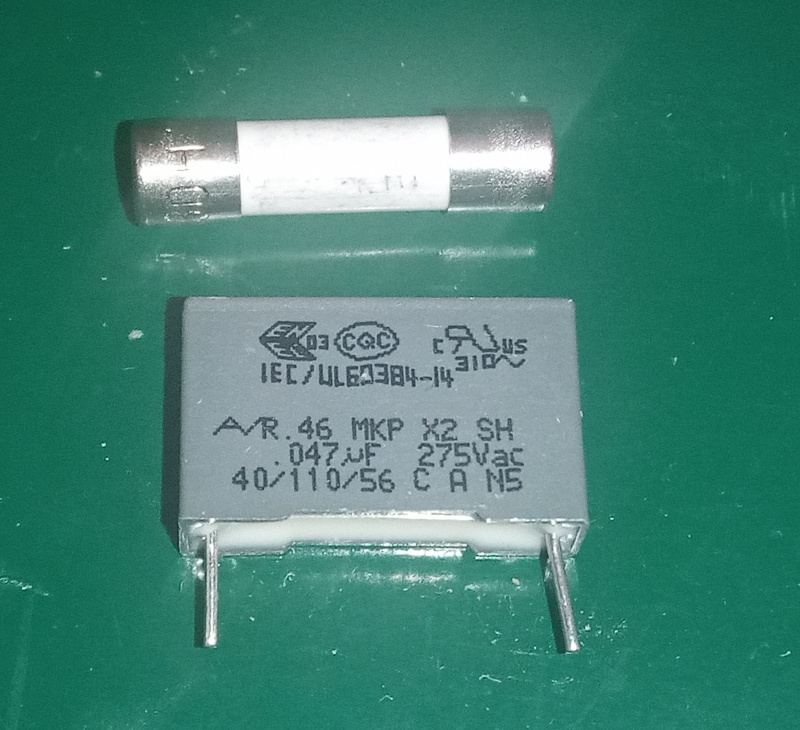 |
That’s a 275VAC, X2 rated 47 nanofarad capacitor and a 630mA, 250VAC fuse.
The capacitor is a known weakness of the HS135. Any time the HS135 is mentioned in the (German langauge) hifi forums, you’ll see a recommendation to replace the 47nF capacitor on the power board. It likes to quit, and it usually stinks and makes a mess when it does.
| Things to do |
|---|
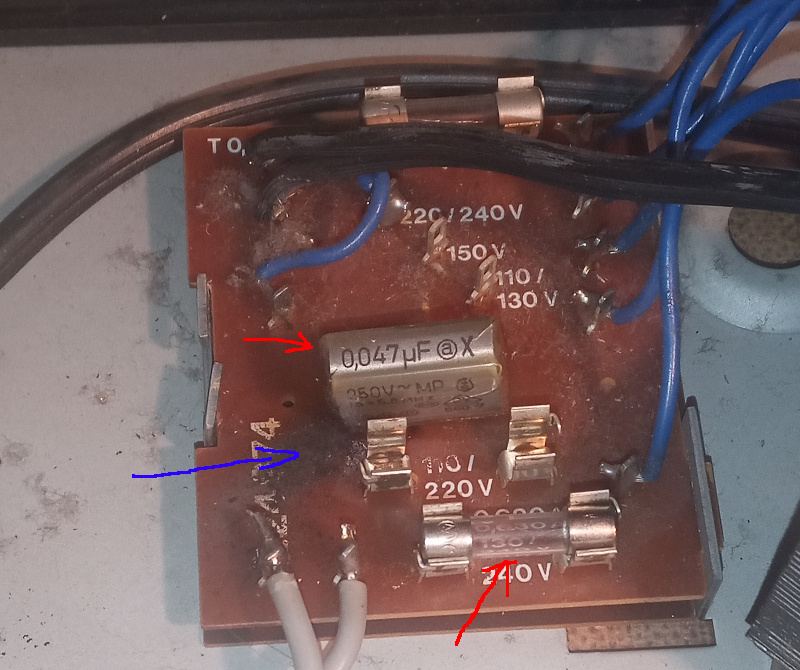 |
I have to replace the fuse (pop the old one out and a new one in,) remove the dead capacitor (see my series on soldering for tips to removing through hole parts,) then clean up the circuit board before installing the new capacitor (see here for tips on soldering through hole parts).
To remove the circuit board from the HS135, you have to straighten the two clips on the left side of the board. I used a pair of pliers. Lift the left edge of the board, then pull it out of the two holders on the right side of the board.
I used ethanol and a stiff brush to scrub the burned remains of the dead capacitor from the circuit board.
I’ll skip the soldering. If you want to see how to do it, check out the complete “HowTo Solder” series I wrote a while back.
| Electrical repairs complete |
|---|
 |
Twist the tabs on the left edge over the circuit board to hold it in place. It only takes a little. If you bend them too much, they’re likely to break - if not this time, then the next time someone has to take the HS135 apart.
Final reassembly
Putting the Dual 1224 turntable back into the HS135 is a bit tricky. It’s tricky to take apart, and tricky to put together.
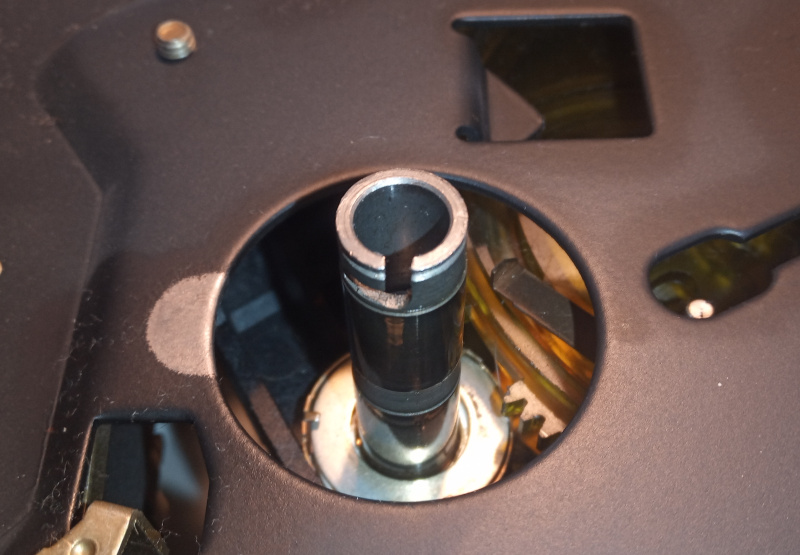
The trick is that there’s one rubber buffer that has to go in its hole first. It has a hold down tab that you can only install if you put it in first.
| Hold down |
|---|
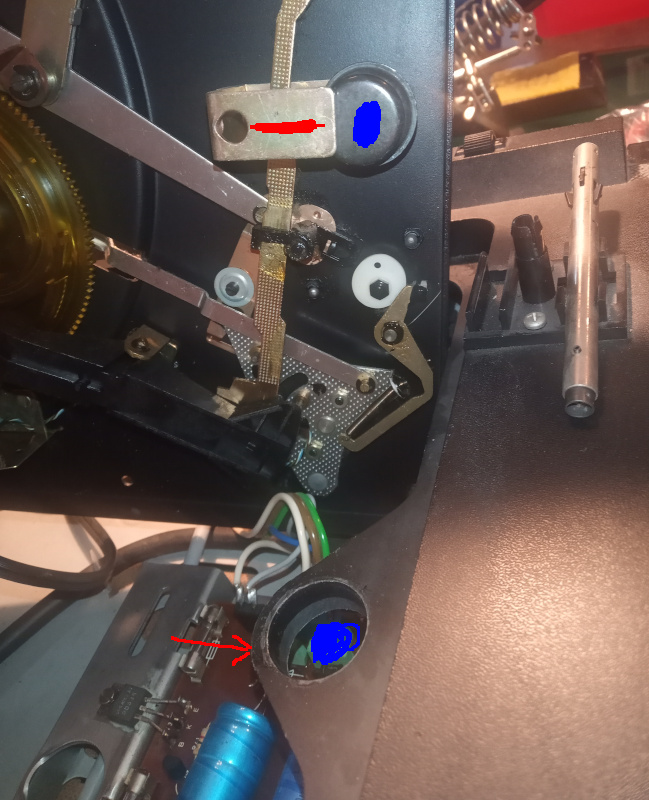 |
The metal tab marked in red has to go under the large hole in the plastic housing of the HS135 (also marked in red.) All of this stuff is underneath the tone arm.
The blue marked rubber buffer has to go in the blue marked hole.
Stand the turntable on edge (the edge with the tone arm down.) Set the turntable on the edge of the HS135 with the metal tab and the hole aligned. Swing the turntable down so that the tab goes under the hole and the rubber buffer goes in the hole. It’ll probably take a couple of tries to get it right.
Once that rubber buffer is in place, push the hold down screws for the turntable to the outside (as when removing the turntable.) Get the washers from the screws under the plastic slots and make sure to get the rubber buffers in their holes.
Tighten the screws to hold the turntable in place.
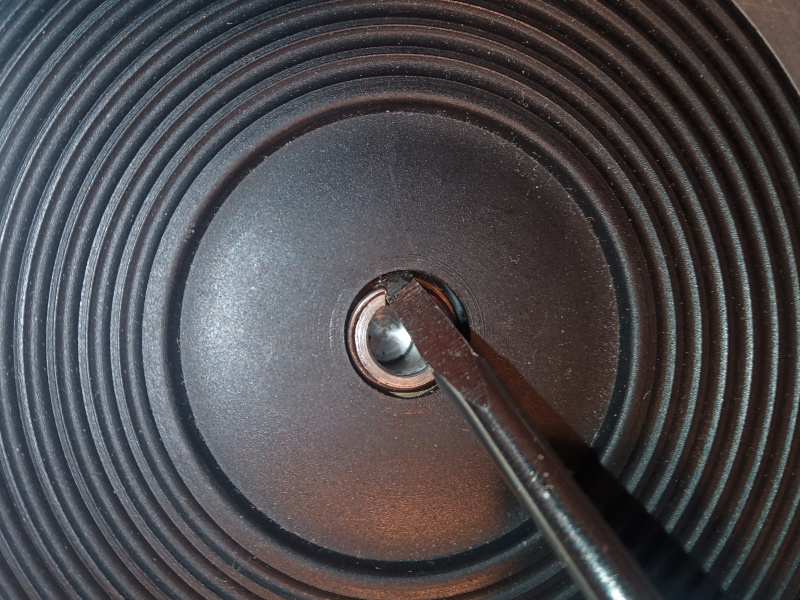
Put the platter back in place, then reinstall the clip.
| Reinstall the clip |
|---|
 |
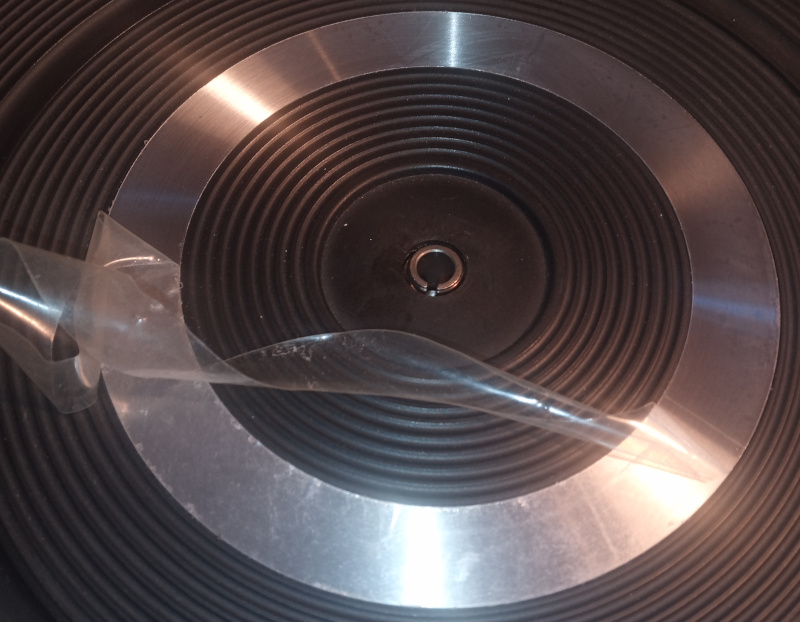
My brother-in-law had never removed the plastic protection sheet from the aluminum ring. It worked itself loose when I was cleaning off the contact cement, so I removed it entirely after I got it all back together.
| Removing the scratch protection |
|---|
 |
All done
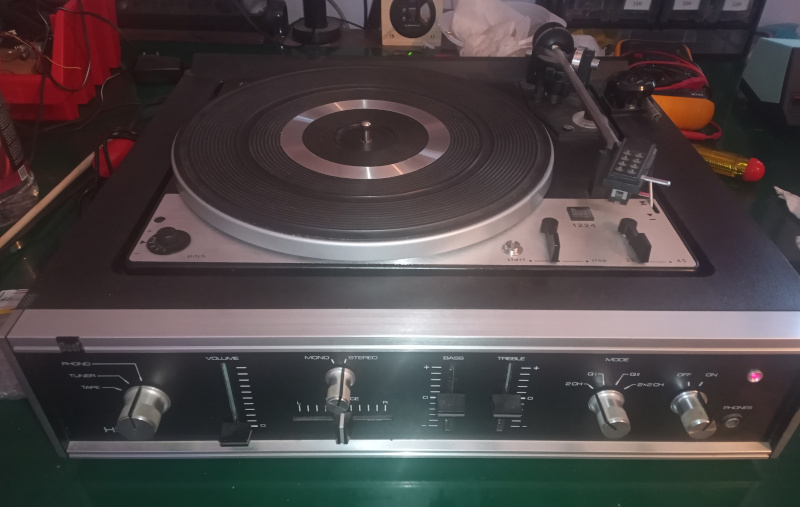
The HS135 is all back together and functional.
| All done |
|---|
 |
I’ll transfer my wife’s records to the computer, then write a description of how to transfer records and cleanup the digital copies using Audacity.
That’ll be a post for another day, though. I’ve got other plans for this evening.